Mom's Dinner

  • Home
  • All Recipes
  • Instant Pot
    • All Instant Pot Recipes
    • Instant Pot Soup
    • Instant Pot Beef
    • Instant Pot Chicken
    • Instant Pot Pork
    • Instant Pot Turkey
    • Instant Pot Pasta
    • Instant Pot Vegetarian
  • Dinner
    • Beef
    • Chicken
    • Pork
    • Turkey
    • Fish & Seafood
    • Mexican
    • Pasta
    • Vegetarian
  • Subscribe
menu icon
go to homepage
  • RECIPES
  • DINNER
  • ABOUT
  • SUBSCRIBE

subscribe
search icon
Homepage link
  • RECIPES
  • DINNER
  • ABOUT
  • SUBSCRIBE

ร—
You are here: Home

Ground Beef Enchilada Casserole

January 25, 2020 by Susie Weinrich 95 Comments

beef enchilada Casserole with a slice cut out so you can see the layers of corn tortillas, beef, cheese and sauce

If you're craving enchilada flavors without spending an hour in the kitchen rolling said enchiladas, you're in the right place. This Layered Beef Enchilada Casserole is a reader favorite for a reason-it's comes together with simple, no-fuss steps and ends in a huge flavor payout. Enchiladas are high on the dinner request list in the Mom's Dinner kitchen, so I've made this more times than I can count, I've worked out all the little details to make sure it's easy to make in YOUR kitchen and totally crave-worthy for your family.

baked ground beef enchilada casserole

You don't need to spend extended time rolling individual enchiladas- simply layering everything gets you the flavors you want without the extra work. It bakes in just 30 minutes and has delicious layers of red enchilada sauce, seasoned ground beef, corn tortillas, and cheese.

This recipe is made to mimic traditional beef enchiladas without the hassle of frying, soaking or heating the corn tortillas. There are no beans, rice or veggies added to the mix. We keep it simple with authentic beef enchilada ingredients only.

Beef Enchilada Casserole in a glass dish with two forks, plates and two margaritas

Beef Enchilada Casserole Ingredients

  • Ground Beef – I recommend using an 85/15 ground beef for this recipe. It has enough fat to be flavorful, but not so much fat that your casserole will turn out greasy.
  • Onion – A white onion will give you a classic enchilada flavor. But if you have yellow or even red on hand, that will work too.
  • Garlic – The recipe calls for 3 chopped garlic cloves but if you want to add more, go for it!
  • Corn Tortillas – This is the classic tortilla to use with enchiladas, so we are including it in the casserole version. I recommend using a YELLOW corn tortilla. They have more flavor than the white corn tortillas.
  • Enchilada Sauce – You will want to use a red or rojo enchilada sauce for this recipe. Use your favorite store bought enchilada sauce or you can make your own. We have a fantastic Red Enchilada Sauce recipe here on Mom's Dinner.
  • Cheese – As with most recipes here on Mom's Dinner we recommend that you shred your own cheese. Buy a block of cheddar, pepper jack, Monterey jack, Colby jackโ€ฆ any will work, and shred it by hand. It is a grind for sure, but totally worth it. Your cheese will melt creamier than the pre-shredded stuff.
  • Seasonings – A mix of kosher salt, cumin and chili powder is all you need to flavor this beef enchilada casserole. The enchilada sauce, garlic, onions, tortillas and cheese do a lot of the heavy lifting in the flavor department.

Corn Tortillas vs. Flour Tortillas

Corn tortillas are definitely more traditional for enchiladas. They have great flavor, however, they are very delicate. If they are not soaked, fried or heated properly before rolling they will tear and crumble, so frustrating.

That is one reason I use flour tortillas in my Chicken Enchilada recipe.

beef enchilada casserole with a piece taken out so you can see the layers of tortillas, beef, cheese, and sauce

But in this Ground Beef Enchilada Casserole recipe you do not have to roll the tortilla. So there is no need to heat, fry or soak the corn tortillas. Everything is layered flat, making this a super easy dinner recipe!

If you are not a fan of corn tortillas you can sub flour tortillas. However I have not tested it with flour.

Enchilada Sauce

Homemade enchilada sauce takes little to no time to make! The nice thing is you can customize the flavor if you like it spicier, tangier or saltier. This is our go-to Red Enchilada Sauce Recipe.

red enchilada sauce in a jar

Sometimes it is nice to use store bought sauce for this enchilada casserole dish. If you want a strong and tangy red enchilada sauce, Target has a great one! It is my go-to.

How to Make Layered Enchilada Casserole

I will take you through step by step how to make this easy beef enchilada casserole. See the photos for step by step how to layer the casserole.

  1. Start by preheating the oven to 350.
  2. In a skillet brown and crumble the ground beef. Drain any excess grease. Add the 1 teaspoon salt, diced onion, and garlic. Saute until they are slightly softened, about 5 minutes.
ground beef in a skillet with onions, garlic and cilantro

3. Stir in 3 tablespoon water, 2 teaspoon chili powder, and 1 teaspoon cumin. Remove it from the heat, it’s time to assemble the casserole.

Layer the Casserole

4. Time to layer everything up and get it in the oven. Start by adding โ…“ cup enchilada sauce to the bottom of a 9×13 casserole pan. Layer 5 corn tortillas on top of that- see the photo how I cut the 5th tortilla in half to fit the end of the pan.

photos showing steps 1- 4 in layering a beef enchilada casserole

5. Layer half the seasoned ground beef across the tortillas. Spread ยพ cup enchilada sauce and then a heaping ยฝ cup of cheese on top.

6. Next add another layer of 5 tortillas, all the remaining ground beef, ยพ cup enchilada sauce, and a heaping ยฝ cup of cheese.

5-8 step by step pictures showing how to make ground beef enchilada casserole

7. To finish add another layer of 5 corn tortillas, the remaining enchilada sauce, and all the remaining cheese.

steps 9-12 photos showing how to make enchilada casserole

8. Cover with foil and bake for 20 minutes. Remove the foil and bake for an additional 10 minutes.

Baked Enchilada casserole in a glass dish

9. Let the casserole cool for about 5 minutes before cutting and serving.

What to Pair With Layered Enchilada Casserole

Think about when you visit your favorite Mexican restaurant – start with chips, salsa and guacamole. Then serve this Layered Enchilada Casserole with Refried Beans, Cilantro Lime Slaw and Mexican Rice! Don't forget to wash it down with a Classic Margarita.

Beef Enchilada Casserole Recipe Tips

  • Use an 85/15 ground beef for the most flavor without all the grease.
  • Choose yellow corn tortillas for the most authentic enchilada flavor.
  • Take a shortcut and use your favorite store bought red enchilada sauce
  • Hand shred the cheese for the creamiest melt.
  • Let the casserole cool before cutting for serving, just like a layered lasagna it needs to congeal a little while cooling.

How to Store Beef Enchilada Casserole

Store any leftover enchilada casserole in the fridge, covered, or in an airtight container for up to 4 days.

To reheat simply place each portion in the microwave and heat for a minute or two until it is warmed through.

Reheating tip: As the casserole is refrigerated the tortillas will absorb the sauce, so if you have extra sauce pour it over each portion before reheating.

enchilada casserole with a slice taken out

Listen To The Recipe

You can listen to the full recipe on the podcast “Let’s Make Dinner”. Susie shares all the tips and tricks and side dish ideas. You can listen by using the audio player below.

More Like This Easy Enchilada Casserole

If you are looking for a different type of enchilada, I have a few options:

  • Chicken Enchiladas
  • Enchirito
  • Veggie Enchiladas with Chili Lime Crema
  • Enchilada Zucchini Boats
  • Creamy Verde Enchiladas

I obviously love enchiladas- LOL!

Beef enchilada casserole with a slice cut out.

Enchilada Bake Recipe

Beef Enchilada Casserole is layers of seasoned ground beef, corn tortillas, enchilada sauce, and cheese. It makes a great family friendly Mexican dinner. It is like having authentic beef enchiladas without all the work!
4.89 from 95 votes
Print Pin Rate Save Saved!
Prep Time: 15 minutes minutes
Cook Time: 30 minutes minutes
Total Time: 45 minutes minutes
Servings: 6 people
Author: Susie Weinrich

Ingredients

  • 1 lb ground beef - prefer 85/15 for flavor and less grease
  • 1 medium yellow or white onion - diced
  • 3 garlic cloves - chopped
  • 1 teaspoon kosher salt
  • 2 teaspoon chili powder
  • 1 teaspoon cumin
  • 3 tablespoon water
  • โ…“ cup fresh cilantro **OPTIONAL - chopped
  • 20 oz red enchilada sauce - If you make your own red enchilada sauce you will need about 2 ยผ cups.
  • 15 corn tortillas
  • 8 oz block of cheddar cheese, shredded - If you use pre-shredded you will need about 2 ยผ cups. You could also use pepper jack or monterey jack

Instructions
 

  • Preheat the oven to 350ยฐ
  • In a large skillet brown and crumble the ground beef, drain any excess grease.
    1 lb ground beef
  • Add the onions, garlic and salt saute for about 5 minutes until the onions are slightly softened.
    Stir in the 3 tablespoon water, 2 teaspoon chili powder, 1 teaspoon cumin.
    1 medium yellow or white onion, 3 garlic cloves , 1 tsp kosher salt, 2 tsp chili powder , 3 tbsp water, 1 tsp cumin
  • If using the cilantro, stir it in now. Remove the pan from the heat.
    โ…“ cup fresh cilantro **OPTIONAL

Layer the Enchilada Casserole

  • In a large 9×13 casserole dish pour โ…“ cup enchilada sauce across the bottom, spread it so it coats the bottom of the dish.
    20 oz red enchilada sauce , 15 corn tortillas , 8 oz block of cheddar cheese, shredded
  • 5 tortillas (the last one split in half at the end of the pan (see photo)
    Top with half the beef
    Pour ยพ cups enchilada sauce over top
    Sprinkle with a heaping ยฝ cup cheese
    5 tortillas
    remaining beef
    ยพ cups enchilada sauce
    heaping ยฝ cup cheese
    5 tortillas
    Remaining enchilada sauce
    Remaining cheese
    corn tortillas in a casserole dish
  • Cover with foil and bake at 350 for 20 minutes.
    Remove foil and bake for an additional 10 minutes.
  • Let the casserole cool for 5 minutes before cutting and serving.

Recipe Tips and Notes:

Looking for Chicken Enchiladas? Check out this recipe for My Favorite Chicken Enchiladas
Storing & Reheating
Store any leftover enchilada casserole in the fridge, covered, or in an airtight container for up to 4 days.
To reheat simply place each portion in the microwave and heat for a minute or two until it is warmed through.
Reheating tip: As the casserole is refrigerated the tortillas will absorb the sauce, so if you have extra sauce pour it over each portion before reheating.
Did you make this recipe?Connect with me and let me know by commenting below!
Jump to Comments
Serving: 1slice (โ…™ of casserole)

more recipes you will love

  • Recipe For Roasted Fennel
  • Maple Ham Glaze Recipe
  • Recipe For Cheesy Potatoes
  • Refried Beans in the Instant Pot
  • Broccoli Salad with Bacon and Raisins
  • Beef Manicotti
  • Ham Leftovers
  • Pulled Buffalo Chicken Instant Pot
  • Recipe For Hot Dog Chili
  • Burger with Fried Egg
  • Garlic Red Skin Mashed Potatoes
  • Buttermilk Chicken Breast
  • Ham Glaze With Brown Sugar
  • Sausage Egg Muffins
  • Oatmeal Recipe For Breakfast
  • Skillet Lasagna with Cottage Cheese
  • Turkey Burgers on Grill
  • Pasta Salad with Cheese Tortellini

20 Amazing Leftover Roasted Chicken Recipes

January 19, 2020 by Susie Weinrich 2 Comments

Rotisserie Chicken on a bed of parsley and lemons

There is nothing better than having a rotisserie chicken or leftover roasted chicken in your fridge to get dinner going, especially for busy weeknights! Having that tender cooked and delicious chicken makes your meal prep fast and easy. Now all you need are a couple good chicken recipes that call for cooked chicken.

Rotisserie Chicken on a bed of parsley and lemons
[feast_advanced_jump_to]

Rotisserie Chicken

Before we get started with leftover chicken recipes, let's talk about buying a rotisserie chicken. One of my favorite places to buy a whole roasted chicken is at Costco. You can grab one for under $6, that is a bargain! I will say Costco makes a really juicy rotisserie chicken! YUM

Your local grocery store, Target, or Walmart also carry already cooked rotisserie chickens. They will generally be near the deli section/counter.

Making Your Own Rotisserie Chicken Or Cooked Chicken

You can absolutely make your own “rotisserie” chicken or cooked chicken to use in these recipes. Most home kitchens don’t have an actual rotisserie, but roasting it in the oven or in your Instant Pot will work too!

  • roasted chicken in a Dutch Oven
    Ultimate Guide to Beautifully Roasted Chicken
  • roasted half chicken with crispy golden skin in a skillet with green beans and gravy
    Cast Iron Roasted Half Chicken with Pan Gravy
  • a whole chicken in an Instant Pot
    Instant Pot Rotisserie Chicken
  • a large white bowl full of shredded chicken that was cooked in the Instant Pot
    Effortless Instant Pot Shredded Chicken
  • poached chicken cut into cubes
    How to Poach Chicken Breasts
  • Shredded chicken meat in a bowl
    How To Make Shredded Chicken

How to Break Down a Rotisserie Chicken

A whole chicken can be broken down into 8 pieces: 2 breasts, 2 wings, 2 legs, 2 thighs.

showing all 8 pieces on a chicken

Here is a great video showing you exactly how to break your chicken down (and shred the chicken if you want):

Rotisserie Chicken Tips

  • It is easier to pull the meat from the chicken when it is still a little warm.
  • You can shred the chicken meat with a stand mixer (paddle attachment) while it is still warm – see the video above!
  • Since most rotisserie chicken are one set price instead of “per pound” buy the biggest one they have.
  • If you are shredding or chopping the meat, pour a cup of chicken broth in the bottom of the storage container to help keep your chicken from drying out.

Storing Rotisserie Chicken – Fridge & Freezer

Rotisserie Chicken keeps in the fridge for up to 4 days. Make sure you keep it in an airtight container or baggie.

Pro Tip: Pour a little broth at the bottom of the storage container to keep your chicken from drying out!

You can also keep your shredded rotisserie chicken meat in the freezer for up to 3 months. I recommend storing it in 2-3 cup portions for easier use in recipes. To use from the freezer thaw in the fridge overnight.

What to Do With Rotisserie Chicken Carcass

After you have removed all the meat from the chicken you can use the bones to make the best Stock! I like to use my electric pressure cooker to make Instant Pot Chicken Stock. It will be full of collagen and nutrients!

mason jars with chicken stock and an instant pot in the back

If you aren’t’ ready to make the chicken stock right away you can keep the carcass/bones in the freezer in a Ziplock for up to 3 months.

MOM’S TIP: When I have a chicken carcass in the freezer I will add veggie scraps to it until I have enough to make Stock. Onion peels and tops, Carrot peels, celery stalk stems, parsley stems…all work!!

25+ Leftover Chicken Recipes

a pan of chicken enchiladas
Homemade Chicken Enchiladas with Red Sauce
This is a great recipe for Chicken Enchiladas that is full of flavor and uses already cooked chicken, store bought enchilada sauce, and flour tortillas. Just add some chips and guacamole for an amazing dinner.
Check out this recipe
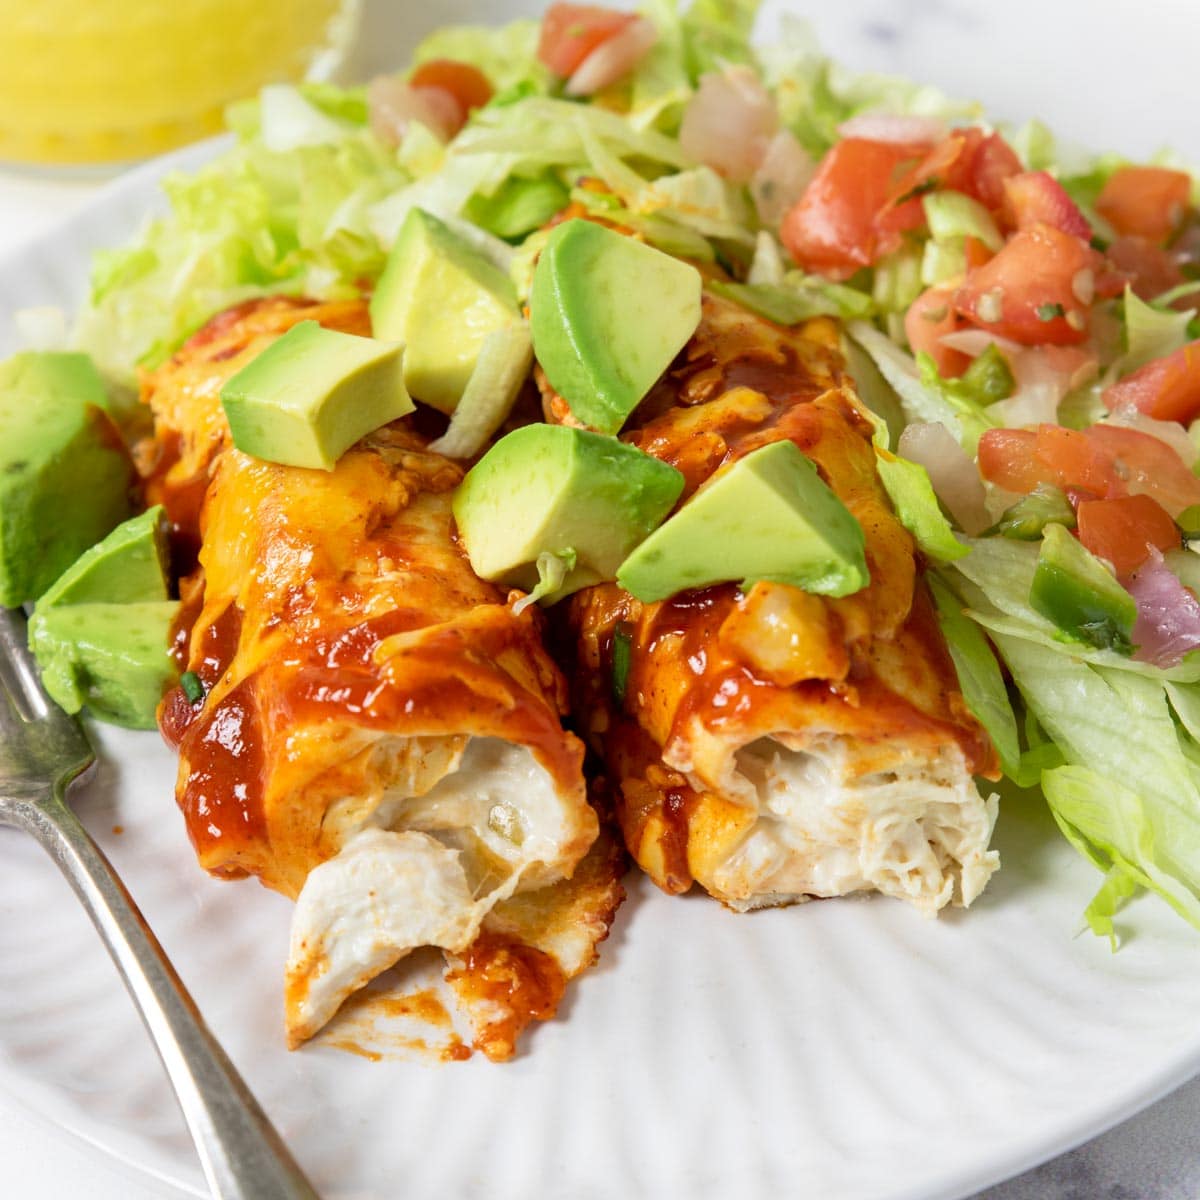
cream cheese chicken enchiladas on a plate with red chili sauce, cheese, and avocados
Cream Cheese Chicken Enchiladas Recipe
Cream Cheese Chicken Enchiladas are a delicious and easy enchilada recipe. Yellow corn tortillas are filled with cream cheese, sour cream, and green chilies mixed with chicken. Red chili enchilada sauce coats the enchiladas and gooey cheese tops it all off!
Check out this recipe
a pan of baked Chicken Enchilada Suiza garnished with cilantro
Suiza Enchilada
Delicious Chicken Enchilada Suiza that are filled with chicken, cheese, cilantro and chilies, all smothered in a creamy verde enchilada sauce and topped with melted cheese.
Check out this recipe
White Chicken Enchilada casserole recipe made in a skillet topped with cilantro
White Chicken Enchilada Casserole
Creamy and delicious recipe for White Chicken Enchilada Casserole. It is made completely on the stove top, no need to turn the oven on. This is a great recipe for rotisserie chicken!
Check out this recipe
chicken salad with grapes on a croissant with lettuce and tomato
Homemade Chicken Salad Recipe
A perfect chicken salad recipe with grapes and pecans, mixed with a creamy dressing that has dill, celery and green onions. Serve it on top of a bed of lettuce, on a sandwich or just as a snack.
Cook along with the video or you can watch Susie make this chicken salad on a 30 minute Pin TV episode!
Check out this recipe
turkey pot pie with a slice taken out
Homemade Turkey Pot Pie Recipe + Video
A delicious double crust, savory pot pie loaded with turkey, veggies, and herbs all in a creamy sauce. This is a great dish to make with leftover roasted turkey (or chicken!).
Check out this recipe
big bowl of chicken noodle soup
Homemade Egg Noodle Chicken Soup
An over the top delicious Homemade Chicken Noodle Soup. This recipe has a SUPER flavorful and slightly thick broth, tender carrots, celery and onions. It is topped off with thick and hearty egg noodles. This will be come your go-to Chicken Noodle Soup recipe!ย 
Check out this recipe
Chicken Soup for Kids
A super easy and kid-friendly recipe for Chicken Noodle Soup. This is a dinner for your kids that they will eat without crying and ask for again and again. It is made with only kid approved ingredients! 
chicken poblano soup in a bowl topped with sour cream and tortilla strips
Chicken Poblano Soup Recipe
A deliciously hearty soup that is full of cooked chicken, roasted poblano peppers, corn, and potatoes in a creamy and cheesy broth.
Makes amazing leftovers!
Check out this recipe
Soup ladle full of creamy chicken wild rice soup pulling up out of the Dutch oven pot.
Chicken and Wild Rice Soup Recipe
Creamy Chicken Wild Rice Soup is a hearty comfort food that has a super flavorful creamy base and is filled with carrots, celery, onion, chicken and wild rice.
Check out this recipe
Italian Gnocchi Chicken Soup in small bowls topped with parmesan cheese and red pepper flakes
Italian Chicken Gnocchi Soup Recipe
Hearty Italian Chicken Gnocchi Soup has tender chicken, pillowy gnocchi, sun dried tomatoes, spinach, in a creamy/savory broth, infused w/ classic Italian flavors.
Check out this recipe
a ladle full of creamy chicken noodle soup
How to Make Creamy Chicken Noodle Soup
A creamy chicken noodle soup that is full of carrots, celery, onions and garlic mixed with a super flavorful stock, tender chicken and seasonings and plenty of hearty kluski noodles.
Check out this recipe
a bowl of chicken and dumplings with a dumpling split open
Creamy Chicken Stew and Dumplings Recipe + Video
Soft and pillowy homemade dumplings are dropped into the a thick and creamy chicken stew and steamed to perfection. Some of the best comfort food!
Use the video player below to watch how to make Chicken and Dumplings!
Check out this recipe
a bowl of white chicken chili topped with avocado, lime wedges and cilantro
White Chicken Chili Recipe
A thick and creamy White Chicken Chili recipe filled with tender chicken, white beans, corn and plenty of spices. The broth is thickened with a mixture of corn tortillas and cream cheese.
Check out this recipe
A bowl of chicken and biscuits
Chicken and Biscuits Casserole
A super flavorful and thick chicken stew is topped with biscuits and baked in the oven. Amazing down-home flavor that everyone will love!
Check out this recipe
a large Dutch Oven filled with Creamy Chicken and Gnocchi soup with a ladle
Creamy Chicken and Gnocchi Soup Recipe
A very hearty and comforting soup, yet very simple to make. This is a creamy chicken soup filled with carrots, celery, onions and garlic, plenty of tender cooked chicken, and finished with pillowy gnocchi.
Check out this recipe
Creamy Chicken and Noodles in a skillet garnished with parsley
Creamy Chicken and Noodles
Creamy Chicken and Noodles is the perfect comfort food dinner. Thick egg noodles and shredded chicken are mixed in a cream sauce that is flavored with spices and herbs. You can even add mixed veggies for a more well-rounded dinner entree.
Check out this recipe
buffalo chicken nachos with toppings being grabbed by a hand
The BEST Game Day Nachos Recipe (Buffalo Chicken Nachos)
An easy recipe for Buffalo Chicken Nachos – the prefect game day appetizer! It's the perfect mash up of Buffalo wings, Buffalo chicken dip, and Nachos!
Check out this recipe
chicken tetrazzini in a casserole dish
Deluxe Chicken Tetrazzini Recipe
An elevated Chicken Tetrazzini that has a homemade sherry laced cream sauce filled with spaghetti, chicken, peas and mushrooms. It is creamy, cheesy and a delicious crowd-pleasing dinner!
(can use cooked turkey too!)
Check out this recipe
two chicken tacos in flour tortillas
Creamy Chicken Tacos
A creamy chicken taco filling that is baked in the oven. Wrap the baked filling in a flour tortilla and garnish with all your favorite taco toppings.
Check out this recipe
Top view of a large wok filled with chicken fried rice ready to serve.
Chicken and Veg Fried Rice
Skip the take-out and make this Chicken Fried Rice at home! It's the perfect mix of tender chicken, crisp veggies, slightly golden rice, and a savory sauce-especially delicious when you've got leftover rice waiting in the fridge.
Check out this recipe
Serving spoon resting in a golden baked chicken lasagna with a slice removed.
Deluxe White Chicken Lasagna
This is a totally deluxe recipe for Chicken Lasagna, also called a White Lasagna. It has layers of tender lasagna noodles, chicken, mozzarella cheese, pesto ricotta, and a garlic bรฉchamel sauce with artichokes and spinach.
Layering video included for easy assembly!
Check out this recipe
two chicken crepes topped with cream sauce
Savory Chicken and Mushroom Crepes
A savory crepe recipe full of creamy chicken and mushrooms, then topped with a cream sauce. These crepes are great for brunch or lunch.
Check out this recipe
verde enchiladas in a white casserole pan
Verde Chicken Enchiladas Recipe
Delicious chicken enchiladas with a verde enchilada sauce. This easy enchilada recipe make a great Mexican dinner. They are full of a creamy mixture of chicken, onions, cilantro, black beans, and cheese, rolled in easy-to-use flour tortillas and smothered in cheese and sauce. 
Check out this recipe
BBQ Chicken Slider Sandwiches on a black slate board
BBQ Chicken Sliders Recipe + Video
Delicious BBQ Chicken Slider recipe that is filled with shredded BBQ chicken, red onions, provolone cheese and cilantro. This chicken slider makes great game day food or simple dinner!
Check out this recipe
creamy artichoke chicken salad in a baking dish topped with french fried onions
Baked Artichoke Chicken Salad
A creamy Artichoke Chicken Salad that is baked to perfection and then topped with crispy french fried onions. This warm chicken salad is full of water chestnuts, green onions, and artichokes. It makes a great sandwich on slider buns, brioche rolls, or croissants.
Check out this recipe

Subscribe To Stay Connected!

Sign up for the Mom's Dinner Newsletter and get dinner help delivered straight to your inbox. From new recipes and videos to weekly dinner ideas and kitchen tips, it's your go-to resource for feeling confident at dinnertime.

Sign Up Now โ†’

Let me know in the comments below what your favorite recipe is to make with leftover chicken!?

Best Instant Pot Mac and Cheese

January 17, 2020 by Susie Weinrich 15 Comments

Instant Pot Mac and Cheese in a bowl

This is the only homemade mac and cheese my two kids will actually eat, and I have made it more times than I can count. Just 6 simple ingredients, one pot, and about 15 minutes start to finish. It comes out creamy and smooth every time, never grainy. No green stuff and no onions. If you have a picky eater at your table, this is the recipe I would hand you first.

Instant Pot Mac and Cheese in a bowl

This mac and cheese recipe is made with elbow mac, a little cream cheese, butter, seasoning salt (Lawry’s), evaporated milk, and Velveeta cheese. All these ingredients make this the creamiest mac and cheese you have ever had!!

[feast_advanced_jump_to]

Mac and Cheese Instant Pot Ingredients

Elbow Macaroni – This recipe was written and tested with elbow macaroni. It cooks perfectly in 4 minutes in the Instant Pot. If you choose to sub a different shape the cooking time may change.

Water – I know that this feels like a missed opportunity to add flavor, but I have tested it with milk and evaporated milk and it burned to the bottom of the pot. I think you could sub chicken broth, but watch the amount of salt in that case.

Ingredients to make Mac and Cheese in the Instant Pot

Salted Butter – Just a little butter adds to the richness of this mac, and also helps thicken the sauce.

Lawry’s Season Salt – Instead of using kosher salt, the addition of seasoned salt adds another layer of flavor! Salt the pot as instructed in the recipe card, but then make sure you taste the finished dish before serving.

Cream Cheese – Adds a little extra flavor and creaminess to the mac and cheese.

Velveeta Cheese – This is a classic Mac and Cheese ingredient. Cut the cheese into cubes so it will melt from the heat of the cooked pasta.

Evaporated Milk – This is a great shelf stable option for your mac and cheese. It makes it super creamy!

Using Evaporated Milk In Mac & Cheese

Evaporated milk is the perfect option for mac and cheese. It is basically cow’s milk that is shelf stable and has less water content than traditional milk. You can usually find it in the baking aisle of your grocery store. Make sure you buy evaporated milk NOT condensed milk. Condensed milk is like sweet milk syrup, which would not be good in your mac and cheese! LOL

How to Make Instant Pot Mac n Cheese

This is a super easy Instant Pot recipe to make and makes an excellent beginners recipe!

water, macaroni, butter, cream cheese and water in the instant pot

Step 1

Pour elbow macaroni into the bottom of the Instant Pot. Add the water and seasonings. Then add 4 oz of cubed cream cheese and butter (or you can just pinch off pieces with your hands, like I do in the video).

Don’t stir!!!!!!!

Instant Pot

Step 2

Pop the lid on and set it to cook on the pressure setting, high, for 4 minutes. Do a quick release.

Stirring a pot of mac and cheese in the instant pot

Step 3

Pour in the evaporated milk and stir everything together, separating and noodles clumped together.

cubes of Velveeta in an Instant pot of cooked macaroni

Step 4

Add the cubes of cheese and stir until melted and creamy.

Taste for seasoning.

What to Serve with Mac and Cheese

Mac and cheese is obviously delicious on it’s own. If we are having a busy week then this will get served as an entree by itself. You can certainly add some raw veggies or fresh fruit on the side.

A side salad also goes great with mac and cheese. Serve it with an Italian or vinaigrette dressing for a great balance of creamy and tangy.

If you want to serve this Instant Pot Mac and Cheese as a side dish, here are some great entree recipes to serve:

  • Instant Pot BBQ Ribs or Oven Cooked Country Ribs
  • Grilled Chicken Skewers
  • Ham Balls
  • Burgers, all types!
  • juicy burger on a bun with mustard, ketchup, lettuce and tomato
    Perfect Grilled Burger Recipe
  • country style ribs baked and coated in bbq sauce
    Tender Oven Baked Country Style Ribs
  • bbq marinated and grilled chicken skewers on a cutting board
    BBQ Chicken Skewers
  • ham balls in a pan with glaze baked over top
    Classic Iowa Ham Balls

Storing

Mac and cheese is always best served right away. But if you have a lot of leftovers simply store them in the fridge for up to 5 days in an airtight container.

To reheat add a little milk or evaporated milk and heat each portion for about 30 seconds in the microwave. Give it a stir and heat for another 20-30 seconds.

Don’t have an Instant Pot?

If you don’t have an Instant Pot but you still want delicious and creamy mac and cheese you can check out this recipe on Mom’s Dinner for Skillet Mac & Cheese.

a large bowl of mac and cheese with a spoon

Susie leaning on the kitchen counter

WATCH SUSIE ON FOOD NETWORK!

โญโญโญโญโญ

The new gameshow, 100 Cooks, premieres on Food Network June 7th, 2026 at 9est/8cst. I hope you will tune in!

Instant Pot Mac and Cheese in a bowl

Pressure Cooker Mac and Cheese

Mac and Cheese made right in your Instant Pot is the ultimate comfort food! It is done in a flash (about 10 minutes total) and is creamy, cheesy, and full of flavor! It is a family friendly recipe that your kids will love!
Homemade Mac and Cheese makes a great entree or side dish for dinner!
5 from 10 votes
Print Pin Rate Save Saved!
Prep Time: 5 minutes minutes
Cook Time: 4 minutes minutes
Total Time: 9 minutes minutes
Servings: 5 people
Calories: 726kcal
Author: Susie Weinrich

Equipment

  • Instant Pot or Electric Pressure Cooker

Ingredients

  • 1 lb elbow macaroni pasta
  • 4 cups water
  • 2 Tbsp salted butter
  • 2 teaspoon seasoning salt - Lawry's (more to taste)
  • 4 oz cream cheese - cubed
  • 12 oz evaporated milk -
  • 16 oz Velveeta cheese - cubed

Instructions
 

  • Add first 5 ingredients to the Instant Pot.
    Add the elbow macaroni, water, butter, season salt (Lawry's), and cream cheese to the Instant Pot. Do not stir, but make sure all the pasta is either covered or touching the water.
    1 lb elbow macaroni pasta , 4 cups water , 2 tsp seasoning salt , 4 oz cream cheese , 2 Tbsp salted butter
    water, macaroni, butter, cream cheese and water in the instant pot
  • Set IP for 4 minutes, pressure cook. Then quick release.
    Set the Instant Pot for 4 minutes, pressure cook on high for 4 minutes. Quick release the pressure.
  • Stir the milk and cheese into the macaroni.
    Pour in the evaporated milk. Stir the cream cheese into the macaroni until it is completely melted. Add the cubed Velveeta and stir until it is completely melted.
    Mom's Tip: You can put your IP on "keep warm" or on LOW saute to help melt the cheese. Just make sure you stir constantly and turn the mode off once the cheese is melted.
    12 oz evaporated milk, 16 oz Velveeta cheese
    cubes of Velveeta in an Instant pot of cooked macaroni
  • Serve immediately!
    Taste for seasoning and then serve hot.
    a large bowl of mac and cheese with a spoon

Recipe Tips and Notes:

No Instant Pot? No problem, Make this Skillet Mac & Cheese instead!
Storing:ย Keep any leftover mac and cheese in the fridge, in an airtight container for up to 5 days.
Reheating:ย Warm leftovers in the microwave. Add a little milk to each portion, microwave for 30 seconds. Stir and then microwave for an additional 20-30 seconds.
Did you make this recipe?Connect with me and let me know by commenting below!
Jump to Comments
Serving: 1.25cups | Calories: 726kcal | Carbohydrates: 85g | Protein: 32g | Fat: 30g | Saturated Fat: 18g | Polyunsaturated Fat: 1g | Monounsaturated Fat: 5g | Trans Fat: 0.2g | Cholesterol: 93mg | Sodium: 2608mg | Potassium: 551mg | Fiber: 2g | Sugar: 15g | Vitamin A: 1498IU | Vitamin C: 1mg | Calcium: 728mg | Iron: 1mg

Zucchini Pizza Boats

January 14, 2020 by Susie Weinrich Leave a Comment

zucchini pizza boats in a row with all the toppings

Zucchini Pizza Boats are a great way to get your pizza fix and add a lot more veggies to your diet! Fresh zucchini takes the place of the pizza crust, they are hollowed out to resemble a boat and then loaded with all your favorite pizza toppings.

zucchini pizza boats in a row with all the toppings

If you love this idea you will also love these Enchilada Zucchini Boats! And definitely give these Pizza Burgers a try at some point during grilling season.

Healthier Pizza Option

I don’t think I have met anyone that doesn’t like pizza. But with each slice of “supreme” pizza weighing in at 380+ calories sometimes you need a healthier alternative to your favorite take out pizza!

glasses of wine and white plates with a casserole pan full of zucchini pizza boats

A pizza zucchini boat is going to be at least HALF the calories of traditional loaded pizza. Since the crust is being replaced by fresh zucchini.

To lower the calories even more you could use turkey sausage or leave the meat out completely.

Marinara vs. Pizza Sauce

Pizza sauce is a little thicker and has less water content than marinara. However, their flavors are very similar. Use whichever you have or whichever you buy at the store! I always have marinara in my pantry so I choose to use that for this recipe.

How to Make Zucchini Boats

  1. Prep 9×13 Pan
  2. Start by preheating your oven to 350 degrees.

    Prep a large casserole dish by coating the bottom with ยฝ cup marinara or pizza sauce. If you have a dish larger than 9×13, use that, or you may have to use two pans to fit all the zucchini.

  3. Cut Zucchini
  4. Cut the ends off the zucchini. Then cut them in half, lengthwise. Using a spoon hollow out the inside. You will mostly be scraping out the seeds and pith.

    Create a dish or boat in the middle of the zucchini, this will hold your pizza fillings. See the photos below for a visual guide:

    showing how to make zucchini boats by hollowing out the center
  5. Make Italian Sausage Filling
  6. In a skillet over medium heat brown and crumble your Italian sausage until it is cooked through. Stir in ยฝ cup onions, 3 garlic cloves, 1 teaspoon dried basil, and 1 teaspoon dried oregano.

    Heat through on medium low heat for about 4 minutes to slightly soften the onions. Pour in 1 cup of marinara or pizza sauce. Stir to coat the sausage.

    sausage filling for pizza boats
  7. Assemble the Zucchini Pizza Boats
  8. Place your hollowed out zucchini in the prepared dish. Fill each zucchini with the sausage mixture, dividing it equally. Then top with the pizza toppings and cheese.

    zucchini boats filled with Italian sausage
    zucchini boats filled with Italian sausage and topped with mushrooms, peppers, and black olives
    zucchini boats filled with Italian sausage and topped with mushrooms, peppers, black olives, and cheese
  9. Bake
  10. Cover the dish with foil and bake for 20 minutes. Remove the foil and bake for an additional 10 minutes.

    Let cool for a few minutes then serve!!

    Baked Pizza Zucchini Boats in a glass pan

Make Ahead

You can make these ahead! Simply prepare them up to the point that you cover the pan with foil. Then do not cook, instead pop them in the fridge.

pizza zucchini boats in a dish

When you are ready to have them for dinner take them straight from the fridge to the oven. You may need to add a minute or two to the cooking time to cook through.

Storing & Reheating

Store any leftover Zucchini Pizza Boats in the fridge in an airtight container for up to 4 days.

To reheat simply microwave each portion for a minute or two. Or you can place them in a 350 degree oven for 15-20 minutes, until warmed through.

More Zucchini Recipes

If you love zucchini recipes, or if you have a garden that is over producing zucchinis, here are a few great recipes that call for fresh zucchini:

  1. Enchilada Zucchini Boats
  2. Healthy Mexican Chicken & Rice Casserole
  3. One Pot Dutch Oven Lasagna

Listen To The Recipe

You can listen to this full recipe, including all the tips and tricks on the Let’s Make Dinner Podcast! It is a short, under 10 minute episode. You can find it on your favorite podcast player or head over to the show notes page that includes an audio player.

More Italian Inspired Dinner Recipes

  • Pizza Burger on a bun topped with cheese, pepperoni, red onion, and green peppers
    Grilled Pizza Burger Recipe
  • penne coated with a mascarpone sauce topped with parsley
    Mascarpone Pasta
  • meatball soup recipe in a bowl with basil and parmesan over top
    Italian Style Meatball Soup
  • The very best lasagna recipe in a 9x13 pan
    BEST Recipe for Homemade Lasagna

Susie leaning on the kitchen counter

WATCH SUSIE ON FOOD NETWORK!

โญโญโญโญโญ

The new gameshow, 100 Cooks, premieres on Food Network June 7th, 2026 at 9est/8cst. I hope you will tune in!

zucchini pizza boats in a row with all the toppings

Zucchini Pizza Boat Recipe + Video

Zucchini Pizza Boats are a great way to get your pizza fix and add a lot more veggies to your diet! Fresh zucchini takes the place of the pizza crust, they are hollowed out to resemble a boat, and then loaded with all your favorite pizza toppings.
5 from 1 vote
Print Pin Rate Save Saved!
Prep Time: 15 minutes minutes
Cook Time: 30 minutes minutes
Total Time: 45 minutes minutes
Servings: 4 people
Calories: 601kcal
Author: Susie Weinrich

Equipment

  • 9×13 baking dish
  • foil

Ingredients

  • 3-4 fresh zucchini - medium sized
  • 1 lb ground Italian sausage - mild, medium or hot, it's up to you!
  • ยฝ cup onion - chopped (red, white, or yellow onion is fine)
  • 3 garlic cloves - chopped
  • 1 teaspoon each: dried basil & dried oregano
  • 1 ยฝ cups marinara or pizza sauce - divided
  • ยฝ cup each pizza topping: black olives, bell pepper, mushroom - add other pizza toppings to suit your tastes!
  • 1 ยฝ cups shredded mozzarella cheese

Instructions
 

  • Preheat the oven to 350ยฐ
    Prepare a large casserole dish by spreading ยฝ cup marinara or pizza sauce across the bottom. If you have one larger than 9×13, use that. Or you may need to use 2 pans to fit all the zucchini.
    1 ยฝ cups marinara or pizza sauce
  • Cut the zucchini in half and hollow.
    Trim the ends of your zucchini so that they will fit into your pan. Cut them in half, lengthwise. Scoop the middle of the zucchini out so you have a dish or boat to hold the fillings. See the photo for visual step-by-step:
    3-4 fresh zucchini
    step by step how to make a zucchini boat by scooping out the center
  • Brown the Italian sausage and add onions, garlic, and herbs.
    In a skillet over medium heat brown and crumble the Italian sausage until it is cooked through.
    Lower the heat to medium low and add the ยฝ cup chopped onions, 3 chopped garlic cloves, ยฝ teaspoon dried basil, and ยฝ teaspoon dried oregano, saute until the onions soften slightly, about 4 minutes.
    Stir in 1 cup marinara or pizza sauce.
    1 lb ground Italian sausage , ยฝ cup onion, 3 garlic cloves, 1 tsp each: dried basil & dried oregano, 1 ยฝ cups marinara or pizza sauce
    sausage filling for pizza boats
  • Time to assemble the Zucchini Pizza Boats:
    Place cut and hollowed zucchini in prepared casserole dish.
    Fill each boat with the Italian sausage mixture.
    Top with black olives, mushrooms, bell peppers and mozzarella cheese.
    ยฝ cup each pizza topping: black olives, bell pepper, mushroom, 1 ยฝ cups shredded mozzarella cheese
    zucchini boats filled with Italian sausage and topped with mushrooms, peppers, black olives, and cheese
  • Cover with foil and bake for 20 minutes.
    Remove foil and bake an additional 10 minutes.
  • Let cool for 5 minutes and serve!

Recipe Tips and Notes:

TO MAKE AHEAD
Simply prepare the zucchini pizza boats but do not cook. Cover with foil and place in the fridge for up to 2 days. Bake as directed when you are ready to have them.
TO REHEAT
Microwave each portion for a minute or two. Or place them in a baking pan or baking sheet and bake at 350 for 15 to 20 minutes, until warmed through.ย ย 
Did you make this recipe?Connect with me and let me know by commenting below!
Jump to Comments
Serving: 2zucchini boats | Calories: 601kcal | Carbohydrates: 14g | Protein: 29g | Fat: 48g | Saturated Fat: 19g | Polyunsaturated Fat: 5g | Monounsaturated Fat: 21g | Cholesterol: 119mg | Sodium: 1804mg | Potassium: 1021mg | Fiber: 4g | Sugar: 8g | Vitamin A: 1043IU | Vitamin C: 37mg | Calcium: 286mg | Iron: 3mg

Crescent Cinnamon Rolls

January 11, 2020 by Susie Weinrich Leave a Comment

crescent cinnamon rolls on a white plate with frosting in the background

Crescent Cinnamon Rolls are delicious homemade pastries made easily by using store bought crescent dough. This is a great 5 ingredient cinnamon roll recipe (including the frosting)! It is especially wonderful when you don’t have the time or energy to make your own cinnamon roll dough.

crescent cinnamon rolls on a white plate with frosting in the background
[Read more…]

How to Make Deviled Eggs

January 10, 2020 by Susie Weinrich 5 Comments

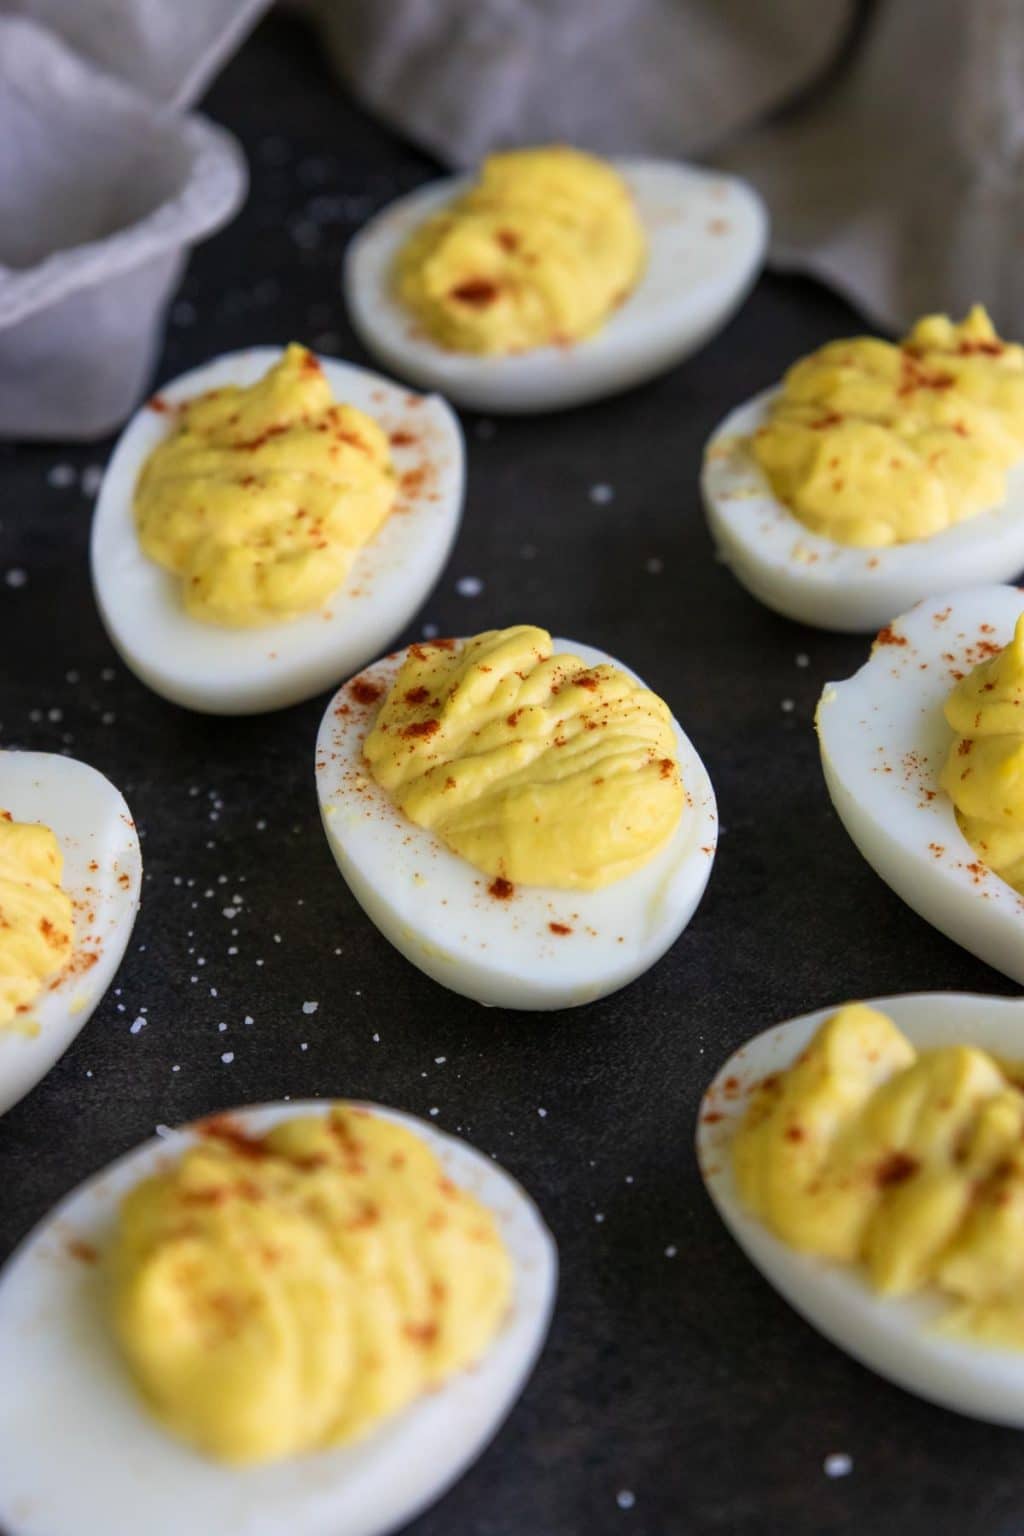
deviled eggs on a tray

This is a CLASSIC Deviled Egg recipe made with mayo, mustard, vinegar and a little sugar. We are not adding bacon or relish or wasabi or anything crazyโ€ฆThis is probably the way your Grandma made deviled eggs!

Classic Deviled Eggs garnished with paprika
[feast_advanced_jump_to]

I have a very long history of making deviled eggs for family gatherings, BBQ's, super bowl parties, NYE parties, and more. If there is one thing I know it is when you bring these Deviled Eggs to a party, they will be the first to go (so you better double or triple the recipe). I've perfected a version that's as classic as it is delicious. This recipe comes straight from my own kitchen so you can trust the flavor is spot on and it will turn out perfectly every time.

Easy Deviled Egg Ingredients

Hard Boiled Eggs – This recipe calls for 6 hard boiled eggs, which will make 12 deviled eggs. But you can definitely double or triple the recipe. Our favorite way to cook hard boiled eggs is using the 5-5-5 Instant Pot Method.

Mayonnaise – Use a good mayo that you like the flavor of, we generally use Hellmann's or Aldi. The mayo mixes with the cooked egg yolks to make the deviled egg filling.

Mustard – Just a bit of yellow mustard helps cut the mayo, also adds a bit of tang.

Sugar – A little sugar added to the filling balances the tang of the mustard and vinegar.

White Vinegar – This is a STRONG ingredient so start with a very small splash and add more as needed.

Kosher Salt – The recipe has salt to taste. Add at the end and then give it a little taste. Remember you can always add more, but removing it is not an option.

Step 1: How to Boil Eggs for Deviled Eggs

If you want the very best hard boiled eggs that are FOOLPROOF use the Instant Pot 5-5-5 method. Your eggs will literally slip right out of the shell!

If you do not have an Instant Pot and want to cook your hard boiled eggs on the stove top follow these instructions.

  1. Place 6-12 eggs in a pot and cover with water, plus an additional 1-2 inches of water above the eggs.
  2. Bring the pot to a rolling boil.
  3. Turn the heat off but keep the pot on the hot burner. Leave the eggs in the hot water for 10-12 minutes.
  4. Drain the water and run cold water (you can add ice too) to stop the eggs from cooking.
Hard Boiled Eggs in an egg carton

Step 2: How to Make Deviled Egg Filling

Here are a few tips I have learned through my many years of making deviled eggs!

  1. Seperate the cooked egg yolks from the egg whites.
  2. Place the cooked egg yolks in a bowl or in a food processor – NOTE the food processor will make for smoother filling.
  3. Process the eggs down to a very fine crumb, either pulsing in the food processor or mashing with the back of a fork. NOTE if you are using the fork method, you will get it mashed finer if you do it while the eggs are still a bit warm.
  4. Now add in the mayo, mustard, sugar, vinegar, and a pinch of kosher salt – either stir or process until it is completely mixed and smooth.
  5. Taste for additional seasoning.
  6. Divide the mixture evenly between the egg whites, filling up the divot where the egg yolk was.
how to cut hard boiled eggs for deviled eggs

Step 3: How to Fill Deviled Eggs – The Easy Way

Filling the deviled eggs is a delicate process. I have a great kitchen tip to get this done easily and without mess.

beautifully filled deviled eggs

Put a ziplock baggie into a tall drinking glass, sticking one corner of the bag down in the bottom of the glass- so it looks like a piping bag. Fold the top of the baggie down around the lip of the glass. Now fill the baggie with the egg yolk mixture. Pull it out of the glass, grabbing the bag right above the filling. Now clip about a ยผ inch off the bottom corner, right under the filling (watch the video below for a visual demonstration). This creates a disposable piping bag. No clean up.

You’re welcome.

Best Deviled Eggs FAQs

How long to boil eggs for deviled eggs?

Cook time will depend on the method you choose to use to make your hard boiled eggs. For the Instant Pot Method you will use a 5 minute cook time, 5 minute natural release and a 5 minute ice bath. For the stove top you will bring the eggs to a boil in water, then turn off the heat and let them sit it the hot water for 10-12 minutes, then do a 5 minute ice bath.

How long are deviled eggs good for?

Your deviled eggs will keep in the fridge, in a covered container for about 4 days. A deviled egg storage container will help keep your deviled eggs looking nice without them slipping around.

What is the best mustard for deviled eggs?

We happen to think that classic yellow mustard is the best for deviled eggs. It adds a nice tang, but doesn't change the flavor or texture of the filling too much, like a stone ground or Dijon mustard would.


Susie leaning on the kitchen counter

WATCH SUSIE ON FOOD NETWORK!

โญโญโญโญโญ

The new gameshow, 100 Cooks, premieres on Food Network June 7th, 2026 at 9est/8cst. I hope you will tune in!

deviled eggs on a tray

Classic Deviled Eggs Recipe (+ Video)

A traditional recipe for classic deviled eggs using mayonnaise and mustard . A super easy recipe with tips for piping the filling into the eggs.
5 from 7 votes
Print Pin Rate Save Saved!
Prep Time: 10 minutes minutes
Cook Time: 15 minutes minutes
Total Time: 25 minutes minutes
Servings: 12 filled deviled egg
Calories: 63kcal
Author: Susie Weinrich

Ingredients

  • 6 hard boiled eggs - see notes for cooking your eggs in the Instant Pot or stove top
  • 3 tablespoon mayonnaise
  • 1 teaspoon yellow mustard
  • ยผ teaspoon sugar
  • ยผ teaspoon white vinegar - up to ยฝ teaspoon for more zing
  • kosher salt to taste
  • optional garnish- paprika, chives, or parsley

Instructions
 

  • Hard boil 6 eggs, peel, and cut in half from top to bottom. Remove the yolks and place in a bowl.
    how to cut hard boiled eggs for deviled eggs
  • Remove the yolks and place in a bowl or in a food processor.
    Cooked egg yolks being crumbled with a fork
  • Using the back side of a fork mash the egg yolks until they are a very fine crumble or you can pulse them in a food processor until they are a fine crumble.
  • Add mayo, mustard, sugar, vinegar, and salt to the yolks and stir (or process) until smooth and well combined.
  • Fill a disposable Ziplock baggie with the yolk mixture. Clip a tiny piece from one corner of the baggie. Pipe the yolk mixture into the cooked egg whites.
    beautifully filled deviled eggs
  • Garnish with paprika, chives, or parsley.

Storing

  • Keep deviled eggs in a covered container, in the fridge for up to 4 days.
  • A deviled egg storage container is a great way to keep them from sliding around!

Recipe Tips and Notes:

For stove top hard boiled eggs:ย 
  • Place 6-12 eggs in a pot and cover with water by 1-2 inches over.
  • Bring the pot to a rolling boil.
  • Turn the heat off but keep the pot on the hot burner. Leave the eggs in the hot water for 10-12 minutes.
  • Drain the water and run cold water (you can add ice too) to stop the eggs from cooking.
For Instant Pot hard boiled eggs:
5-5-5 Instant Pot hard boiled eggs
Did you make this recipe?Connect with me and let me know by commenting below!
Jump to Comments
Serving: 2deviled eggs | Calories: 63kcal | Carbohydrates: 0.4g | Protein: 3g | Fat: 5g | Saturated Fat: 1g | Polyunsaturated Fat: 2g | Monounsaturated Fat: 2g | Trans Fat: 0.01g | Cholesterol: 95mg | Sodium: 58mg | Potassium: 33mg | Fiber: 0.02g | Sugar: 0.4g | Vitamin A: 133IU | Vitamin C: 0.002mg | Calcium: 13mg | Iron: 0.3mg

Originally Posted April 2017 – Copy & Photos updated January 2020

Instant Pot Cheesy Chicken, Broccoli, & Rice

January 9, 2020 by Susie Weinrich 7 Comments

A bowl of Instant Pot Cheesy Chicken and Rice on a blue and white towel

Instant Pot Chicken and Rice is a great dinner to make when you need a little comfort food. The bonus is that this is basically a one pot meal. You have your starch, protein, veggie, and dairy all in one! What is really great is this chicken and rice recipe is done in about 30 minutes in your electric pressure cooker!

Two bowls of Instant Pot Chicken and Rice with an Instant Pot in the background
[Read more…]

Damn Good Instant Pot Chili

January 8, 2020 by Susie Weinrich 10 Comments

a bowl of chili made in the instant pot with jalapenos, fritos and sour cream on top

Instant Pot Chili tastes like it has been simmering all day on your stove top, when actually it is done in a fraction of the time- just 30 minutes in your electric pressure cooker! This is some damn good chili!

Ground beef is seasoned with herbs and chili spices and mixed with onions, celery, and peppers, then blended with chili beans and northern beans in a tomato base.

Instant Pot Chili in two bowls topped with cheese, sour cream and fritos

This Instant Pot Chili recipe will be your new go-to when you want a big bowl of chili on a cold night. Just add some cornbread, buttermilk cornbread, cornbread muffins, or cinnamon rolls (it's a Midwestern thingโ€ฆ pick these Halloween cinnamon rolls during the fall) and you have a perfect dinner.

Why This Recipe is So Great

Then it makes amazing leftovers. Just like traditional Chili, it gets more flavorful with time. This is a great make-ahead Instant Pot dinner. Save it in your fridge for up to 5 days and reheat portions as needed.

Chili Beans

We are not trying to reinvent the wheel over here. This chili recipe calls for store-bought canned chili beans in sauce. Which are usually red beans or pinto beans in a chili flavored sauce. I generally buy Mild Brooks brand, but if you like spicy chili buy the spicy beans.

Instant Pot full of chili with a ladel

Do not drain your chili beans. The sauce is flavored perfectly for your chili and adds the right amount of liquid for the recipe.

I know that there is some controversy as to whether or not chili should have beans. I vote for beans, so obviously this recipe has beans! If you hate the bean- check out this recipe for true Texas Style Chili with no beans.

How To Make Instant Pot Chili

Start with your pot on sautรฉ, add 1 tablespoon olive oil. Then crumble and brown 1 lb of ground beef. It doesn't need to be completely cooked through. It will continue to cook under pressure.

Drain any excess grease before moving on.

Stir in 1 diced yellow onion, 2 chopped celery stalks, and 3 chopped garlic cloves. Sautรฉ for just a few minutes.

Add the seasonings:

  • 1 ยฝ tablespoon sugar
  • 1 heaping tablespoon chili powder
  • 1 teaspoon dried oregano
  • 1 teaspoon cumin
  • 1 teaspoon salt
  • ยฝ teaspoon black pepper
  • pinch of each: ground allspice or clove, and some red pepper flakes

Stir to coat the beef & veggies.

ADD THE NEXT INGREDIENTS IN ORDER, AND DO NOT STIR- ยฝ cup water, 1 can drained northern beans, 1 can chili beans (NOT drained), 16 oz tomato sauce, 15 oz can diced tomatoes (not drained).

Pop the lid on and set for 10 minutes chili/bean mode (or manual pressure/high), do a 5 minute natural release and then do a quick release for any remaining pressure.

Stir, let cool for a few minutes and serve!

Spice Level

I would say that this chili recipe is mild in spiciness. If you like a real kick of heat when you eat chili you have a couple options:

  • When you add all the spices add more red pepper flakes and cayenne pepper.
  • Use spicy chili beans in sauce.
  • Add a jalapeno pepper (the seeds and ribs carry the majority of the heat) with the celery, and onion.
  • Dash in some hot sauce while you are eating.
a bowl of chili made in the instant pot with jalapenos, fritos and sour cream on top

Thickening Chili

If you like your broth a little thicker you can pop your Instant Pot on sautรฉ mode (low or normal) for about 5-10 minutes to simmer out some of the water content and concentrate the flavors.

Toppings

If you are a chili purist and like it just as is, skip this section. But if you like "loaded" chili, here are some great topping ideas:

  • sour cream or plain Greek yogurt
  • green onions or red onions
  • jalapenos
  • cilantro
  • cheese
  • fritos or chili cheese fritos
  • crumbledย cornbread
  • hot sauce

Variations

There are so many different types of chili from chili con carne to veggie chili. Here are some great variations for this Instant Pot Chili to make it your own:

  1. Use ground turkey or ground chicken in place of the beef. (or check out this Hearty Turkey Chili Recipe)
  2. Add a jalapeno with the onion and garlic to make it a little spicier.
  3. Sub in 1 chopped bell pepper in place of the diced green chilies.
  4. Try different beans in place of the Northern Beans: something like black beans or red kidney beans can work here!
  5. Instead of serving as a soup, pour it on top of a baked potato!

No Instant Pot??

No problem, bounce over to this recipe for Classic Chili. This one is made the old fashioned way on the stove top for that simmered all day flavor.

More Chili Recipes

  • a bowl of white chicken chili topped with avocado, lime wedges and cilantro
    Thick and Hearty White Chicken Chili
  • quick stove top chili in a pot and on a wooden spoon
    Chili Dog Chili Recipe
  • Instant Pot Chili Mac (no beans)
  • chili cheese dogs in a foil packet
    Oven Chili Cheese Dogs

Susie leaning on the kitchen counter

WATCH SUSIE ON FOOD NETWORK!

โญโญโญโญโญ

The new gameshow, 100 Cooks, premieres on Food Network June 7th, 2026 at 9est/8cst. I hope you will tune in!

a bowl of chili made in the instant pot with jalapenos, fritos and sour cream on top

Damn Good Instant Pot Chili Recipe + Video

Instant Pot Chili is made in your Electric Pressure Cooker and has cooked all day flavor but is done in 30 minutes! This is the perfect chili for when you want delicious comfort food, fast.
5 from 8 votes
Print Pin Rate Save Saved!
Prep Time: 15 minutes minutes
Cook Time: 10 minutes minutes
Natural Release: 5 minutes minutes
Total Time: 30 minutes minutes
Servings: 6 people
Calories: 521kcal
Author: Susie Weinrich

Equipment

  • Instant Pot or Electric Pressure Cooker

Ingredients

  • 1 tablespoon olive oil
  • 1 ยฝ lb. ground beef - 80/20, 85/15 or 93/7
  • 3 garlic cloves - chopped
  • 1 yellow or white onion - chopped
  • 2 celery ribs - chopped
  • OPTIONAL FOR HEAT – 1 jalapeno, chopped
  • 1 ยฝ tablespoon white sugar
  • 1 tablespoon (heaping) chili powder
  • 1 teaspoon dried oregano
  • 1 teaspoon cumin
  • 1 teaspoon salt
  • ยฝ teaspoon black pepper
  • pinch of each: ground clove or ground allspice and red pepper flakes
  • ยฝ cup water
  • 4 oz can – diced green chilies
  • 15 oz can – northern beans - drained
  • 15 oz can – chili beans in sauce - do not drain!! (We love Brooks Mild Chili Beans)
  • 16 oz tomato sauce
  • 15 oz diced tomatoes - do not drain!!

Instructions
 

  • With the Instant Pot on sautรฉ mode, add the olive oil and ground beef. Crumble and brown the beef for a few minutes. You do not need to cook the beef completely, it will continue to cook under pressure.
  • Drain any excess grease from the beef before moving on.
  • Stir in 3 chopped garlic cloves, 1 diced yellow onion, 2 chopped celery ribs, and OPTIONAL chopped jalapeno.
    Sautรฉ for just a couple minutes.
  • Turn off the sautรฉ function.
  • Add all the seasonings & herbs
    1 ยฝ tbsp white sugar, 1 tbsp (heaping) chili powder , 1 tsp dried oregano, 1 tsp cumin, 1 tsp salt, ยฝ tsp black pepper, pinch of each: ground clove or ground allspice and red pepper flakes
  • ADD THE FOLLOWING INGREDIENTS IN THIS ORDER AND DO NOT STIR. THIS WILL HELP PREVENT GETTING A BURN WARNING ON YOUR POT:
    ยฝ cup water
    4oz can diced green chilies
    1 can northern beans
    1 can chili beans in sauce
    16 oz tomato sauce
    15 oz diced tomatoes
    Fight the urge to stir!!! DO NOT STIR!!
  • Pop the lid on and lock the pressure valve to seal. Set the pot to cook on bean/chili mode (or manual pressure/high) for 10 minutes.
  • Do a 5 minute natural pressure release.
    Finish with a quick release of any remaining pressure.
  • Stir and let cool for a few minutes, then serve with all your favorite chili toppings!

Storing

  • Keep in an airtight container in the fridge for up to 5 days.

Recipe Tips and Notes:

NO INSTANT POT?? If you do not have an Instant Pot or Electric Pressure Cooker check out this similar recipe for Classic Chili.
TOPPINGS:ย 
  • sour cream or plain Greek yogurt
  • green onions or red onions
  • jalapenos
  • cilantro
  • cheese
  • Fritos or chili cheese Fritos
  • crumbledย cornbread
  • hot sauce
MAKE AHEAD: Chili is almost better as leftovers!! You can make this ahead for a busy week and reheat it for an easy dinner. Make the recipe completely and let it cool. Keep it in an airtight container, in the fridge, for up to 5 days.
SPICE IT UP! Tips for adding heat to your Instant Pot Chili:
  • buy chili beans in spicy sauce
  • add a jalapeno, including the seeds and ribs
  • increase the amount of red pepper flakes to 1 tsp.
  • add cayenne pepper when you add the seasonings & herbs
  • dash some hot sauce or tabasco into the pot or individual servings.
Did you make this recipe?Connect with me and let me know by commenting below!
Jump to Comments
Serving: 1serving | Calories: 521kcal | Carbohydrates: 41g | Protein: 30g | Fat: 27g | Saturated Fat: 9g | Polyunsaturated Fat: 2g | Monounsaturated Fat: 12g | Trans Fat: 1g | Cholesterol: 81mg | Sodium: 1434mg | Potassium: 1306mg | Fiber: 10g | Sugar: 13g | Vitamin A: 831IU | Vitamin C: 18mg | Calcium: 134mg | Iron: 7mg

Easy Chicken and Biscuits

January 5, 2020 by Susie Weinrich 4 Comments

A ladle serving chicken and biscuits

We LOVE a good down-home recipe here at Mom’s Dinner, and I don’t know that it gets more down-home than this Chicken and Biscuits Casserole. I recently updated this recipe and it is better than ever…like make you weak in the knees, delicious! This recipe is like a mic drop. Nothing else needs to be said. It’s THAT good. Promise ๐ŸŽค

A bowl of chicken and biscuits

You will start by making one of the best chicken stews ever. Start with butter, which is always a good start. It’s full of carrots, peas, onions, garlic, celery, and seasonings. A roux is made with Better Than Bouillon Chicken Base and a little flour. Then chicken broth and heavy cream make it a “stew”. Bake it all in the oven topped with store bought biscuits and viola, dinner is ready.

[feast_advanced_jump_to]

Why You Are Going To Fall In Love with This Recipe

If it’s comfort food, we take it very seriously here at Mom’s Dinner! BUT we also believe that really good food doesn’t need to be complicated. Here are 8 other reasons (like you needed more reasons) to make this recipe asap:

  1. Perfect dinner for a cold night. Aren’t cozy dinners the best!?
  2. The chicken filling is bursting with flavor from the chicken base.
  3. A little heavy cream added to the filling makes it extra luscious.
  4. The recipe has the perfect amount of filling to biscuit ratio.
  5. Use a store bought biscuit to make dinner a little easier.
  6. Make Ahead Friendly! Instructions below.
  7. Great recipe for a rotisserie chicken (Helloooo Costco) or leftover shredded chicken.
  8. The chicken filling is the perfect amount of thickness. It is creamy and hearty without being gluey and glumpy.
someone serving a portion of chicken n biscuits

Chicken N Biscuits Ingredients

Chicken – this is a great time to use a rotisserie chicken from the store or leftover chicken! If not you can cook up a combo of chicken breasts and chicken thighs to shred for the filling. Poached chicken or Instant Pot Chicken works really well too. I find that I prefer shredded chicken over chopped chicken for the stew.

TIP for shredding warm chicken easily –

Place the cooked WARM chicken breasts/thighs in the bowl of a stand mixer fitted with the paddle or whisk attachment. Turn the mixer on to low speed and let it run for 20-30 seconds, or until the chicken is shredded to your desired consistency. Can do with a hand mixer as well.

Biscuits – this recipe calls for store bought biscuits, but you can certainly make your own biscuits, if you prefer that. This Easy Drop Biscuit Recipe would be a great option. The biscuits stay a little “wet” on the bottom, which makes them like a biscuit/dumpling combo. If you are totally opposed to that you can cook the biscuits separate and place them on top of the stew for serving.

Ingredients for making chicken and biscuits casserole on a table

Butter – Perfect start to the recipe, the veggies cook up beautifully in the butter. It also makes a roux with the flour to thicken the stew. Salted butter is the only butter we recognize here at Mom’s Dinner. If you use unsalted butter you will want to add an extra dash or two of salt to the dish.

Onion, Carrots, Celery – along with the frozen peas, these are the veggies for the Chicken and Biscuit filling. Cut the veggies all about the same size (similar to the peas). I have found that this veggie chopper does a great job!!!!

Frozen Peas – make sure to use frozen peas, not canned peas. If you use canned peas they will be too mushy once everything is cooked. No need to thaw your peas, they will warm through in the oven. Add the peas last into the stew so they retain their texture and color.

Seasonings – a mix of kosher salt, black pepper, onion powder is all you need to season the chicken stew perfectly. You want the flavor of the chicken and veggies to shine.

Chicken Base – SECRET INGREDIENT, always!!! If I am making any kind of chicken stew, chicken soup or chicken casserole, you better bet there is going to be Better Than Bouillon in it! It is a staple in my kitchen. This is what gives this Chicken and Biscuit recipe a blast of flavor.

Chicken base, Better Than Bouillon brand

Chicken Broth – you can use a chicken stock or chicken broth for the filling. A stock will have a little more flavor than a broth. If you make your own chicken stock from leftover rotisserie chicken bones, that is great too!

Heavy Cream- this helps thicken the chicken stew and makes it more luscious when it cooks in the oven.

How to Make Chicken and Biscuits

This is a quick overview of how to make this Chicken and Biscuit Casserole. For more detailed instructions and ingredient amounts, pop down to the recipe card.

carrots, celery and onions sautรฉing in butter

Step 1

Melt the butter in a large pot, over medium heat. Sautรฉ the onions, carrots and celery for 15 mins.

better than bouillon chicken base added to chicken and biscuits filling

Step 2

Add the garlic, chicken base and seasonings. Stir to coat.

chicken broth being stirred into veggies with a flour roux

Step 3

Sprinkle in the flour and cook for 1 minute. Whisk in the chicken broth and simmer for 15 mins.

making chicken and biscuit filling on the stove top

Step 4

Add in the heavy cream, peas and chicken. Simmer another 5 minutes.

chicken and biscuit filling in a 9x13 pan

Step 5

Pour into the prepared baking dish. Bake at 350ยฐF for 15 minutes.

raw biscuits on top of chicken and biscuit casserole, ready for the oven

Step 6

Top with the biscuits and cook another 20 minutes. Tent with foil if the biscuits are getting too dark on top.

a 9x13 casserole pan with chicken and biscuits

Step 7

Let cool for about 10 minutes before serving. It will be hot, and it will thicken a little as it cools.

How To make Ahead

This can be a great meal prep or make ahead meal for a family dinner.

  • Make the chicken filling completely.
  • Pour into a 9×13 baking dish and let cool.
  • Cover and pop in the fridge for up to 2 days.
  • Place on a rimmed baking sheet and place in a 350ยฐF oven for 25 minutes.
  • Remove from the oven and top with biscuits. Bake for another 20 minutes.

Storing

Store any leftover Chicken and Biscuits in the fridge, covered, for up to 4 days. The stew will thicken as it sits in the fridge. It will thin when you reheat.

How To Reheat

To reheat the stew, simply microwave each portion in a microwave safe bowl for 1 minute. I like to cover with a damp paper towel. Give it a stir and add a biscuit on top, microwave for an additional 15-20 seconds.

spooning the chicken filling out of a casserole pan of chicken and biscuits

To reheat the whole casserole, cover with foil and place in a 350ยฐF oven for 20-25 minutes. Make sure the center is warmed through before serving.

Chicken and Biscuit Recipe FAQ’s

These are some common questions we get about Chicken and Biscuits. I hope this helps!

How To Thicken The Stew?

If you follow the recipe as written the stew should be perfectly thick. But I know that things don’t always go as planned in the kitchen.

If you haven’t baked the Chicken and Biscuits yet and want to thicken the stew a little more, you can add some more heavy cream and simmer a little longer. Another options is to stir in a mixture of 1 tablespoon cornstarch combined with 1 tablespoon cool water (called a cornstarch slurry) while the stew is simmering, that will thicken it very quickly.

If you have already cooked the entire dish and the stew doesn’t seem thick enough, wait about 10 minutes. As it cools the stew should thicken up perfectly.

If you waited the 10 minutes and it still isn’t thick enough, remove the biscuits from the top, pour the stew into a pot over medium heat, in a separate bowl stir together 1 tablespoon cornstarch and 1 tablespoon cool water. Once the stew simmers stir int he cornstarch slurry. It should thicken up very quickly. Reassemble the dish and serve!

Can I Use Crescent Rolls?

The answer here is two fold…You can use crescent rolls BUT I wouldn’t recommend baking the crescent rolls ON TOP of the Chicken and Biscuits. They are a more delicate roll that may stay too soggy if cooked on top. BUT you can cook them separately and then serve them on top.

Can I Use Homemade Biscuits?

Hell yeah, you can use homemade biscuits. Can I come over for dinner? Use any homemade biscuit recipe you would like. However, if the cook time for those biscuits is more than 20 minutes, adjust the cook time after you add them to the top of the casserole.

What Spices & Seasonings Enhance Chicken and Biscuits?

You really want the chicken, veggies and biscuits to shine here, so this is not the time for curry or paprika etc… We think that the Better Than Bouillon Chicken Base adds such amazing flavor to the stew. Then just some of the standby’s are great seasoning – salt, pepper, onion powder, garlic powder. However, if you still want to add some extra flavor, here are some things that will work:

  • Extra Black Pepper
  • Thyme
  • Rosemary
  • Sage
  • Poultry Seasoning
  • Chicken Stock instead of Chicken Broth
  • Garlic Powder

More Comfort Food Recipes

  • a bowl of chicken and dumplings with a dumpling split open
    Creamy Chicken Stew and Dumplings
  • The very best lasagna recipe in a 9x13 pan
    BEST Recipe for Homemade Lasagna
  • serving creamy scalloped potatoes and ham
    Homemade Scalloped Potatoes and Ham
  • meatloaf with a ketchup topping, on a platter with two slices cut
    Homemade Meatloaf Recipe

Susie leaning on the kitchen counter

WATCH SUSIE ON FOOD NETWORK!

โญโญโญโญโญ

The new gameshow, 100 Cooks, premieres on Food Network June 7th, 2026 at 9est/8cst. I hope you will tune in!

A bowl of chicken and biscuits

Chicken and Biscuits Casserole

A super flavorful and thick chicken stew is topped with biscuits and baked in the oven. Amazing down-home flavor that everyone will love!
4.50 from 4 votes
Print Pin Rate Save Saved!
Prep Time: 15 minutes minutes
Cook Time: 55 minutes minutes
Total Time: 1 hour hour 10 minutes minutes
Servings: 6 people
Calories: 500kcal
Author: Susie Weinrich

Equipment

  • 9×13 baking dish

Ingredients

  • 8 tablespoon salted butter
  • 1 large yellow onion - diced
  • 2 cups carrots - diced
  • 1 ยฝ cups celery - diced
  • 2 garlic cloves - minced
  • 1 tablespoon chicken base - I use Better Than Bouillon brand
  • ยฝ cup all purpose flour
  • 1 teaspoon kosher salt
  • ยฝ teaspoon black pepper
  • ยฝ teaspoon onion powder
  • 3 ยฝ cups chicken stock or broth
  • 1 ยฝ cups frozen peas
  • 3 cups cooked chicken (rotisserie chicken works well!!) - shredded
  • 1 cup heavy cream
  • 8 count store bought biscuits - (12-16 oz can)

Instructions
 

  • Preheat the oven to 350โ„‰. Spray the 9×13 pan with non-stick spray (or rub with oil)

CHICKEN FILLING

  • In a large pot over medium heat add the butter to melt, add the onions, carrots, and celery. Sautรฉ for 15 minutes, stirring occasionally.
    8 Tbsp salted butter , 1 large yellow onion, 2 cups carrots , 1 ยฝ cups celery
    carrots, celery and onions sautรฉing in butter
  • Add the garlic and sautรฉ 1 minute.
    2 garlic cloves
  • Stir in the chicken base to melt and the seasonings to coat the veggies.
    1 Tbsp chicken base , 1 tsp kosher salt , ยฝ tsp black pepper , ยฝ tsp onion powder
  • Sprinkle the flour over the veggies. Stir to coat and cook the flour for 1 minute.
    ยฝ cup all purpose flour
  • Whisk in the chicken broth, scraping browned bits from the bottom of the pot. Let it simmer for 10-12 minutes to thicken and veggies to soften, stirring occasionally.
    3 ยฝ cups chicken stock or broth
  • Add in the peas, chicken and heavy cream. Stir and simmer for another 5 minutes, stirring occasionally.
    1 ยฝ cups frozen peas, 3 cups cooked chicken (rotisserie chicken works well!!), 1 cup heavy cream
    making chicken and biscuit filling on the stove top

BAKING

  • Pour into the 9×13 pan, pop in the oven for 15 minutes.
    TIP: if your 9×13 pan is shallow, place it on a rimmed baking sheet to catch any spills in the oven.
    chicken and biscuit filling in a 9x13 pan
  • Remove from the oven and place the biscuits on top. Place back in the oven for another 20 minutes.
    TIP: if the biscuits are browning on the top too much, tent foil over top.
    8 count store bought biscuits
    raw biscuits on top of chicken and biscuit casserole, ready for the oven
  • Let the chicken and biscuits cool for 10-15 minutes before serving (it will be SO hot). It will thicken a little as it cools.
    baked chicken and biscuits casserole in a 9x13 pan, cooling on the counter
  • Ladle the chicken and biscuits into bowls. Great served with a side salad!
    A bowl of chicken and biscuits

STORING & REHEATING

  • Keep any leftover chicken and biscuits in the fridge, covered, for up to 4 days.
  • To reheat portion in a bowl, cover with a damp paper towel, microwave each portion for 1 minute. Stir. Add a biscuit on top and microwave for an additional 15-20 seconds.

MAKE AHEAD INSTRUCTIONS

  • Make the chicken filling completely.
    Pour into a 9×13 baking dish and let cool.
    Cover and pop in the fridge for up to 2 days.
  • Place on a rimmed baking sheet and place in a 350ยฐF oven for 25 minutes.
    Remove from the oven and top with biscuits. Bake for another 20 minutes.
Did you make this recipe?Connect with me and let me know by commenting below!
Jump to Comments
Serving: 1serving | Calories: 500kcal | Carbohydrates: 23g | Protein: 24g | Fat: 35g | Saturated Fat: 20g | Polyunsaturated Fat: 3g | Monounsaturated Fat: 9g | Trans Fat: 1g | Cholesterol: 141mg | Sodium: 1416mg | Potassium: 573mg | Fiber: 4g | Sugar: 7g | Vitamin A: 8601IU | Vitamin C: 20mg | Calcium: 90mg | Iron: 2mg

Instant Pot Rotisserie Chicken

January 4, 2020 by Susie Weinrich 4 Comments

a whole chicken in an Instant Pot

Instant Pot Rotisserie Chicken is one of the easiest ways to cook a whole chicken. The chicken will be done in under an hour and is tender, moist, and flavorful. Your Instant Pot will make fast work of cooking up a whole chicken. I like to pop one in my IP on Sunday and have shredded cooked chicken in my fridge to use in easy chicken recipes for the crazy weekdays! 

making a whole chicken in the instant pot

There is no easier way to get dinner on the table then having tender cooked chicken leftover in the fridge, ready to go. You can make everything from chicken enchiladas to chicken noodle soup. Or pop over to this post for Leftover Rotisserie Chicken Recipes for Dinner This Week.  

If you would rather roast your chicken in the oven head over to this Ultimate Guide for Roast Chicken.

Ingredients 

To make this juicy and tender chicken you only need a few simple ingredients.

Ingredients to make Instant Pot Rotisserie Chicken
  1. Whole Fresh Chicken– I recommend buying a chicken that is around 4-5 lbs. and has been “air chilled” which will be written on the label. Here in the Midwest we have Smart Chicken which is air chilled and always delicious.
  2. Onion– you can use white or yellow.
  3. Garlic – use as much as you like. In fact I like to just cut a whole head of garlic in half!
  4. Lemon – adds a nice acid balance to all the savory and salty ingredients.
  5. Seasonings – If you don’t have a favorite chicken seasoning then I recommend using kosher salt, black pepper, garlic powder, onion powder, dried basil, and dried oregano.
  6. Water or Chicken Broth

Instant Pot Cooking Times

Since you cook the chicken as one whole piece you need to use the weight to estimate how much time it will take to cook. Before you unpackage your chicken make note of the total weight.

Whole fresh chickens are cooked at 6 minutes per pound in the Instant Pot or Electric Pressure Cooker.

  • 3 lbs. – 18 minutes.
  • 4 lbs. – 24 minutes.
  • 5 lbs. – 30 minutes.
  • 6 lbs. – 36 minutes.

Then finish with a 15 minute natural release .

A natural release is when the cook time is finished, the pot beeps and then the time starts to count back up. The “keep warm” light may even be illuminated. The heating element is no longer on and the pressure starts to dissipate, but the chicken is still cooking during this process so don’t skip it!

Step By Step Instructions

There are 3 main steps in making an Instant Pot Whole Rotisserie Chicken:

  1. Preparing
  2. Seasoning
  3. Pressure cooking

1. Prep The Chicken

It is very important that you remove the gizzards and neck from the inside of the chicken. Sometimes they are contained in a plastic bag and you do NOT want to cook that!

So reach in, pull out all the loose bits and pieces and then get started! You can save the neck and gizzards to make Gravy or Stock!

Remove any excess skin or fat around the openings and any feather pins left on the chicken.

Pat the whole chicken dry with paper towels.

Pro Tip: you do not need to rinse your chicken! It is actually a cross-contamination hazard and is not recommended.

2. Season The Chicken

Mix together 2 teaspoon kosher salt, 1 teaspoon black pepper, 1 teaspoon garlic powder, 1 teaspoon dried oregano, 1 teaspoon dried basil, ยฝ teaspoon onion powder. Sprinkle โ…“ of the seasoning into the inner cavity of the chicken. 

Quarter an onion, cut the garlic clove in half, and slice half a lemon into wedges. Stuff as much as you can into the cavity of the chicken.

Sprinkle the remaining seasoning on the outside of the chicken.

whole chicken that has been seasoned and stuffed with aromatics

3. Pressure Cooking

Pour 1 ยฝ cups water (or chicken broth) into the bottom of the Pot. Place the metal trivet in the pot. Put the seasoned whole chicken, BREAST SIDE UP, on top of the trivet. 

Close the Instant Pot and set it to cook on high pressure mode for 6 MINUTES PER POUND. For example I had a 5 lb chicken so I set my cook time to 30 minutes.

At the end of cooking time do a 15 minute natural release and then quick release any remaining pressure.

chicken that has been cooked in the Instant Pot

Pro Tip: Use the trivet handles to pull the whole chicken out of the Instant Pot and place on a rimmed baking sheet. (this will catch any juices that spill out)

Let the chicken rest for about 20 minutes before cutting and serving.

Storing

Keep any cut or shredded cooked chicken in the fridge in an airtight container for up to 4 days.

You can also freeze your cooked chicken and it should be good for up to 3 months!

8 Piece Chicken

There are 8 pieces on a whole chicken, and two types of meat: white & dark meat.

White meat is located in the two chicken breast and two wings. The white meat is traditionally considered the healthier of the two, yet can be drier when overcooked. 

showing all 8 pieces on a chicken

Dark meat is located on the legs and thighs. This meat is considered more flavorful and juicier, yet higher in fat content.

The majority of the meat will come from the breasts and thighs.

How to Cut a Rotisserie Chicken

Here are the simple steps to remove all 8 pieces from your rotisserie style chicken:

(if you are a visual learner you can watch this video on how to cut a rotisserie chicken.)

Start by cutting the breasts off of the chicken.

cutting the breast from a rotisserie chicken

Run your knife along the breast bone located at the very top middle of the whole chicken.

showing how to cut a breast from a rotisserie chicken

Run the knife between the leg and the breast to cut the skin. Lastly, run the knife between the breast and the wing.

The breast should now pull away easily. Repeat on the other side. 

The wings will just pull away once you cut the breasts out.

To remove the leg/thigh combo pull the leg away from the whole chicken. You will crack the bone that holds it to the carcass. You may have to run your knife between the leg and the whole chicken.

rotisserie chicken cut into parts- breasts, thighs, legs, wings

Lastly, pick any remaining chicken meat stuck to the carcass.

Tips For Shredding

If you are going to use your rotisserie chicken to make other recipes then you will want to cut or shred your chicken.

Easily Shred Cooked Chicken

The easiest way to shred your chicken is with a hand held blender or stand mixer with a paddle attachment. Place the warm/hot chicken in the stand mixer and run for about 30 seconds. The chicken shreds up perfect!

How to Brown & Crisp your Rotisserie Chicken Skin

You will notice when your chicken comes out of the Instant Pot that it definitely does not have crispy skin! If you want to serve your rotisserie chicken whole, you will probably want to brown/crisp the skin.

whole chicken with crispy skin

Once it comes out of the Instant Pot simply place it on a rimmed sheet pan, brush with a little olive oil or melted butter and place under the broiler for about 3 minutes. Watch it carefully so it doesn’t burn.

Favorite Recipes for Leftover Chicken

There are endless ways to use your chicken to make dinner. There are plenty of chicken recipes on Mom’s Dinner to look through and a great post on Leftover Chicken Recipes. But here are a few of my favorites that would make a great dinner!

  • Creamy Chicken & Noodles
  • Chicken Enchiladas
  • Chicken Noodle Soup for Kids or Homestyle Chicken Noodle Soup
  • Artichoke Chicken Salad

More Delicious Chicken Recipes

  • roasted chicken in a Dutch Oven
    Ultimate Guide to Beautifully Roasted Chicken
  • roasted half chicken with crispy golden skin in a skillet with green beans and gravy
    Cast Iron Roasted Half Chicken with Pan Gravy
  • poached chicken cut into cubes
    How to Poach Chicken Breasts
  • Rotisserie Chicken on a bed of parsley and lemons
    20 Amazing Leftover Roasted Chicken Recipes

Susie leaning on the kitchen counter

WATCH SUSIE ON FOOD NETWORK!

โญโญโญโญโญ

The new gameshow, 100 Cooks, premieres on Food Network June 7th, 2026 at 9est/8cst. I hope you will tune in!

a whole chicken in an Instant Pot

Instant Pot Rotisserie Chicken Recipe

Cooking a rotisserie chicken in the Instant Pot is the easiest and quickest way to cook a whole chicken. You will have tender and juicy chicken that you can serve as is, or make an amazing chicken dinner recipe.
5 from 4 votes
Print Pin Rate Save Saved!
Prep Time: 15 minutes minutes
Cook Time: 30 minutes minutes
Natural Pressure Release: 15 minutes minutes
Total Time: 1 hour hour
Servings: 4 people
Author: Susie Weinrich

Equipment

  • Instant Pot or Electric Pressure Cooker

Ingredients

  • 1 fresh whole chicken - 4-6 lbs.
  • 1 yellow or white onion - cut into 4 pieces
  • ยฝ fresh lemon - cut into wedges
  • garlic cloves
  • 2 teaspoon kosher salt
  • 1 teaspoon black pepper
  • 1 teaspoon each: garlic powder, dried basil, dried oregano
  • ยฝ teaspoon onion powder
  • 1 ยฝ cup water or chicken broth

Instructions
 

  • Prepare the whole chicken by removing the giblets and neck from the inside of the chicken cavity.
    Pat the outside of the chicken dry with paper towels.
  • In a small bowl mix together the 2 teaspoon kosher salt, 1 teaspoon black pepper, 1 teaspoon dried basil, 1 teaspoon dried oregano, 1 teaspoon garlic powder, and ยฝ teaspoon onion powder.
  • Sprinkle โ…“ of the seasoning mix in the inside cavity of the chicken.
    Place as much of the cut onion, garlic cloves and lemon as you can inside the bird.
  • Sprinkle the remaining seasoning mix on all sides of the outside of the chicken.
  • Pour the water or broth into the bottom of the Instant Pot.
    Place the metal trivet in the pot.
    Put the chicken BREAST SIDE UP in the pot.
  • You will cook the chicken on pressure mode/high for 6 MINUTES PER POUND.
    3 lbs. – 18 minutes.
    4 lbs. – 24 minutes.
    5 lbs. – 30 minutes.
    6 lbs. – 36 minutes.
  • Do a 15 minute natural pressure release at the end of the cook time and then quick release any remaining pressure.
    Make sure your chicken has reached 165ยฐ F by using an instant read thermometer instered into the thickest part of the breast and/or thigh!
  • Remove the chicken from the pot by using the trivet – be careful the handles of the trivet may be hot.
    Place on a rimmed baking sheet.
    Let the chicken rest 5-10 minutes for the juices to redistribute before cutting or serving.

Crisping/Browning the Skin

  • Crisping the skin of the rotisserie chicken is completely optional.
    If I am just using the chicken for recipes then I definitely will not crisp the skin. But if I am serving the chicken as an 8 piece dinner than I will probably crisp the skin.
  • Once it comes out of the IP place on a sheet pan and lightly brush with olive oil or melted butter. Set under the broiler for about 3 minutes until the skin is golden.
    Watch it closely so it doesn't burn

Storing

  • Store your leftover cooked chicken meat in and airtight container in the fridge for up to 4 days
  • You can also freeze leftover cooked chicken in the freezer for up to 3 months.

Recipe Tips and Notes:

Leftover Chicken – If you want to use the leftover cooked chicken in recipes for the week, head over to this post for Leftover Chicken Recipes.
Shredding Chicken -If you are going to use your rotisserie chicken to make other recipes then you will want to cut or shred your chicken.
The easiest way to shred your chicken is with a hand held blender or stand mixer with a paddle attachment.ย  Just make sure to do it when it is still warm/hot.
Run it for about 30 seconds. There may be some larger pieces you need to shred by hand. Don’t overmix or your chicken will turn to dust!ย 
Did you make this recipe?Connect with me and let me know by commenting below!
Jump to Comments

Homemade Chocolate Sheet Cake & Chocolate Frosting

December 31, 2019 by Susie Weinrich 6 Comments

pile of three pieces of cake with a bite taken out of the top piece

Chocolate Sheet Cake, sometimes called Texas Chocolate Sheet Cake or Texas Skip Cake… a whole lot of names for one cake recipe. It is a rich, moist, chocolatey cake topped with one of the best boiled chocolate frostings you have ever had!

Chocolate sheet cake cut into squares and placed on a cake pedestal
[Read more…]

Creamy Cajun Pasta with Beef Sausage

December 22, 2019 by Susie Weinrich 2 Comments

Cajun Pasta in a large bowl garnished with parsley

Cajun Pasta is a delicious dinner that is made with penne pasta, peppers, onions, smoked beef sausage and lots of cajun seasonings. It all gets tossed in a creamy cajun sauce. This is such an easy dinner recipe it will be your new go-to Cajun Pasta Recipe!

cajun pasta with peppers and sausage topped with parsley

Cajun Seasoning

There are quite a few options when it comes to cajun seasoning. The Louisiana Fish Fry Cajun Seasoning is the one that I like to use. But do note that if you use this brand it does contain salt, so you will not want to add additional salt to your dish.

Louisiana Fish Fry Cajun Seasoning

If you choose a seasoning blend that does not contain salt you can add salt to taste.

If you like this seasoning you should also check out my recipes for Cajun Rice with Chicken & Sausage (Instant Pot), and Skillet Dirty Rice & Beans.

Cajun Food

Cajun food is traditionally rural food born out of the swamp lands of Louisiana. It is the hearty comfort food that country folk would make for their families. The counterpart to cajun food is Creole. Creole food is more known for its blend of southern style with a European flair. It is also considered more of an urban cuisine.

two bowls of creamy cajun pasta with peppers and sausage

A lot of cajun dishes also begin with what is known as the holy trinity: onions, celery, and peppers. In this Cajun Pasta Recipe we do utilize the onions and peppers, but no celery!

How to Make Cajun Pasta

Start by prepping your veggies and sausage. Slice the peppers and onions in similar sized strips. Cut your sausage into ยฝ inch rounds.

yellow peppers and red onions cut into strips
Beef smoked sausage cut into slices

Boil a pot of salted water and cook the ยฝ pound of penne to al dente, following package instructions. Drain and set aside. It is best not to rinse your pasta because the starch will help thicken the sauce at the end.

In a large skillet (with high sides), over medium heat, add 1 tablespoon of olive oil. Saute the red onions, peppers, and garlic, stirring occasionally, for about 4-5 mins. Add the sausage and cook for an additional minute.

penne pasta, beef sausage, peppers and onions coated in cajun seasoning and spices

Stir in the drained diced tomatoes, cooked pasta, 1 heaping teaspoon cajun seasoning, 1 heaping teaspoon smoked paprika, pinch of red pepper flakes (or cayenne pepper for more heat), ยฝ teaspoon each – onion powder, garlic powder, and dried oregano. Stir around the pan for a minute to coat the pasta and warm the spices.

Creamy Cajun Pasta in a high sided skillet

Add 1 ยผ cups heavy whipping cream and let it simmer over medium heat until the cream thickens and coats the pasta, about 5-10 minutes.

Taste for additional seasoning and serve!

penne pasta, smoked sausage, onions and peppers in a cajun cream sauce in a large white bowl garnished with parsley

Pasta Dinner

If you love pasta for dinner here are a couple other recipes worth checking out!

  • Dutch Oven Lasagna
  • Baked Penne with Sausage
  • Skillet Mac & Cheese
  • Teriyaki Beef Noodles

Susie leaning on the kitchen counter

WATCH SUSIE ON FOOD NETWORK!

โญโญโญโญโญ

The new gameshow, 100 Cooks, premieres on Food Network June 7th, 2026 at 9est/8cst. I hope you will tune in!

Cajun Pasta in a large bowl garnished with parsley

Cajun Pasta Recipe

Cajun pasta is a delicious dinner. Penne pasta, peppers, onions, smoked beef sausage are coated in a creamy cajun sauce with plenty of seasonings.
5 from 4 votes
Print Pin Rate Save Saved!
Prep Time: 10 minutes minutes
Cook Time: 25 minutes minutes
Total Time: 35 minutes minutes
Servings: 4 people
Calories: 786kcal
Author: Susie Weinrich

Ingredients

  • ยฝ lb. penne pasta - cooked to al dente
  • 1 tablespoon olive oil
  • 1 bell pepper - sliced in strips, any color
  • ยฝ red onion - sliced in strips
  • 3-4 garlic cloves - chopped
  • 14.5 oz can diced tomatoes - drained
  • 12 oz fully cooked beef smoked sausage - cut into ยฝ inch pieces
  • 1 teaspoon (heaping) cajun seasoning - **see note about cajun seasoning
  • 1 teaspoon (heaping) smoked paprika
  • ยฝ teaspoon each: onion powder, garlic powder, dried oregano
  • pinch red pepper flakes - or cayenne pepper for more heat
  • 1 ยผ cups heavy whipping cream

Instructions
 

  • Cook pasta. Cook your penne pasta to al dente, per box instructions. Drain and set aside.
    ยฝ lb. penne pasta
  • Saute the peppers & onions in oil. In a large skillet (with high sides), over medium heat, add 1 tablespoon olive oil and saute the onions, peppers, and garlic for 4-5 minutes.
    1 tbsp olive oil, 1 bell pepper, ยฝ red onion, 3-4 garlic cloves
  • Add all additional ingredients, except cream. Stir in the ยฝ lb. pasta, 12 oz. smoked beef sausage, 14.5 oz. drained diced tomatoes, 1 heaping teaspoon cajun seasoning, 1 heaping teaspoon smoked paprika, ยฝ teaspoon onion pwd, garlic pwd, dried oregano, pinch of red pepper flakes. Stir for 1 minute to coat the pasta and warm the spices.
    14.5 oz can diced tomatoes, 12 oz fully cooked beef smoked sausage , 1 tsp (heaping) cajun seasoning , 1 tsp (heaping) smoked paprika, ยฝ tsp each: onion powder, garlic powder, dried oregano, pinch red pepper flakes
  • Stir the the heavy cream and simmer until thickened. Stir in 1 ยผ cups heavy whipping cream and simmer over medium heat until the cream has thickened and coated the pasta, about 5-10 minutes.
    1 ยผ cups heavy whipping cream
  • Taste for seasonings & serve!

Recipe Tips and Notes:

Cajun Seasoning
I use Louisiana Fish Fry Cajun Seasoning which contains salt. If you use another cajun seasoning that has salt, do not add additional salt.
If your cajun seasoning doesn’t have salt, add salt to taste at the end.
Did you make this recipe?Connect with me and let me know by commenting below!
Jump to Comments
Serving: 1serving | Calories: 786kcal | Carbohydrates: 54g | Protein: 21g | Fat: 54g | Saturated Fat: 26g | Polyunsaturated Fat: 4g | Monounsaturated Fat: 20g | Cholesterol: 144mg | Sodium: 894mg | Potassium: 654mg | Fiber: 4g | Sugar: 8g | Vitamin A: 2392IU | Vitamin C: 50mg | Calcium: 109mg | Iron: 3mg

  • « Previous Page
  • 1
  • …
  • 51
  • 52
  • 53
  • 54
  • 55
  • …
  • 65
  • Next Page »
Susie in the kitchen with an apron on getting ready to cook

Meet The Author:

Susie Weinrich is a professional recipe developer specializing in classic Midwest cooking, recently seen on Food Network's 100 Cooks. Her thoroughly tested recipes and step-by-step guides give home cooks real confidence in the kitchen.

YOU will feel like a huge success at dinner time with any of the simple recipes on Mom's Dinner! Read More

Helpful Meal Planning Resources

  • a table with white place settings and green garland
    Easy Meals for House Guests
  • a round table with a large family eating dinner
    30 Easy Meals for Large Family Vacations & Gatherings
woman owned small business certificate by Sertify

Amazing New Recipes

  • Scoop of broccoli cheese casserole coming out of a baking dish.
    Down Home Broccoli and Cheese Casserole
  • Close up of a fresh made fried pork tenderloin sandwich topped with onion rings, pickles, horseradish mayo and lettuce.
    Iowa Fried Pork Tenderloin Sandwiches
  • two kids jumping in a lake off the dock at sunset
    Dinners for a Week at the Lake House
  • Tuna Noodle Casserole in a white dish being spooned out of the baking pan
    Mom’s Tuna Noodle Casserole

Footer

^ back to top

About

  • Susie Weinrich
  • Privacy Policy
  • Accessibility Policy

Contact

  • Sign Up! for emails
  • Contact Me!
  • Join Me On YouTube

Recipes

  • Recipe By Category
  • Instant Pot Recipes
  • Dinner Recipes

Copyright ยฉ 2026 Mom's Dinner

Rate & Review This Recipe

Your vote:


A rating is required
A name is required
An email is required