Mom's Dinner

  • Home
  • All Recipes
  • Instant Pot
    • All Instant Pot Recipes
    • Instant Pot Soup
    • Instant Pot Beef
    • Instant Pot Chicken
    • Instant Pot Pork
    • Instant Pot Turkey
    • Instant Pot Pasta
    • Instant Pot Vegetarian
  • Dinner
    • Beef
    • Chicken
    • Pork
    • Turkey
    • Fish & Seafood
    • Mexican
    • Pasta
    • Vegetarian
  • Subscribe
menu icon
go to homepage
  • RECIPES
  • DINNER
  • ABOUT
  • SUBSCRIBE

subscribe
search icon
Homepage link
  • RECIPES
  • DINNER
  • ABOUT
  • SUBSCRIBE

ร—
You are here: Home

Traditional Christmas Cornflake Wreaths

December 21, 2019 by Susie Weinrich 4 Comments

cornflake wreaths with mini red M&M's

Cornflake Wreaths are a cute traditional Christmas cookies that look like green wreaths made to mimic a holly wreath. These holiday treats are similar to rice krispie treat but instead of puffed rice cereal they use cornflake cereal, dyed green, shaped into a wreath and then topped with red “berries”.

Christmas Cornflake Wreath Cookies on a piece of wax paper

Some other traditional Holiday treats that we love are Fruitcake Cookies, Peanut Butter Cup Cookies, and Saltine Toffee!

Ingredients & Tools

These Cornflake Wreaths are made with really simple ingredients like cornflake cereal, butter, and marshmallows. Here are some tips on a few ingredients and supplies:

ingredients for cornflake wreaths

Wax Paper

You will want to line your counter or a baking sheet with wax paper. This is the best option as it is kind of “slick” and ensures the sticky treats don’t stick to the paper.

Non Stick Spray

Since these treats are SO STICKY you will need something to keep your hands clean. either a non-stick pan spray, sprayed on your hands or wet your hands with a little water. Both will work!

You may also want that non-stick spray for your measuring cup, this will allow the sticky cornflake mixture to fall out of the cup easily.

Cornflake Cereal

Make sure you buy CORNFLAKE CEREAL and not Frosted Flakes. The frosted version will be a little too sweet for this treat.

Food Coloring

In any treat that calls for food coloring we always prefer a gel food coloring. It tends to have more pigment so you can use less and not water down your recipe. This green gel food coloring is great!

Red Berries on the Holly Wreath

It is traditional to use red hots candy but I find that kids don’t LOVE red hots. I like to use mini M&M’s you can find them in the holiday section in little tubes and they are only colored red and green.

Step by Step with Tips

Start by lining a baking sheet or two with wax paper. Set aside so they are ready for the wreaths.

Measure out 6 cups of cornflakes into a bowl. Set aside.

In a large pot over medium-low heat melt 1 stick of butter and the 12 oz bag of marshmallows, stirring often so the marshmallows don’t burn to the bottom of the pan.

Once all the marshmallows are completely melted stir in 1 teaspoon of green food coloring (if you have gel food coloring you may only need ยผ tsp). Add a little at a time if you want a stronger green color.

marshmallows, butter and green food coloring in a pot

Pour in the cornflakes and stir until every cornflake is coated with the green marshmallow mixture.

Cornflakes coated in green marshmallow mixture

Drop the green cornflake mixture by the ยผ or โ…“ cup portions into little heaps on the wax paper.

Pro Tip: spray your measuring cup with a little non-stick spray to help the sticky mixture fall out.

Coat your hands with the non-stick spray OR wet them under a little running water so the marshmallow coated cereal doesn’t stick to your hands while you form the wreaths.

Push your finger in the center of the mound. Wiggle it around so that it forms a hole in the center. Then shape the wreath into a nice circle. They do not have to be perfect!!

showing how to make cornflake wreaths by placing your finger in the center
cornflake wreaths with mini red M&M's

Place 3 red M&M’s together on the wreath so they mimic the holly berries. You will want to do this while they are still warm so they stick to the sticky marshmallows.

Cooling & Storing

Let the Cornflake Wreath Cookies cool and set for about an hour or so. Store on the wax paper, at room temperature, in an airtight container for up to 5 days.

Cornflake wreath cookies on wax paper

Cookie Exchange

These make an excellent cookie for a Holiday cookie exchange! They are so festive and scream Christmas!! Attach this FREE PRINTABLE GIFT TAG and you have a great edible gift. Here are a few other great cookies to consider making at the Holidays:

  • Microwave Fudge
  • Peanut Clusters
  • Peanut Butter & Chocolate Star Cookies
  • Rolo Pretzel Turtles
  • Peanut Butter Cup Cookies
  • Buckeye Balls

Pin TV Episode

You can watch these Cornflake Wreaths being made on an episode ofย Pin TV, it's an hour long episode of no-bake holiday treats.

I also makeย Peppermint Bark Oreos,ย Peanut Clusters, and Microwave Fudge in this episode.


Susie leaning on the kitchen counter

WATCH SUSIE ON FOOD NETWORK!

โญโญโญโญโญ

The new gameshow, 100 Cooks, premieres on Food Network June 7th, 2026 at 9est/8cst. I hope you will tune in!

cornflake wreaths with mini red M&M's

Traditional Christmas Cornflake Wreaths Recipe

A traditional Christmas treat, similar to a rice krispy treat, but they are made with cornflake cereal. They are dyed green and shaped into "holly" wreaths then topped off with 3 red "holly" berries (M&M's or red hots)
5 from 4 votes
Print Pin Rate Save Saved!
Prep Time: 20 minutes minutes
Cook Time: 10 minutes minutes
Cooling/Setting: 1 hour hour
Total Time: 1 hour hour 30 minutes minutes
Servings: 15 cookies
Author: Susie Weinrich

Equipment

  • wax paper
  • ยผ or โ…“ cup measuring cup

Ingredients

  • ยฝ cup butter - salted or unsalted
  • 12 oz bag marshmallows
  • 1 teaspoon green food coloring - you may want a little more for stronger color (or use gel food coloring and start with just ยผ tsp)
  • 6 cups cornflake cereal
  • 45 mini red M&M's - see notes
  • cooking/pan spray

Instructions
 

  • Line a baking sheet or two with wax paper. Set aside.
  • Measure 6 cups of cornflakes into a large bowl. Set aside.
    6 cups cornflake cereal
  • Melt the marshmallows & butter together. In a large pot over medium low heat, melt 1 stick of butter and the entire 12 oz bag of marshmallows. Stirring often so the marshmallows don't burn to the bottom of the pan.
    ยฝ cup butter , 12 oz bag marshmallows
  • Stir in the food coloring & cornflakes. Mix in 1 teaspoon of green food coloring (if using gel food coloring start with ยผ tsp) and the 6 cups of cornflake cereal. Stir to completely coat the cornflakes with the marshmallow mixture.
  • Form into wreath cookies on the wax paper. Drop the cornflake mixture by the ยผ or โ…“ cup mounds on the wax paper.
    Pro Tip: spray the inside of the measuring cup with non-stick spray so the sticky cereal mixture will come out easily.
  • Coat your hands in nonstick spray or wet with a little running water, this will prevent the marshmallows from sticking to your hands. Push your finger into the center of the cookie and wiggle it around to form a hole. Then form the wreath so it is a complete circle.
  • Add the "holly berries". Place 3 mini red M&M's together on the wreath to mimic holly berries. You can also use red hots.
    45 mini red M&M's
  • Cooling & Storing. Let the wreath cookies cool and set for at least an hour. Then store them on the wax paper at room temperature in an airtight container for up to 5 days.

Recipe Tips and Notes:

For the holly berries you can use any mini candy that is red.
  • red hots
  • red M&M’s – you can buy the little tubes of mini Christmas M&M’s. They only have red and green M&M’s.
  • red sixlets
FREE PRINTABLE GIFT TAG
Did you make this recipe?Connect with me and let me know by commenting below!
Jump to Comments
Serving: 1cookie

How To Make Snow Ice Cream

December 19, 2019 by Susie Weinrich 1 Comment

snow ice cream in a glass dessert bowl topped with pink and white sprinkles

Snow Ice Cream is a delicious homemade ice cream that only uses two ingredients: clean snow & sweetened condensed milk. There is no better snow day activity than making “snow cream” with the kids.

snow ice cream in a glass dessert bowl topped with pink and white sprinkles

If you are fresh out of snow you can make a no-churn ice cream that is super delicious! Try this mango ice cream or key lime cookies and cream no churn ice cream.

Or if you want a fun science experiment to do with the kids, grab this 3 ingredient ice cream recipe made in a zip lock baggie!

Just grab two ingredients: clean snow and sweetened condensed milk!

Step by Step Instructions

This recipe could not be easier. But be ready to work fast before the snow melts in your warm house.

Simply take a large bowl outside after a fresh snow and in a clean, untraveled area scoop up 12-14 cups of snow.

12 cups of snow in a glass bowl

Quickly take the snow inside and pour an entire 14 oz. can of sweetened condensed milk over the snow.

condensed milk being poured over snow

Stir vigorously until the snow starts to clump into “ice cream”.

stirring the snow ice cream ingredients together - showing how it clumps together

You can stir in sprinkles if you have them!

Serve it as soon as it is ready, before it melts. This is not a “save for later” type of ice cream. It will not refreeze well.

Amount of Snow

If you want to have sweeter true ice cream texture then plan to scoop up 12 heaping cups of snow for your snow cream.

If you want a fluffier, lightly sweetened, “I can still tell there is snow in there” grab 14 heaping cups of snow.

three bowls of snow ice cream with pink sprinkles

Variation and Toppings

Just like a big bowl of vanilla ice cream everyone likes to have different flavors added and different toppings. Here are some variations and toppings to try:

  • Add 1 teaspoon of almond extract for a wedding cake like flavor.
  • Add 1.5 teaspoon vanilla extract for an extra kick of vanilla.
  • Pour some chocolate syrup over top for a sundae
  • and of course, sprinkles are always encouraged!

More Kid Friendly Recipes Perfect for a Snow Day

  • one brownie on a cake plate with crumbs around and a fork
    Cake Mix Brownies
  • a cutting board that is full of kids foods
    Kids Charcuterie Board
  • two bowls of chicken noodle soup for kids with legos and crackers around the table
    Chicken Noodle Soup for Kids
  • Chocolate Cake Mix Cookies on a cooling rack with milk and a plate of cookies
    Chocolate Cake Mix Cookies

Susie leaning on the kitchen counter

WATCH SUSIE ON FOOD NETWORK!

โญโญโญโญโญ

The new gameshow, 100 Cooks, premieres on Food Network June 7th, 2026 at 9est/8cst. I hope you will tune in!

overhead shot of snow ice cream in a dessert bowl topped with sprinkles

How To Make Snow Ice Cream

Snow Ice Cream made with two ingredients. A simple and delicious snow day activity.
5 from 1 vote
Print Pin Rate Save Saved!
Prep Time: 5 minutes minutes
Cook Time: 0 minutes minutes
Total Time: 5 minutes minutes
Servings: 5 people
Calories: 255kcal
Author: Susie Weinrich

Equipment

  • large bowl

Ingredients

  • 12-14 cups fresh, clean snow - (heaping cups)
  • 14 oz can sweetened condensed milk

Instructions
 

  • Bring the clean fresh snow inside in a large mixing bowl.
    *12 heaping cups for sweeter and creamier snow ice cream
    *14 heaping cups for less sweet and fluffier snow ice cream
  • Pour the sweetened condensed milk over the snow.
  • Stir vigorously until the snow starts to clump into ice cream (snow cream).
  • Serve immediately before it melts!

Recipe Tips and Notes:

OPTIONAL ADDย INS
Add in sprinkles or serve them over top.
Drizzle chocolate syrup over top.
Stir in 1.5 teaspoon vanilla extract for additional flavor.
Stir in 1 teaspoon almond extract for a sweet almond flavor.
Did you make this recipe?Connect with me and let me know by commenting below!
Jump to Comments
Serving: 1serving | Calories: 255kcal | Carbohydrates: 43g | Protein: 6g | Fat: 7g | Saturated Fat: 4g | Cholesterol: 27mg | Sodium: 101mg | Potassium: 294mg | Sugar: 43g | Vitamin A: 212IU | Vitamin C: 2mg | Calcium: 225mg | Iron: 1mg

Goat Cheese Chicken

December 18, 2019 by Susie Weinrich 11 Comments

Chicken in a red sauce topped with goat cheese, crusty bread to the side.

Goat Cheese Chicken is such a delicious chicken dinner recipe. Tender chicken breasts are baked in a delicious tomato and red wine sauce then topped with tangy goat cheese. Serve this baked chicken dish with crusty bread and a caesar salad or over pasta, it is excellent for entertaining or just a family dinner.

Chicken in a red sauce topped with goat cheese, crusty bread to the side.

Goat Cheese

Goat Cheese, also known as chevre, is a soft cheese that is made from goat’s milk. It can come crumbled or formed in a log (4oz or 8oz). For this recipe you are looking for the log of goat cheese, it will have more moisture and soften a little better in the oven.

Goat Cheese cut into rounds

In the photos I used a plain goat cheese, however I have also used herbed and garlic. Both were delicious!

There is not a great sub for goat cheese. It has such a distinct flavor that you cannot truly match it with other cheeses.

How to Make Goat Cheese Chicken

Preheat your oven to 400 degrees.

Start by slicing each chicken breasts in half lengthwise, so you end up with 2 thinner chicken breasts. This helps the chicken cook quicker and more evenly.

Chicken breasts in a tomato sauce topped with goat cheese

Season both sides of the chicken breasts liberally with salt and pepper

Brown the Chicken

Grab an oven safe skillet, dutch oven, or large cast iron skillet. Place over medium – medium/high heat on the stove top. Drizzle 2 tablespoons of oil into the pan.

Brown both sides of the chicken, about 4-5 minutes per side. Do not force the chicken from the pan, once it is browned it will release. Note: You may have to brown the chicken in two batches to not overcrowd the pan.

Remove the browned chicken from the pan and set on a plate.

Make the Sauce

In the now empty pan place one small onion, chopped, and 3-4 chopped garlic cloves (add a little oil to the pan if it is dry). Saute, stirring constantly for about 2 minutes.

garlic onions and red wine simmering in a skillet

Add ยฝ cup red wine to the pan and scrape up any browned bits. You will want to use a red wine that is bold in flavor:

  • cabernet sauvignon
  • merlot
  • malbec

Let the wine simmer for about 1 minute. Then add the 28 oz can of crushed tomatoes, drained capers, salt, dried basil, dried oregano, smoked paprika, sugar, red and pepper flakes. Give it a good stir to combine.

tomato red wine sauce in a pan for goat cheese chicken

Add the chicken back to the pan and nestling it down in the sauce.

Browned Chicken breasts nestled down in a red wine tomato sauce

Bake the Chicken + Goat Cheese

Place in the oven and bake at 400 degrees for 20 minutes.

Remove from the oven, crumble the goat cheese over the chicken breasts and return to the oven for 5-8 minutes, or until the chicken reaches 165 degrees.

Chicken breasts in a tomato red wine sauce topped with goat cheese

If you are already a huge goat cheese fan, definitely check out this recipe for Crispy Chicken with Goat Cheese and Sun Dried Tomatoes


Susie leaning on the kitchen counter

WATCH SUSIE ON FOOD NETWORK!

โญโญโญโญโญ

The new gameshow, 100 Cooks, premieres on Food Network June 7th, 2026 at 9est/8cst. I hope you will tune in!

Goat Cheese Chicken in a skillet

Skillet Goat Cheese Chicken Recipe

Goat Cheese Chicken is an elegant yet easy dish that is great for entertaining or a family dinner. Tender chicken breasts and goat cheese are baked in a tomato red wine sauce.
Serve with crusty bread or over pasta.
5 from 14 votes
Print Rate Save Saved!
Prep Time: 15 minutes minutes
Cook Time: 35 minutes minutes
Total Time: 50 minutes minutes
Servings: 6 people
Author: Susie Weinrich

Ingredients

  • 2 tablespoon olive oil
  • 3 boneless skinless chicken breasts, cut in half lengthwise to create 6 thinner chicken breasts - seasoned generously with salt and pepper
  • 1 small yellow onion, diced
  • 3-4 plump garlic cloves, chopped
  • ยฝ cup red wine - cabernet, merlot, malbec- something with bold flavors
  • 28 oz canned crushed tomatoes
  • 1 tablespoon white sugar
  • 1 teaspoon kosher salt
  • 1 teaspoon each: dried oregano, dried basil
  • ยผ teaspoon smoked paprika
  • 2 tablespoon capers (drained)
  • pinch red pepper flakes
  • 4 oz goat cheese, crumbled - If you really love goat cheese you can use up to 8 oz.

Instructions
 

  • Preheat the oven to 400ยฐ
  • In a large oven safe skillet, over medium / medium-high heat, add the olive oil. Place the seasoned chicken breasts in the hot pan and brown on both sides, about 4-5 minutes per side. Set aside on a plate.
    NOTE: Do not force the chicken from the pan, when it is browned it will release easily.
    2 tbsp olive oil, 3 boneless skinless chicken breasts, cut in half lengthwise to create 6 thinner chicken breasts
  • In the empty pan add the 3-4 chopped garlic cloves and the diced onions (if the pan is dry add a little olive oil too). Saute, stirring constantly so the garlic does not burn, for about 2 minutes.
    3-4 plump garlic cloves, chopped , 1 small yellow onion, diced
  • Add the ยฝ cup wine to the hot pan. Immediately scrape up any browned bits from the bottom of the pan, this is called deglazing. Let the wine simmer in the pan for about 1 minute.
    ยฝ cup red wine
  • Pour in the 28 oz. can of crushed tomatoes. Add the 1 tablespoon sugar, 1 teaspoon salt, 1 teaspoon basil, 1 teaspoon oregano, ยผ teaspoon smoked paprika, 2 tablespoon drained capers, and pinch of red pepper flakes, stir it around the pan to incorporate. Remove the pan from the heat.
    28 oz canned crushed tomatoes, 1 tbsp white sugar, 1 tsp kosher salt, 1 tsp each: dried oregano, dried basil , ยผ tsp smoked paprika, 2 tbsp capers (drained), pinch red pepper flakes
  • Nestle the chicken breasts into the sauce.
  • Bake at 400ยฐ for 20 minutes.
  • Crumble the goat cheese over the chicken. Bake for an additional 5-8 minutes.
    Make sure the chicken has reached 165 degrees.
    4 oz goat cheese, crumbled
  • Serve immediately with crusty bread or over pasta.
Did you make this recipe?Connect with me and let me know by commenting below!
Jump to Comments

Easy Hot Cocoa Cookies

December 16, 2019 by Susie Weinrich 6 Comments

Hot cocoa cookies in stacks on brown parchment paper

Hot Cocoa Cookies are such a yummy chocolate cookie treat. It is like you are eating a cup of hot chocolate. A chocolate cookie base is filled with mini marshmallow bits and mini chocolate chips.

Hot cocoa cookies in stacks on brown parchment paper

Bonus, this Hot Cocoa Cookie recipe is super easy because it is made with a chocolate cake mix!! It is so easy your kids can make it (or at least help) without anyone breaking down in tears.

Did you know you can also make Brownies with Cake Mix! It’s another easy recipe that only takes 4 ingredients.

Free Gift Tag Printable

These Hot Chocolate Cookies also make an excellent edible gift. You can print out cute love and chocolate gift tags to go along with your treats!

Hot Cocoa Cookie Ingredients

Like I said before these Hot Chocolate Cookies are made with a chocolate cake mix. The nice thing about using a cake mix is that the flour, leavener, sugar, and flavor are already mixed for you! All you have to do it add the eggs, oil, vanilla, marshmallow bits and mini chocolate chips.

Hot Cocoa Cookies on brown parchment paper

You don’t even have to get the mixer out. You can blend this all by hand.

Cake Mix

The cake mix that I prefer to use is the Betty Crocker Chocolate Fudge cake mix. I find that it makes for really fudgy cookies. And who doesn’t love fudgy!!

Marshmallow Bits

The marshmallows that are in this cookie recipe are not traditional fluffy marshmallows. Instead, they are Kraft Marshmallow Bits. They are a little drier like a marshmallow you would find in cereal or a hot cocoa mix.

Kraft marshmallow bits

The size and texture of these marshmallows work well in the hot cocoa cookies.

How to Make Hot Cocoa Cookies

This is a super easy cookie recipe so if your kids love to bake, this is a good one to have them help with!

Fudgy hot cocoa cookies with marshmallow bits

Start by preheating your oven to 350 degrees and prepping a baking sheet with parchment paper or reusable silpat.

In a large mixing bowl stir together the entire box of chocolate cake mix, 2 eggs, ยฝ cup canola or vegetable oil, 1 teaspoon vanilla extract. Once that comes together fold in ยฝ cup marshmallow bits and ยฝ cup mini chocolate chips.

Hot Cocoa Cookie dough

Kitchen Tip: To achieve the look of my cookies with the marshmallow bits on the top, save a few bits back and place them on the tops of the raw cookie dough balls after you drop them onto the baking sheet.

raw cookie dough balls on parchment lined cookie sheet with marshmallow bits placed on top of cookies

Drop the cookies dough by the spoonful onto the parchment lined baking sheet. Bake accordingly:

  • Dark sheet pan: 9-10 mins.
  • Light sheet pan: 10-11 mins.
Cookie scoop
This is the cookie scoop that I like to use to make dropping the cookies super easy!

If you are baking the cookies in batches, place the dough in the fridge while the first batch is baking.

Let the hot cocoa cookies cool on the baking sheet for 3-4 mins then place on a cooling rack.

Hot Chocolate Cookies cooling on a rack

Store your Hot Cocoa Cookies at room temp in an airtight container for up to 5 days.

Other Sweet Cookie Recipes

  • Chocolate star cookie cooling on parchment paper
    Peanut Butter Chocolate Star Cookies
  • funfetti cookies on a cake plate
    Funfetti Cake Mix Cookies
  • Chocolate Rolo Cookie cut in half showing the fudgy center and melted caramel
    Homemade Chocolate Rolo Cookies
  • Chocolate Cake Mix Cookies on a cooling rack with milk and a plate of cookies
    Chocolate Cake Mix Cookies

Susie leaning on the kitchen counter

WATCH SUSIE ON FOOD NETWORK!

โญโญโญโญโญ

The new gameshow, 100 Cooks, premieres on Food Network June 7th, 2026 at 9est/8cst. I hope you will tune in!

Fudgy hot cocoa cookies with marshmallow bits

Easy Hot Cocoa Cookie Recipe

Hot Cocoa Cookies are an easy cookie recipe made with chocolate cake mix, marshmallow bits, and mini chocolate chips. This is a great cookie recipe to have the kids help make.
4.67 from 3 votes
Print Pin Rate Save Saved!
Prep Time: 10 minutes minutes
Cook Time: 10 minutes minutes
Total Time: 20 minutes minutes
Servings: 20 Cookies
Author: Susie Weinrich

Equipment

  • Large rimmed baking sheet
  • Parchment paper
  • Cookie Scoop (optional)

Ingredients

  • 15.25 oz Chocolate Cake Mix - I use Betty Crocker Chocolate Fudge cake mix
  • 2 eggs
  • ยฝ cup oil - vegetable or canola oil
  • 1 teaspoon vanilla extract
  • ยฝ cup marshmallow bits - I use Kraft Marshmallow Bits
  • ยฝ cup mini chocolate chips

Instructions
 

  • Preheat the oven to 350ยฐ
    Prepare a baking sheet with parchment paper or reusable silpat.
  • Mix the cookie dough. In a mixing bowl stir together the 15.25 oz chocolate cake mix, 2 eggs, ยฝ cup oil, 1 teaspoon vanilla extract.
    Fold in the marshmallow bits & chocolate chips. Once the dough comes together mix in the ยฝ cup marshmallow bits and ยฝ cup chocolate chips.
  • Drop the cookie dough onto the cookie sheet. Drop the hot cocoa cookie dough by the spoonful onto the parchment lined cookie sheet.
    Kitchen Tip: To achieve the look of my cookies place a few marshmallow bits and mini chocolate chips on the top of the cookie dough after it is dropped on the cookie sheet.
    raw cookie dough balls on parchment lined cookie sheet with marshmallow bits placed on top of cookies
  • Bake 9-11 mins. Dark baking sheet- 9-10 mins. Light baking sheet 10-11 mins.
    If you are baking these cookies in batches, place the dough in the fridge while the first batch is baking.
  • Let cool. Let the cookies cool on the baking sheet for 3-4 minutes then place on a cooling rack.
  • Store at room temp. Store at room temperature in an airtight container for up to 5 days.

Recipe Tips and Notes:

FREE PRINTABLE GIFT TAG
Did you make this recipe?Connect with me and let me know by commenting below!
Jump to Comments
Serving: 1Cookie

Easy Cookie Recipes

If you are looking for other easy cookie recipes then you are in the right place! I keep all baking at Mom’s Dinner SUPER EASY! Here are a few to check out:

  • Chocolate Cake Mix Cookies
  • Copycat Thin Mint Cookies
  • Rolo Pretzel Turtles
  • Peanut Butter Cup Cookies
  • Chocolate No Bake Cookies

Instant Pot Zuppa Toscana

December 15, 2019 by Susie Weinrich 21 Comments

a bowl of zuppa toscana with a spoon

Instant Pot Sausage & Kale Potato Soup (AKA. Instant Pot Zuppa Toscana) is a broth based soup full of sausage, potatoes, garlic, and fresh kale, with a little cream stirred in at the end to add richness in flavor. If you like Zuppa Toscana from Olive Garden, you will LOVE this recipe.

Instant Pot Zuppa Toscana in a bowl with a spoon

No Instant Pot, no problem! You can head over to this recipe for Copycat Zuppa Toscana to make it on your stove top or in your slow cooker.

Buying An Instant Pot

If you do not have an Instant Pot but are interested in buying one, I would highly recommend the 6 qt Duo Plus 9-in-1 or the 6 qt Duo Plus 7-in-1.

I personally have the 6 quart 9-in-1, to be honest I am not sure I will ever use all 9 features (like the sterilize or yogurt), but I guess they are there if I want them. The main features I use are the saute, meat/stew, soup/broth, rice, and pressure cook.

6qt Instant Pot

The main reason that I recommend these two Instant Pots is the size, 6 quarts. This gives you the space you need inside the pot to make just about any recipe, for two people or ten people!

Did you know that your Instant Pot can also double as a Slow Cooker!!! I plan to take advantage of that feature more this winter.

Buy the Instant Pot here, thru my affiliate link. It will NOT cost you any extra, it simply supports me and allows me to continue providing awesome recipes for free on Mom's Dinner! Thank youโ™ฅ

Ingredients

Here are the things you need to make Zuppa Toscana in your Instant Pot:

ingredients for zuppa toscana on a table with text overlays

Sausage – use any ground Italian sausage that you like – sweet, mild, hot. It can be pork or turkey.

How to Make Instant Pot Zuppa Toscana

Start with your Instant Pot on sautรฉ mode. Add a little oil to the bottom of the pot and crumble the sausage while cooking through, about 5 minutes.

If you have a lot of excess grease in the pot, drain the majority of it.

Add the chopped onions and chopped garlic to the sausage. Saute until the onions soften a little, about 5 minutes.

Stir the peeled and sliced potatoes and 6 cups chicken broth into the pot. Turn the sautรฉ mode off.

a bowl of zuppa toscana with a spoon

Pop the lid on the pot, lock the pressure vent to sealing. Set the pot to cook on soup or pressure mode for 6 minutes.

At the end of 6 minutes do a quick release of pressure. Stir in a pinch or two of red pepper flakes, 3-4 cups of kale and 1 cup of heavy whipping cream.

Taste for salt and pepper seasoning.

Serve!

Storing

Store your Instant Pot Zuppa Toscana leftovers in the fridge in an airtight container for up to 5 days.

I do not recommend freezing this soup because of the dairy content.

Instant Pot Zuppa Toscana for Dinner

This is a favorite winter dinner. It is easy to make, filling, super tasty and leftovers are amazing. To make it a meal simply serve a loaf of ciabatta bread that has been warmed in the oven.

To make it a try copycat dinner make a Olive Garden Salad and Breadsticks!

More Soup Recipes to Love

  • a brown crock full of potato leek soup
    Creamy Potato Leek Soup
  • a bowl of zuppa toscana with a spoon
    Copycat Zuppa Toscana from Olive Garden
  • a large pot of red wine beef stew ready to serve
    Beef Stew with Red Wine


Susie leaning on the kitchen counter

WATCH SUSIE ON FOOD NETWORK!

โญโญโญโญโญ

The new gameshow, 100 Cooks, premieres on Food Network June 7th, 2026 at 9est/8cst. I hope you will tune in!

a bowl of zuppa toscana with a spoon

Instant Pot Zuppa Toscana Recipe

A truly delicious Instant Zuppa Toscana that is full of sausage, kale, onions, and potatoes, with a light cream broth for richness. It is a perfect Olive Garden copycat!
5 from 13 votes
Print Pin Rate Save Saved!
Prep Time: 15 minutes minutes
Cook Time: 16 minutes minutes
Total Time: 31 minutes minutes
Servings: 6 people
Calories: 559kcal
Author: Susie Weinrich

Equipment

  • Instant Pot or Electric Pressure Cooker

Ingredients

  • 1 lb Pork Sausage - mild, sweet, hot, even turkey sausage- whatever you prefer
  • 1 tablespoon oil
  • 3 garlic cloves - minced
  • 1 yellow onion - chopped
  • 3 cups russet potatoes - peeled, halved lengthwise, then sliced ยผ – ยฝ inch thick
  • 6 cups chicken stock
  • 3-4 cups fresh kale - chopped, hard stem pieces removed
  • 1 cup heavy whipping cream
  • salt to taste - (TASTE THE SOUP BEFORE SALTING)
  • pepper and red pepper flakes to taste

Instructions
 

  • Set your Instant Pot to saute mode.
  • Add the oil and sausage, cook while crumbling the sausage, until it is cooked thru, about 5 minutes.ย Drain any excess grease.
    Add the onions and garlic, saute an additional 5 minutes, stirring often.
  • Turn off saute mode.
  • Add the chicken broth and potatoes to the sausage mixture.
  • Put the lid on and lock in place. Turn the pressure valve to seal.ย 
    Set the pot to Soup/Broth OR Pressure mode (either will work). Set the timer for 6 minutes.ย 
    Walk away and let it cook!!
  • Turn the pot off after the timer beeps and do a quick release of the pressure.
  • Add the kale and cream. The heat of the soup will wilt the kale and warm the cream.
  • Serve!
  • Store the leftover soup in the fridge, in an airtight container, for up to 5 days.

Recipe Tips and Notes:

To make this on the stove top or slow cooker pop over to Copycat Zuppa Toscana Recipe!
Did you make this recipe?Connect with me and let me know by commenting below!
Jump to Comments
Serving: 1serving | Calories: 559kcal | Carbohydrates: 28g | Protein: 22g | Fat: 40g | Saturated Fat: 17g | Polyunsaturated Fat: 5g | Monounsaturated Fat: 16g | Trans Fat: 1g | Cholesterol: 116mg | Sodium: 857mg | Potassium: 979mg | Fiber: 1g | Sugar: 5g | Vitamin A: 3995IU | Vitamin C: 48mg | Calcium: 107mg | Iron: 3mg

Chocolate Cake Mix Cookies

December 12, 2019 by Susie Weinrich 5 Comments

Chocolate Cake Mix Cookies on a cooling rack with milk and a plate of cookies

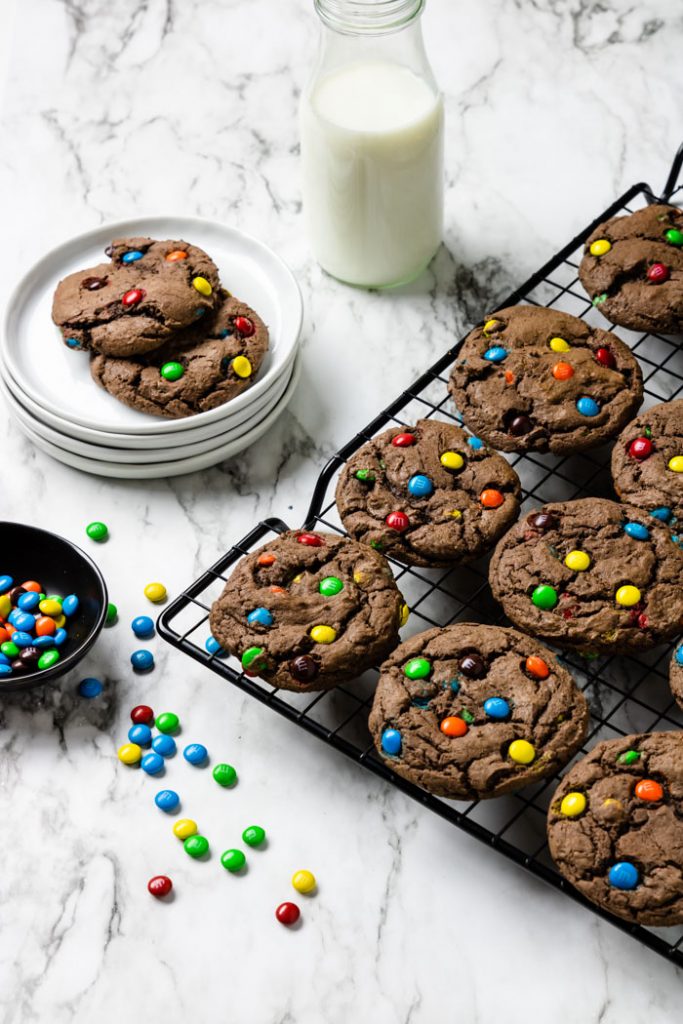
Chocolate Cake Mix Cookies are literally cookies made with cake mix from a box! How great is that! If you are not a baker or you need a cookie recipe shortcut, then this is the recipe for you. The cookies come out fudgey, chocolatey and delicious without a lot of effort.

Chocolate Cake Mix Cookies on a cooling rack with milk and a plate of cookies

You only 4 ingredients to make these amazing cake mix cookies!

These Hot Cocoa Cookies are also made with cake mix. But if you are not in the mood for cookies you can also make Brownies from Cake Mix.

Cake Mix for Cookies

How great is cake mix! It comes pre-mixed with almost everything you need for cookies: sugar, flavoring, leavener, and flour all mixed in one little package. All you need to do is add the fat and binder.

picture showing the fudgy center of the chocolate cake mix cookie

If you just add ยฝ cup vegetable or canola oil (fat) and 2 eggs (binder) you get the PERFECT cookie batter. I like to add mini M&M’s in this chocolate cake mix cookie recipe for texture and extra chocolate.

Chocolate Cake Mix Cookie batter with M&M's added

For this recipe I used a 15.25 oz Betty Crocker Chocolate Fudge cake mix but you should be able to use any brand of chocolate cake mix you would like (or have).

Cake Mix Cookies

If you are not in the mood for chocolate you can make cake mix cookies in any flavor that sounds good: lemon, red velvet, strawberry…. Just follow the recipe card below. Then mix in whatever compliments your cookie flavor: peanut butter chips, white chocolate chips, pecans….

How to Make Chocolate Cake Mix Cookies

Start be preheating your oven to 350 degrees. Prep a baking sheet with parchment paper or a reusable silpat.

Chocolate M&M cookie on a cooling rack

In a large mixing bowl stir together the entire chocolate cake mix, 2 eggs, ยฝ cup canola or vegetable oil, and 1 teaspoon vanilla.

As soon as the batter comes together fold in โ…” cup of mini M&M baking chips (you could also use mini chocolate chips).

Mini M&M baking bits

Kitchen tip: to get the look of my cookies save a few M&M’s to the side and press them into the top of the batter after you place them on the baking sheet.

Cake Mix Cookie batter on a parchment lined baking sheet with M&M's pressed into the top

Using a spoon or a small scoop, like the one pictured below, drop the cookie batter onto the parchment lined baking sheet.

Kitchen tip: If you are baking the cookies in batches you will want to place the unused dough in the fridge while the first batch bakes.

Cookie scoop

Bake for 9-11 minutes. Here are time guides depending on your baking sheet:

  • Dark baking sheet: 9-10 minutes
  • Light baking sheet: 10-11 minutes

Let the cake mix cookies cool on the baking sheet for 3-5 minutes then move to a cooling rack.

Chocolate Cake Mix Cookies with M&M's cooling on a black wire rack

Store the cookies at room temperature in an airtight container for up to 5 days.

Chocolate Cake Mix Cookie Recipe

Chocolate Cake Mix Cookies on a cooling rack with milk and a plate of cookies

Chocolate Cake Mix Cookies

Chocolate Cake Mix Cookies with M&M's are delicious chocolate cookies made from cake mix, eggs, oil, and vanilla. They are an easy and quick cookie recipe!
5 from 8 votes
Print Pin Rate Save Saved!
Prep Time: 10 minutes minutes
Cook Time: 10 minutes minutes
Total Time: 20 minutes minutes
Servings: 18 cookies
Author: Susie Weinrich

Ingredients

  • 15.25 oz box of chocolate cake mix - I use Betty Crocker Chocolate Fudge Cake Mix
  • 2 eggs
  • ยฝ cup oil - vegetable or canola
  • 1 teaspoon vanilla
  • โ…” cup mini M&M baking bits - or mini chocolate chips

Instructions
 

  • Preheat the oven to 350ยฐ. Prep a baking sheet with parchment paper or a reusable silpat.
  • In a bowl stir together the chocolate cake mix, 2 eggs, ยฝ cup oil, and 1 teaspoon vanilla.
  • Fold in โ…” cup mini M&M baking bits.
    Kitchen tip: if you want to achieve the look of my cookies, press a few M&M's on the outside of the cookie batter after you place it on the baking sheet.
    Cake Mix Cookie batter on a parchment lined baking sheet with M&M's pressed into the top
  • Drop the cookie batter by the spoonful onto the prepared baking sheet.
    If you are baking in batches place the unused dough in the fridge while the first batch bakes.
  • Bake for 9-11 minutes.
    light baking sheet: 10-11 mins.
    dark baking sheet: 9-10 mins.
  • Let the cookies cool on the baking sheet for 3-5 minutes, then transfer to a cooling rack.
  • Store the chocolate cake mix cookies at room temp. in an airtight container for up to 5 days.
Did you make this recipe?Connect with me and let me know by commenting below!
Jump to Comments

Cookie Recipes

If you are in the mood to bake or just are always on the lookout for great cookie that are easy to make, here are some to check out:

  • Chocolate Star Cookies
  • No Bake Cookies
  • Copycat Girl Scout Thin Mints
  • Peanut Butter Cup Cookies
  • Peanut Clusters

Super Flavorful Gravy Without Drippings

December 11, 2019 by Susie Weinrich 13 Comments

no dripping gravy in a glass gravy boat

Yes, you can make gravy without drippings! Just because you didn’t roast a turkey or whole chicken doesn’t mean you cannot have super flavorful gravy with your mashed potatoes or stuffing. To make homemade gravy without pan drippings you just need some butter, onions, flour, broth and lots of seasonings. This is an easy gravy recipe, it just takes a little time and patience.

Homemade Gravy in a gravy boat with rosemary and butter to the side.

So let’s get on with how to make an amazing gravy without pan drippings!

FYI: if it’s the Holiday Season and your stove top is occupied, you can also make a similar no drip gravy in your Instant Pot!

Good Gravy

Sure, you can make gravy with butter, flour and broth.

BUT, to make really good gravy without pan drippings you need to start with a really great flavor base. For this recipe that means caramelized onions, garlic, rosemary and chicken base (or turkey).

Ingredients

There are 4 key ingredients for making gravy:

  • Fat (butter)
  • Flavoring (onions, rosemary, thyme, salt, pepper)
  • Thickener (flour)
  • Liquid (meat drippings, stock, or broth)
ingredients for making gravy on a table

Stock or Broth: Since you don’t have pan drippings you will be using chicken stock or broth. The difference between the two is that stock is made from the bones and meat of the chicken, and broth is made from just the meat.

For more flavor opt for a STOCK at the grocery store.

Rosemary: This herb adds amazing flavor to your gravy. No need to chop it, you can throw a whole sprig right in. However, if rosemary is not your favorite flavor you can absolutely add thyme instead. You can even add 1 sprig of fresh sage for a Thanksgiving flavor!

Chicken base, Better Than Bouillon brand
Better Than Bouillon Chicken Base

Chicken Base: For all the love of gravy don’t skip this ingredient! Chicken Base is like the grown up version of bouillon. You will find it in the soup aisle of the grocery store and will be in a tub or jar (see photo above). It comes in a paste form and adds amazing flavor to your gravy!

We highly recommend the Better Than Bouillon Brand.

Making Flavor Variations

The recipe below is written for CHICKEN GRAVY. But with just a few ingredient swaps you can make anything from Turkey to Pork Gravy!

Turkey Gravy

To make this recipe into a turkey gravy you will start with the same caramelized onions and herbs, but you will add turkey flavors. Perfect for Roasted Turkey.

Hands holding a glass gravy boat filled with super flavorful turkey gravy without drippings.

Turkey Gravy; no drippings

Follow this recipe for turkey gravy for a different flavor profile. It is great for Thanksgiving and the Holiday season.

Turkey Gravy

Beef Gravy

To make this recipe into a beef gravy simply swap the broth for beef broth and the chicken base for roasted beef base. Great for Pot Roast.

a gravy boat full of brown gravy

Brown Gravy

Super simple brown gravy recipe that doesn’t require any drippings!

Brown Gravy

Pork Gravy

To make this recipe into a pork gravy simply swap the chicken base for ham base.

Vegetarian Gravy

Yes, you can make vegetarian gravy! Simply swap the broth for vegetable broth and the chicken base for roasted vegetable base, mushroom base or roasted garlic base.

Mushroom Gravy

If you want a little veggie added to your gravy, this mushroom gravy is a great option.

a gravy boat full of mushroom gravy

Mushroom Gravy

A hearty beef style gravy that is full of flavor and mushrooms.

Mushroom Gravy

How to Make Great Gravy without Drippings

Start with a large skillet, Melt 1 stick of butter over medium – medium/low heat.

Chop the onion into ยผ-1/2 inch strips and add to the melted butter. You are going to caramelize the onions, which is to brown them (not burn). Do this by letting the onions simmer in the butter, stirring occasionally. This will take a while, around 15-20 minutes, so be patient! This step adds the most flavor!

onions caramelized in a pan with garlic and rosemary

Once you start to see browning around the edges of the onions, about 15 minutes in, stir in 1 rosemary (or thyme) sprig and 3 cracked cloves of garlic. Continue to simmer until the onions turn golden brown, about 10 more minutes.

Next stir in 1 teaspoon of chicken base. Stir until it melts into the onions.

Add โ…“ cup all purpose flour to the onion mixture. Stir it constantly for about 1 minute. This will get rid on the raw flour flavor and help it combine with the flour to make a roux.

Note: if this gravy is for the holidays add a dash of dried poultry seasoning and ground sage at this point.

whisking stock into gravy

For the next step you will want to grab a whisk. Slowly whisk in 3 cups of chicken stock (or broth). Turn the heat up to medium and let the gravy simmer for about 5 minutes until it is your desired thickness.

Optional- stir in a tablespoon or two of heavy cream to add richness. If you plan on freezing the gravy wait and add this when you are ready to thaw and use the gravy.

whisking heavy cream into gravy

Taste for salt & pepper seasoning.

Strain the onions, garlic, and rosemary out of your gravy by pouring it through a fine mesh sieve. (MAKE SURE YOU PUT A BOWL UNDER THE SIEVE so your delicious gravy doesn’t go down the drain. LOL). Give the onion mixture a stir in the sieve to help force all the flavor & gravy into the bowl!

solids from making gravy without drippings being strained through a sieve
a colander being removed from a bowl revealing the gravy below

Serve your homemade gravy (made without drippings!) over mashed potatoes, stuffing, turkey, and/or chicken.

Thinner Gravy

If you want your gravy thinner just whisk in a little more chicken broth or cream to thin the gravy.

Thicker Gravy

For thicker gravy you can lessen the liquid added to 2 ยฝ cups, if you have not added the broth.

If you have already added the 3 cups of broth, then keep simmering over medium heat until it thickens. You will want to stir constantly so the bottom does not burn.

gravy and mashed potatoes

Another option is to mix together 1 tablespoon cool water or broth with 1 tablespoon cornstarch and whisk it in while the gravy is simmering.

Flavor Troubleshooting

  • The Gravy got too salty??ย No problem, you just need to dilute it slightly. In this case I might recommend adding water or a low sodium broth if you have it. Milk content can also help diminish salt content, consider adding milk or half & half. Then re-taste for additional seasoning needed
  • I want a little more flavor in my Gravy??ย Whisk in some poultry seasoning, dried sage, and black pepper. Taste again and add more as desired.
  • My Gravy got lumpy??ย Don’t freak out! First run the gravy through the fine mesh sieve. If that didn't do the trick whisk the heck out of the gravy. If that still didn't do it, run the gravy in a blender just a couple pulses until it is smooth.

Make Ahead and Freeze Your Gravy

Yes! You can freeze gravy!

This gravy can be made ahead and frozen for up to 4 months. You will want to make it without the cream and add that when you reheat to serve.

You can freeze it in containers, ice cube trays for smaller servings, or baggies. Just be sure to cool first before freezing!

Recipes That Go Great with Gravy!!

  • mashed potatoes in a bowl
    Best Instant Pot Mashed Potatoes
  • A large serving bowl of Yukon Gold Mashed Potatoes topped with melting butter
    The BEST Yukon Gold Mashed Potatoes
  • roasted half chicken with crispy golden skin in a skillet with green beans and gravy
    Cast Iron Roasted Half Chicken with Pan Gravy
  • sliced pork tenderloin on a plate with herbs
    Marinated Rosemary Pork Tenderloin
  • Red Skin Mashed Potatoes in a bowl with a spoon to the side
    Red Skin Mashed Potatoes
  • a large bowl of roasted garlic mashed potatoes topped with butter
    Outrageous Roasted Garlic Mashed Potatoes

Susie leaning on the kitchen counter

WATCH SUSIE ON FOOD NETWORK!

โญโญโญโญโญ

The new gameshow, 100 Cooks, premieres on Food Network June 7th, 2026 at 9est/8cst. I hope you will tune in!

no dripping gravy in a glass gravy boat

Super Flavorful Gravy Recipe without Drippings

Homemade gravy made without drippings. This is an easy gravy recipe that only requires a couple ingredients and a little time. It is perfect to serve over potatoes, stuffing, chicken, or turkey!
LISTEN TO THE AUDIO RECIPE USING THE PLAYER BELOW.
5 from 12 votes
Print Pin Rate Save Saved!
Prep Time: 5 minutes minutes
Cook Time: 30 minutes minutes
Servings: 3 cups
Calories: 388kcal
Author: Susie Weinrich

Equipment

  • large skillet or cast iron pan
  • whisk

Ingredients

  • 8 tablespoon salted butter
  • 1 yellow onion - cut into ยผ-1/2 inch slices
  • 1 fresh sprig of rosemary - (can sub thyme, or use both)
  • 3 plump garlic cloves - cracked using the flat side of a knife
  • 1 ยฝ teaspoon chicken base - I use Better Than Bouillon brand
  • โ…“ cup all purpose flour
  • 3 cups chicken stock or broth
  • salt and pepper to taste

Optional

  • 2 tablespoon heavy cream
  • dash of ground sage and poultry seasoning - I like to add this if I am serving this gravy during the holidays.

Instructions
 

  • Melt the 8 tablespoons of butter in a skillet. In a large skillet over medium-low heat melt the butter, I use a stainless steel skillet.
    8 tbsp salted butter
  • Caramelize the onions in the butter. Once the butter melts add the onions and simmer, stirring occasionally until the onions begin to brown around the edges, about 15 minutes.
    1 yellow onion
  • Add the cracked garlic & rosemary. Stir in the garlic and rosemary sprig. Continue to simmer until the onions are a deep caramel color, about 10-15 more minutes. See photo.
    1 fresh sprig of rosemary , 3 plump garlic cloves
    onions, garlic, and rosemary caramelized in a pan
  • Stir in 1 ยฝ teaspoon chicken base. Mix in the chicken base until it melts into the onion mixture.
    If you are adding a couple dashes of poultry seasoning and ground sage, add that now.
    1 ยฝ tsp chicken base , dash of ground sage and poultry seasoning
  • Mix in the flour. Add the flour into the onion/butter mixture, stir constantly for 1 minute.
    โ…“ cup all purpose flour
  • Slowly whisk in the chicken stock. Pour the chicken stock into the flour/onion mixture slowly, all while whisking.
    3 cups chicken stock or broth
  • Increase the heat to medium and simmer the gravy. Bring the gravy to a simmer over medium heat, it will thicken as it cooks.
    If using the heavy cream, whisk in once the gravy is thickened.
    2 tbsp heavy cream
  • Taste for seasoning. Give the gravy a taste and see if you want to add some salt & pepper.
    salt and pepper to taste
  • Strain the gravy. Place a fine mesh sieve over a bowl and pour the gravy through the sieve. Use the whisk to stir the solids making sure you get all the flavor and gravy through the sieve.
  • Serve!

To thin your gravy:

  • To thin your gravy add an additional ยฝ cup stock at a time until it is your desired consistency.

To thicken your gravy:

  • To thicken your gravy continue to simmer on the stove until it is your desired consistency. Stir continuously so it does not burn on the bottom of the pan.
    If it still needs to be thicker, mix a tablespoon of cornstarch with a tablespoon of cool broth or water, and stir it into the simmering gravy.

Serving

  • If there is one thing that goes great with gravy it's MASHED POTATOES!! Try one of these amazing recipes for the delicious gravy you just made-
    Instant Pot Mashed Potatoes
    Yukon Gold Mashed Potatoes
    Red Skin Mashed Potatoes
    Roasted Garlic Mashed Potatoes
    Garlic Parmesan Mashed Potatoes

Recipe Tips and Notes:

Flavor Troubleshooting:
  • The Gravy got too salty??ย No problem, you just need to dilute it slightly. In this case I might recommend adding water or a low sodium broth if you have it. Milk content can also help diminish salt content, consider adding milk or half & half. Then re-taste for additional seasoning needed
  • I want a little more flavor in my Gravy??ย Whisk in some poultry seasoning, dried sage, and black pepper. Taste again and add more as desired.
  • My Gravy got lumpy??ย Don’t freak out! First run the gravy through the fine mesh sieve. If that didn't do the trick whisk the heck out of the gravy. If that still didn't do it, run the gravy in a blender just a couple pulses until it is smooth.

Tips for Making Ahead & Freezing Gravy:
You can make this gravy ahead of time and freeze it for up to 4 months. You will want to make it without the cream, and then add that when you are ready to reheat and serve.
Make the gravy and cool completely, pour into a freezer safe container, baggie, or ice cube tray (for smaller portions).

Flavor Variations
Turkey Gravy: For a turkey flavor profile, pop over to this Turkey Gravy Recipe
Beef Gravy:ย For a beef flavor, pop over to this Brown Gravy Recipe
Pork Gravy: To make this recipe into a pork gravy simply swap the chicken base for ham base.
Vegetarian Gravy: Yes, you can make vegetarian gravy! Simply swap the broth for vegetable broth and the chicken base for roasted vegetable base, mushroom base or roasted garlic base.
Mushroom Gravy: If you love a mushroom flavor AND mushrooms in your gravy, pop over to this Mushroom Gravy Recipe.
More Gravyย 
During the holidays when your stove top is occupied you can make a similar no drip gravy in your Instant Pot!
ย 
Did you make this recipe?Connect with me and let me know by commenting below!
Jump to Comments
Serving: 3cups | Calories: 388kcal | Carbohydrates: 17g | Protein: 4g | Fat: 35g | Saturated Fat: 22g | Polyunsaturated Fat: 1g | Monounsaturated Fat: 9g | Trans Fat: 1g | Cholesterol: 96mg | Sodium: 1356mg | Potassium: 144mg | Fiber: 1g | Sugar: 3g | Vitamin A: 1086IU | Vitamin C: 4mg | Calcium: 43mg | Iron: 1mg

Rolo Pretzel Turtles

December 6, 2019 by Susie Weinrich 6 Comments

Rolo Pretzel Turtles on a white plate with Rolo candy in the back

Rolo Pretzel Turtles are a classic treat that only require 3 ingredients: Rolo candies, pecans, and pretzels. Rolo Turtles are really easy to make and are ready in about 15 minutes!

Rolo Pretzel Turtle Candies on a white plate
[Read more…]

Baked Penne Pasta with Italian Sausage

December 5, 2019 by Susie Weinrich Leave a Comment

Baked Penne Pasta Recipe in a grey 9x13 pan

This Baked Penne Pasta Recipe is a delicious and comforting one pan dinner made by mixing cooked penne pasta, marinara sauce, Italian sausage, ricotta cheese, and mozzarella cheese. Everything is combined and layered in a casserole pan and then oven baked for a delicious dinner!

penne pasta bake in a casserole pan and a spoon scooping out a serving

This easy-to-make pasta bake recipe features a delicious marinara sauce and an abundance of cheese, making it an ideal dinner option for any night of the week. If you’re a fan of pasta and in search of a fuss-free dinner idea, you’ve found it! This penne pasta bake is bound to become a new favorite in your recipe collection.

It’s a great recipe to serve at large family dinners and Sunday Dinner!

This baked penne recipe is similar to a lasagna because of the layers of sauce, cheese, meat and pasta. It just doesn’t take quite as much time as a labor intensive lasagna!

If you are ever really short on time and craving all these flavors, pop over to this Skillet Lasagna Recipe or Baked Gnocchi for a quick weeknight dinner.

Ingredients & Subs

You just need a few simple ingredients to pull together this Baked Penne Recipe. Here are some tips on a few ingredients, plus some variations to try.

Italian Sausage: This baked penne pasta recipe calls for ground mild or hot Italian sausage. However feel free to use whatever sausage or beef your family likes. You could sub out the sausage with some of these options:

  • Ground beef
  • ground Italian turkey sausage
  • a 50/50 mix of ground beef and ground Italian sausage

Marinara Sauce: I use our family favorite Rao’s Marinara, but feel free to use whatever jarred marinara sauce flavor your family likes (or that you have in your pantry): mushroom, tomato basil, hearty vegetable. You could even try it with an alfredo sauce!

Ricotta Cheese: I recommend using a whole milk ricotta cheese. It tends to be creamier and more flavorful. If you don’t love ricotta cheese you can always try subbing in a 4% or 2% cottage cheese.

Mozzarella Cheese: As with all recipes that have shredded cheese, we recommend that you fresh shred the cheese. It will melt creamier because it isn’t coated in anticlumping agents that prevent it from melting properly! If you can find whole milk mozzarella cheese to shred that is going to melt the creamiest and most delicious.

How to Make Baked Penne Pasta with Sausage

To start preheat the oven to 350 degrees, put a pot of salted water on to boil, and grab a 9×13 baking pan.

In a large skillet brown the sausage while crumbling. Drain any excess grease then add the 1 cup diced onions and 3 chopped garlic cloves. Saute until the onions begin to soften about 5-8 minutes.

Add the entire 24 oz. jar of marinara sauce and a drained 14.5 oz. can of diced tomatoes to the sausage/onion mixture. Give it a good stir to combine everything. Turn the heat off.

When the water starts to boil cook 1 lb. of penne pasta to al dente per package instructions. When the pasta is done RESERVE ยฝ CUP OF THE COOKING WATER. Drain the pasta and run cold water over the noodles to stop the cooking!

Pro Tip: Place a glass measuring cup in your colander and you won’t forget to reserve the pasta water!

In a small bowl mix the 15 oz. container of whole milk ricotta cheese with the 1 tsp. dried basil, 1 tsp. dried oregano. ยฝ tsp. garlic powder, ยฝ tsp. onion powder, and ยฝ tsp. kosher salt.

Pour HALF of the sauce mixture and the ยฝ cup reserved pasta water over the pasta and stir to coat. Reserve the other half of the sauce for assembling the dish.

Time to assemble the Penne Bake- Step by Step Pictures

In a 9×13 casserole dish pour half of the sauced penne pasta.

sausage, penne and marinara in a 9x13 pan

Top that with half of the ricotta mixture and half of the mozzarella cheese.

assembling Penne Pasta Bake in a 9x13 pan

Pour half of the remaining sauce over top.

sausage marinara poured over penne pasta in a casserole dish

Add the remaining pasta over top.

penne pasta with sausage marinara over top

Top with the remaining ricotta cheese, then the remaining sauce, and finish with all the remaining mozzarella cheese.

Penne Pasta Bake Recipe completely assembled before going into the oven

Cover the pan with foil and bake for 25 minutes. Uncover and bake for an additional 10 minutes until the cheese on top is melty.

Pro Tip: Spray the underside of the foil with non-stick spray so the cheese doesn’t stick to the foil!

Let the baked penne cool for about 5 minutes then serve with Caesar Salad or a Big Italian Salad and Garlic Bread.

Freezing Baked Penne

You can freeze this pasta bake and save it for later, just like you would a lasagna.

Baked Penne with melty mozzarella cheese on top

Assemble the dish completely in a freezer safe dish, but instead of baking it, let it cool in the fridge for 1 hour. Wrap the cooled dish completely with two layers of plastic wrap, going all the way around the bottom of the pan. Then cover in foil. You can freeze the pasta bake for up to 3 months.

Pro Tip: make sure to label the dish so you know what it is and when you frozen it!

When it is time to bake simply thaw in fridge over-night and then proceed with baking for 25 minutes covered with foil and then an additional 10 minutes uncovered.

More Delicious Italian Dinner Recipes

  • Italian Meatballs in a Marinara Sauce
    Very Best Baked Italian Meatballs
  • Marinated Chicken Spiedini with Amogio
  • Shrimp Carbonara on a platter with parsley garnish
    Shrimp Carbonara

Susie leaning on the kitchen counter

WATCH SUSIE ON FOOD NETWORK!

โญโญโญโญโญ

The new gameshow, 100 Cooks, premieres on Food Network June 7th, 2026 at 9est/8cst. I hope you will tune in!

Baked Penne Pasta Recipe in a grey 9x13 pan

Baked Penne Pasta Recipe

This Baked Penne Pasta Recipe is layers of al dente penne, Italian sausage, mozzarella cheese, tomatoes, marinara sauce, ricotta, herbs and spices. This is a great pasta bake dish that can serve a lot of people! Perfect for family dinners.
5 from 1 vote
Print Pin Rate Save Saved!
Prep Time: 25 minutes minutes
Cook Time: 35 minutes minutes
Total Time: 1 hour hour
Servings: 8 people
Calories: 593kcal
Author: Susie Weinrich

Equipment

  • 9×13 baking dish

Ingredients

  • 1 lb penne pasta - boil to a firm al dente in salted water, about 5 minutes. RESERVE ยฝ CUP OF THE COOKING WATER BEFORE DRAINING!
  • 1 lb. mild or hot ground Italian Sausage - cooked and crumbled
  • 1 cup yellow onion - diced
  • 3 garlic cloves - chopped
  • 24 oz jarred marinara - -we love Rao's
  • 14.5 oz. can diced tomatoes - drained
  • ยฝ cup Reserved pasta cooking water
  • 10 oz. container whole milk ricotta cheese
  • 1 teaspoon dried basil
  • 1 teaspoon dried oregano
  • ยฝ teaspoon each: onion powder and garlic powder
  • ยฝ teaspoon kosher salt
  • 8 oz. mozzarella cheese, grated - – whole milk is preferred but not necessary. (if using pre-shredded cheese you will need about 2 cups)

Instructions
 

  • Preheat the oven to 350ยฐ

Cook the Pasta

  • Cook the penne pasta to al dente, per package instructions (should be about 5-7 minutes). You do not want to overcook the pasta at this point because it will continue to cook in the oven.
    1 lb penne pasta
  • Reserve ยฝ cup of starchy pasta water.
    Run cold water over the pasta to stop the cooking and set aside.
    Pro Tip: place a glass measuring cup in your colander, that way you will not forget to reserve the starchy pasta cooking water!

Sausage Marinara

  • In a large skillet over medium heat cook/crumble the sausage. Drain any excess grease. Add the onions and garlic, sautรฉ until they soften, about 5-7 minutes.
    1 cup yellow onion, 1 lb. mild or hot ground Italian Sausage , 3 garlic cloves
  • Stir the entire jar of marinara and the drained tomatoes into the sausage mixture and stir to combine. Remove from heat.
    Set aside.
    24 oz jarred marinara , 14.5 oz. can diced tomatoes

Ricotta Mixture

  • In a sperate bowl stir together the ricotta cheese with the spices/herbs.
    10 oz. container whole milk ricotta cheese , 1 tsp dried basil, 1 tsp dried oregano, ยฝ tsp each: onion powder and garlic powder, ยฝ tsp kosher salt

Assembly

  • Combine HALF of the sausage marinara sauce mixture and the ยฝ cup of reserved pasta water with all of the cooked pasta. Stir to coat.
    note: if you forgot to reserve the pasta water, just use tap water.
  • Pour half of the sauced pasta into the bottom of your 9×13 casserole pan.
    sausage, penne and marinara in a 9x13 pan
  • Dot with half of the ricotta mixture.
    Spread half of the mozzarella cheese over top.
    Top with half of the remaining sausage marinara sauce.
    assembling Penne Pasta Bake in a 9x13 pan
  • Pour in the remaining sauced pasta.
    Finally, top with the remaining ricotta cheese, all the remaining sausage marinara sauce, and finish with the remaining mozzarella cheese.
    Pro Tip: the dish can be frozen at this point. See the notes below.
    Penne Pasta Bake Recipe completely assembled before going into the oven

Baking

  • Cover with foil and bake for 25 minutes. Remove the foil and bake for an additional 10 minutes, until the cheese is melty.
    Pro Tip: spray the underside of the foil with nonstick spray so the cheese doesn't stick to the foil.
  • Let the dish cool for about 5 minutes then serve with salad and garlic bread.

Recipe Tips and Notes:

TO FREEZE THE BAKED PENNE:
Assemble the dish completely in a freezer safe dish, but instead of baking it, let it cool in the fridge for 1 hour. Wrap the cooled dish completely with two layers of plastic wrap, going all the way around the bottom of the pan. Then cover in foil. Pop in the freezer.
You can freeze the pasta bake for up to 3 months.ย 
Note: make sure to label the dish so you know what it is and when you frozen it!
When it is time to bake simply thaw in fridge overnight and then proceed with baking for 25 minutes covered with foil and then an additional 10 minutes uncovered. Test the middle to make sure it warmed through. If not, pop it back in the oven for an additional 10 minutes.
Did you make this recipe?Connect with me and let me know by commenting below!
Jump to Comments
Serving: 1serving | Calories: 593kcal | Carbohydrates: 53g | Protein: 28g | Fat: 30g | Saturated Fat: 13g | Polyunsaturated Fat: 3g | Monounsaturated Fat: 11g | Cholesterol: 84mg | Sodium: 1248mg | Potassium: 718mg | Fiber: 4g | Sugar: 7g | Vitamin A: 783IU | Vitamin C: 14mg | Calcium: 280mg | Iron: 3mg

Reese’s Peanut Butter Cup Cookies

December 2, 2019 by Susie Weinrich 4 Comments

a photo of a Reece's peanut butter cup in a muffin tin

Peanut Butter Cup Cookies are delicious chewy peanut butter cookie cups that are stuffed with mini Reese’s Peanut Butter Cups. They are an easy cookie recipe using Reese’s Peanut Butter Cups! Both kids and adults will love them. They are great any time of year, but especially during the holidays.

Reece's Peanut Butter Cup Cookie in a muffin tin

When you are craving something peanut butter and chocolate you know a Reece’s peanut butter cup will satisfy the craving… take it the extra step and make these amazing cookies using peanut butter cups!!

RELATED: Peanut Butter Chocolate Star Cookies

Reese’s Peanut Butter Cups

This cookie recipe calls for mini Reese’s Peanut Butter Cups but you do not want to buy the large cups that come in a two pack. You will want to buy the 11 oz bag of individually wrapped mini Reese’s Peanut Butter Cups. See the photo below for example:

mini Reece's peanut butter cups wrapped and unwrapped

How to Make Reece’s Peanut Butter Cup Cookies

This is a fairly easy and quick cookie recipe to make.

  1. Prep
  2. Start by preheating your oven to 350 degrees and grab two 12 count muffin tin, spray each cup with some non-stick spray. Set aside.

  3. Cream sugar and fats.
  4. In the bowl or a stand mixer or with a hand mixer cream together ยฝ cup room temp. butter, ยฝ cup creamy peanut butter, ยฝ cup white sugar, ยฝ cup brown sugar, until it is combined and fluffy. About 2 minutes.

  5. Prep
  6. Add in 1 egg and ยฝ teaspoon of vanilla and mix until combined, about 1 more minute.

    dough for making Reese's cup peanut butter cookies
  7. Sift dry ingredients and add to cookie dough.
  8. Sift together 1 ยผ cup flour, ยฝ teaspoon salt, and ยฝ teaspoon baking soda. Continue to mix just until everything comes together. Do not over mix at this point.

    Pro Tip: I like to sift it onto a piece of parchment paper and then pick it up to funnel the dry ingredients into the mixing bowl.

    dry ingredients on a piece of parchment paper
  9. Roll dough.
  10. Roll about a tablespoon and a half into balls and place in the prepared muffin tins, one per cup. They will be about a 1 inch ball of dough. Work quickly so the dough does not get too warm.

    Rolling a ball of peanut butter cookie to be baked in a muffin tin

    Pro Tip: If you are working with one muffin tin, place the remaining dough in the fridge until the other batch is done.

    Do not flatten the dough balls, keep them as rolled balls in the muffin tin.

    peanut butter cookie balls in a muffin tin
  11. Bake.
  12. Bake for about 10 minutes. Do not overbake. You want them to be lightly golden and still have a soft middle.

    Pro Tip: While they bake unwrap the Reese’s Peanut Butter Cups so they are ready to add to the cookies right when they come out of the oven.

  13. Reece’s Peanut Butter Cups
  14. Pull the cookies out of the oven and press 1 Reese’s in the center of each cookie.

    pressing a mini Reece's Peanut Butter Cup into the middle of the cooked peanut butter cookie cup

    Let cool in the muffin tin for about 15 minutes so they can finish cooking and setting up. Then pop them out of the muffin tin.

    Pro Tip: You may need to run a sharp knife around the edge to release from the pan.

Storing and Freezing

Store the Reece’s Peanut Butter Cup Cookies at room temp. in an airtight container for up to a week.

a cookie cooling rack full of Reece's Peanut Butter Cup Cookies

You can freeze them for longer storage. Place cooled cookies in an airtight/freezer safe container or baggie and pop in the freezer for up to 3 months. To thaw place at room temp for an hour or two.

More Chocolate & Peanut Butter Treats

If you are a lover of anything “peanut butter & chocolate” try some of these treats too:

  • a Buckeye Ball with a bite taken out, showing the center
    Peanut Butter Buckeye Balls
  • Chocolate star cookie cooling on parchment paper
    Peanut Butter Chocolate Star Cookies
  • scotcheroos cut into squares
    Best Scotcheroos Recipe
  • chocolate no bake cookie on a white tray
    Fudgy Chocolate No Bake Cookies

Susie leaning on the kitchen counter

WATCH SUSIE ON FOOD NETWORK!

โญโญโญโญโญ

The new gameshow, 100 Cooks, premieres on Food Network June 7th, 2026 at 9est/8cst. I hope you will tune in!

a photo of a Reece's peanut butter cup in a muffin tin

Reece’s Peanut Butter Cup Cookie Recipe

Reese's Peanut Butter Cups are pressed into the middle of a warm peanut butter cookie. These are a delicious cookie treat!
5 from 3 votes
Print Pin Rate Save Saved!
Prep Time: 15 minutes minutes
Cook Time: 8 minutes minutes
Resting time: 5 minutes minutes
Total Time: 28 minutes minutes
Servings: 20 cookies (approx)
Author: Susie Weinrich

Equipment

  • stand mixer or hand held mixer
  • Cookie Scoop (optional)
  • two – 12 cup muffin tin

Ingredients

  • ยฝ cup butter - , softened at room temp.
  • ยฝ cup creamy peanut butter - (Jif or Skippy are great, no natural peanut butter)
  • ยฝ cup white sugar
  • ยฝ cup brown sugar
  • 1 large egg
  • ยฝ teaspoon vanilla
  • 1 ยผ cups all-purpose flour
  • ยฝ teaspoon baking soda
  • ยฝ teaspoon kosher salt
  • 24 Mini Reese's Peanut Butter Cups - 11 oz bag of individually wrapped Reese's Peanut Butter Cups
  • non stick spray

Instructions
 

  • Preheat the oven to 350โ„‰. Spray your muffin tin with non stick spray.
    non stick spray
  • In a bowl of a stand mixer with the paddle attachment or a hand held mixer, cream together the butter, creamy peanut butter and sugars until it is combined and fluffy. About 2 minutes.
    ยฝ cup butter, ยฝ cup creamy peanut butter , ยฝ cup white sugar, ยฝ cup brown sugar
  • Blend in 1 egg and ยฝ teaspoon vanilla for about 1 minute.
    1 large egg, ยฝ tsp vanilla
  • In a bowl or on a piece of parchment paper sift together the flour, baking soda and kosher salt. Slowly add to the cookie dough. Blend just until the flour is incorporated.
    1 ยผ cups all-purpose flour, ยฝ tsp baking soda , ยฝ tsp kosher salt
    dough for making Reese's cup peanut butter cookies
  • Form the cookie dough into about 1-1.5 inch balls and place in the muffin tin. You will have about 20-24 balls. Do not flatten, leave them in the ball form.
    The dough is sticky but work quickly so the dough doesn't get too warm.
    **If you are working with one muffin pan, place the remaining dough in the fridge until the first batch is cooked.
    peanut butter cookie balls in a muffin tin
  • Bake the cookies for about 10 minutes. Do not overbake, you want them to be golden and the middle to still be soft so you can put a Reese's in the middle.
    While they are baking unwrap the Reese's Peanut Butter Cups.
  • As soon as the cookies come out of the oven press a peanut butter cup into the middle of each cookie. Let them cool for about 15 minutes and then remove them from the muffin tin.
    24 Mini Reese's Peanut Butter Cups
    pressing a mini Reece's Peanut Butter Cup into the middle of the cooked peanut butter cookie cup
  • Store at room temp. in an air tight container for up to a week.
    Can freeze for up to 3 months, then thaw at room temp for about 1-2 hours.
Did you make this recipe?Connect with me and let me know by commenting below!
Jump to Comments

Fudgy Chocolate No Bake Cookies

November 25, 2019 by Susie Weinrich 6 Comments

chocolate no bake cookie on a white tray

No Bake Cookies are a delicious and fudgy cookie that you don’t have to bake in the oven! Sugar, milk, butter, vanilla, cocoa, peanut butter, and quick oats are mixed together on the stove top and then dropped onto parchment paper to cool. This is an easy no-bake cookie recipe that only takes a few minutes to make!

Chocolate No Bake Cookies on parchment paper

It is a dessert/sweet treat that has been enjoyed for generations and generations, just like these No Bake Peanut Clusters. They never go out of style! I remember eating them as a little girl, and now my kids LOVE them!

Ingredients

Here are the specific ingredients that you need to make this Chocolate No Bake Cookie Recipe. It’s a lot of simple ingredients you probably have in your pantry and fridge:

1 stick of butter (salted or unsalted)
2 cups white sugar
ยฝ cup milk (any kind)
1 teaspoon vanilla
ยผ cup unsweetened cocoa powder
ยฝ cup creamy peanut butter
2 ยฝ cups quick cooking oats

Step by Step Picture Instructions

Pro Tip: Start by prepping all your ingredients, once you get started the recipe moves along quickly!

Prep 2 baking sheets with parchment paper and grab the utensil you will use to drop the cookies.

In a large pot over medium/medium-high heat bring the 2 cups sugar, ยฝ cup milk, and butter to a boil. Boil for 2 minutes.

Turn the heat off and quickly stir in the vanilla, peanut butter, cocoa powder, and oats.

no bake cookie mixture in a pot with a wooden spoon

AS SOON AS IT IS COMBINED move on to dropping the cookie mixture by the spoonful onto the sheets of parchment.

Dropping no bake cookies on parchment paper with a scoop

Let them set up at room temperature, for at least 20 minutes, and then enjoy!!

Storing

Store your Chocolate No Bake Cookies at room temperature in an airtight container for up to 5 days. But, they probably won’t last that long- they are GOOD!!

Tips for Making Fudgy No Bake Cookies

There are a few things to remember to get the best results when making these cookies:

  • Prepare and measure all your ingredients ahead of time. This recipe goes FAST and you don’t want to be fumbling for ingredients.
  • Prepare two baking sheets with parchment paper before you start cooking. Once everything is mixed it sets up very quickly.
  • Drop the no bake cookies onto the parchment AS SOON as the ingredients are mixed. The mixture will set up quickly and if you don’t drop them into cookies immediately your cookies will not stick together correctly and they will be dry and brittle.
  • By dropping them quickly they also spread into perfectly shaped no bake cookies!
  • Use a small scoop like the one pictured below, if you have it. It will make the process go quickly and all the Chocolate No Bake Cookies will be uniform.
cookie scoop for making no bake cookies

More No Bake Dessert Recipes

If you love a sweet treat but the thought of baking a whole cake is too much, check out these other no-bake desserts:

  • Copycat thin mints in a baking pan
    Copycat Thin Mint Cookies
  • peppermint bark oreos in a pile with a bite taken out of two cookies
    Homemade Peppermint Bark Oreos
  • No-Bake Chocolate Pot de Crรจme
  • butterscotch pudding in a mason jar topped with whipped cream and chocolate
    Homemade Butterscotch Pudding
chocolate no bake cookie on a white tray

Chocolate No Bake Cookie Recipe

Chocolate No Bake Cookies are a delicious and easy bakeless cookie. All the ingredients are cooked together on the stove top and then dropped by the spoonful into fudgy oatmeal cookies.
5 from 4 votes
Print Pin Rate Save Saved!
Prep Time: 5 minutes minutes
Cook Time: 2 minutes minutes
Cooling: 15 minutes minutes
Total Time: 22 minutes minutes
Servings: 30 cookies
Calories: 133kcal
Author: Susie Weinrich

Equipment

  • Cookie Scoop (optional)
  • Parchment paper

Ingredients

  • 2 cups white sugar
  • ยฝ cup butter - salted or unsalted
  • ยฝ cup milk - any kind
  • 2 ยฝ cups quick cooking oats
  • ยฝ cup creamy peanut butter
  • ยผ cup unsweetened cocoa powder
  • 1 teaspoon vanilla extract

Instructions
 

Prep

  • This recipe goes fast and you want to be ready for the next step before you get there!
    Prep and measure all your ingredients so they are ready to go.
    Prep two baking sheets lined with parchment paper and the spoon or scoop you will drop the cookies with.

No Bake Cookies

  • In a large pot over medium/medium-high heat bring 1 stick of butter, 2 cups of sugar, and ยฝ cup of milk to a boil.
    Boil for 2 minutes, stirring occasionally.
  • Turn the heat off and stir in the ยผ cup cocoa powder, ยฝ cup creamy peanut butter, 1 teaspoon vanilla, and 2 ยฝ cups quick cooking oats.
    Stir just until everything is mixed together.
  • QUICKLY drop the hot chocolate/oat mixture by the spoonful onto the parchment paper. It will slightly spread and then harden.
    (do this step quickly bc the mixture will set up FAST and you want to have all the cookies dropped before it sets!!!)
  • Let cool for about 20 minutes and they are ready to eat.

Storing

  • Store in an air tight container at room temp. for up to 5 days.
Did you make this recipe?Connect with me and let me know by commenting below!
Jump to Comments
Serving: 1cookie | Calories: 133kcal | Carbohydrates: 19g | Protein: 2g | Fat: 6g | Saturated Fat: 3g | Polyunsaturated Fat: 1g | Monounsaturated Fat: 2g | Trans Fat: 0.1g | Cholesterol: 9mg | Sodium: 45mg | Potassium: 66mg | Fiber: 1g | Sugar: 14g | Vitamin A: 101IU | Calcium: 12mg | Iron: 0.5mg

Old Fashioned Peanut Cluster Recipe

November 17, 2019 by Susie Weinrich 23 Comments

Peanut Cluster on a sheet of wax paper

Peanut Clusters are a classic sweet and salty snack made of melted chocolates and salted cocktail peanuts. They are great no-bake homemade treat to put together and they only require 3 simple ingredients. They are so simple you can even have the kids help.. and they’ll still turn out perfectly. The recipe is foolproof.

Chocolate Peanut Clusters on wax paper

Chocolate Peanut Clusters have always been a holiday tradition in my family. Growing up, they were a staple at the Holidays, and to this day, I still make them every Christmas. Here on Mom's Dinner, I wanted to share the true, classic version. This is exact Peanut Cluster Recipe I've been making for years. No twists, no modern updates – just the original candy-shop style clusters made with three simple ingredients: salted cocktail peanuts, almond bark, and semi-sweet chocolate chips.

[feast_advanced_jump_to]

What Reviews Say about my Peanut Clusters!

โญโญโญโญโญBest peanut clusters EVER!! We used to have an old candy store in Williamsville that made these and I have not had this quality cluster since 1960s-these were my dad's favorite. I put them in the fridge to set and they are just scrumptious. – Mary Ann

โญโญโญโญโญI absolutely love this easy Peanut Cluster recipe. I added caramel bits at the end of melting the chocolate and almond bark, but otherwise followed recipe as written. Came out wonderful. This is going to be my go to recipe from now on! -Deb

Why You’ll Love This Peanut CLuster Recipe

This is a CLASSIC recipe, not altered or updated. You can trust this one is just like the Peanut Clusters your Grandma made!

The recipe uses a combo of semi sweet chocolate chips and almond bark, which gives you a more balanced flavor.

Using almond bark helps these peanut clusters set up perfectly without adding additional ingredients.

Peanut Clusters are a really simple treat to make and are only made with ingredients that are easy to find.

The recipe is so easy, it’s a great one to make with kids.

These also make a great holiday treat for your neighbors and friends. Wrap them up in a cellophane bag tied with a pretty ribbon, then you can print this “We’re Nuts About You” FREE PRINTABLE GIFT TAG and attach it to the bag.

Ingredients Needed For Chocolate Peanut Clusters

You just need 3 simple ingredients to make these Old Fashioned Peanut Clusters:

Peanut Cluster Ingredients - chocolate, almond bark, and salted cocktail peanuts

Cocktail Peanuts – specifically buy “cocktail peanuts” sometimes also known as Virginia Peanuts or Spanish Peanuts.

Semi Sweet Chocolate Chips – 1 bag of chocolate chips, the same kind you buy when you make Chocolate Chip Cookies.

Almond Bark – you can also buy a product called white chocolate melting wafers, but don’t use white chocolate chips. If you use almond bark be sure to chop it first so it melts faster and the chocolate chips don’t over-cook before the almond bark melts!!

Recommended Equipment

You will melt the chocolate over a double boiler. That is basically a heat proof bowl set on top of a saucepan. You can buy a product called a double boiler, but it isn’t necessary!

Double boiler

A double boiler allows you to slowly melt chocolate without over-cooking it. The steam and heat from the simmering water is enough to melt the chocolate in the upper bowl.

Fill the saucepan with about 2 inches of water, ensuring that the water doesn’t touch the bottom of the pan on top. Place a heat-proof bowl in the top and bring the water to a simmer. Pour in the chocolate and stir occasionally until it is completely melted.

Watch The Recipe

How to Make Peanut Clusters

Chocolate and white chocolate melting wafers melted together in a double boiler

Step 1

Melt the chocolate chips and white chocolate melting wafers (or almond bark) in a double boiler.

Stirring cocktail peanuts into melted chocolates

Step 2

Add the peanuts and stir so the chocolates coat the peanuts.

Scooping peanut clusters onto wax paper

Step 3

With a scoop or spoon, potion out the peanut clusters onto wax paper or parchment paper.

Peanut Clusters set up on wax paper

Step 4

Place in the fridge to set up for about 30-45 minutes.

Peanut Clusters Recipe Variations

Nut Variation – swap the peanuts for different type of nut or a combo of nuts: almonds, cashews, and pecans would all be great!

Chocolate – switch up the semi sweet chocolate chips for dark chocolate chips or milk chocolate chips for a different flavor.

Mix Ins – add some different textures and flavors by stirring in about ยพ cup of:

  • dried fruits
  • toffee chips or caramel bits
  • crunched pretzels
  • marshmallow bits

How To Store Peanut Clusters

You can keep the Peanut Clusters around for quite a while!

  • Room Temperature: Store clusters in an airtight container on the counter for up to 5 to 7 days. This keeps the chocolate softer and shinier. Just be sure they're kept away from heat or direct sunlight.
  • Refrigerator: For longer storage, keep them in an airtight container in the fridge. They'll stay fresh for about 2 to 3 weeks, though the chocolate may lose a little bit of its glossy finish. Let them sit out for 5-10 minutes before serving so they're not too firm.
  • Freezer: Peanut clusters freeze perfectly. Place them in a freezer-safe bag or container, and they'll last up to 3 months. Thaw at room temperature before enjoying.

FAQ

Can I make peanut clusters in the microwave?

Yes, you can make Peanut Clusters in the microwave.
– Use a glass or ceramic bowl, plastic can sometimes warp or overheat.
– Add your chocolate (chips and chopped almond bark) to the bowl. Microwave in 30 second intervals, stirring after each round. Stop when the chocolate is about 90% melted, then stir until completely smooth (the residual heat will finish melting). This prevents scorching.
– Stir in the peanuts until fully coated in chocolate.

What is the best chocolate to use?

We thing this recipe is best kept classic with a combo of semi sweet chocolate chips and almond bark. However you can change up the semi sweet chocolate chips to dark or milk chocolate to change flavor profiles. However you will want to keep the almond bark or melting wafers as these help "set" the chocolate on the peanut clusters.

More Super Simple Treats

  • Hands holding a bowl of sweet white chocolate chex mix.
    White Chocolate Chex Mix
  • saltine cracker toffee in a bowl
    How to Make Christmas Crack (Saltine Toffee)
  • Rolo Pretzel Turtles on a white plate with Rolo candy in the back
    Rolo Pretzel Turtles
  • chocolate no bake cookie on a white tray
    Fudgy Chocolate No Bake Cookies

Susie leaning on the kitchen counter

WATCH SUSIE ON FOOD NETWORK!

โญโญโญโญโญ

The new gameshow, 100 Cooks, premieres on Food Network June 7th, 2026 at 9est/8cst. I hope you will tune in!

Peanut Cluster on a sheet of wax paper

Peanut Cluster Recipe + Video

Chocolate Peanut Clusters are a classic treat made with 3 simple ingredients: semi-sweet chocolate, almond bark, and salted cocktail peanuts.
5 from 18 votes
Print Pin Rate Save Saved!
Prep Time: 5 minutes minutes
Cook Time: 5 minutes minutes
Cooling time: 45 minutes minutes
Total Time: 55 minutes minutes
Servings: 30 pieces
Author: Susie Weinrich

Equipment

  • parchment or wax paper
  • Cookie Scoop (optional)

Ingredients

  • 12 oz semi-sweet chocolate chips
  • 12 oz white almond bark - chopped (or white chocolate melting wafers)
  • 1 lb. salted cocktail peanuts or salted spanish peanuts

Instructions
 

  • In a double boiler melt the chocolate chips and almond bark together. Once it is completely smooth, remove from the heat.
    12 oz semi-sweet chocolate chips , 12 oz white almond bark
    Double boiler
  • Stir in the peanuts.
    1 lb. salted cocktail peanuts or salted spanish peanuts
  • Drop spoonful's of the peanut cluster mixture onto wax paper or parchment paper lined baking sheets.
    Make these about a 2 or 3 bite sized treat! They are rich.
    Scooping peanut clusters onto wax paper
  • Pop in the fridge for 30- 45 minutes to set up.
    Peanut Clusters set up on wax paper
  • Store in an airtight container in the fridge for up to a week.

Recipe Tips and Notes:

These Peanut Clusters make a great EDIBLE GIFT! Grab your free gift tag with the link below:
FREE PRINTABLE GIFT TAG
ย 
DOUBLE BOILER –ย 
Fill a saucepan with about 2 inches of water, ensuring that the water doesn’t touch the bottom of the pan on top. Place a heat-proof bowl in the top and bring the water to a simmer. Pour in the chocolate and stir occasionally until it is completely melted.
ย 
Did you make this recipe?Connect with me and let me know by commenting below!
Jump to Comments
  • « Previous Page
  • 1
  • …
  • 52
  • 53
  • 54
  • 55
  • 56
  • …
  • 65
  • Next Page »
Susie in the kitchen with an apron on getting ready to cook

Meet The Author:

Susie Weinrich is a professional recipe developer specializing in classic Midwest cooking, recently seen on Food Network's 100 Cooks. Her thoroughly tested recipes and step-by-step guides give home cooks real confidence in the kitchen.

YOU will feel like a huge success at dinner time with any of the simple recipes on Mom's Dinner! Read More

Helpful Meal Planning Resources

  • a table with white place settings and green garland
    Easy Meals for House Guests
  • a round table with a large family eating dinner
    30 Easy Meals for Large Family Vacations & Gatherings
woman owned small business certificate by Sertify

Amazing New Recipes

  • Scoop of broccoli cheese casserole coming out of a baking dish.
    Down Home Broccoli and Cheese Casserole
  • Close up of a fresh made fried pork tenderloin sandwich topped with onion rings, pickles, horseradish mayo and lettuce.
    Iowa Fried Pork Tenderloin Sandwiches
  • two kids jumping in a lake off the dock at sunset
    Dinners for a Week at the Lake House
  • Tuna Noodle Casserole in a white dish being spooned out of the baking pan
    Mom’s Tuna Noodle Casserole

Footer

^ back to top

About

  • Susie Weinrich
  • Privacy Policy
  • Accessibility Policy

Contact

  • Sign Up! for emails
  • Contact Me!
  • Join Me On YouTube

Recipes

  • Recipe By Category
  • Instant Pot Recipes
  • Dinner Recipes

Copyright ยฉ 2026 Mom's Dinner

Rate & Review This Recipe

Your vote:


A rating is required
A name is required
An email is required