This is your absolute ultimate guide for making the most delicious Whole Roasted Chicken with super crispy skin. It includes everything you need to know from salting & refrigerating the bird, to trussing, roasting & carving, not a detail is missed. Your chicken will turn out juicy and flavorful with perfectly golden crispy skin.
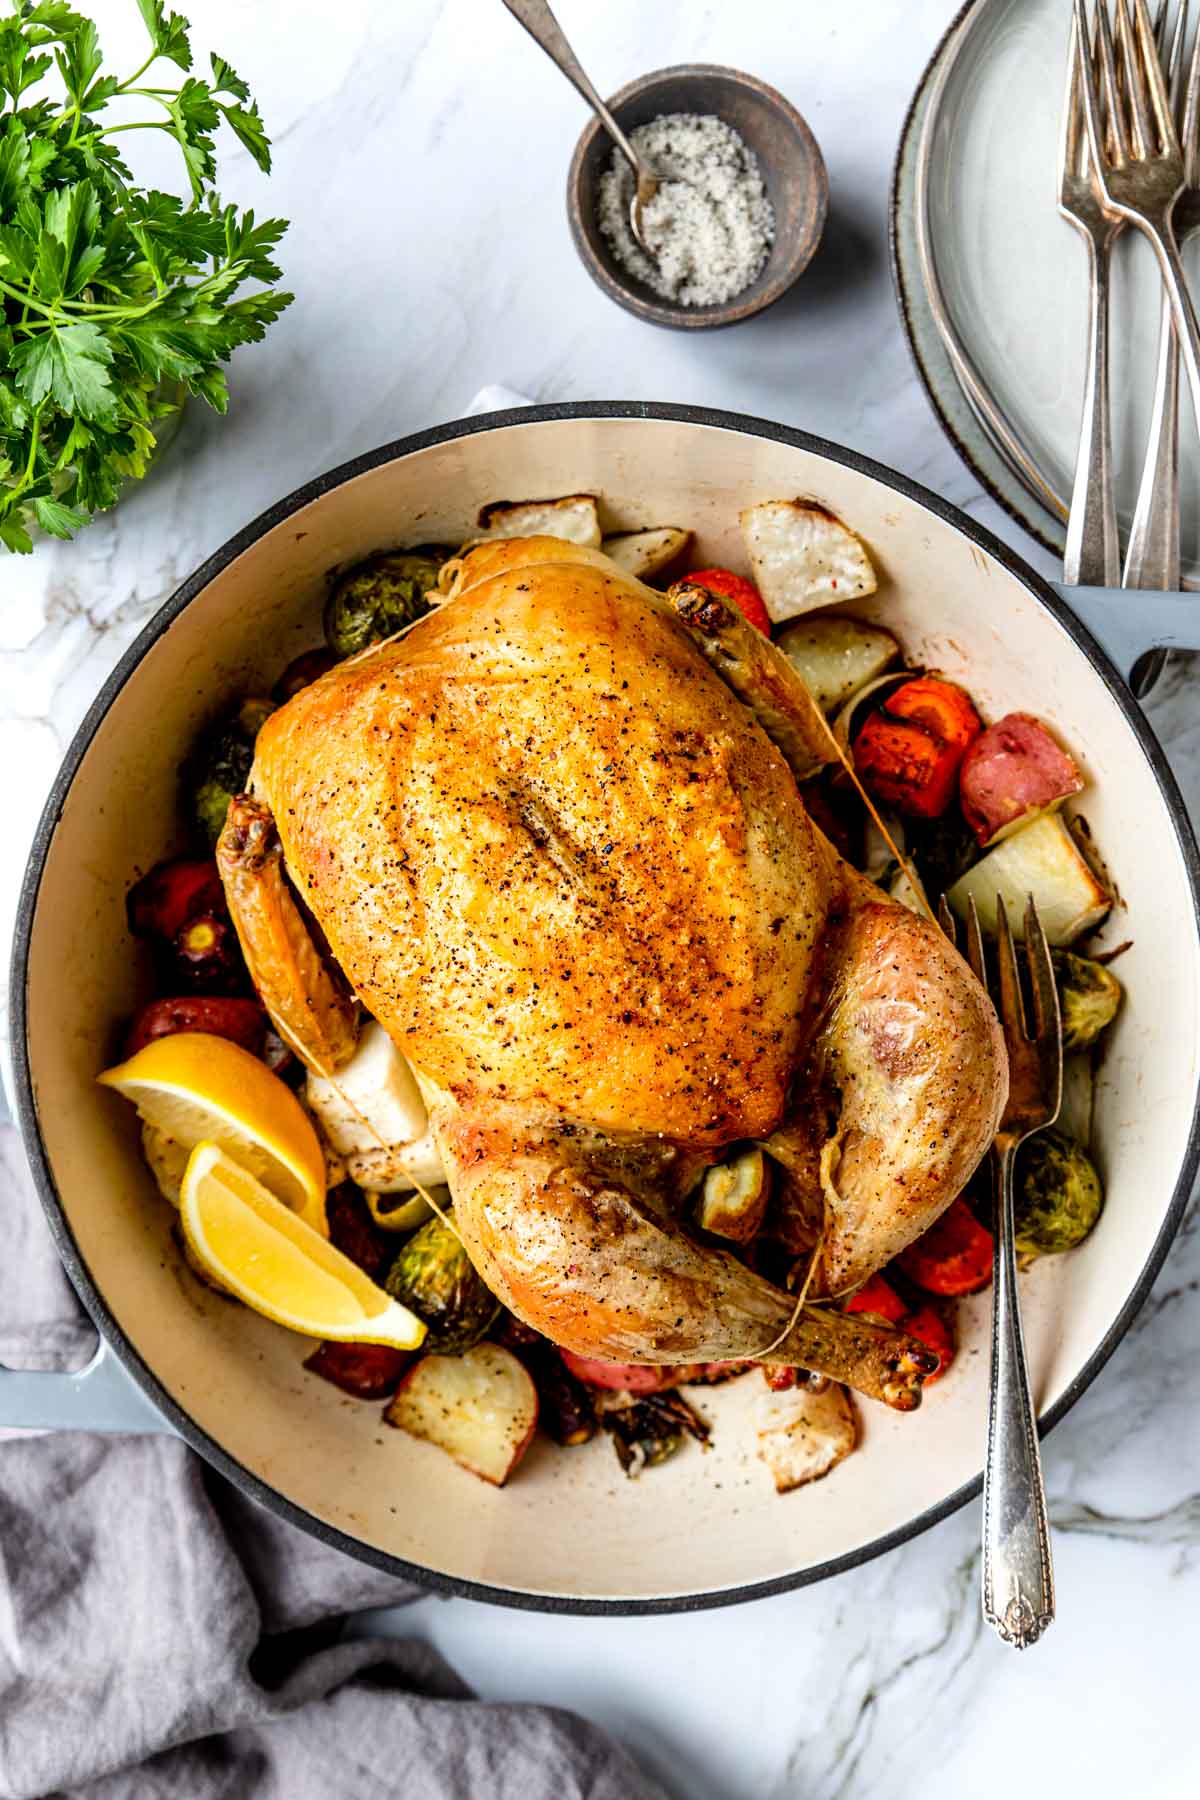
When you serve this Perfect Roasted Chicken for dinner don’t forget the mashed potatoes and gravy! Or stuffing goes great with chicken too!
For a smaller group of 2, pop over to this Roasted Half Chicken! Then save the other half in the freezer for another night.
And if you have leftovers head to this post for Leftover Chicken Recipes for extra dinners this week.
Buying a Quality Whole Chicken
I cannot stress this enough. If you are going to take the time to prep and roast a whole chicken definitely purchase the very best one you can. This is not the time to buy the best value brand or whatever is on sale.
One way to know you are buying quality chicken is looking for the label “Air Chilled”. This means that after slaughter instead of being held in baths of cold chlorinated water for hours, they are hung and “chilled” in cold air coolers. This process creates more flavorful & tender chicken instead of being diluted with chlorinated water solutions.
In the Midwest we have a brand called Smart Chicken. I do not deviate from this chicken. It is air chilled and always delicious.
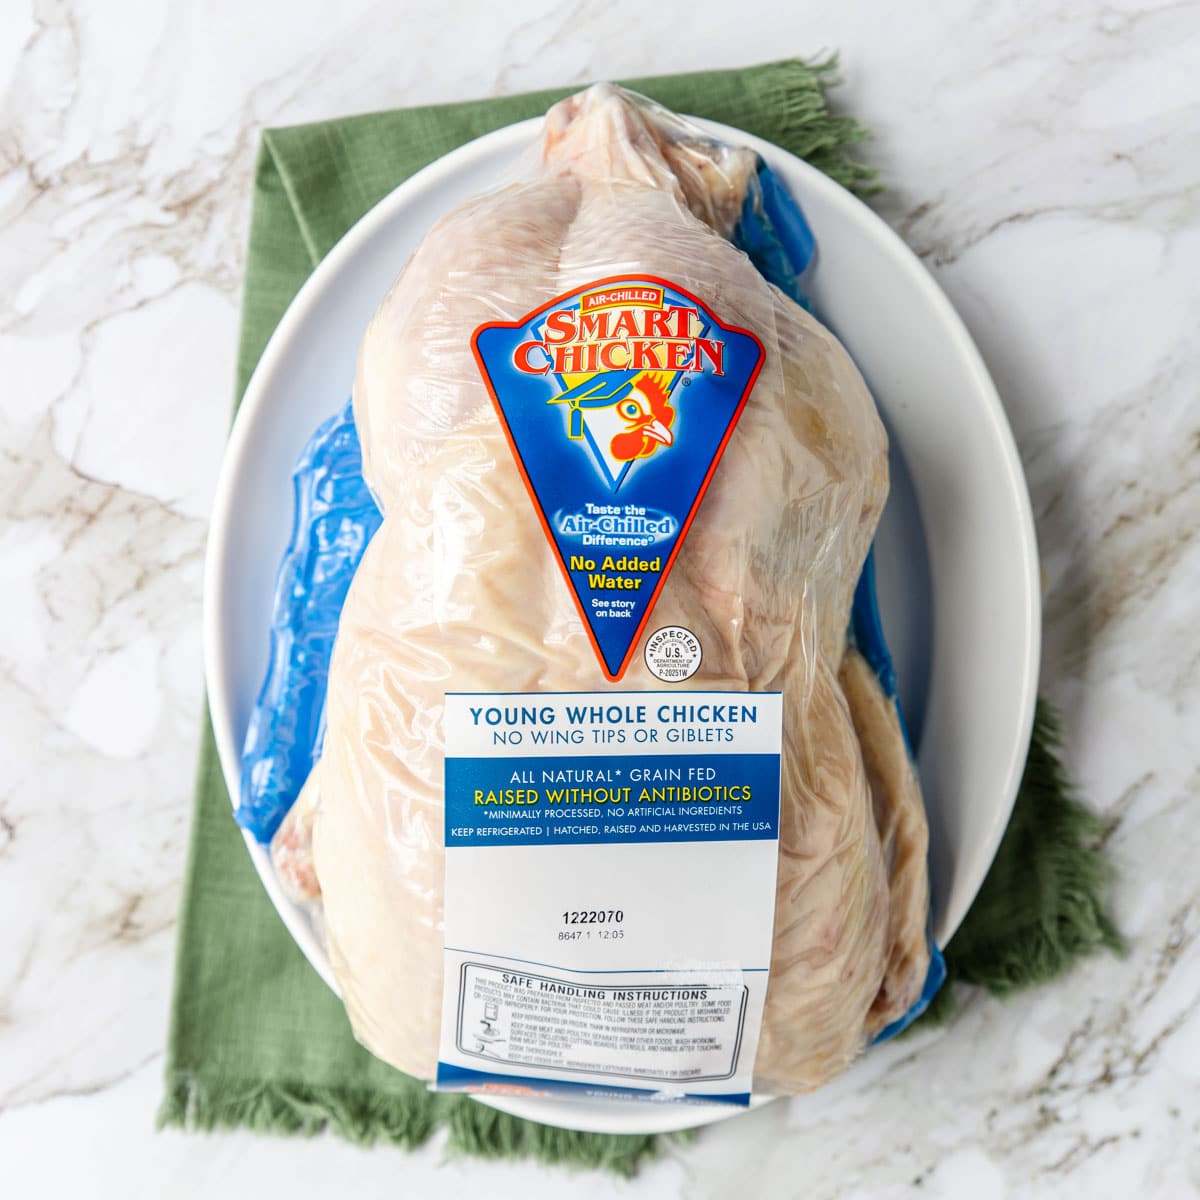
For a good quality whole chicken you will probably be spending around $14-$18. It is worth it!
Now if you also want to look for organic chicken or free range that is up to you… In My Opinion it is the “air chilled” that has the biggest effect of flavor.
Some packaging verbiage that doesn’t mean anything is “all natural“. That just means that it isn’t made of plastic! Also “no hormones added” means nothing. It has been illegal to add hormones to chickens since the 50’s.
Salting & Refrigerating A Whole Chicken
Time to get started preparing your Ultimate Roasted Chicken! This process takes 1-2 days, so make sure you plan ahead!
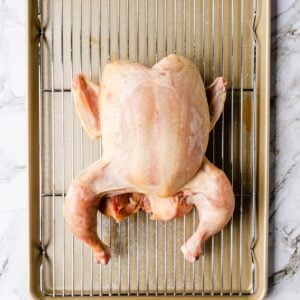
Place the chicken on a rimmed baking sheet that is fitted with a raised cooling rack. This allows the air to circulating around the bird completely while in the fridge.
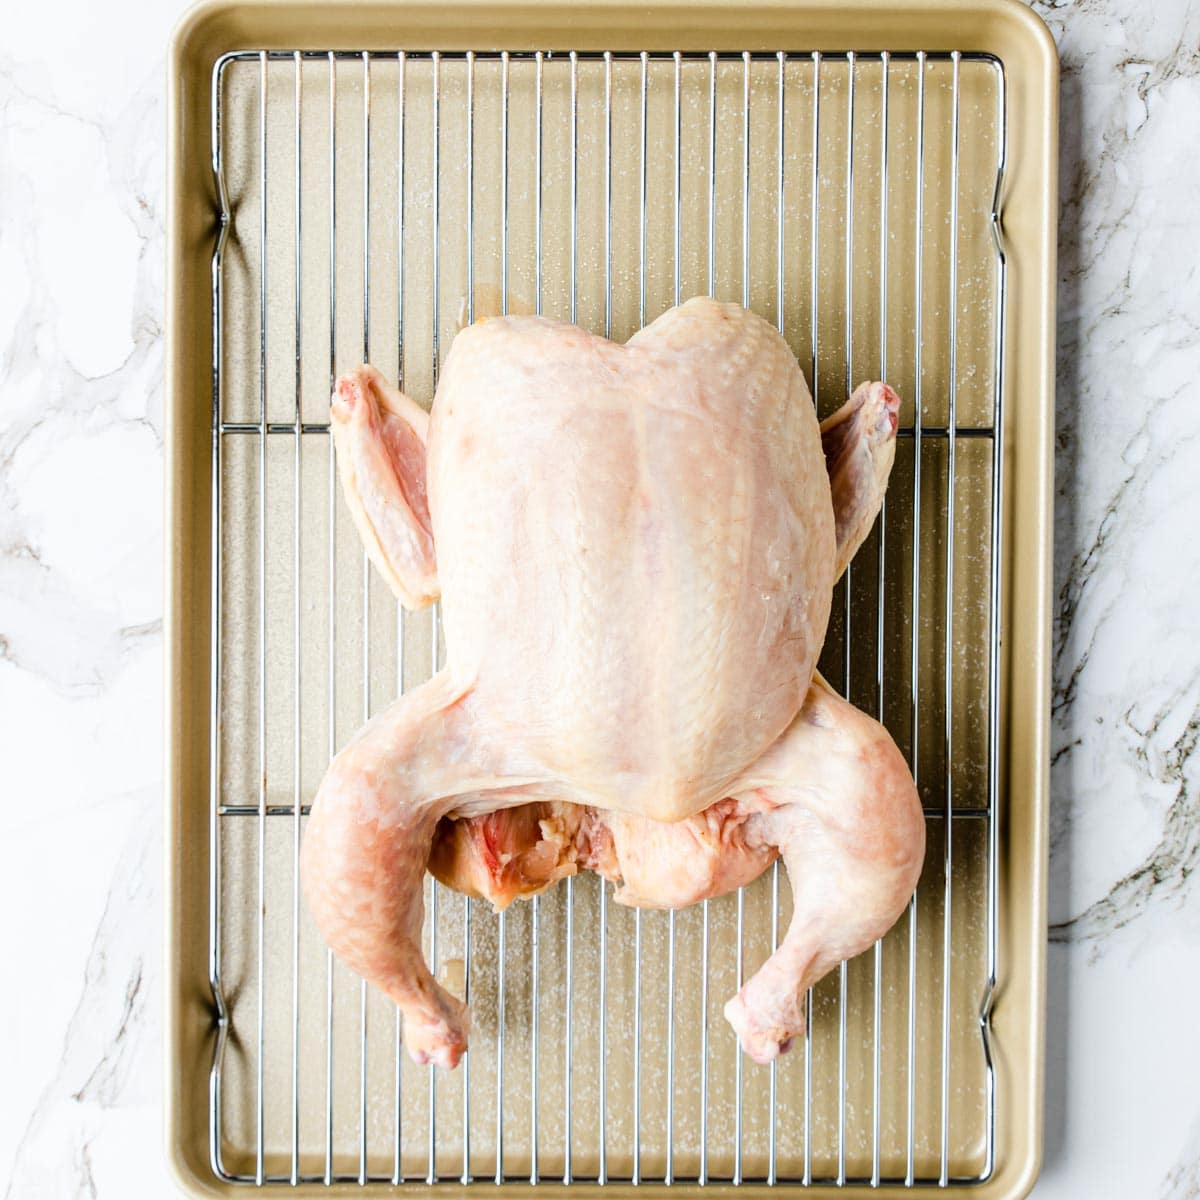
If it came trussed at all go ahead and remove that string. This is also a good time to double check if the gizzards and neck are in the cavity of the bird. If they are pull them out. You can save them to make gravy or stock if you like!
There is no need to wash your chicken, simply pat it dry with paper towels.
Generously salt the chicken on all sides with kosher salt (do not use iodized salt). Don’t forget to salt the inside cavity of the bird too! Use about 1 tablespoon kosher salt for this part.
Doing this “air dry bringing” will start to draw moisture out of the chicken, however once the moisture is flavored with the salt it sinks back into the bird creating a more flavorful and tender roasted chicken!
Refrigerate UNCOVERED for 24, up to 48 hours, letting the cold air circulate around the bird.
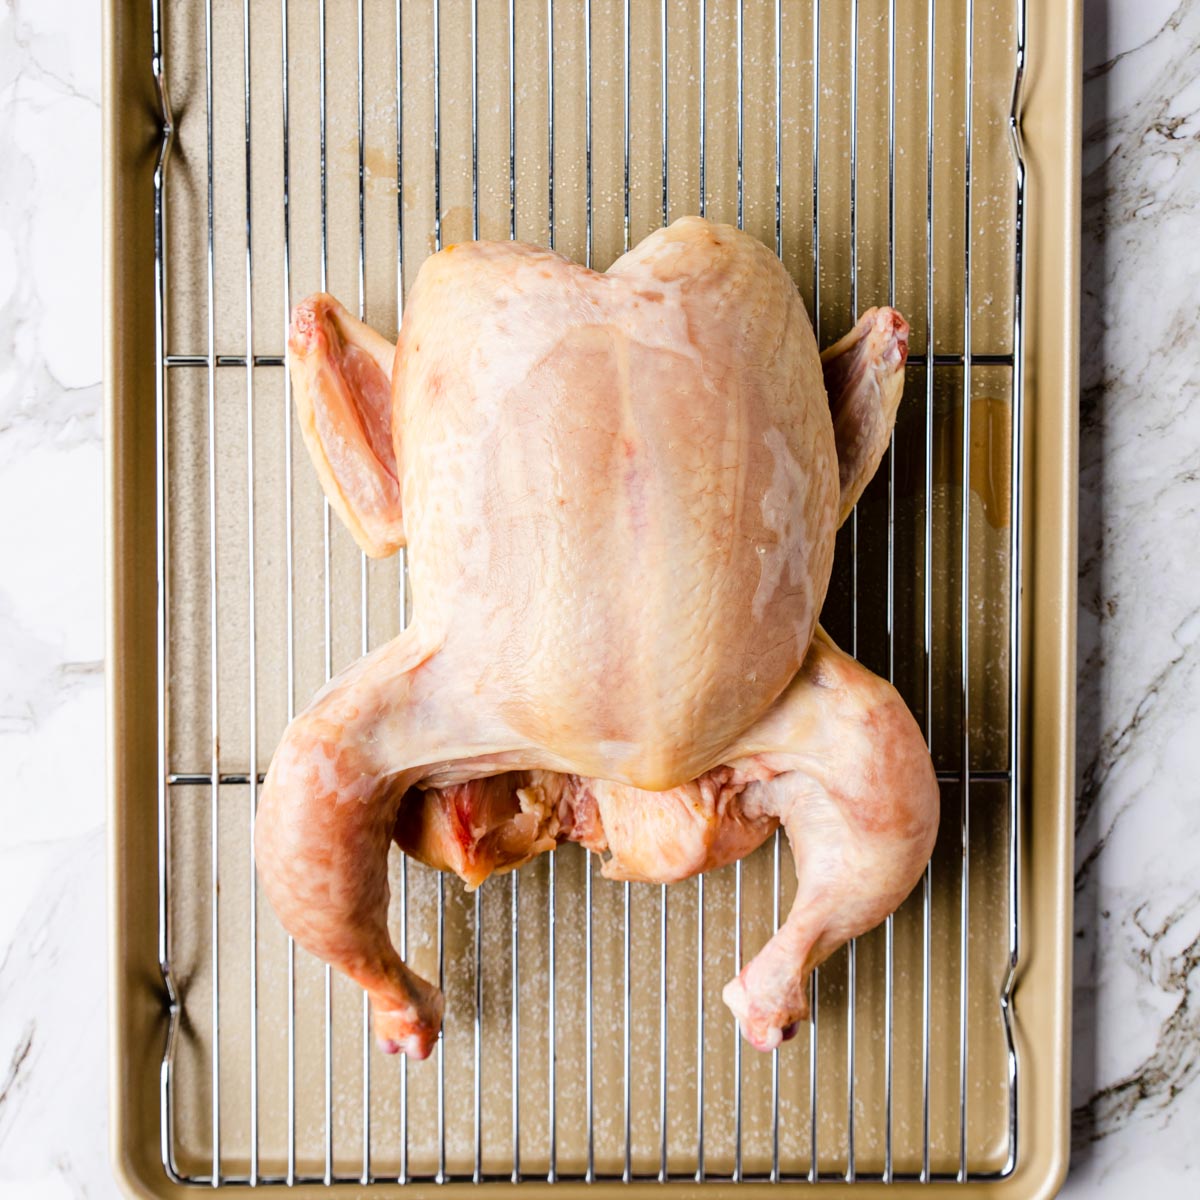
The skin will start to darken & dry in the fridge. Making for a really beautifully crisped skin when it is roasted!
Trussing (Tying The Chicken)
After the chicken has dry brined for 1-2 days you will prepare it for roasting. Trussing is the first step.
Trussing is another word for tying up the legs and wings of a chicken (or any bird) before cooking. There are many ways to truss a chicken, but this is the most basic method that ties the legs together and pulls the wings in tight to the bird.
Start by stuffing any fresh herbs, lemon, and garlic cloves into the chicken cavity.
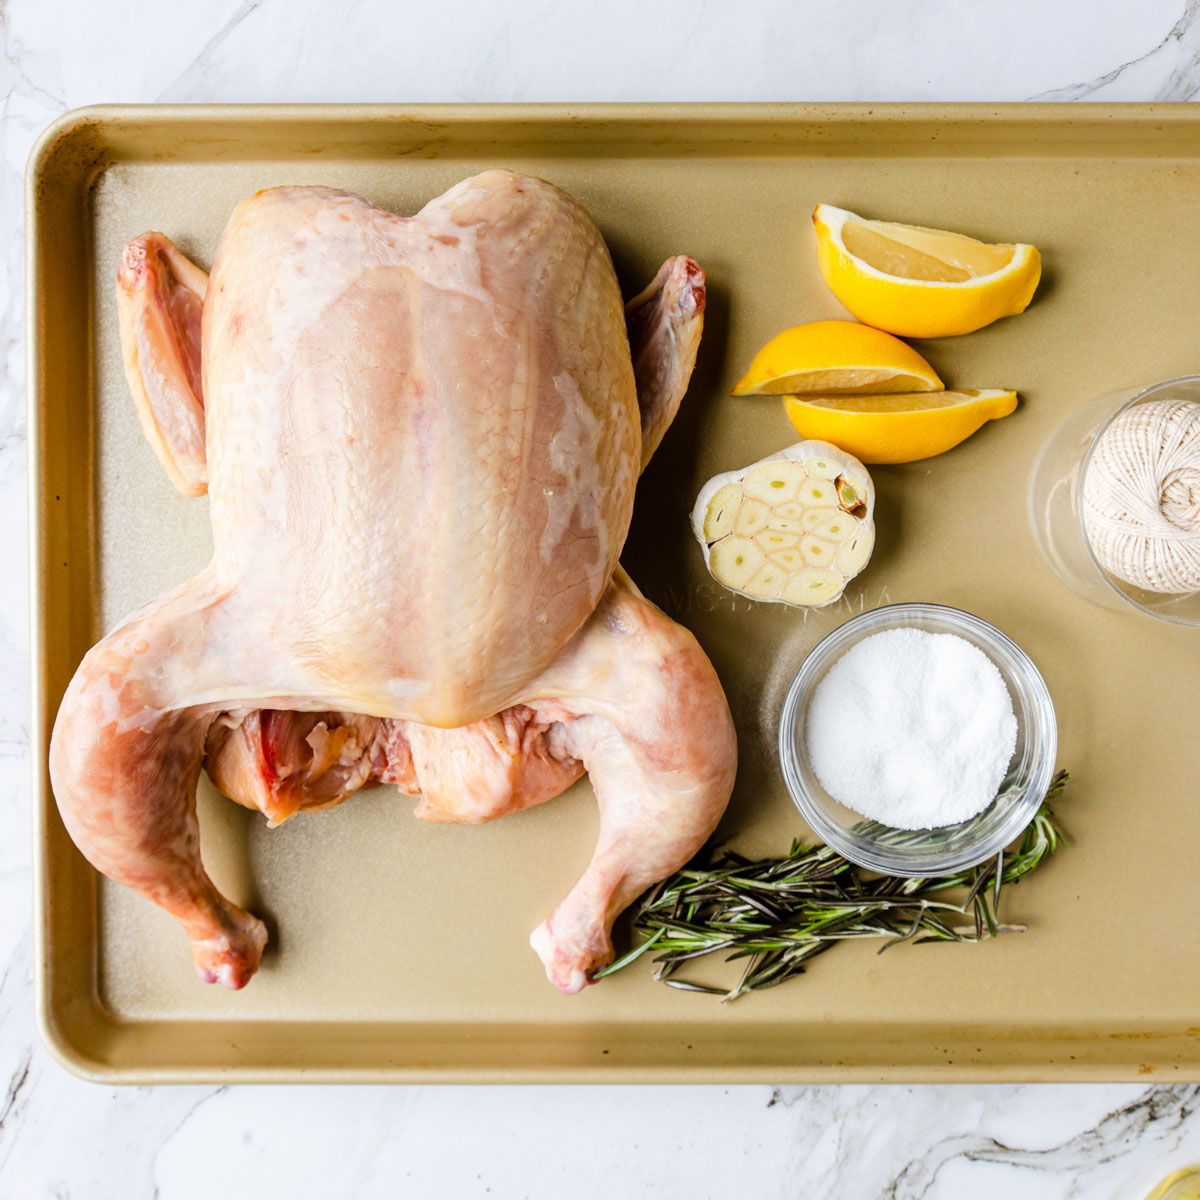
Here is how to truss your chicken before roasting:
- Trussing Step 1
- Trussing Step 2
- Trussing Step 3
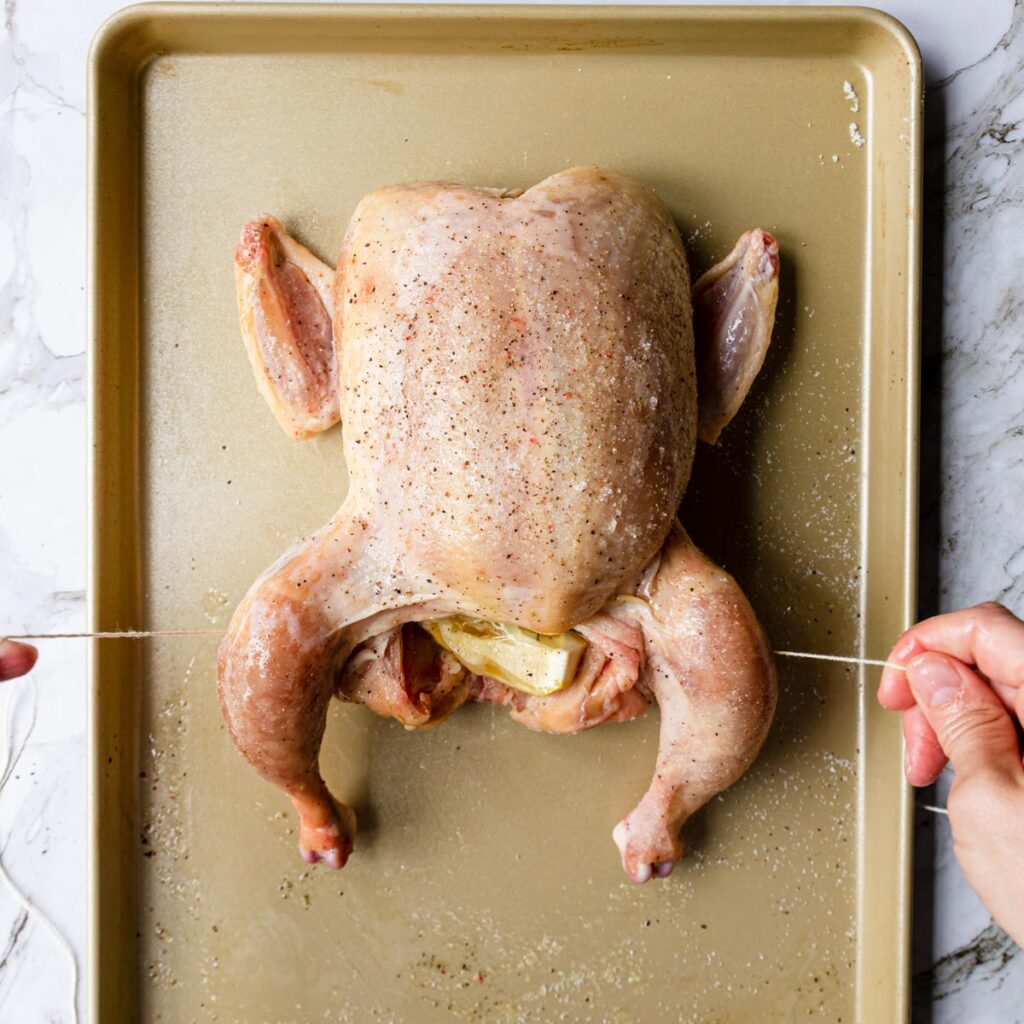
Set the bird breast side up on a clean surface. Cut a very long piece of kitchen string (also called butchers twine or kitchen twine).
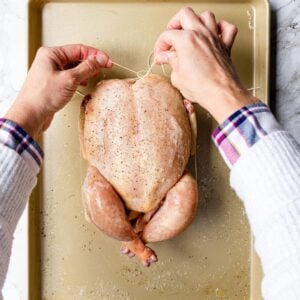
Snuggle the middle point of the twine under the tail. Bring each end of the twine up and around the outside of the legs, then cross the twine and bring it under and around the legs. Pull tight brining the legs in close to the bird.
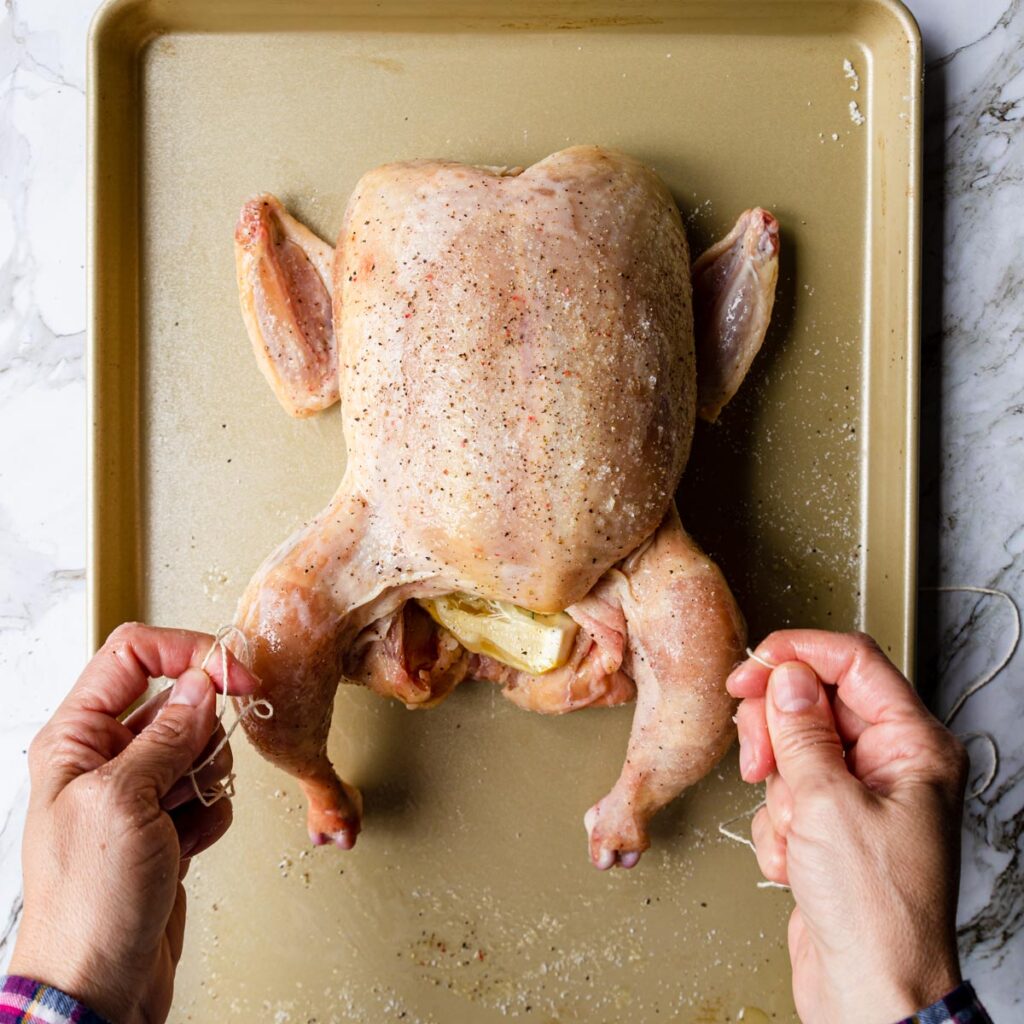
Now bring it up around to the top of the chicken in front of the breasts and tie.
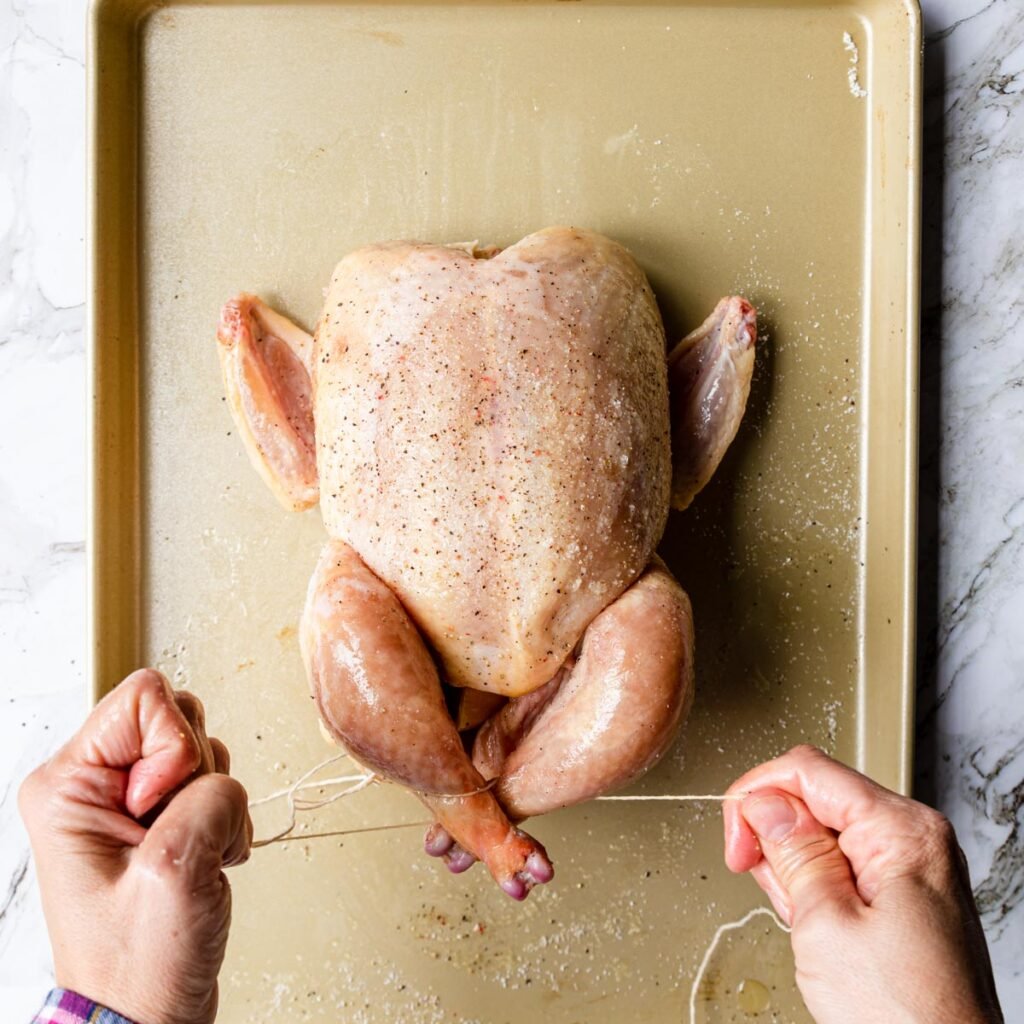
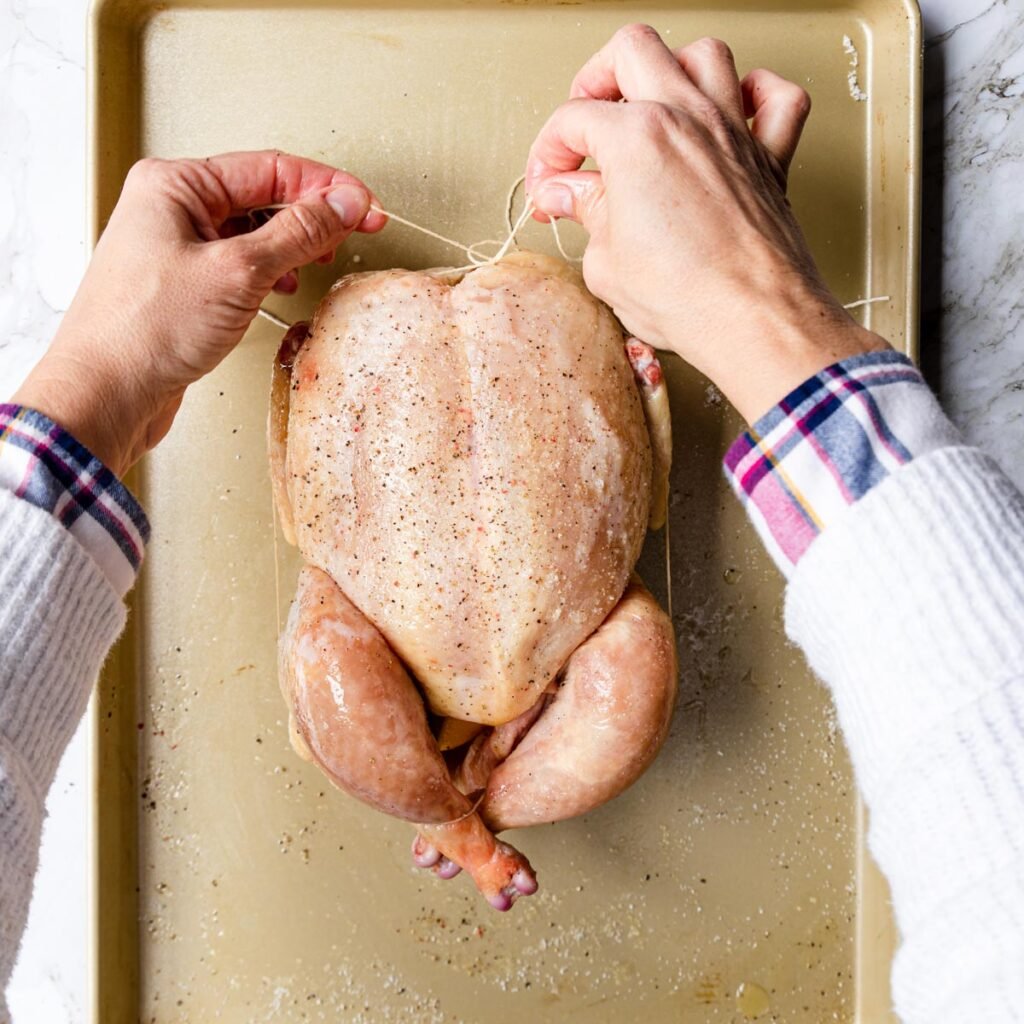
Pro Tip: I have had chickens with a very short tail area that the string won’t stay snuggled under. That is ok. If your string won’t stay under the tail just bring it on the outside of the leg to pull them together, then cross and continue with the trussing instructions.
Veggies
You can use whatever root style veggies that your family loves. I like to use a combo of carrots, onion, brussels sprouts, fennel, turnips, and red potatoes.
Whatever you choose make sure you have enough veggies for 4 people. Also, cut the vegetables roughly the same size so they roast evenly.
Place them in the Dutch Oven or roasting pan and toss with olive oil and salt/pepper. The chicken will cook right in the center of the veggies.
Any liquid/broth that runs off the chickens during cooking will flavor the veggies beautifully!
Cooking Time
Since whole chickens can weigh anywhere from 3-6 lbs. your cook time may vary drastically. The recipe guide written below is for a 4 lb. chicken.
Chicken is not like beef or pork, it needs to be cooked well done in order to be safe to eat. Chicken is considered safe and cooked at 165 degrees Fahrenheit.
At the end of the cooking time use an instant read thermometer inserted into the breast area and the thickest part of the thigh, it should register at 160-165 degrees. The juice at the thigh/leg area should run clear (not red or pink).
If your bird is not cooked through pop it back in the oven for 5 minute increments until it reaches 160-165 degrees Fahrenheit.
8 Pieces- Light & Dark Meat
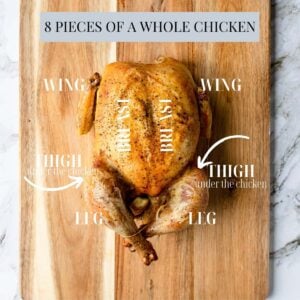
There are 8 pieces of chicken on a whole chicken and two types of meat- light meat and dark meat.
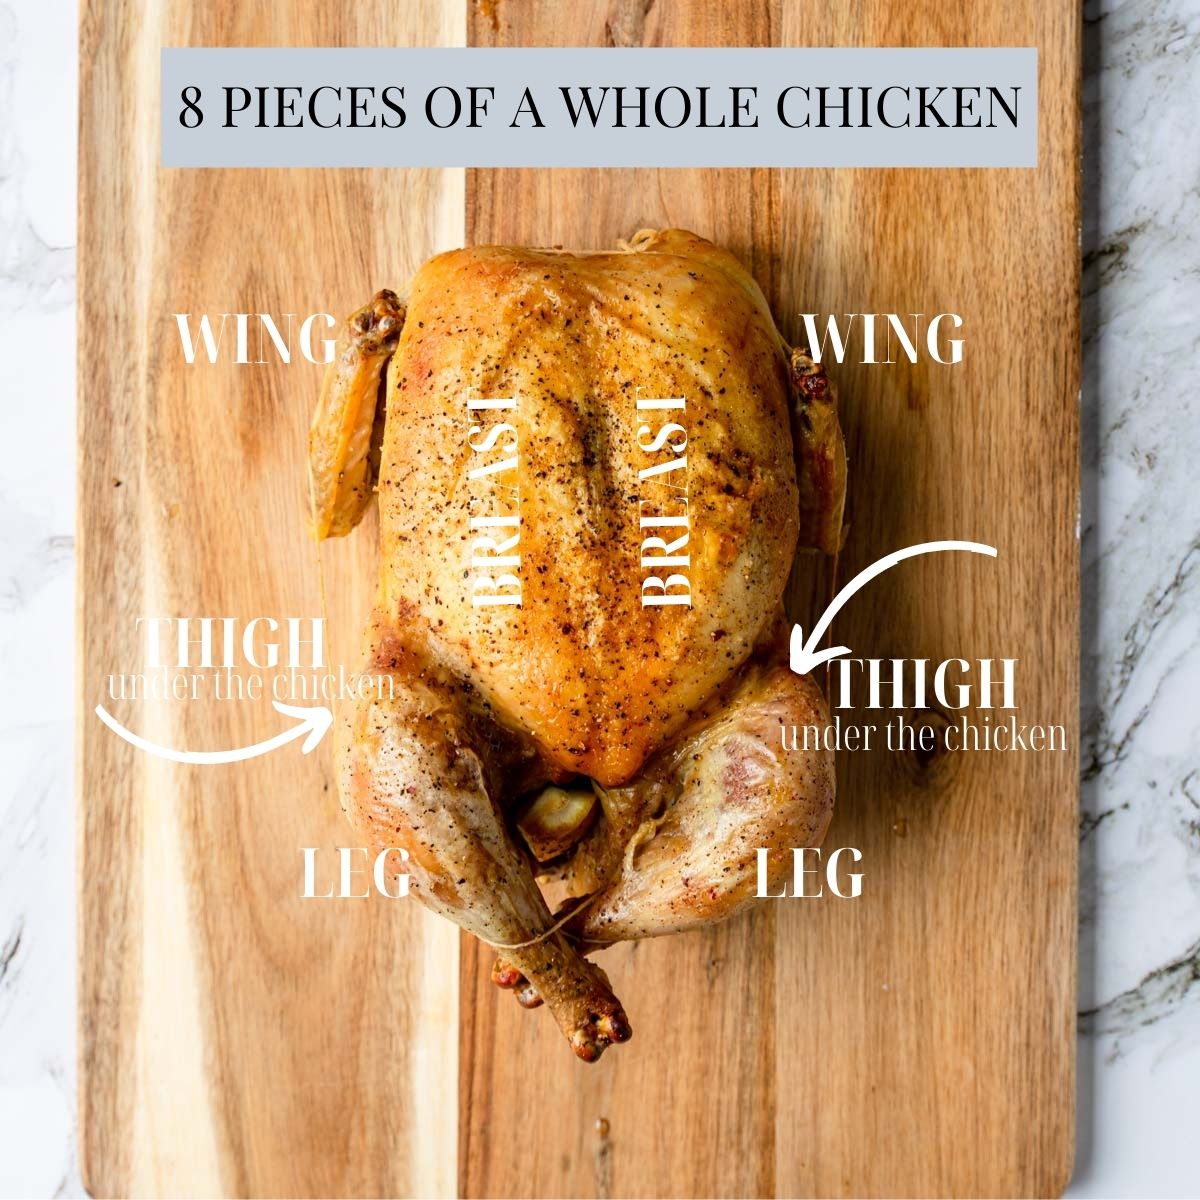
Dark Meat- (my favorite) recognized by the darker, more pink color of the meat. This includes the thighs and legs of the bird. It will be more flavorful and juicier/fattier parts of the bird. Dark meat is fully cooked at 175 degrees Fahrenheit but is safe to eat at 165 degrees F.
White Meat- recognized by the true white color of the meat after cooking. This includes the breast and wings of the bird. It is considered the healthier portions of the bird. These pieces can tend to overcook and be drier if you don’t watch the cooking temperatures. White meat is fully cooked at 165 degrees Fahrenheit.
Popes Nose and The Oysters
It sounds like the name of a punk band – Pope’s Nose and They Oysters. But they are actually two tasty treats on a roasted chicken that are a perfect prize for the Chef!
Pope’s Nose -Also called a Parson’s Nose is the protuberance at the tail end of the bird. Some chef’s love the Pope’s Nose, some actually recommend to remove before roasting, and a lot of home cooks overlook this part of the bird completely. But it is edible and a tasty little treat for the Chef!
Oyster– there are two dark meat “oysters” on a chicken. They are basically little pockets of chicken meat, on either side of the backbone near the thighs that are constantly basted with the chicken juices during roasting and are tender and very flavorful. See the photo below to find the Oysters.
Carving & Serving Chicken
After roasting let the chicken rest for about 20 minutes to cool and let the juices redistribute.
Move the chicken to a cutting board surface. I like to use a rimmed sheet pan, it will catch any juices that spill out.
This is a great video showing how to break down a rotisserie chicken.
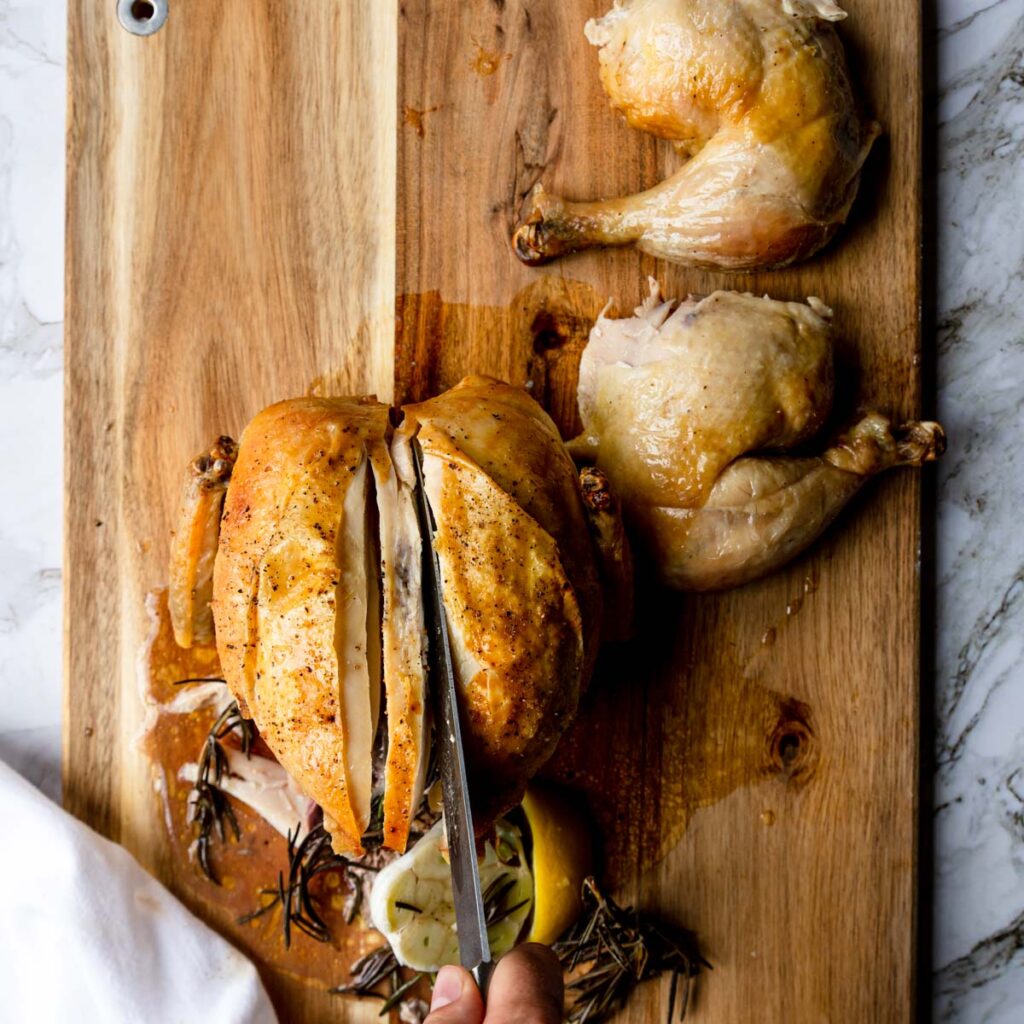
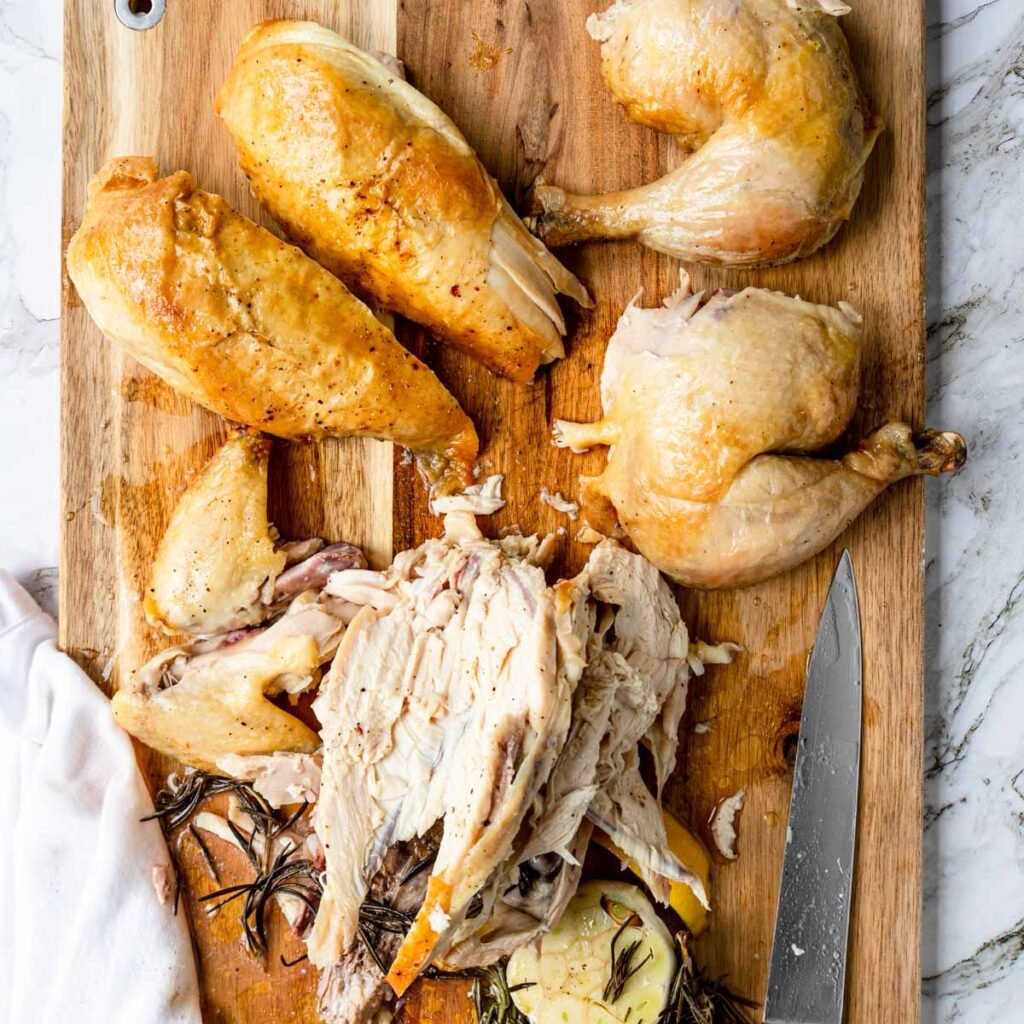
- LEG THIGH: Remove the leg and thigh by cutting between the breast and the leg/thigh combo. Repeat on both sides. Optionally- separate the leg and thigh.
- BREAST MEAT: The breast bone runs right in-between the two breasts and is about ½-1 inch wide. Cut on either side of the breast bone and down around the breasts. Each breast should pull away from the carcass easily.
- OYSTERS: Turn the remaining carcass over. In the middle of the backbone on either side, near where the thighs were, there will be two little oval pockets of dark meat. They are not very big so these are well known “treats” for the chef! Enjoy!
Pro Tip: Save the remaining carcass and all your veggies scraps (even the neck and gizzards if you have them) in the freezer for up to 3 months and make Instant Pot Chicken Broth!!!
Making a Whole Roast Chicken Dinner
Nothing will fill up your house with a more comforting smell than a whole roasted chicken (ok, fresh baked bread is also the best smell ever).
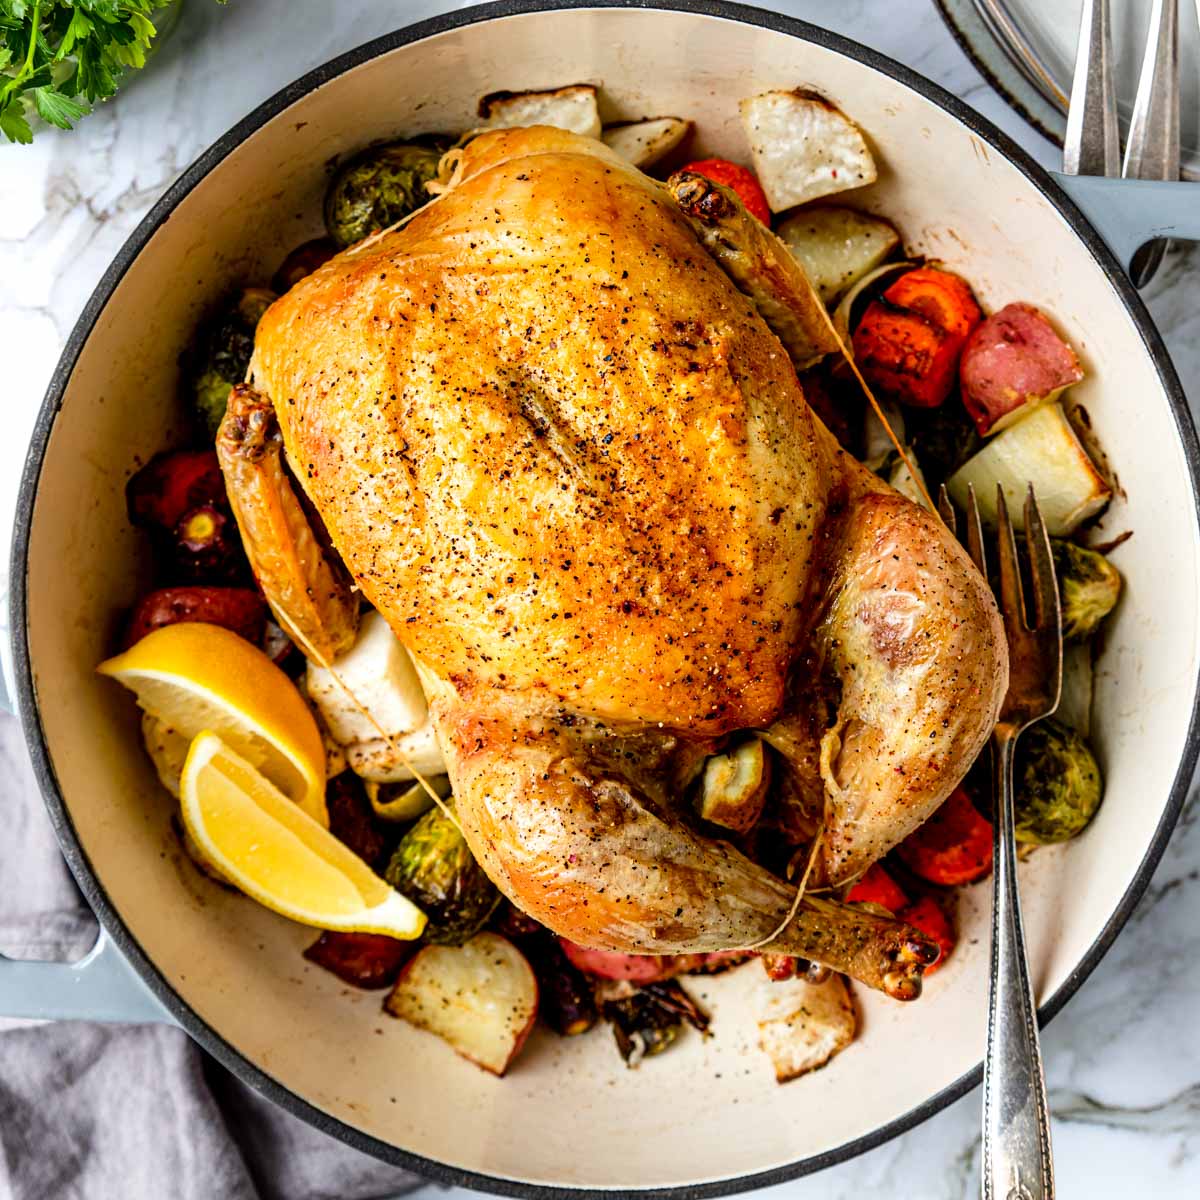
It will call the whole family to the dinner table very easily!! Here are some great side dishes to make and serve with your Whole Roasted Chicken:
- Mashed Potatoes (or Instant Pot Mashed Potatoes)
- Stuffing or Sausage Stuffing
- Gravy (or Instant Pot Gravy)
- Raspberry Jell-O Fluff
- Broccoli and Bacon Salad
- Rolls & Butter
TL;DR – Final Pro Tips for Roasting A Whole Chicken
Too Long; Didn’t Read – Here are all my final takeaway “pro” tips for roasting a whole chicken:
- Buy a quality chicken that is “air chilled”.
- Plan a day or two ahead of time so you can properly salt and dry brine the chicken in the fridge.
- Place a wire rack in a rimmed baking sheet so the air can circulate around the whole bird while in the fridge.
- Use kosher salt NOT iodized table salt. Diamon Crystal or Real Salt have great kosher salts.
- Stuff the cavity of the bird with your favorite aromatics – garlic, onion, lemon, rosemary, thyme, parsley, etc…
- Let the bird sit at room temp for about 30 minutes before roasting. This is called tempering.
- Truss the bird so it cooks evenly.
- Generously brush the bird with olive oil or melted butter to get a golden crisp skin.
- Start roasting at a higher temperature of 475, then finish at 400.
- Make sure the thickest part of the breast and the thigh have reached at least 160 degrees F.
- Let the roasted chicken sit for about 20 minutes before carving.
More Whole Chicken Recipes

💛💛💛💛💛
Did you make this recipe?
I would love to hear your review, especially if you have tips and tricks to add! Pop down to the comment section and connect with me
Ultimate Guide to Roasted Chicken
Equipment
- Sharp Knife
Ingredients
Chicken
- 4 lb. whole, fresh chicken - (highly recommend air chilled chicken)
- 1 tablespoon plus 2 teaspoon kosher salt - (divided) highly reccomend Diamon Crystal or Real Salt brands
- 1 small head of garlic
- 1 lemon
- fresh rosemary, thyme, or parsley - – or use all three!
- 3 tablespoon olive oil
Veggies
- NOTE: Use whatever root vegetables your family loves! Cut everything roughly the same size so it cooks evenly.
- olive oil
- large carrots - peeled and cut into 1 inch pieces
- red potatoes - cut into 1 inch pieces
- onion - cut into 8 pieces
- fennel - cut into 8 pieces
- turnips - peeled and cut into 1 inch pieces
- brussels sprouts
- kosher salt and black pepper
- fresh lemon
Instructions
Salting & Refrigerating – 1-2 days ahead
- Remove the chicken from the packaging. If it came pre-trussed you can cut the string from the bird.Place on a rimmed baking sheet fitted with a cooling rack, so the bird can have air circulating all the way around.4 lb. whole, fresh chicken
- Now generously salt the bird on all sides (for my 4 lb. chicken I use about 1 tablespoon of kosher salt.). Don't forget to salt the inside of the cavity too!
- Pop in the fridge for 24 hours, up to 48 hours. Make sure you do not cover the bird in the fridge, you want the skin to start to dry and the salt to infuse the meat with flavor.

Trussing
- Remove the bird from the fridge.
- Stuff the cavity of the bird with half a lemon (I like to squeeze some of the juice into the cavity too), herbs that you love (rosemary, thyme, parsley for example), and a head of garlic that has been cut in half (no need to remove the papery outside).1 small head of garlic, 1 lemon, fresh rosemary, thyme, or parsley
- Set the bird breast side up on a clean surface. Cut a very long piece of kitchen string (butchers twine). Snuggle the middle point of the twine under the tail end. Bring each end of the twine up and around the outside of the legs, then cross the twine and bring it under and around the outside of the legs. Pull tight brining the legs together and in close to the bird. (if the string won't stay under the tail end just wrap it around the legs and pull them together)Now bring it up around to the top of the chicken, around the outside of the wings, pulling them into the bird, and in front of the breasts and then tie the string.
- Brush the skin generously with olive oil. Season with a little kosher salt and black pepper.3 tablespoon olive oil

Preparing and Roasting
- Preheat the oven to 475°. While the oven preheats prepare the veggies and let the chicken rest at room temp. for 30 minutes, up to an hour.(This is called tempering and will help the chicken cook more evenly.)large carrots, red potatoes, onion, fennel, turnips, brussels sprouts
- Prepare all the veggies by chopping them into similar sizes. Place in the bottom of a roasting pan. Toss with 3 tablespoon olive oil, salt and pepper.kosher salt and black pepper
- Move the veggies around the pan to make a space for the chicken. Nestle it into the pan, breast side up.
- Roast, uncovered, at 475° for 25 minutes.
- Turn the heat down to 400° and roast for another 45 minutes until the thickest part of the breast and thigh reaches 160°-165°. If the skin is getting too dark you can always tent loosely with foil.Pro Tip: highly recommend using a Thermoworks Instant Read Thermometer.
- If your chicken hasn't reached 160-165°, continue to roast in 5 minute incremements until it is cooked through.
- Once it is roasted completely let it rest, uncovered, for 20 minutes before carving. No need to tent with foil, you are not trying to carryover cook, you just want the juices to redistribute in the bird and for it to slightly cool before handling & carving.
Carving
- CARVING TIPS BEFORE STARTING: Take a good look at the bird before starting to carve and notice where the 8 pieces are- breasts (top), thighs (bottom/back side), legs (back), wings (front). Use a medium sized VERY sharp knife. This will help pierce the skin without destroying the nice crispy skin on each piece. If the skin is starting to tear or fall off a piece of chicken stop cutting, reposition the skin, reassess and start again. Take your time! Even if things go array during carving… the chicken will still be DELICIOUS. Promise!

- Remove the chicken to a cutting board or rimmed sheet pan to catch juices.
- Remove the truss by cutting it at the legs and unraveling it from the chicken.
- If you are a visual learner, this is a great video on cutting a roasted chicken.
- LEG THIGH:Remove the leg and thigh by cutting between the breast and the leg/thigh combo. Repeat on both sides. Optionally- separate the leg and thigh.
- BREAST:The breast bone runs right in-between the two breasts and is about ½-1 inch wide. Cut on either side of the breast bone and down around the breasts. Each breast should pull away from the carcass easily.
- OYSTERS:Turn the remaining carcass over. In the middle of the backbone on either side, near where the thighs were, there will be two little oval pockets of dark meat. They are not very big so these are well known "treats" for the chef! Enjoy!
- Pro Tip: Save the remaining carcass and all your veggies scraps (even the neck and gizzards if you have them) in the freezer for up to 3 months and make Instant Pot Chicken Stock!!!
Veggies
- If the veggies have cooled too much you can warm them oven low/medium heat on the stove top.
- Toss them with the juices in the bottom of the pan.
- You can also squeeze a little lemon juice over the veggies for enhanced flavor.
Serving
- Plate the veggies on a big serving platter. Top with the 8 pieces of chicken – 2 breasts, 2 thighs, 2 wings, 2 legs.
- Goes GREAT with mashed potatoes and gravy! (or for the Instant Pot lovers try this mashed potato recipe and this Instant Pot Gravy Recipe)


Olena says
Thank you for sharing your tips and wisdom was us. I made a whole roasted chicken following your recipe last night and everyone loved it! My husband and two grown boys asked me to make it again tomorrow.
Lori says
I never knew what a Pope’s nose was on a chicken! Such good info! And such a good recipe!
Lauren says
My husband I made this over the weekend for his family. It was a huge hit!