Mom's Dinner

  • Home
  • All Recipes
  • Instant Pot
    • All Instant Pot Recipes
    • Instant Pot Soup
    • Instant Pot Beef
    • Instant Pot Chicken
    • Instant Pot Pork
    • Instant Pot Turkey
    • Instant Pot Pasta
    • Instant Pot Vegetarian
  • Dinner
    • Beef
    • Chicken
    • Pork
    • Turkey
    • Fish & Seafood
    • Mexican
    • Pasta
    • Vegetarian
  • Subscribe
menu icon
go to homepage
  • RECIPES
  • DINNER
  • ABOUT
  • SUBSCRIBE

subscribe
search icon
Homepage link
  • RECIPES
  • DINNER
  • ABOUT
  • SUBSCRIBE

ร—
You are here: Home

Instant Pot Pulled BBQ Chicken

March 24, 2020 by Susie Weinrich 28 Comments

BBQ Chicken sandwich

Instant Pot Pulled BBQ Chicken is fall apart tender cooked chicken breasts that are seasoned with a bbq dry rub, then cooked in your electric pressure cooker.

Instant Pot BBQ Chicken Sandwich on a white plate with lemonade in the background

Pull it and shred it and then mix it up with your favorite BBQ sauce and serve it on a bun topped with delicious coleslaw for an amazing pulled chicken sandwich, which make a really easy dinner!

This pulled barbecue chicken would also be amazing on my BBQ Chicken Sliders!

A white bowl of pulled bbq chicken

If you love BBQ – definitely check out my Instant Pot Boneless BBQ Ribs! But, if you are looking for a non-barbecue pulled chicken, check out this recipe for Instant Pot All Purpose Pulled Chicken.

How to Make BBQ Pulled Chicken in the Instant Pot

Start by cutting your boneless skinless chicken breasts into 4 pieces each. This will allow more surface area for flavor! If you want to use a mix of chicken breasts and chicken thighs for a dark/white mix, you can absolutely do that!

BBQ Chicken sandwich

Make a delicious bbq dry rub, which will impart extra bbq flavor! Mix together:

  • 1 tablespoon brown sugar
  • 1 ยฝ teaspoon kosher salt
  • 1 teaspoon black pepper
  • ยฝ teaspoon each: onion powder and garlic powder
  • ยฝ teaspoon smoked paprika

Sprinkle the dry rub on all sides of the chicken, pressing it in so it sticks.

  • BBQ Dry rub in a glass bowl
  • cut chicken breasts coated with BBQ dry rub

In the Instant Pot pour 1 cup of water, 1 tablespoon Worcestershire sauce, ยฝ tablespoon cider vinegar, and 3 crushed garlic cloves. Place the seasoned chicken in the pot.

Using the trivet is optional.

  • liquid and garlic cloves in the bottom of the Instant Pot
  • BBQ dry rub coated chicken pieces in the bottom of the instant pot

Close the pot and set to cook on high pressure for 8 minutes.

Do a 5 minute natural release and then finish with a quick release.

Frozen Chicken

Yes you can definitely use frozen chicken, however note that it will not be quite as tender.

Make sure that your chicken breasts are seperated and not frozen in one chunk.

Increase the cook time to 12 minutes with a 10 minute natural pressure release.

Shred the Chicken

Remove the chicken from the pot and pull or shred it. My very favorite way to shred chicken is in the stand mixer with the paddle attachment, it makes really quick work of it! Just make sure the chicken is warm and watch so it doesn’t over shred.

shredded cooked chicken

You can also shred it by using two forks pulling each chicken piece apart.

Add the BBQ Sauce

Mix your shredded chicken with your favorite BBQ sauce. We like a stickier KC style BBQ sauce . For this amount of chicken I use between ยฝ to ยพ cup sauce.

Serving your Pulled BBQ Chicken

My very favorite way to serve this chicken is on a bun for Pulled BBQ Chicken Sandwiches, top it with a little coleslaw and I am in heaven!

BBQ chicken sandwiches with the instant pot in the background

Related Recipes

  • Instant Pot pulled pork in a white bowl
    Instant Pot Pulled Pork
  • shredded chicken in a bowl with taco fixing around
    Instant Pot Shredded Chicken Tacos
  • Shredded Buffalo Chicken Sandwich on a bun with blue cheese crumbles over top.
    Easy Instant Pot Shredded Buffalo Chicken

Susie leaning on the kitchen counter

WATCH SUSIE ON FOOD NETWORK!

โญโญโญโญโญ

The new gameshow, 100 Cooks, premieres on Food Network June 7th, 2026 at 9est/8cst. I hope you will tune in!

BBQ Chicken sandwich

Instant Pot BBQ Pulled Chicken

Delicious tender chicken seasoned with BBQ dry rub and cooked in the Instant Pot, pulled and shredded and mixed with your favorite BBQ sauce!
5 from 16 votes
Print Pin Rate Save Saved!
Prep Time: 10 minutes minutes
Cook Time: 10 minutes minutes
Pressure and Natural Release Time: 15 minutes minutes
Total Time: 35 minutes minutes
Servings: 6 sandwiches
Calories: 143kcal
Author: Susie Weinrich

Equipment

  • Instant Pot or Electric Pressure Cooker

Ingredients

  • 1.5-2 lbs fresh – boneless skinless chicken breast - each breast cut into 4 pieces (see frozen chicken notes below)
  • 1 tablespoon brown sugar
  • 1 ยฝ teaspoon kosher salt
  • 1 teaspoon black pepper
  • ยฝ teaspoon each – onion powder & garlic powder
  • ยฝ teaspoon smoked paprika
  • 1 cup water
  • 1 tablespoon Worcestershire sauce
  • ยฝ tablespoon apple cider vinegar
  • 3 fresh garlic cloves - crushed or smashed
  • BBQ Sauce – your favorite brand or flavor

Serving

  • Buns

Instructions
 

  • Mix the BBQ dry rub in a small bowl – 1 tablespoon brown sugar, 1 ยฝ teaspoon kosher salt , 1 teaspoon black pepper , ยฝ teaspoon onion powder , 1 teaspoon garlic powder, ยผ teaspoon smoked paprika.
  • Sprinkle the dry rub on all sides of the cut chicken breasts. Press the seasoning in so it will stick to the chicken.
  • Pour 1 cup water, 1 tablespoon Worcestershire sauce, ยฝ tablespoon apple cider vinegar and the crushed garlic cloves into the Instant Pot.
    Put all the seasoned chicken breasts in the Instant Pot
  • Close the pot and lock the pressure valve in place. Set it to cook on pressure mode, high for 8 minutes.
  • Do a 5 minute natural release, then do a quick release for any remaining pressure.
  • Remove the chicken from the pot and shred/pull it.
    Kitchen Tip: put the warm chicken in a stand mixer with a paddle attachment for easy and fast shredding!!!
    Discard the liquid in the pot.
  • Mix the shredded chicken with desired amount of BBQ sauce. We like between ยฝ-3/4 cup BBQ sauce.
  • Serve on buns for amazing pulled BBQ chicken sandwiches.

Recipe Tips and Notes:

Chicken : Can use a mix of chicken breasts and thighs for a dark and white meat mixture.
For Frozen Chicken : If you are using frozen chicken, don’t cut, just cook whole but make sure the breasts are seperated and not frozen together! Sprinkle with the seasoning. Set it to cook on 12 minutes high pressure with a 10 minute natural release.
Did you make this recipe?Connect with me and let me know by commenting below!
Jump to Comments
Serving: 1serving | Calories: 143kcal | Carbohydrates: 3g | Protein: 24g | Fat: 3g | Saturated Fat: 1g | Trans Fat: 1g | Cholesterol: 73mg | Sodium: 744mg | Potassium: 458mg | Fiber: 1g | Sugar: 2g | Vitamin A: 79IU | Vitamin C: 2mg | Calcium: 16mg | Iron: 1mg

Creamy Chicken Tacos

March 23, 2020 by Susie Weinrich 23 Comments

two chicken tacos in flour tortillas

Creamy Chicken Tacos are my new favorite chicken taco! Tender pieces of cooked chicken get mixed into a creamy sauce full of Mexican seasonings & spices, tomatoes & chilies, fresh herbs, and cheese.ย 

2 creamy chicken tacos on a wooden cutting board
[Read more…]

All-Day Marinara Sauce in Under an Hour

March 22, 2020 by Susie Weinrich 17 Comments

a mason jar full of homemade marinara sauce

This recipe for Homemade Marinara Sauce is a rich tomato based sauce full of traditional marinara ingredients: fresh basil, spices, garlic, onions, flavorful tomatoes, and herb flavored extra virgin olive oil. It tastes like it simmered in your Grandma’s kitchen all day but it is ready in under 1 hour!

a bowl of spaghetti that is coated with homemade marinara

Perfect for any pasta recipe that calls for marinara or tomato sauce or meatball recipe.

Balancing Flavor

You will add a few unique ingredients to make sure your Homemade Marinara Sauce has the best and most balanced flavor.

The addition of balsamic vinegar adds a warm flavor in the background. A little sugar balances the acidity of theย vinegar and tomato.

The unexpected ingredient of evaporated milk adds just a hint of creaminess without making it a “cream sauce”, it also soothes the acidity of the tomatoes.

Ingredients

You need really good canned tomatoes, some fresh herbs and spices from your cabinet to make really good homemade marinara sauce.

Cento Crushed Tomatoes

Since tomatoes are the star of this recipe, I recommend buying the very best canned tomatoes you can.

I prefer to use Cento Crushed Tomatoes, they are a super high quality canned tomato product that is easy to find. Cento Crushed Tomatoes are grown in California, abiding to the high quality standards of the Cento company. Resulting in a super flavorful, rich tomato product.

Canned Cento Crushed Tomatoes

If you want to have an authentic Italian grown tomato you could also choose to use Cento’s Organic Crushed Tomatoes or Whole Peeled San Marzano Tomatoes. Both of these products are grown in Italy.ย  However, only the Whole Peeled Tomatoes follow the strict guidelines that come with being Certified San Marzano.

Extra Virgin Olive Oil

Using a good extra virgin olive oil is also key in this recipe. You do not want to use plain olive oil, it will not give you the same flavor. Extra Virgin Olive Oil is the one that has intense, rich, buttery olive flavor that you can truly taste.

Just make sure the bottle says “extra virgin” on the label.

Fresh Herbs

Fresh rosemary and basil add a beautiful herbaceous flavor to this Marinara recipe. They are fried in the EVOO, releasing all their flavor into the oil, which is then infused into the entire pot of sauce.

The fried herbs are discarded and then the remaining basil gets chopped and added to the sauce. Lending the perfect Italian flavors.

Evaporated Milk

There is one unusual ingredient that I add, evaporated milk. I do this to create an almost creamy texture and taste to the marinara. It is not the same as adding half and half or heavy whipping cream, that would turn this recipe into a true cream sauce.

The evaporated milk just mellows the acidity and gives it a velvety flavor. You can also simmer the evaporated milk without worrying it will curdle.

Step by Step

I love how you start this recipe, by frying the fresh rosemary and 6 basil leaves in the extra virgin olive oil. It is such a simple step but makes such a difference in the flavor of your Homemade Marinara!

When the herbs start to get crispy, about 5 minutes, pull the herbs out and discard. Some pieces may crumble off into the oil, that is ok, but try to get the majority of the herb solids out of the oil.

herbs frying in extra virgin olive oil

In the now fragrant oil, add the onions and garlic and sautรฉ over medium low heat for about 5 minutes until the onions are softened.

Pro Tip: If you don’t like having onion pieces in your sauce you can also just cut an onion in half and place in the sauce. Then discard at the end of cooking.

Now add all the remaining ingredients: fresh basil, Cento Crushed Tomatoes, onion powder, dried oregano, salt, sugar, pinch of red pepper flakes, balsamic vinegar, and evaporated milk. Stir everything so it is well combined, place the lid on the pot and simmer over medium low heat for 20 minutes.

a dutch oven full of marinara sauce with a wooden spoon

You will want to stir the sauce occasionally to make sure the tomatoes do not burn on the bottom.

Once the tomato sauce is ready taste for seasoning (salt and pepper) and pour over your warm pasta.

Making Ahead

You can also make this Homemade Marinara Sauce ahead and store in the fridge for use during a busy week.

a mason jar full of homemade marinara sauce

Follow the instructions but then let the sauce cool for about 25-30 minutes and then place in an airtight container in the fridge for 4-5 days. You may need to thin the sauce with ยผ cup of water when reheating.

Variations

You will love this recipe just as is, but it is easily customizable to suit your family’s taste buds. Here are a few ideas:

  • After the sauce is cooked stir in cooked and drained ground beef or ground Italian sausage for a meat sauce.
  • If you like your sauce spicy add more than a pinch of red pepper flakes.
  • Make this a true tomato cream sauce by adding โ…“ cup of heavy whipping cream after it is done simmering.
  • Use this sauce as a sub in your favorite recipes calling for marinara.
  • If you want an authentic San Marzano tomato flavor, use the Cento Whole Peeled Tomatoes. Just crush them by hand before adding them to the pot.

Uses for Homemade Marinara Sauce

Like I said before this is a tear free dinner at our house, so it is a Mom’s Dinner favorite! This Homemade Marinara Sauce gets spooned over spaghetti or penne and garnished with Parmesan cheese, red pepper flakes, fresh basil, or all three.

You can also use it in dishes that call for marinara; Italian Meatballs, Meatball Sub Sandwiches, or Lasagna.

Side Dishes To Make It Dinner

On a busy night it is served with an easy to make bagged Caesar salad. On the weekend when we have a little more time to prep dinner and sit around the table I will add a Big Italian Salad, sauteed garlic green beans or roasted fennel and garlic bread.

More Italian Style Recipes

If you like this Italian recipe, you may also want to check out these recipes on Mom’s Dinner:

  • Marinated Chicken Spiedini with Amogio
  • a bowl of creamy risotto
    Perfect Instant Pot Risotto Recipe
  • Beef ragu over pappardelle pasta with a dallop of ricotta on top
    The Best Slow Simmered Beef Ragu
  • Shrimp Carbonara on a platter with parsley garnish
    Shrimp Carbonara

Susie leaning on the kitchen counter

WATCH SUSIE ON FOOD NETWORK!

โญโญโญโญโญ

The new gameshow, 100 Cooks, premieres on Food Network June 7th, 2026 at 9est/8cst. I hope you will tune in!

a mason jar full of homemade marinara sauce

Homemade Marinara Sauce Recipe

A super flavorful Homemade Marinara Sauce that is great spooned over cooked pasta. It is easy to make yet tastes like is simmered in your Grandma's kitchen all day.
4.80 from 5 votes
Print Pin Rate Save Saved!
Prep Time: 10 minutes minutes
Cook Time: 30 minutes minutes
Total Time: 40 minutes minutes
Servings: 3 cups (approx)
Calories: 350kcal
Author: Susie Weinrich

Equipment

  • large pot

Ingredients

  • ยผ cup good Extra Virgin Olive Oil
  • 15-18 fresh basil leaves, divided - 6 left whole and the remaining basil chopped
  • 2 sprigs fresh rosemary
  • 3 plump garlic cloves - minced
  • 1 small yellow onion - diced, about 1 cup (or see notes about leaving whole)
  • 28 ounces Crushed Tomatoes - (I recommend Cento brand)
  • 5 ounces canned evaporated milk
  • 1 tablespoon balsamic vinegar
  • 1 tablespoon sugar
  • 1 tablespoon kosher salt
  • ยฝ teaspoon black pepper
  • ยฝ teaspoon dried oregano
  • ยฝ teaspoon onion powder

Instructions
 

  • In a large sauce pot or dutch oven, over low heat, add the extra virgin olive oil. Once the oil is hot add the rosemary (left on the stem) and 6 fresh basil leaves (left whole).
  • Fry in the oil, making sure to not burn the herbs, about 5 minutes, until they are crisp. Remove the herbs from the oil and discard. (It is ok if some of the herb pieces break off into the oil)
  • Add the onions and garlic to the pot and raise the heat to medium low. Sautรฉ, stirring occasionally, until the onions are soft and translucent but not browned, about 5 minutes.ย 
  • Add all remaining ingredients: crushed tomatoes, chopped basil, balsamic vinegar, evaporated milk, sugar, salt, pepper, dried oregano, and onion powder. Stir until it is all well combined.ย 
  • Reduce the heat to low. Put the lid on the pot and simmer for 20 minutes, stirring occasionally so the sauce does not burn on the bottom.

Serving/Storing

  • Serve immediately over pasta or as a sub in your favorite recipe calling for marinara.ย 
  • This Marinara Sauce can be made ahead. Completely prepare, cool for 30 minutes, and store in an airtight container in the fridge for up to a week.

Recipe Tips and Notes:

SERVING: You should have enough sauce for 1 ยฝ pounds of pasta.
ONION: If you do not want to have onion pieces in your marinara you can cut the onion in half, peel and put the two halves in the sauce. Simmer and then at the end remove the onion and discard.
Did you make this recipe?Connect with me and let me know by commenting below!
Jump to Comments
Serving: 1cup | Calories: 350kcal | Carbohydrates: 34g | Protein: 8g | Fat: 22g | Saturated Fat: 5g | Polyunsaturated Fat: 2g | Monounsaturated Fat: 14g | Cholesterol: 14mg | Sodium: 2729mg | Potassium: 1009mg | Fiber: 6g | Sugar: 23g | Vitamin A: 798IU | Vitamin C: 29mg | Calcium: 242mg | Iron: 4mg

Creamy Mushroom Pasta Recipe

March 21, 2020 by Susie Weinrich 4 Comments

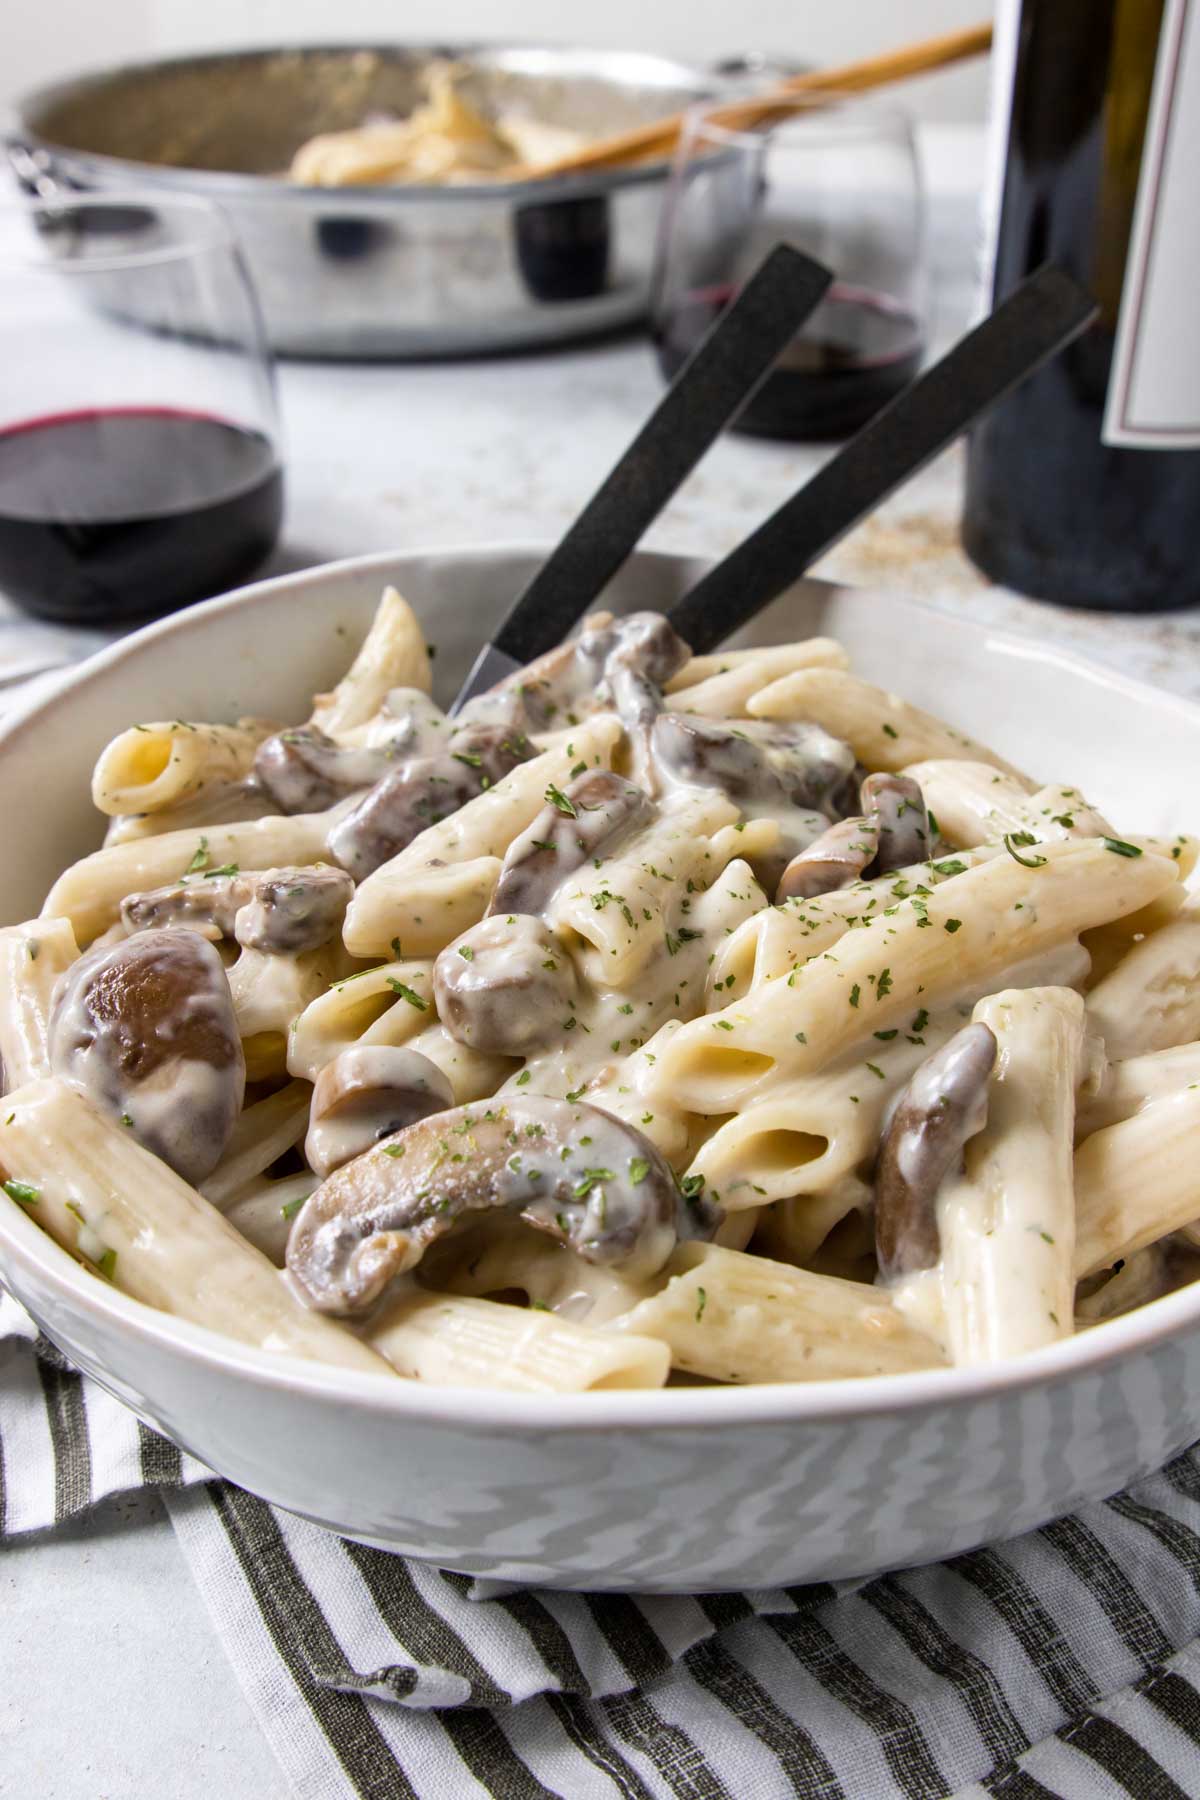
Creamy Mushroom Pasta Recipe in a white bowl

If there is one food pairing I can't get enough of it’s mushrooms, butter and garlic! Oh that smellโ€ฆ like savory potpourri. That combo is where this recipe started. I wanted a creamy pasta dish that had those flavors front and center – and so this Creamy Mushroom Pasta Recipe took shape. It's an uncomplicated pasta recipe with straightforward flavors and 8 simple ingredients.

This pasta and mushroom dish makes an easy dinner. Simply pair it with a green salad and some warm bread for a delicious dinner.

close up of penne pasta in a cream sauce with mushrooms

If you love pasta for dinner definitely check out this Easy Tomato Cream Sauce and if you love penne pasta these recipes are great too:

  • Lemon Penne with Roasted Broccoli
  • Penne Pasta Bake with Sausage
  • Instant Pot Tuscan Chicken Pasta
[feast_advanced_jump_to]

Why You’ll Love This Creamy Mushroom Pasta

Super simple ingredients – all combined to make a really great dinner!

Meatless Monday – as grocery prices get higher and higher, adding a meatless option to your menu plan can be very budget friendly.

Easy Recipe – this is a very straightforward and easy recipe that has big flavor payout!

Great new pasta recipe – if you are like me, then you plan on pasta at least one night a week. This a great way to shake up that pasta night from the traditional spaghetti with meat sauce.

Creamy Mushroom Pasta Recipe Ingredients

Penne Pasta – Penne is perfect here because the ridges grab onto that creamy mushroom sauce. Cook it just to al dente per package instructions so it holds up.

Cremini Mushrooms – These bring a deeper, more savory flavor than white mushrooms. They may also be called baby bellas in the grocery store.

Heavy Cream – This is what gives the sauce its creamy texture. It creates a wonderful sauce without needing a ton of extra ingredients.

All purpose flour – A small amount goes a long way to thicken the sauce. Cooking it briefly with the butter prevents any raw flour taste and keeps the sauce smooth

Garlic – one of my favorite combos to smell cooking is garlic, mushrooms and butter!!! Adding the garlic to the final minute or two of cooking the mushrooms makes sure the flavor stays pronounced.

Salted Butter – The only butter we recognize here at Mom’s Dinner. The fat of the butter mixes with the flour to thicken the sauce.

Milk – A 2% or whole milk lightens the heavy cream just enough while still keeping the sauce creamy. It helps create a balanced, not-too-rich finish

Parmesan brings salty, nutty depth and ties the whole sauce together. Grate it fresh if you can it melts better and tastes cleaner.

How to Use Cremini Mushrooms

For this dish I recommend using cremini mushrooms, which are actually baby portobello mushrooms. You may even see them called “baby portobellos” or “baby bellas” in the store.

cremini mushrooms also called baby bellas sliced

Of course you can use whatever mushrooms you prefer. Just make sure you cut them nice and thick so they still have a bite to them after they are sauteed for 10 minutes!

Here are some pro tips for using mushrooms:

  • “Wash” the mushrooms with a damp cloth. Do not submerge the mushrooms in water, they will absorb the water and end up with a spongy texture. Instead dampen a paper towel or clean kitchen towel and brush the dirt from the outside.
  • Slice them nice and thick. You want the mushrooms to remain “meaty” after they are sautรฉed in the butter. Achieve this by slicing them at least ยผ-1/2 inch thick.
  • Use the stems too don’t toss the stems! They have great flavor too. Chop them right along with the caps and toss them into the sauce.
  • Don’t be shy with the butter.  When you sautรฉ mushrooms they will absorb the liquid/fat that they are cooked with. Using butter or extra virgin olive oil is a great way to sautรฉ the mushrooms and add delicious flavor.
  • Salt the mushrooms. Once the mushrooms have sauteed for a minute or two season with kosher salt. It helps draw out the moisture and leaves the mushrooms nice and tender and “meaty”.

How to Make Mushroom Pasta

  1. Start by cooking your pasta according to package instructions. Drain. If your sauce isn’t ready right away toss the pasta with a little olive oil and set aside. This will prevent the noodles from clumping together.
  2. Meanwhile in a large skillet with tall sides, add 3 tablespoon of butter and melt over medium heat. Add the thick sliced mushrooms for about 2 mins.
  3. Sprinkle in 1 teaspoon kosher salt. Continue to sautรฉ for about 8 more minutes until the mushrooms are softened. Add the garlic and saute another minute.
Creamy Mushroom Pasta in a skillet
  1. Add another 1 tablespoon butter to the pan and let it melt completely. Sprinkle in 2 tablespoon all purpose flour. Stir the flour around the pan to coat the mushrooms, about 1 minute to cook the raw flour taste out.
  2. Pour in 1 cup heavy whipping cream and ยฝ cup milk, Stir around the pan until it is thickened.
  3. Remove from the heat and stir in ยฝ cup shredded parmesan and the cooked pasta, stir until the cheese is melted and the pasta is coated.

Mushroom Penne Pasta Recipe Variations

This is a really simple Mushroom Pasta Recipe, so you can absolutely add some things to make it your own.

Here are some ingredients that would pair well with the mushrooms and creamy flavors:

  • Thyme or Rosemary add some fresh herbs to totally change the flavor profile. 2 teaspoon of fresh chopped rosemary or thyme or a combo would be great. Add it when you add the mushrooms and garlic to the pan.
  • Fresh spinach add after the mushrooms have sauteed and let the spinach wilt in the pan for about 2 minutes.
  • Sauteed or Grilled Shrimp serve this on top of each serving of pasta. A skewer of grilled shrimp would be delicious!
  • Chicken or Grilled Chicken either toss it into the pan with the pasta or add it on top of each serving.
  • Asparagus add chopped asparagus about half way through the mushroom cooking time.
  • Stir in a couple spoonful’s of Fresh Pesto this will give you more of a pesto cream sauce. Stir it in at the very end before serving.

Storing

Let the pasta cool slightly, then store it in an airtight container in the refrigerator for up to 4 days. The sauce will thicken as it sits, so add a splash of milk or cream when reheating to loosen everything back up.

Reheating

To reheat portion single servings into a microwave safe bowl, stir in a little milk to reconstitute the sauce. Microwave for about 1 minute. Stir. Microwave for an additional 20-30 seconds.

A white bowl full of creamy mushroom pasta

Serving Suggestions for Creamy Mushroom Pasta

This pasta dish serves 2-4 people, but I do recommend serving it with a green salad and warm bread.

A Caesar Salad would be great or if you want to go the extra mile this Big Italian Salad is excellent! Of course Garlic Bread or Cheesy Garlic Bread is wonderful too.

For Mushroom Lovers

The smell of mushrooms and garlic cooking in butter is one of our favorite kitchen smells! So you know we love all-things-mushrooms in the Mom’s Dinner Test Kitchen.

Here are some other mushroom recipes to check out if you are also a huge mushroom lover:

  • Instant Pot Mushroom Risotto
  • Chicken and Mushroom Crepes
  • Instant Pot Coq au Vin
  • Chicken Pot Roast

Susie leaning on the kitchen counter

WATCH SUSIE ON FOOD NETWORK!

โญโญโญโญโญ

The new gameshow, 100 Cooks, premieres on Food Network June 7th, 2026 at 9est/8cst. I hope you will tune in!

Creamy Mushroom Pasta Recipe in a white bowl

Mushroom Penne Pasta Recipe

Creamy Mushroom Pasta is a delicious pasta dinner recipe. Al dente pasta is mixed with perfectly sauteed mushrooms and garlic all coated in an easy parmesan cream sauce.
If you have 4 VERY HUNGRY people I reccomend doubling the recipe. Hover over the servings and move the slider to change ingredient amounts.
USE THE PLAYER BELOW TO LISTEN TO THE FULL AUDIO RECIPE!
5 from 3 votes
Print Pin Rate Save Saved!
Prep Time: 10 minutes minutes
Cook Time: 20 minutes minutes
Total Time: 30 minutes minutes
Servings: 4 people
Calories: 622kcal
Author: Susie Weinrich

Ingredients

  • 8 oz (penne) pasta - cooked per package instructions
  • 16 oz cremini mushrooms - cleaned and sliced ยผ-1/2 inch thick
  • 3 plump fresh garlic cloves - add more if you love garlic!
  • 4 tablespoon butter - divided
  • 1 teaspoon kosher salt
  • 2 tablespoon all purpose flour
  • 1 cup heavy whipping cream
  • ยฝ cup milk - recommend 2% or whole
  • ยฝ cup shredded parmesan cheese

Optional Add Ins:

  • Fresh spinach, sauteed shrimp, chicken, asparagus or stir in a couple spoonfuls of pesto - see notes

Instructions
 

Pasta

  • Cook your pasta in salted boiling water according to package instructions.
    8 oz (penne) pasta
  • If your sauce isn't ready by the time the pasta is done cooking, drain it and toss it with a little olive oil. This prevents the pasta from sticking together.

Mushroom Cream Sauce

  • In a large skillet with tall sides melt 3 tablespoon butter over medium – medium/low heat. Stir in the sliced mushrooms and garlic cloves and sautรฉ for about 2 minutes.
    16 oz cremini mushrooms , 3 plump fresh garlic cloves
  • The stir in the kosher salt.
    Continue to sautรฉ the mushroom mixture for another 8 minutes.
    1 tsp kosher salt
  • Add the other 1 tablespoon butter in the pan and let it melt.
  • Stir in the 2 tablespoon all purpose flour and stir around the pan for 1 minute to coat the mushrooms and cook out the raw flour taste.
    2 tbsp all purpose flour
  • Pour in the 1 cup heavy cream and ยฝ cup milk. Simmer lightly until it is thickened.
    1 cup heavy whipping cream, ยฝ cup milk
  • Off the heat add the 8 oz cooked pasta and ยฝ cup shredded parmesan cheese. Stir until the pasta is coated with the sauce and the cheese is melted.
    ยฝ cup shredded parmesan cheese
  • Taste for seasoning.

Serving

  • Serve with a green salad, like a bagged Caesar Salad or this Italian Salad, and warm bread!

Storing and reheating

  • Keep any leftovers in the fridge in an airtight container for up to 4 days.
  • To reheat: portion single servings into a microwave safe bowl, stir in a little milk to reconstitute the sauce.
    Microwave for about 1 minute. Stir. Microwave for an additional 20-30 seconds.

Recipe Tips and Notes:

PRO TIPS FOR MUSHROOMS:
  • “Wash” the mushrooms with a damp cloth. Do not submerge the mushrooms in water, they will absorb the water and end up with a spongy texture. Instead dampen a paper towel or clean kitchen towel and brush the dirt from the outside.
  • Slice them nice and thick. You want the mushrooms to remain “meaty” after they are sautรฉed in the butter.
  • Don’t be shy with the butter. ย When you sautรฉ mushrooms they will absorb the liquid/fat that they are cooked with. Using butter or extra virgin olive oil is a great way to sautรฉ the mushrooms and add delicious flavor.
  • Salt the mushrooms.ย Once the mushrooms have sauteed for a minute or two season with kosher salt. It helps draw out the moisture and leaves the mushrooms nice and tender and “meaty”.
CREAM SAUCE TROUBLESHOOTING:
Not thick enough – simmer for longer to cook out some of the water content.
Didn’t thicken up at all – mix a heaping tablespoon of cornstarch with about 2 tablespoon water and stir into the sauce. Simmer until it is thickened.
Too thick – add a little more milk until the consistency is to your liking.
OPTIONAL ADD INS:
  • Thyme or Rosemary add some fresh herbs to totally change the flavor profile. 2 teaspoon of fresh chopped rosemary or thyme or a combo would be great. Add it when you add the mushrooms and garlic to the pan.
  • Fresh spinach add after the mushrooms have sauteed and let the spinach wilt in the pan for about 2 minutes.
  • Sauteed or Grilled Shrimp serve this on top of each serving of pasta. A skewer of grilled shrimp would be delicious!
  • Chicken or Grilled Chicken either toss it into the pan with the pasta or add it on top of each serving.
  • Asparagus add chopped asparagus about half way through the mushroom cooking time.
  • Stir in a couple spoonful’s of Fresh Pesto this will give you more of a pesto cream sauce. Stir it in at the very end before serving.
Did you make this recipe?Connect with me and let me know by commenting below!
Jump to Comments
Serving: 1serving | Calories: 622kcal | Carbohydrates: 54g | Protein: 18g | Fat: 38g | Saturated Fat: 24g | Polyunsaturated Fat: 2g | Monounsaturated Fat: 10g | Trans Fat: 0.5g | Cholesterol: 109mg | Sodium: 910mg | Potassium: 765mg | Fiber: 3g | Sugar: 7g | Vitamin A: 1372IU | Vitamin C: 1mg | Calcium: 265mg | Iron: 2mg

Instant Pot Corn on the Cob

March 20, 2020 by Susie Weinrich 3 Comments

a plate of ears of corn with butter and salt

Instant Pot Corn on the Cob is an easy way to cook perfectly crisp tender fresh corn. It cooks in just 2 minutes after your Instant Pot comes to pressure. Serve it topped with some butter and salt for a perfect side dish.

Corn on the cob on a white plate

No Instant Pot, no problem- pop over to this article on How To Boil Corn on the Cob.

When corn is sweet and in season you will also like to make this Homemade Creamed Corn , Corn Chowder or Corn Salsa!

Picking a Good Ear of Corn

I am sure there are a lot of ways to ensure you have ripe and juicy corn on the cob. I grew up in Iowa and we have gone through our fare share of fresh sweet corn.

Fresh ear of corn with the husk and silk pulled back
  1. My favorite way is to slightly peel back the husk and silk from the ear.
  2. If the corn kernels are plump and yellow/white ALL the way to the TOP then you have a good ear. If there is just husk with no corn, try again!
  3. Another good sign is if the “silk” is slightly damp and yellowish in color. It can be dried at the very top but shouldn’t be dead and dried all the way into the cob.
  4. Use your nose! If the corn smells like sweet corn, that’s a good sign.
  5. And always (this is gross)… look for bugs or worms at the top of the corn cob when you pull the husk back.

How to Cook Corn on the Cob in the Instant Pot

Of course you can boil water on the stove and make corn on the cob. But if you have the grill going and you can’t watch for the water to boil, cooking the corn in the Instant Pot is a great option!

  1. Prep the Corn
  2. Shuck the corn on the cob by peeling back the husk and silk. Give it a rinse under cool water. If there is still a stem end trim that off.

  3. Place Corn in the Instant Pot
  4. Place the metal trivet in the pot, pour 1 cup water into the bottom.

    Set the corn upright, lay it down, or if you have large ears of corn you can cut them in half before adding them to the pot.

    Corn standing up in the instant pot
    corn on the cob laying down in the instant pot
  5. Time To Cook
  6. Place the lid on the pot and set it to cook on high pressure for 2 minutes. Do a quick release at the end of cook time.

    With pressure building time and release time the total process is around 13 minutes.

  7. Serve
  8. Serve your corn with butter and salt! Sometimes if you have really sweet corn it doesn’t even need the butter and salt.

    Fresh corn on the cob cooked in the Instant pot

Butter and Salt

Pro Tip: if you have a lot of corn to butter and salt, drain the water out of the Instant Pot. Add a couple tablespoons of butter and pinches of kosher salt to the pot. Put the lid on and shake the corn in the Instant Pot. It will get a nice coating of butter!

What to Serve with Corn

If you love serving corn on the cob as a side dish, here are some awesome entrรฉe ideas to accompany your Instant Pot Corn on the Cob:

  • Ham Balls
  • Steak Bites
  • Grilled Burgers
  • Instant Pot Boneless BBQ Ribs
  • Grilled Buttermilk Chicken
  • Grilled Chicken Burgers

More Side Dish Recipes

  • a large bowl of potato salad
    The Best Potato Salad with Eggs
  • Pasta Salad with Cheese Tortellini
  • a large cast iron skillet full of cooked crispy little potatoes
    Crispy Cast Iron Skillet Potatoes
  • broccoli bacon salad in a white bowl
    Broccoli Salad with Bacon and Raisins

Susie leaning on the kitchen counter

WATCH SUSIE ON FOOD NETWORK!

โญโญโญโญโญ

The new gameshow, 100 Cooks, premieres on Food Network June 7th, 2026 at 9est/8cst. I hope you will tune in!

a plate of ears of corn with butter and salt

Instant Pot Corn on the Cob Recipe

A really easy way to cook corn on the cob in your electric pressure cooker. Just set the pot for 2 minutes for perfectly crisp tender corn.
5 from 4 votes
Print Pin Rate Save Saved!
Prep Time: 5 minutes minutes
Cook Time: 2 minutes minutes
Pressure Time & Quick Release: 10 minutes minutes
Total Time: 17 minutes minutes
Servings: 4 up to 8 ears of corn
Calories: 100kcal
Author: Susie Weinrich

Equipment

  • Instant Pot or Electric Pressure Cooker

Ingredients

  • 4-8 ears of fresh corn on the cob
  • 1 cup water

Serving

  • kosher salt
  • butter

Instructions
 

  • Remove the husk, silk, and stem end from your ears of corn. Wash the ear of corn if necessary.
    4-8 ears of fresh corn on the cob
  • Pour 1 cup of water into the bottom of the pot, put the trivet in the pot. Place your cleaned fresh corn on the cob in the pot.
    You can lay it down, stand it up, or if you have large ears of corn you can break them in half before placing them in the pot.
    1 cup water
  • Put the lid on the pot and lock the pressure valve to "seal".
    Set the pot to cook on high pressure for 2 minutes.
    (cook time will be the same whether you have 4 ears or 8 ears of corn in the Instant Pot)
  • Do a quick release of pressure.
  • Remove the corn from the Instant Pot and serve with butter and salt.
    If you have a lot of corn to butter and salt, drain the water out of the Instant Pot. Add a couple tablespoons of butter and pinches of kosher salt to the pot. Put the lid on and shake the corn in the Instant Pot. It will get a nice coating of butter!
    kosher salt, butter
Did you make this recipe?Connect with me and let me know by commenting below!
Jump to Comments
Serving: 1ear | Calories: 100kcal

Oven Roasted Asparagus

March 18, 2020 by Susie Weinrich 15 Comments

fresh asparagus on a roasting pan

Fun fact…Asparagus grows wild across the Midwest, and growing up in Iowa, every spring my whole family would gather at my grandparents house for an asparagus “hunting” day. Then we would have a huge feast for dinner. I have loved asparagus since I was little! As an adult I still love it, but my favorite way to cook it is in the oven for about 10-12 minutes.

Oven Roasted Asparagus on a white plate with lemon wedges

Oven roasting is the perfect method for cooking fresh asparagus. It is so easy, only requiring 3 ingredients, a sheet pan, and 10 minutes. It also leaves the spears crisp-tender, which is the perfect texture, exactly how it should be. Sprinkle a little parmesan cheese or lemon over the top and you have a stand-out side dish.

[feast_advanced_jump_to]

What You’ll Need for Cooking Asparagus in the Oven

Fresh Asparagus – Man I love asparagus!!! This recipe is only for fresh asparagus, not frozen. Look for firm, bright green spears with tight, closed tips. Make sure you trim the asparagus root end (see "how to trim" section)

Olive Oil – just a tablespoon or two to coat the spears so they roast instead of drying out. Regular or extra virgin both work, and avocado oil is a great swap.

Kosher Salt – a large pinch to season. Kosher salt has a softer, milder saltiness than table salt. A finishing sprinkle of flaky sea salt is lovely too.

Parmesan or Lemon Zest (optional) – the finishing touch which is totally optional!

Large Sheet Pan – you need enough room to spread the asparagus in a single layer. Crowd the pan and the spears will steam instead of roast, so reach for your biggest one or use two.

Tips for Trimming Asparagus

You always want to make sure you trim the woody hard stem end from your fresh asparagus. You will never be able to chew thru it and you don’t want your guests politely chewing for 10 minutes!

Hold a single spear with both hands, one hand near the thick stem end and the other just below the flowery tip. Gently bend it until it snaps. The spear naturally breaks right at the spot where the tough, woody end meets the tender part you want to eat. Toss the woody end and keep the rest.

Fresh Asparagus

Now line that piece up with the rest of the bundle, using the flower end for lining everything up. Cut the rest of the asparagus at the point where the pre trimmed piece ends. Voila- you’re left with tender, yummy asparagus, ready to cook!

How to Cook Asparagus in the Oven

Start by preheating your oven to 400ยฐF. Grab a large sheet pan that will allow your asparagus enough room to roast. If you overcrowd the pan the asparagus will steam instead of roast. Rather use 2 pans then crowd it all onto one pan.

Fresh Asparagus

Place all your trimmed asparagus on the baking sheet and drizzle with olive oil and sprinkle with kosher salt. With clean hands toss the asparagus so it is coated in the oil. Place in the pre-heated oven for 10-12 minutes.

At the end you can zest a little lemon over top or sprinkle with fresh grated parmesan.

What to Serve with Oven Roasted Asparagus

This beautiful side dish can really sit alongside almost any dinner menu. Here are some of my favorites:

  1. Grilled Filet Mignon, Oven Roasted Asparagus, and Roasted Garlic Mashed Potatoes, and Ambrosia Salad
  2. Oven Roasted Pork Tenderloin, Oven Roasted Asparagus, and Herbed Roasted Potatoes (all made in the oven, too easy!)
  3. Ham Balls, Baked Potatoes, and Roasted Asparagus
  4. Grilled Pork Burgers, Oven Roasted Asparagus, and Parmesan Fries

This recipe is also a staple on our Easter dinner menu. It just screams SPRING and adds beautiful color to the menu!

Storing and Reheating

In the fridge: Let the asparagus cool completely, then store it in an airtight container in the fridge for 3 to 4 days. Just know the spears will soften a bit as they sit.

To reheat: For the best texture, reheat in a 400ยฐF oven or the air fryer for a few minutes to bring back some of that crisp tender bite.

Using up leftovers: Cold or room temp roasted asparagus is delicious chopped into a salad, folded into an omelet or frittata, tossed with pasta, or piled into a grain bowl.

Picking wild Asparagus In Iowa

Asparagus grows wild in the Midwest especially in Iowa, where I grew up. When I was little, in the Spring, my entire family would gather at my grandparents house and we would have an asparagus hunting day.

Everyone would put on their grubby clothes, tie their hair up in bandanas and pack a pocket knife to cut down the wild spears. We would spend the afternoon trekking thru the ditches and along railroad tracks of Iowa looking for asparagus to harvest. At the end of the day we would be loaded with more asparagus than one family could possibly eat in a week!

After coming home we would do a quick tick check and then move on to preparing our feast from the afternoon spoils. My grandpa would grill farm fresh T-Bone steaks and my grandma would prepare all the asparagus you could ever want to eat. After the weekend everyone would be sent home with their own bundle of wild asparagus.

Kyle W with a stack of wild asparagus picked in Iowa

I still think about those days every time I eat asparagus… or a T-Bone steak! And I try to take my kids back to Iowa to “hunt” asparagus in the Spring! Above is a picture of Kyle with one of our hauls…

More Fresh Veggie Side dishes

  • cooked haricot verts on a plate with a pat of butter
    Haricot Vert Recipe
  • a bowl of roasted carrots garnished with parsley
    Oven Roasted Carrots
  • Roasted Broccoli in a bowl
    How to Make Roasted Broccoli in the Oven
  • ears of corn on the cob cooked and stacked with butter on top
    How To Boil Fresh Corn on the Cob
Roasted Asparagus spears on a plate

Cooking Asparagus in the Oven

Oven Roasted Asparagus is perfectly cooked fresh asparagus. By roasting the asparagus in the oven you end up with crisp tender spears. Exactly what you want! Add a little parmesan cheese or lemon zest to dress it up!!
5 from 1 vote
Print Pin Rate Save Saved!
Prep Time: 5 minutes minutes
Cook Time: 10 minutes minutes
Total Time: 17 minutes minutes
Servings: 5 people
Author: Susie Weinrich

Ingredients

  • 1 bunch fresh asparagus
  • 1 tablespoon olive oil
  • large pinch of kosher salt
  • *Optional- parmesan cheese or lemon zest

Instructions
 

Prep

  • Preheat the oven to 400โ„‰
  • Trim the hard ends from the asparagus and discard.
    Mom's Tip: An easy way to do this is grab the thicker end of the asparagus, then grab right below the flower end and bend the asparagus until it snaps. That is the exact split between the tender end and the woody end. Now line up all the asparagus and cut the same amount of woody end from the other spears.
    1 bunch fresh asparagus
  • Place the asparagus on a large sheet pan and drizzle with olive oil. Using clean hands, toss the asparagus to coat with the oil.
    1 Tbsp olive oil
  • Sprinkle with kosher salt.
    large pinch of kosher salt

Roasting

  • Bake for 10-12 minutes, shaking the pan half way thru to rotate the asparagus.
  • Remove from the oven and serve immediately.
  • Optional– sprinkle with lemon zest or parmesan cheese.

Recipe Tips and Notes:


This is a recipe for fresh asparagus – do not use frozen asparagus in this recipe.
Did you make this recipe?Connect with me and let me know by commenting below!
Jump to Comments

Pantry, Frozen & Staple Item Meal Plan and Grocery List

March 13, 2020 by Susie Weinrich Leave a Comment

pantry and staple item meal plan pin image

If there every is a situation where you have to eat strictly from your pantry and the current staples that are in your fridge – like eggs and milk – wouldn’t it be helpful to have a meal plan to make the most of your ingredients.

pantry and staple item meal plan pin image
[Read more…]

Broccoli Salad with Bacon and Raisins

March 12, 2020 by Susie Weinrich 7 Comments

broccoli bacon salad in a white bowl

This Broccoli Bacon Salad is a classic Midwest side dishes that I have been making for years… truly since I could cook in the kitchen. It's actually my dad and my mother-in-law's favorite side dish, so it almost always makes an appearance at Easter, Thanksgiving, and Christmas. It's also the kind of dish that's perfect when you want one more side but don't know what to add (goes great with BBQ).

Broccoli Bacon Salad in a bowl

It's a super old-fashioned recipe that has been handed down and shared for years. The combination of crisp raw broccoli, smoky bacon, sweet raisins, crunchy sunflower seeds, and a sweet-and-tangy dressing is simple but totally delish.

[feast_advanced_jump_to]

Broccoli Bacon Salad Ingredients

Most of the ingredients in this dish are raw, which makes it so easy!

  • Broccoli: You will want to use fresh broccoli florets. You can buy heads of broccoli or already cut florets. Just make sure to cut them down into small bite side pieces.
  • Bacon: You can cook your bacon in the oven or skillet. But a small package of fully cooked microwavable bacon is the perfect amount! I buy the Market Pantry bacon at Target, it has about 10 slices and is crispy and ready in about 1 minute in the microwave!
broccoli, onions, sunflower seeds and raisins in a bowl topped with bacon
  • Sunflower Seeds: These little seeds add a nice salty crunch to the salad.
  • Raisins: You can use raisins or dried sweetened cranberries. Both are delicious!

MOM’S TIP: soak your raisins or cranberries in a little hot water for about 5 minutes. They will plump up and be nice and juicy in your salad.

  • Red Onion: Dice the red onion so that you are not eating huge chunks of onion. Also follow the onion tip below to make sure the onion doesn’t take over your salad.

Tips for Raw Onion

You know how when you eat raw onions the flavor can stick around a lot longer than you would like? Or the onion flavor is so strong it takes over the whole dish? It doesn’t have to be that way!

One you cut the onion, but before you dice it, give it a generous rinse (or you can soak it for 5 minutes) under cool water, slightly separating the layers of the onion.

This will wash away the enzyme that keeps the onion flavor around long after you have eaten it!

3 Ingredient Dressing

To make the dressing you just need mayonnaise, sugar and apple cider vinegar. Do not sub miracle whip, it will not be the same.

You can make the dressing a day ahead. I like to use a large mason jar to mix it up and pop it right in the fridge.

How to Make Broccoli Salad with Bacon

This veggie side dish is so easy to prepare and makes the perfect fresh salad to add to any dinner.

broccoli in a bowl

Step 1

Cut the broccoli into bite size pieces.

broccoli, onions, sunflower seeds and raisins in a bowl

Step 2

Add the sunflower seeds, red onion and raisins.

broccoli, onions, sunflower seeds and raisins in a bowl topped with bacon

Step 3

Cook and crumble the bacon. Let cool and add to the bowl.

broccoli, onions, sunflower seeds and raisins in a bowl topped with bacon and mayo dressing

Step 4

Mix the dressing and pour over the broccoli mixture. Toss to combine, then let the salad sit for 15-30 minutes before serving.

To Make Ahead

I almost always make this Broccoli Bacon Salad ahead of time. It is so easy to do!

  • Prep the broccoli and place in a large bowl.
  • Measure out the sunflower seeds and place in a small container in with the broccoli. Soak the raisins or craisins in hot water for 5 minutes, drain and then pour on top of the broccoli.
  • Cut the red onion, rinse them, then dice. Put in a small container and place in the bowl with the broccoli.
  • Cover and refrigerate up to 24 hours.
  • Prepare the dressing in a separate container and refrigerate separate from the salad. I like to use a mason jar for this!

About an hour before serving cook the crispy bacon, then toss the whole salad together. Keep in the fridge until it is time to eat.

Storing

Broccoli Bacon Salad stores really well. Keep any leftovers in an airtight container in the fridge for up to 4 days.

Serve With…

  • juicy burger on a bun with mustard, ketchup, lettuce and tomato
    Perfect Grilled Burger Recipe
  • a plate of Instant Pot Country Style Ribs
    Instant Pot Country Style Ribs
  • two grilled chicken breasts
    Grilled Buttermilk Chicken Recipe
  • Shredded BBQ Beef (oven or crock pot)

Susie leaning on the kitchen counter

WATCH SUSIE ON FOOD NETWORK!

โญโญโญโญโญ

The new gameshow, 100 Cooks, premieres on Food Network June 7th, 2026 at 9est/8cst. I hope you will tune in!

broccoli bacon salad in a white bowl

Easy Recipe for Broccoli Salad with Bacon

A classic Broccoli Bacon Salad recipe that has raw broccoli, crispy bacon, sweet raisins and sunflower seeds with a sweet and tangy dressing. Makes a great side dish for any holiday or barbecue.
Can also be prepped a day ahead!
4.64 from 11 votes
Print Pin Rate Save Saved!
Prep Time: 15 minutes minutes
cooking bacon: 15 minutes minutes
Total Time: 15 minutes minutes
Servings: 8 servings
Calories: 408kcal
Author: Susie Weinrich

Ingredients

  • 4-5 cups raw, fresh broccoli - chopped into bite sized florets
  • ยฝ cup sunflower seeds
  • ยผ cup red onion - diced, See Note#1
  • ยฝ cup raisins - or dried sweetened cranberries, See Note #2
  • 8-10 slices bacon - cooked and crumbled, See Note #3

Dressing

  • 1 cup mayonnaise
  • โ…“ cup sugar
  • 1 tablespoon apple cider vinegar

Instructions
 

  • In a mixing bowl add the 1 cup mayo, โ…“ cup sugar, and 1 tablespoon apple cider vinegar. Whisk or stir together until completely smooth. Set aside.
    1 cup mayonnaise, โ…“ cup sugar, 1 Tbsp apple cider vinegar
  • In a separate large bowl combine the cut broccoli florets, raisins, sunflower seeds, diced red onion, and crumbled bacon.
    Pro Tip: soak your raisins or dried cranberries in hot water for 5 minute to plump before adding to the salad.
    4-5 cups raw, fresh broccoli, ยฝ cup raisins, ยฝ cup sunflower seeds, ยผ cup red onion, 8-10 slices bacon
    broccoli, onions, sunflower seeds and raisins in a bowl topped with bacon
  • Pour the prepared dressing over the broccoli salad and stir to coat.
    broccoli, onions, sunflower seeds and raisins in a bowl topped with bacon and mayo dressing
  • Let rest in the fridge for 20-30 minutes before serving.
    a large white bowl with a broccoli salad with bacon

TO MAKE AHEAD:

  • Prep the broccoli and place in a large bowl.
  • Measure out the sunflower seeds and place in a small container in with the broccoli. Soak the raisins or craisins in hot water for 5 minutes, drain and then pour on top of the broccoli. Cut the red onion, rinse them, then dice. Put in a small container and place in the bowl with the broccoli.
  • Cover and refrigerate up to 24 hours.
  • Prepare the dressing in a separate container and refrigerate separate from the salad. I like to use a mason jar for this!
  • About an hour before serving crisp up the bacon and add to the salad.
  • Mix everything together and let sit for 30 minutes in the fridge before serving.

Recipe Tips and Notes:

  1. RED ONION TIP: Rinse the raw red onion slices under cool water before chopping. This will rinse away the enzyme that makes raw onion flavor stick around for too long!
  2. RAISINS OR CRANBERRIES: soak your raisins or dried cranberries in hot water for 5 minutes before adding to the salad. It makes them plump and juicy.
  3. BACON: A small package of fully cooked microwavable bacon is the perfect amount for this salad! I buy the Market Pantry bacon at Target and it has about 10 slices and cooks up crispy in the microwave in about 1 minute!
Did you make this recipe?Connect with me and let me know by commenting below!
Jump to Comments
Serving: 1serving | Calories: 408kcal | Carbohydrates: 21g | Protein: 6g | Fat: 34g | Saturated Fat: 7g | Polyunsaturated Fat: 16g | Monounsaturated Fat: 10g | Trans Fat: 0.1g | Cholesterol: 26mg | Sodium: 342mg | Potassium: 331mg | Fiber: 3g | Sugar: 10g | Vitamin A: 314IU | Vitamin C: 42mg | Calcium: 35mg | Iron: 1mg

Knock-Out Bacon Jam (perfect for burgers)

March 11, 2020 by Susie Weinrich 17 Comments

What is bacon jam, you ask? Well, THIS Bacon Jam recipe is a delicious, syrupy combo of bacon, onions, raisins, brown sugar, balsamic vinegar and Worcestershire sauce. It is a great condiment for classic hamburgers, or it would be really amazing on top of these Grilled Pork Burgers! Put a huge dollop on top of your morning eggs, or pour warm bacon jam on top of some room temp cream cheese for an amazing appetizer.

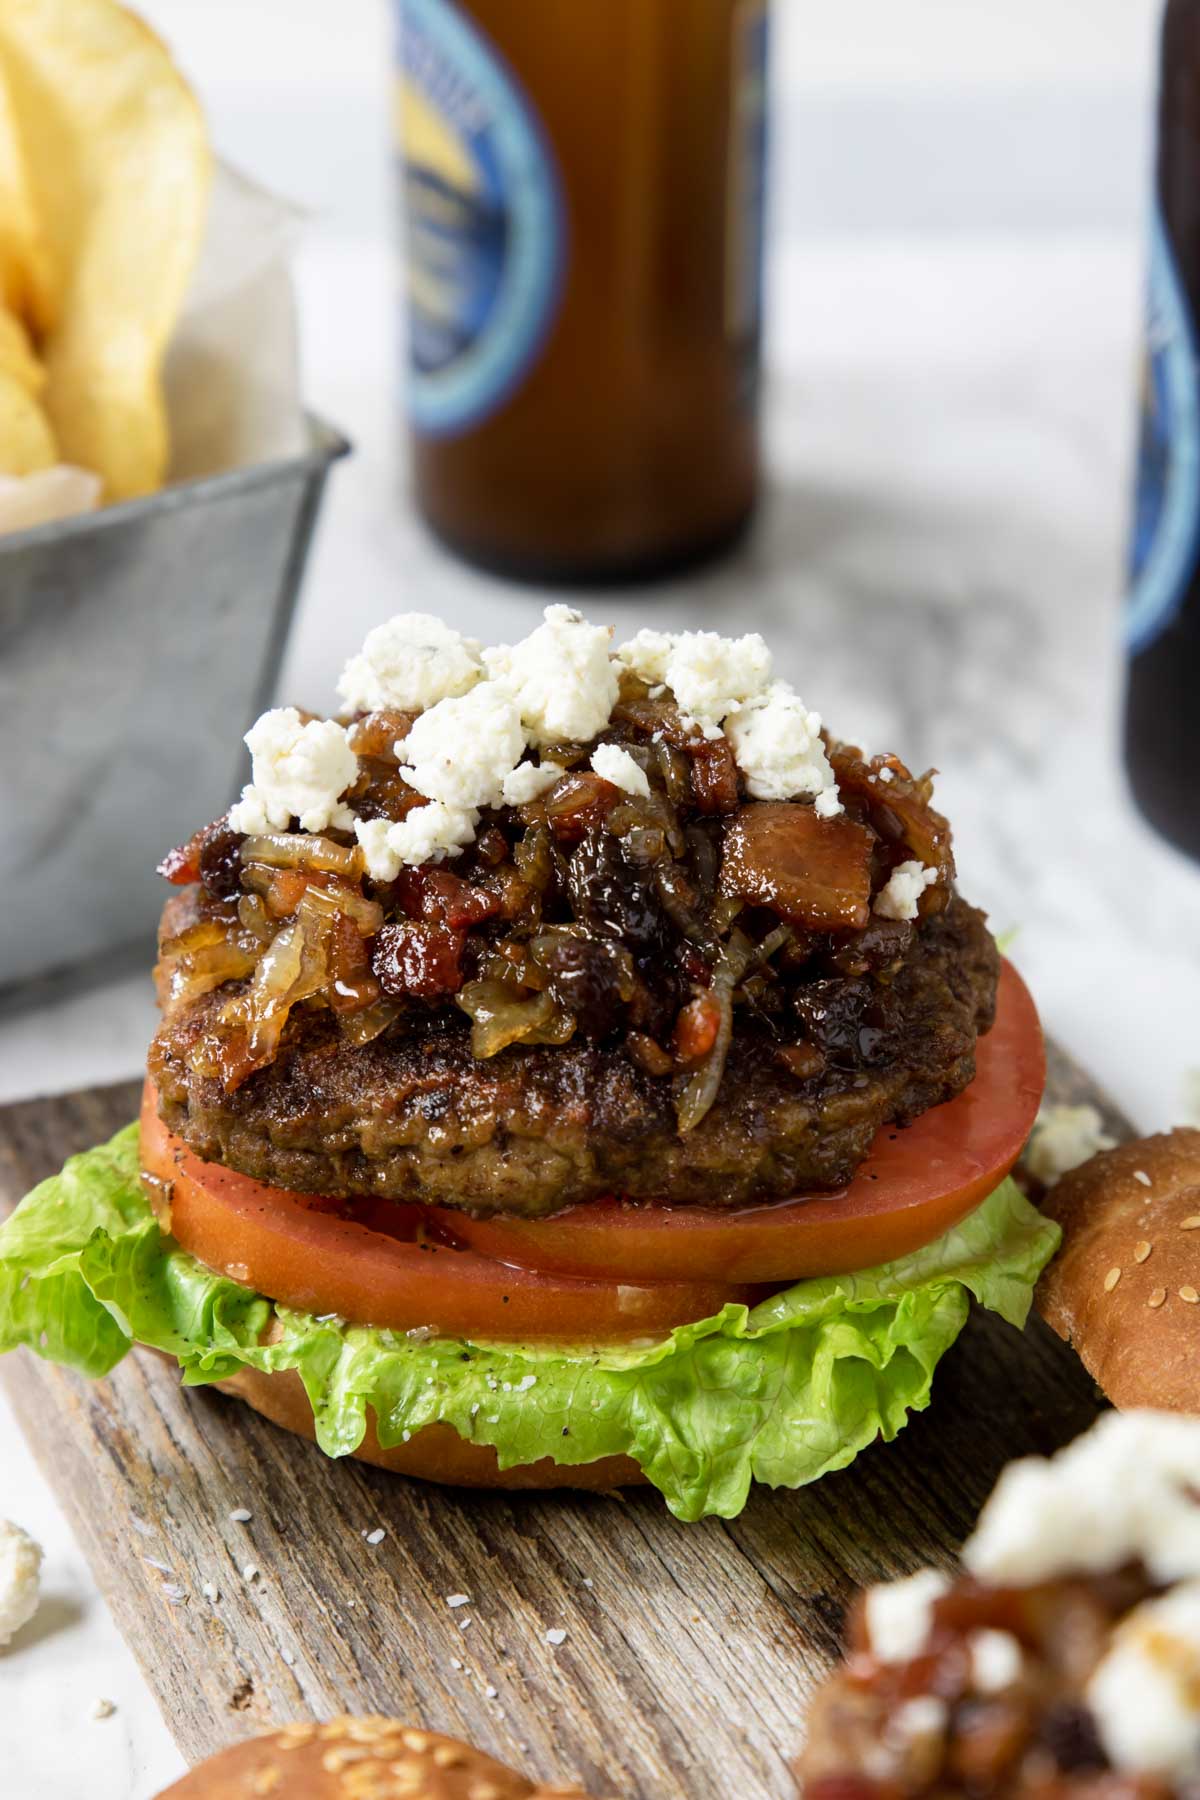
two burgers topped with bacon jam and boursin cheese and two bottles of beer in the background

This is often praised as THE BEST BACON JAM RECIPE EVER. The combination of sweet onions and smoky bacon creates a truly irresistible taste that will take your grilled burgers OVER THE TOP!

RELATED: Dill Slaw for Burgers

Is it Bacon Jam really “Jam”?

The word “jam” is a little misleading when referring to bacon jam. I don’t want you to think this recipe is going to come out like a jelly with bacon in it.

bacon jam on a wooden spoon

This Bacon Jam recipe is more of a relish with chunks of bacon and sliced onion coated in a sweet and salty syrupy glaze. Yum!

Bacon Jam Burgers

There may be a lot of ways to use bacon jam, however, eating it on top of a grilled burger is my #1 favorite way!

burger layered with lettuce, tomato, bacon jam and boursin cheese

To make this burger exactly like I make it you will need: romaine or arugula, Boursin cheese, a slicing tomato sprinkled with garlic powder, salt and pepper, warm bacon jam, and of course a great hamburger.

How to Make Bacon Jam

Start by chopping 1 pound of bacon into 1 inch chunks. Then in a large non-stick skillet, over medium heat, I cook the bacon in two batches until it is crispy.

Using a slotted spoon I dish the crispy bacon onto a paper towel lined plate.

How to cut raw bacon for bacon jam recipe
cooked bacon on a paper towel

Reserve 4 tablespoon bacon grease. Make sure to reserve the bacon grease in a heat safe bowl.

Slice 2 small yellow onions in very thin slices. Then rough chop the slices so that you do not have any long strands of onion remaining. See the photo below as a visual reference:

how to cut onions for bacon jam recipe

Next cook the onion and garlic in 4 tablespoons of reserved bacon grease, over medium low heat, until the onions are very soft and translucent, about 15-20 minutes.

Meanwhile chop through the crispy cooked bacon, so you end up with smaller bits.

Cooked bacon chopped into bite sized pieces

Add the bacon and brown sugar to the onion mixture, stirring occasionally for about 2 minutes.

Next add the raisins, Worcestershire, balsamic vinegar, and water to the bacon mixture. Simmer, stirring occasionally, for 5-8 minutes until the mixture has thickened and looks syrupy.

Storing

To store any leftover bacon jam simply place it in an airtight container and refrigerate for up to a week.

You can serve it at room temp or warmed through.

After the bacon jam has been in the fridge, some of the bacon fat will harden and turn white. When it warms to room temperature it will look and taste amazing.

Or to serve warm simply reheat in a skillet over medium low heat.

Additional Ways to Serve Bacon Jam

  • Make a great appetizer by spreading a little cream cheese on a cracker and then top with warm Bacon Jam.
  • Use as a condiment for pulled pork sandwiches or grilled chicken sandwiches.
  • Spread on a pizza crust and top with gouda, fresh mozzarella, brie, or your favorite melty cheese. Put it in the oven or place on the grill to warm thru and melt the cheese.
  • Fill mini phyllo cups with brie, bake in the oven until the cheese is melted. Top with warm Bacon Jam.
  • Top a room temp. block of cream cheese with warm Bacon Jam. Serve it with Ritz crackers for a great appetizer. Tip: Add a few sprinkles of cayenne pepper for a Spicy Bacon Jam & Cream Cheese appetizer. (see photo below)
  • Add to a charcuterie board.
charcuterie board with veggies, crackers, grapes and cream cheese with warm bacon jam

More Popular Bacon Recipes

If you are a bacon lover the other recipe you MUST try is this Shrimp Carbonara! Here are a few others to check out as well:

  • Creamy Red Potato Soup
  • Amazing Corn Chowder
  • Broccoli Bacon Salad
  • Brussels Sprouts with Bacon
  • Sub bacon for the ham in these Savory Waffles!
  • Instant Pot Coq Au Vin

Susie leaning on the kitchen counter

WATCH SUSIE ON FOOD NETWORK!

โญโญโญโญโญ

The new gameshow, 100 Cooks, premieres on Food Network June 7th, 2026 at 9est/8cst. I hope you will tune in!

Knock-Out Bacon Jam Recipe

This is one of the BEST BACON JAM recipes you will make! It is the perfect combo of salty bacon, sweet onions and garlic in a thick syrup-like mixture of bacon renderings, brown sugar, Worcestershire and Balsamic. Serve it on top of grilled burgers or a great condiment for a charcuterie board!
LISTEN TO THE FULL AUDIO RECIPE WITH THE PLAYER BELOW!
5 from 11 votes
Print Pin Rate Save Saved!
Prep Time: 10 minutes minutes
Cook Time: 30 minutes minutes
Total Time: 40 minutes minutes
Servings: 8 servings (2 Tbsp)
Calories: 369kcal
Author: Susie Weinrich

Ingredients

  • 1 lb. bacon - grease reserved after cooking (see below)
  • 2 cups yellow onion, - about 2 small onions -thinly sliced then roughly chopped
  • 2 garlic cloves - minced
  • 4 tablespoon reserved bacon grease
  • โ…“ cup brown sugar
  • 2 tablespoon raisins
  • 1 tablespoon Worcestershire
  • 3 tablespoon balsamic vinegar
  • โ…“ cup water
  • **Optional pinch cayenne pepper

Instructions
 

  • Slice the raw bacon into 1 inch chunks.
    1 lb. bacon
  • Cook the bacon in a large skillet over medium heat until crispy.
    You may need to cook this in 2 batches to get crispy bacon! With a slotted spoon remove the bacon to a paper towel lined plate to drain while cooking the second batch.
  • Reserve at least 4 tablespoon of the grease rendered from the bacon in a heat safe bowl- set aside.
    4 Tbsp reserved bacon grease
  • Slice your onions very thin and then give them a rough chop, so you do not have long strands of onion remaining. See photo for reference:
    how to cut onions for bacon jam recipe
  • In the emptied skillet add the 4 tablespoon reserved bacon grease, chopped onions and minced garlic. Sautรฉ over low heat, stirring occasionally, until the onions are very soft and translucent, about 15-20 minutes.
    2 garlic cloves, 2 cups yellow onion,
  • Give the cooled bacon a rough chop so there are no large chunks remaining.
    Add all the bacon and โ…“ cup brown sugar to the onions, stir to coat and cook for 2 minutes.
    โ…“ cup brown sugar
  • Add the 2 tablespoon raisins, 1 tablespoon Worcestershire, 3 tablespoon vinegar and โ…“ cup water to the bacon mixture. Simmer over medium low heat for 5-8 minutes, until the sauce has thickened and looks syrupy.
    2 Tbsp raisins, 1 Tbsp Worcestershire, 3 Tbsp balsamic vinegar, โ…“ cup water, **Optional pinch cayenne pepper
  • Serve immediately or store in an airtight container in the fridge for 5-7 days.

Using the Bacon Jam

  • You can serve the bacon jam at room temp or warmed through.
  • After the bacon jam has been in the fridge, some of the bacon fat will harden and turn white. Leave at room temp for about 30 minutes, stirring occasionally. When it warms to room temperature it will look and taste amazing.
    Or you can pop it in the microwave for 30 second increments until the hardened fat has melted into the bacon jam.
  • To serve warm simply reheat in a skillet over medium low heat until desired temp is reached.

Serving

  • See notes for serving ideas.

Storing

  • Your bacon jam will stay good in the fridge in an airtight container for up to a week.

Recipe Tips and Notes:

SERVING IDEAS FOR BACON JAM:
  • Ultimate Burger: Grilled Burger, lettuce, slicing tomato seasoned with salt, pepper and garlic powder, grilled burger, pile on the bacon jam, top with Boursin cheese!ย 
  • This bacon jam is also amazing piled on top of a Grilled Pork Burger!
  • Make a great appetizer by spreading a little cream cheese on a cracker and then top with warm Bacon Jam.
  • Use as a condiment for pulled pork sandwiches or grilled chicken sandwiches.
  • Spread on a pizza crust and top with gouda, fresh mozzarella, brie, or your favorite melty cheese. Put it in the oven or place on the grill to warm thru and melt the cheese.
  • Add to your favorite grilled cheese.
  • Fill mini phyllo cups with brie, bake in the oven until the cheese is melted. Top with warm Bacon Jam.
  • Top a room temp. block of cream cheese with warm Bacon Jam. Serve it with Ritz crackers for a great appetizer. Tip: Add a few sprinkles of cayenne pepper for a Spicy Bacon Jam & Cream Cheese appetizer.ย 
Did you make this recipe?Connect with me and let me know by commenting below!
Jump to Comments
Serving: 1serving | Calories: 369kcal | Carbohydrates: 18g | Protein: 8g | Fat: 30g | Saturated Fat: 10g | Polyunsaturated Fat: 4g | Monounsaturated Fat: 13g | Trans Fat: 0.1g | Cholesterol: 44mg | Sodium: 421mg | Potassium: 241mg | Fiber: 1g | Sugar: 12g | Vitamin A: 24IU | Vitamin C: 4mg | Calcium: 26mg | Iron: 1mg

Easy Egg Salad Recipe

March 9, 2020 by Susie Weinrich 4 Comments

This Easy Egg Salad Recipe starts with a foolproof way to make hard boiled eggs that are easy to peel. Those eggs get mixed with a little mayo, mustard, green onions, celery, and is finished with sugar and salt.

egg salad sandwich on a plate with veggies and chips

Egg salad is one of those simple recipes that tells you a lot about a cook. When it's good, it's really good. When it's not, it's usually because a few small details were missed. I've been making egg salad for years โ€ฆ for myself through my 20's and then later for my family. Over time I've tested every little variable and I've nailed what actually makes it taste fresh instead of flat. It's the right blend of egg to sauce, the right ratio of saltiness and tanginess with just a dash of sugar to balance. Then the addition of crunchy celery and green onions rounds everything out.

Now all you have to do is choose how you are going to eat it! On bread or a croissant, in a wrap, or on top of a salad!? Let me know in the comments what you choose.

RELATED: Chicken Salad with Grapes

[feast_advanced_jump_to]

Absolutely delicious! It's the egg salad that everyone knows and loves. Franky, it's simple and basic but this great recipe gives me all the right proportions of the ingredients….

-Phil

What You’ll Need for this Easy Egg Salad Recipe

  • Hard Boiled Eggs – Make your hard boiled eggs however you like. My favorite method is the Instant Pot 5-5-5 method – perfect every time!
  • Celery – Chop the celery into smaller pieces so they mix in nicely with the egg and green onions.
  • Green Onions – Using green onions instead of a white or yellow onion gives you a milder onion flavor and adds a bit of texture.
  • Mayo – even thought there is mayo and sugar, don't substitute miracle whip, it won't give you the same flavor.
  • Mustard – Just yellow mustard works great here, it keeps the flavors really classic.
  • Sugar – A dash of sugar will balance the acidic flavor of the mustard and mayo.
  • Kosher Salt and Pepper – Perfect seasoning for your egg salad.

How to Hard Boil Eggs for This Simple Egg Salad Recipe

Now if you have an Instant Pot, then you are in luck! Using the 5-5-5 Method for hard boiled eggs is truly foolproof. The eggs are perfectly cooked every time and the egg literally slips right out of the shell!

Hard Boiled eggs in the instant pot

Instant Pot

Follow the link above to read more about the Instant Pot 5-5-5 method, or follow these easy instructions:

  • trivet in the pot, add 1 cup of water
  • place the eggs on the trivet
  • 5 minute pressure cook on high
  • 5 minute natural release, quick release remaining pressure
  • 5 minute ice bath

Stove Top

If you do not have an Instant Pot then you can cook them the traditional way of boiling on the stove top.

  • Place 6-12 eggs in a pot and cover with water, plus an additional 1-2 inches of water above the eggs.
  • Bring the pot to a rolling boil.
  • Turn the heat off but keep the pot on the hot burner. Leave the eggs in the hot water for 10-12 minutes.
  • Drain the water and run cold water (you can add ice too) to stop the eggs from cooking.

How to Make Egg Salad

Finely chop 6 hard boiled eggs. Chop ยผ cup green onions and dice โ…“ cup celery.

hard boiled egg chopped on a cutting board

In a mixing bowl stir together the chopped eggs, ยผ cup green onions, โ…“ cup diced celery, โ…“ cup mayonnaise, 1 tablespoon yellow mustard, ยผ teaspoon salt, and ยฝ teaspoon sugar.

chopped hard boiled eggs in a bowl
easy egg salad ingredients in a bowl
egg salad all mixed together in a bowl

I recommend letting it sit for 5-10 minutes for the flavors to combine. If you can make it the day before the flavors are even better the next day, like chili!

easy egg salad recipe in a white bowl with a spoon

That’s it! That is how easy it is to make this Egg Salad!

Troubleshooting This Recipe for Egg Salad

Everyone has their own tastes when it comes to egg salad. I prefer just a classic recipe. But if you like it with a little heat, a little sweeter, or tangier, here are some ways to troubleshoot your egg salad:

To add heat: add a little horseradish, start with ยฝ teaspoon and add more until it is to your liking. Another option is to swap the yellow mustard for dijon mustard.

To add sweetness: two options here- 1. swap the mayo for miracle whip. 2. bump up the sugar to 1 tsp.

To add tang: add a splash of white vinegar, start with a ยผ teaspoon and taste and add more if needed.

Too salty: Add 2 additional chopped hard boiled eggs and another 1 tablespoon mayo and ยฝ teaspoon mustard.

Too sweet: Add a ยผ teaspoon white vinegar and 1 tablespoon mayo.

Creamier: For a saucier or creamier egg salad add 1 tablespoon mayo and ยฝ teaspoon mustard.

Easy Egg Salad Sandwiches

I have two favorite ways to eat egg salad- on a sandwich or as a dip with potato chips!

egg salad sandwich on a croissant with chips and veggies to the side

To make an egg salad sandwiches simply spoon a heap of egg salad on to your bread choice (some of my favorite egg salad sandwich breads are croissants, brioche buns, or whole grain bread). You can top it with lettuce and tomato or just eat as is!

More Egg Recipes

  • a large bowl of potato salad
    The Best Potato Salad with Eggs
  • deviled eggs on a tray
    How to Make Deviled Eggs
  • a perfectly hard cooked egg cut in half
    Instant Pot Hard Boiled Eggs with Easy to Peel Shells

Susie leaning on the kitchen counter

WATCH SUSIE ON FOOD NETWORK!

โญโญโญโญโญ

The new gameshow, 100 Cooks, premieres on Food Network June 7th, 2026 at 9est/8cst. I hope you will tune in!

Egg Salad Recipe (Easy!)

An Easy Egg Salad Recipe made with all the classic ingredients. This is the best recipe for egg salad sandwiches!
Plus two easy ways to cook your hard boiled eggs.
5 from 4 votes
Print Pin Rate Save Saved!
Prep Time: 10 minutes minutes
Cook Time: 0 minutes minutes
hard boiled eggs: 15 minutes minutes
Total Time: 25 minutes minutes
Servings: 3 large egg salad sandwiches
Author: Susie Weinrich

Ingredients

  • 6 hard boiled (large or extra large) eggs - diced
  • โ…“ cup mayonnaise
  • 1 tablespoon yellow mustard
  • โ…“ cup diced celery
  • ยผ cup finely sliced green onions
  • ยฝ teaspoon sugar
  • ยผ teaspoon kosher salt

Instructions
 

Hard Boiled Eggs

  • Instant Pot – 5-5-5 Method
    trivet in the pot, add 1 cup of water
    place the eggs on the trivet
    5 minute pressure cook on high
    5 minute natural release, quick release remaining pressure
    5 minute ice bath
  • Stove Top
    Place 6-12 eggs in a pot and cover with water, plus an additional 1-2 inches of water above the eggs.
    Bring the pot to a rolling boil.
    Turn the heat off but keep the pot on the hot burner. Leave the eggs in the hot water for 10-12 minutes.
    Drain the water and run cold water (you can add ice too) to stop the eggs from cooking.

How to Make Egg Salad

  • Place the mayonnaise, yellow mustard, salt, and sugar in a mixing bowl, stir by hand thoroughly until the mayo and mustard are completely combined.
    โ…“ cup mayonnaise , 1 tbsp yellow mustard , ยฝ tsp sugar , ยผ tsp kosher salt
  • Add in the chopped hard boiled eggs, celery and onion.
    6 hard boiled (large or extra large) eggs , โ…“ cup diced celery, ยผ cup finely sliced green onions
  • Stir so that the dressing coats all the egg, celery and onion.
  • Let sit for 5-10 minutes for the flavors to combine.
  • Serve on bread for egg salad sandwiches or as a dip with chips.

Recipe Tips and Notes:

Keep your leftover egg salad in the fridge in an airtight container for up to 4 days.ย 
Did you make this recipe?Connect with me and let me know by commenting below!
Jump to Comments

Sausage Egg and Cheese Muffins

March 3, 2020 by Susie Weinrich 34 Comments

sausage egg cups on a breakfast buffet

Sausage Egg Cups are such a great breakfast or breakfast-for-dinner. They are made with breakfast sausage, eggs, spinach, and parmesan cheese- which also makes them a great low carb breakfast option. You can make them ahead for breakfast or dinner on-the-go!

a breakfast board with sausage egg cups, fruit, yogurt and toast

If breakfast is your jam, or you love breakfast for dinner, check out these Banana Bread Muffins, Instant Pot Hard Boiled Eggs, and Spring Egg Cups!

Make Ahead Sausage Egg Cups

These egg cups are so easy to have in the fridge to rewarm for a weekday breakfast. I like to serve these alongside fresh fruit. 

sausage egg muffins on a plate with fresh fruit

This is also a very popular dinner option at our house. I can make the egg cups on the weekend and keep them in the fridge until a busy night. Then I just pop them in the oven or microwave and serve them with some fruit and probably some premade waffles (like Eggo- not ones I premade!).

These Breakfast Egg Muffins are a Perfect Breakfast for Weekend Guests!

These egg cups also make an easy breakfast to have PREpared for weekend house guests. Pair it with some fresh fruit, store bought pastries, and coffee and breakfast is already ready!

For a full version of meal planning for weekend guests, check out this post on Easy Meal Ideas for Weekend House Guests.

Ingredients

  • Breakfast Sausage – A classic breakfast sausage brings instant seasoning to these egg cups. Look for a raw breakfast-style sausage (not links) so it browns and crumbles and blends evenly through the eggs. We love Jimmy Dean bulk sausage.
  • Olive Oil – Just a little oil helps the sausage and veggies cook evenly without sticking. If your sausage is especially lean, this becomes even more important.
  • Green onions add a mild onion flavor without overpowering the eggs. Use both the white and light green parts.
  • Spinach gives these egg cups color and a little veggie boost. It wilts down dramatically, so don't be surprised by how much you start with versus how little ends up in the pan.
  • Fresh basil brings a light herby flavor that makes these egg cups so fresh tasting.
  • Eggs are the structure of the whole recipe. Whisk them well to fully combine the whites and yolks so the cups bake up tender instead of streaky.
  • Half & half makes the egg cups soft and custardy instead of spongy. This is the secret to that rich, coffee-shop style egg bite texture.
  • Freshly grated parmesan melts more smoothly.

How to Make Sausage Egg Muffins

  1. Start by preheating your oven to 350 degrees. Prep a 12 cup muffin tin with baking spray or olive oil.
  2. In a skillet over medium heat brown the ground breakfast sausage until it is cooked through and crumbled. If you have excess grease in the pan, drain that before moving on.
  3. Add the fresh spinach and onions to the pan and saute until the spinach is wilted and the onions are softened, about 5 minutes. Remove from the heat, stir in the chopped basil, and let the mixture cool for a few minutes.
crumbled breakfast sausage with spinach and basil in a skillet

4. Meanwhile in a large bowl whisk together the eggs, half and half, salt, and pepper.
5. Divide the sausage mixture evenly into your prepared muffin tin(s), filling each one half way. You will have enough for 12-24 cups, depending on how large your muffin tin(s) are.

sausage mixture in a muffin tin
showing how sausage egg cups are assembled
pouring egg mixture over sausage for sausage egg muffins

6. Pour enough egg mixture over each cup, filling it almost to the top.
7. Sprinkle each cup with a generous portion of parmesan cheese.

Egg Cups ready for the oven

8. Bake for 15-18 minutes until the cheese is bubbly and they are cooked through.
9. Let the sausage egg cups cool for about 5 minutes before removing them from the muffin tin.
10. Run a knife around the outside edge of each cup and they will lift right out of the pan!

cooked sausage egg cups in a muffin tin

Variations

Southwest-style is a great way to give these egg cups a little kick. Swap the breakfast sausage for spicy sausage or chorizo, trade the basil for fresh cilantro, and stir in some finely diced red bell pepper. Instead of parmesan, a pepper jack or cheddar-jack blend fits the flavor profile really well.

Ham and Swiss works beautifully. Use finely diced ham in place of the sausage, skip the basil, and whisk a little Dijon mustard into the eggs. Swiss or Gruyรจre melts nicely and keeps the flavor soft and savory.

Bacon Cheddar is always delish. Replace the sausage with cooked, crumbled bacon, drop the basil, and use sharp cheddar instead of parmesan. The green onions and spinach still work well, then sprinkle a little bacon on top before baking.

Italian-style spin works naturally with this recipe. Mild Italian sausage is an easy swap, and the spinach and basil can stay. A pinch of red pepper flakes adds a kick of heat, and using a mix of parmesan and mozzarella makes the cups extra melty. Finely chopped sun-dried tomatoes, patted dry, add big flavor too!

Making These Breakfast Egg Cups Kid Friendly

I know some kids can be weird about spinach, or green things in general. To make a non-green, kid-friendly version just set some sausage aside before adding the spinach to the skillet. Then you can assemble a few cups with just egg and sausage.

egg cups, fruit, yogurt and toast on a breakfast board

Now you are a breakfast hero and everyone is happy. Until you serve them strawberries when they wanted blueberries and they melt into a puddle on the floor. #momlife

How to Store Breakfast Egg Cups

Once baked, let the egg cups cool completely so steam doesn't get trapped (that's what causes soggy bottoms). Store them in an airtight container in the refrigerator for up to 4 days. If you're stacking them, slip a paper towel between layers to absorb excess moisture.

For longer storage, these freeze beautifully. Arrange the cooled egg cups on a baking sheet and freeze until solid, then transfer to a freezer bag or container. This keeps them from sticking together and makes it easy to grab just one or two at a time. They'll keep well in the freezer for about 2 months.

To reheat from the fridge, a short burst in the microwave works well, cover lightly so they heat through without drying out. From frozen, microwave straight from the freezer or let them thaw overnight in the fridge first for more even reheating.

More Breakfast Recipes To Love

  • Make Ahead Egg Casserole
  • a morning glory muffin cut open to show all the fruits, veggies and nuts
    Morning Glory Muffins
  • a perfectly hard cooked egg cut in half
    Instant Pot Hard Boiled Eggs with Easy to Peel Shells
  • cranberry orange muffins topped with a cinnamon crumble, on a black and white napkin, fresh cranberries to the side
    Cranberry Orange Muffins

Susie leaning on the kitchen counter

WATCH SUSIE ON FOOD NETWORK!

โญโญโญโญโญ

The new gameshow, 100 Cooks, premieres on Food Network June 7th, 2026 at 9est/8cst. I hope you will tune in!

sausage egg cups on a breakfast buffet

Make Ahead Sausage Egg Muffins

These Sausage Egg Cups are such a great breakfast or breakfast-for-dinner. They are made with breakfast sausage, eggs, spinach, and parmesan cheese- which also makes them a great low carb breakfast option. You can make them ahead for breakfast or dinner on-the-go!
LISTEN TO THE AUDIO RECIPE WITH THE PLAYER BELOW.
4.96 from 22 votes
Print Pin Rate Save Saved!
Prep Time: 20 minutes minutes
Cook Time: 15 minutes minutes
cooling: 5 minutes minutes
Total Time: 40 minutes minutes
Servings: 12 up to 24 egg cups
Calories: 251kcal
Author: Susie Weinrich

Equipment

  • 12 count muffin tin(s)

Ingredients

  • 16 oz ground sausage - breakfast style, like Jimmy Dean
  • 1 tablespoon oil
  • ยพ cup green onion
  • 2 cups fresh baby spinach - firmly packed
  • ยฝ cup fresh basil - chopped, loosely packed (if you do not have fresh basil you can sub 1 teaspoon dried basil)
  • 8 eggs
  • 1ยฝ cups half & half
  • 1ยผ cup parmesan cheese - fresh grated
  • ยฝ teaspoon salt
  • pepper to taste

Instructions
 

  • Preheat your oven to 350.
  • Prep your muffin tin by spraying each cup with cooking spray, or coating with oil.
  • In a large skillet add 1 tablespoon olive oil and cook the sausage until it is cooked through and crumbled. If there is excess oil drain the fat from the sausage before moving on.
    1 tbsp oil, 16 oz ground sausage
  • Add the 2 cups fresh baby spinach and ยพ cup green onion, stirring occasionally, until the spinach is wilted, about 5 minutes. Remove from the heat, add the ยฝ cup fresh basil, stir to combine. Set aside and let cool for a few minutes.
    ยพ cup green onion, 2 cups fresh baby spinach, ยฝ cup fresh basil
  • Meanwhile whisk the 8 eggs, 1 ยฝ cups half & half, ยฝ teaspoon salt, and pepper together until the eggs and milk are completely smooth.
    8 eggs, 1ยฝ cups half & half, ยฝ teaspoon salt, pepper to taste
  • **This recipe can make 12 large egg cups or up to 24 smaller egg cups, divide your filling according to how many sausage egg muffins you want.ย 
    Divide the sausage mixture evenly into the muffin cups. Pour enough egg mixture so that it is almost to the top of each cup.ย 
    Sprinkle each cup with Parmesan cheese.
    1ยผ cup parmesan cheese
  • Bake for 15-18 minutes until the cheese is bubbly and they cooked through the center. Let cool for 5 minutes before removing them from the muffin tin.
    You may need to run a knife around the edge of each muffin cup to remove them from the pan.

Recipe Tips and Notes:

12-24 Egg Cups:
This recipe can make 12 large egg cups or up to 24 smaller egg cups, divide your filling according to how many sausage egg muffins you want.ย 
ย 
To Make Ahead:
Bake the egg cups and let cool. Remove from the muffin tin and place in a 9×13 pan. Refrigerate for up to 3 days.
To reheat bake at 350 for 15 minutes, until heated through. You can also microwave the egg cups a few at a time for 30 seconds – 1 minute.
ย 
Did you make this recipe?Connect with me and let me know by commenting below!
Jump to Comments
Serving: 1egg cup | Calories: 251kcal | Carbohydrates: 3g | Protein: 14g | Fat: 20g | Saturated Fat: 8g | Polyunsaturated Fat: 2g | Monounsaturated Fat: 8g | Trans Fat: 0.1g | Cholesterol: 154mg | Sodium: 569mg | Potassium: 232mg | Fiber: 0.3g | Sugar: 2g | Vitamin A: 959IU | Vitamin C: 3mg | Calcium: 187mg | Iron: 1mg

Originally posted March 2017 – Photos & copy updated March 2020

Instant Pot Shrimp and Asparagus Risotto

March 2, 2020 by Susie Weinrich 20 Comments

Instant Pot Shrimp Risotto in a grey bowl with a black and white napkin to the side

Instant Pot Shrimp Risotto with asparagus is a creamy arborio rice recipe with flavors of white wine, lemon, and parmesan cheese all cooked in your electric pressure cooker without a watchful eye! This is a wonderful one pot dinner.

Instant Pot Shrimp Risotto with asparagus in a bowl with two glasses of white wine

If you are looking for an Instant Pot Risotto recipe without seafood or meat, check out this recipe for Instant Pot Mushroom Risotto or Instant Pot Classic Risotto!

[feast_advanced_jump_to]

What is Risotto

Risotto is any dish that is cooked with arborio rice, which is an Italian rice that is short and fat. During the cooking it releases a lot of rice starch making it a creamy rice.

Arborio rice, short grain Italian rice in a white bowl, used in risotto recipes

Normally arborio rice is a labor intensive dish to make, slowly pouring hot chicken broth or water over the rice throughout the cooking process.

In the Instant Pot the arborio rice cooks without any babysitting. Pop it all in the electric pressure cooker and let it do it’s thing!

Instant Pot Risotto Ingredients

Shrimp – Large shrimp is perfect for this recipe, see more about the shrimp below.

Arborio Rice – Is essential for risotto. Its high starch content is what creates that naturally creamy texture without heavy cream. You can read more about arborio rice above.

Lemon – the zest adds a bright citrus flavor without adding liquid. Always zest before juicing, and only take the yellow part - the white pith is bitter.

Garlic – Just enough to flavor the shrimp and risotto without overpowering. Fresh garlic makes a big difference here compared to jarred.

Shallots – Milder and slightly sweeter than onions, which keeps the risotto delicate and restaurant-style rather than heavy.

White Wine – Adds more complex flavor than just using chicken broth. Use a white wine that is not sweet. Also use something you would actually drink and you can serve it with dinner.

Did you know you can freeze white wine to use in cooking later! I like to buy the aseptic containers of white wine, like Bota Box, to keep in the freezer for up to 6 months. If you have a bottle, just transfer the wine to a freezer safe container.

Chicken Stock or Broth – Using stock instead of water is what keeps Instant Pot risotto from tasting flat.

Parmesan – Freshly shredded melts smoothly and gives the risotto depth of flavor. Pre-shredded doesn't melt nearly as well.

Half and Half – This makes the risotto creamy without tipping it into "cream sauce" territory.

Asparagus – Adds freshness, and a little snap that balances the creamy rice. Cutting it small ensures it cooks evenly and stays tender, not stringy.

Best Shrimp For Instant Pot Risotto

You can use fresh or frozen shrimp, just like in this Skillet Cajun Shrimp recipe. I recommend using a large or extra large shrimp, sized between 26/30 to 31/35. That just means that there will be between 26-35 shrimp per pound.

Trader Joe's peeled and deveined raw shrimp for cajun shrimp

If you choose to use frozen shrimp you will want to thaw it in the fridge overnight, then rinse and dry before using.

If you forgot to thaw your shrimp you can place the frozen shrimp in a bowl of warm water (not hot water!!), changing it every few minutes until it is thawed completely.

How to Make Risotto With Shrimp

This Risotto recipe has such bright and fresh flavors from the lemon, asparagus and white wine. Yet is still so comforting from the starchy rice, milk, and parmesan cheese. It’s the best of both worlds!

Instant Pot Shrimp Risotto in a bowl with an Instant Pot on the counter

It comes together easily, it just requires a few steps:

Start by marinating the shrimp by combining the shrimp, 1 tablespoon olive oil, 2 teaspoon lemon zest, 1 chopped garlic clove, ยฝ teaspoon kosher salt. Stir it all together so the lemon zest coats the shrimp then set it aside for 30 minutes to an hour.

shrimp marinating in garlic, lemon and olive oil

Once you are ready to cook, turn the Instant Pot onto saute mode and add 1 tablespoon olive oil. Saute the marinated shrimp for 3 minutes, flipping halfway through. If you are making a pound of shrimp you will want to saute them in two batches so you don’t overcrowd the pot.

Remove the shrimp from the pot and set aside.

shrimp sauteed in the Instant Pot

Now add 2 sliced shallots and 2 garlic cloves (if you need more olive oil go ahead and add 1 tbsp) and saute for about 2 minutes. Add the 1 ยฝ cups risotto and stir around the pot for an additional minute.

Deglaze the bottom of the pot by pouring in ยฝ cup white wine while it is still on saute mode. Scrape up ALL the browned bits. NOTE: this step is very important to help prevent the dreaded “burn” notice.

Pour in 3 ยฝ cups chicken stock, ยผ cup fresh lemon juice, and 1 teaspoon salt to the rice mixture.

Pop the lid on the pot and lock the pressure vent to “seal”. Set the pot to cook on pressure mode for 7 minutes. Do a 10 minute natural release, then release any additional pressure with a quick release. Don’t remove the lid until you are ready:

Before Moving On

arborio rice cooked in the instant pot

Add the ยฝ cup half & half and 1 cup shredded parmesan cheese, give the risotto a stir. Add the chopped asparagus and stir into the hot risotto. Lay the shrimp on top. Close the lid (or place just place it on top) for 5-8 minutes, to keep the heat in and soften the asparagus and finish cooking the shrimp.

marinated and sauteed shrimp on top of risotto and asparagus in the Instant Pot

Taste the risotto for additional seasoning (salt, pepper, lemon juice, or lemon zest), and serve!

Instant Pot Shrimp Risotto in a grey bowl with a black and white napkin to the side

Variations

  • Lemon Garlic Shrimp Risotto Add extra lemon zest and a little more garlic, then finish with chopped parsley or basil.
  • Spring Vegetable Shrimp Risotto Add peas, spinach, or zucchini at the end for more color and freshness.
  • Asparagus & Mushroom Shrimp Risotto Sautรฉ sliced mushrooms with the shallots for a deeper, savory base.
  • Spicy Shrimp Risotto Add red pepper flakes or a pinch of cayenne for gentle heat.

Tips For Making Risotto With Shrimp

Rinsing your Rice

All rice has a certain amount of rice starch on the outside. That is why when you are making “fluffy” white rice or basmati rice and you individual grains of cooked rice you will want to rinse any extra starch before you start the cooking process.

With a risotto dish you actually want to leave that extra starch. It contributes to the creamy texture that makes risotto SO good!

What to Serve With Shrimp and Asparagus Risotto

This shrimp risotto is really a complete meal on its own; you've got the protein, starch, and veggies all in one bowl. That said, it's especially good with some warm crusty table bread, a little olive oil for dipping, and a small bowl of assorted olives.

Storing

This Instant Pot Shrimp Risotto stores surprisingly well, which makes it great for lunch the next day. Let leftovers cool, then transfer to an airtight container and refrigerate for up to 3 days. Risotto will thicken as it sits, so when reheating, add a splash of chicken broth, water, or half & half and warm gently, stirring often, to bring back that creamy texture.

Instant Pot Shrimp Risotto in a grey bowl with a black and white napkin to the side

Instant Pot Risotto With Shrimp

Instant Pot Shrimp Risotto is arborio rice flavored with white wine, lemon, and parmesan cheese, then topped with fresh asparagus and shrimp, all cooked together in your electric pressure cooker.
4.86 from 14 votes
Print Pin Rate Save Saved!
Prep Time: 10 minutes minutes
Cook Time: 7 minutes minutes
Marinating & Natural Release: 40 minutes minutes
Total Time: 57 minutes minutes
Servings: 5 people
Author: Susie Weinrich

Equipment

  • Instant Pot or Electric Pressure Cooker

Ingredients

Shrimp

  • ยฝ-1 lb shelled, deveined, raw shrimp - somewhere between 26/30 – 31/35 in size
  • 1 tablespoon olive oil
  • 2 teaspoon lemon zest
  • 1 fresh garlic clove - chopped
  • ยฝ teaspoon kosher salt
  • โ…› tsp black pepper

Risotto

  • 1 tablespoon olive oil
  • 2 shallots - thinly sliced
  • 3 garlic cloves - chopped
  • 1 ยฝ cups uncooked arborio rice - (risotto)
  • ยฝ cup white wine - you do not want a sweet white wine. Chardonnay is a great pick for this recipe.
  • 3 ยฝ cups chicken stock or broth
  • ยผ cup lemon juice
  • 1 teaspoon kosher salt
  • 1 cup fresh shredded parmesan cheese
  • ยฝ cup half & half
  • 1 bundle fresh asparagus (about 25-30 sprigs) - woody stem removed – remaining tender asparagus cut into 1 inch pieces.

Instructions
 

Marinate & Saute the Shrimp

  • Combine the shrimp, 1 tablespoon olive oil, 2 teaspoon lemon zest, 1 chopped garlic clove, ยฝ teaspoon kosher salt – stir it all together so the lemon zest coats the shrimp. Set it aside for 30 minutes to an hour.
  • Turn the Instant Pot onto saute mode and add 1 tablespoon olive oil. Once the pot reads "hot" on the display screen pour all the shrimp into the pot and saute for 3 minutes, flipping halfway through
    Remove the shrimp from the pot and set aside.
    Note: if you are using a full pound of shrimp you will want to saute them in two batches.

Make the Instant Pot Risotto

  • Add 2 sliced shallots and 2 garlic cloves (if you need more olive oil go ahead and add 1 tbsp). Soften/saute for 2 minutes. Add the 1 ยฝ cups risotto and stir around the pot for an additional minute.
  • Pour the ยฝ cup white wine into the pot and deglaze the bottom by scraping up ALL the browned bits.
    NOTE: this step is very important to help prevent the dreaded "burn" notice.
  • Add the 3 ยฝ cups chicken stock, ยผ cup fresh lemon juice, and 1 teaspoon salt to the rice mixture.
  • Pop the lid on the pot and lock the pressure vent to "seal". Set the pot to cook on pressure mode for 7 minutes.
    Do a 10 minute natural release, then release any additional pressure with a quick release.
  • Move quickly for this step, you want to retain the heat in the pot as much as possible! Have your milk measured, parmesan grated, and asparagus cut.
    Add the ยฝ cup half & half and 1 cup shredded parmesan cheese, give the risotto a stir.
    Add the chopped asparagus and stir into the hot risotto. Lay the shrimp on top of the risotto. Close the lid (or place just place it on top) for 5-8 minutes, to keep the heat in and soften the asparagus and finish cooking the shrimp.
  • Taste the risotto for additional seasoning (salt, pepper, lemon juice, or lemon zest), and serve!

Recipe Tips and Notes:

Storing & Reheating:
Store the leftover Instant Pot Shrimp Risotto in the fridge, in an airtight container, for up to 4 days.
This dish reheats perfectly in the microwave. Simply place a portion on a microwave safe plate and heat for 1 minute, give it a stir and microwave for an additional 20-30 seconds.
ย 
Also check out this Instant Pot Mushroom Risotto recipe!
Did you make this recipe?Connect with me and let me know by commenting below!
Jump to Comments
  • « Previous Page
  • 1
  • …
  • 49
  • 50
  • 51
  • 52
  • 53
  • …
  • 65
  • Next Page »
Susie in the kitchen with an apron on getting ready to cook

Meet The Author:

Susie Weinrich is a professional recipe developer specializing in classic Midwest cooking, recently seen on Food Network's 100 Cooks. Her thoroughly tested recipes and step-by-step guides give home cooks real confidence in the kitchen.

YOU will feel like a huge success at dinner time with any of the simple recipes on Mom's Dinner! Read More

Helpful Meal Planning Resources

  • a table with white place settings and green garland
    Easy Meals for House Guests
  • a round table with a large family eating dinner
    30 Easy Meals for Large Family Vacations & Gatherings
woman owned small business certificate by Sertify

Amazing New Recipes

  • Scoop of broccoli cheese casserole coming out of a baking dish.
    Down Home Broccoli and Cheese Casserole
  • Close up of a fresh made fried pork tenderloin sandwich topped with onion rings, pickles, horseradish mayo and lettuce.
    Iowa Fried Pork Tenderloin Sandwiches
  • two kids jumping in a lake off the dock at sunset
    Dinners for a Week at the Lake House
  • Tuna Noodle Casserole in a white dish being spooned out of the baking pan
    Mom’s Tuna Noodle Casserole

Footer

^ back to top

About

  • Susie Weinrich
  • Privacy Policy
  • Accessibility Policy

Contact

  • Sign Up! for emails
  • Contact Me!
  • Join Me On YouTube

Recipes

  • Recipe By Category
  • Instant Pot Recipes
  • Dinner Recipes

Copyright ยฉ 2026 Mom's Dinner

Rate & Review This Recipe

Your vote:


A rating is required
A name is required
An email is required