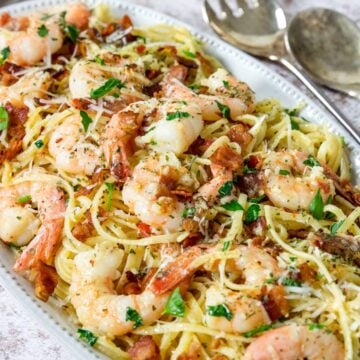
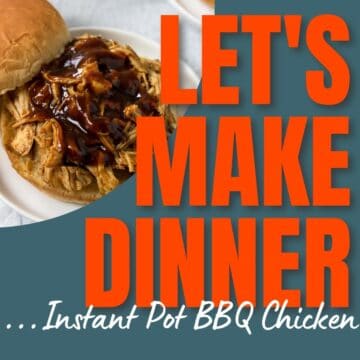
• Home
  • All Recipes
  • Instant Pot
    • All Instant Pot Recipes
    • Instant Pot Soup
    • Instant Pot Beef
    • Instant Pot Chicken
    • Instant Pot Pork
    • Instant Pot Turkey
    • Instant Pot Pasta
    • Instant Pot Vegetarian
  • Dinner
    • Beef
    • Chicken
    • Pork
    • Turkey
    • Fish & Seafood
    • Mexican
    • Pasta
    • Vegetarian
  • Subscribe
menu icon
go to homepage
  • All Recipes
  • Dinner
  • About
  • Subscribe
subscribe
search icon
Homepage link
  • All Recipes
  • Dinner
  • About
  • Subscribe
ร—
You are here: Home

Amazing Instant Pot Italian Meatballs

February 24, 2022 by Susie Weinrich 1 Comment

meatballs in a bowl with a spoon

Yes, you can make Amazing Italian Style Meatballs right in your Instant Pot! It is a quick way to get perfectly cooked homemade meatballs in under 30 minutes. No browning or sautรฉing required! Just pop the uncooked meatballs right in the sauce and cook on high pressure for 8 minutes with a 5 minute natural release.

a bowl of Italian Meatballs with spaghetti and an Instant Pot in the background

Don’t worry all the flavors of Traditional Italian Meatballs are included. Just add some spaghetti or polenta and you have an amazing family dinner that everyone will love! It will surely become a heavy contender for your dinner rotation.

Some other Instant Pot Meatball recipes to love are Instant Pot BBQ Meatballs and the Instant Pot Turkey Meatballs! Now if you just want spaghetti without the meatballs we love this Instant Pot Spaghetti using your favorite Store Bought Jar Sauce!

Why These Are The Best Instant Pot Meatballs

  • No sautรฉing onions and garlic before you make the meatballs!
  • No browning the meatballs before they cook.
  • The panade of panko, extra virgin olive oil, and milk keep your meatballs tender and juicy.
  • The RIGHT amount of panade and egg in this meatball ensures they will not fall apart under the pressure of the Instant Pot.
  • Using coarse grated parmesan makes delicious little pockets of cheese.
  • Putting down a layer of oil or non stick spray on the bottom of the Instant Pot helps reduce the chance of getting the dreaded burn notice.

Ingredient Details

Pictured below are the ingredients you need to make this Instant Pot Meatballs recipe, plus some tips on a few crucial ingredients.

Ingredients for making Italian Meatballs in your Instant Pot with text labels

Ground Beef

Since the meatballs cook right in the sauce I recommend that you use a lean beef. Something like a 90/10 or 93/7 ratio ground beef will work great. You will still have a little grease in your sauce but it will add flavor without making it greasy.

Ground Pork

We are talking ground pork here, not sausage. Ground pork is a great combo with the ground beef. It is also incredibly inexpensive.

If you find you love it, definitely try these Pork Burgers with Garlic Cream Sauce next!

Parmesan Cheese

One of the Italian secrets to great meatballs is using a coarse grated parmesan. It should look like small pea gravel. See the photo below.

coarse ground parmesan cheese

I like to achieve this by pulsing parmesan in a food processor or blender.

Panko

Panko bread crumbs are not the same as traditional or Italian breadcrumbs. They are pretty coarse and soak up the milk and olive oil like a torn bread would. It makes the perfect panade for these meatballs.

You should be able to find Panko in any grocery store (including Aldi), near the other traditional breadcrumbs.

Extra Virgin Olive Oil

Extra Virgin and Regular Olive Oil are not the same thing. Make sure you use “Extra Virgin Olive Oil”, the stronger the flavor the better! Regular Olive Oil generally does not have any flavor. Extra Virgin has a buttery, peppery flavor that adds a nice layer to your meatballs.

Garlic

I say 2-3 plump garlic cloves… but you measure that garlic with your heart! If you want 5 cloves, go for it!!

What is a Panade

Traditionally a panade is a combination of a starch and liquid, like bread or crackers mixed with milk or broth. It is used to keep ground meat recipes tender and juicy.

I use this panade method in a lot of my recipes, like these Chicken Meatballs, Next Level Swedish Meatballs, Italian Meatloaf, and Italian Meatballs.

Burn Warning

“In my own opinion” I truly think that some of the newer Instant Pots (2019 to present) have a more sensitive burn warning. My pot is a few years older (circa 2017) and I have yet to get a “burn warning”.

One feature of this recipe that will help reduce the chances of the burn notice is adding a layer of oil under the meatballs.

However if you have a very sensitive Instant Pot you might want to use the metal trivet that came with your Pot. See the notes section of the recipe below for details.

Step by Step Picture Instructions

This is a great Pro Tip for making meatballs of all kinds….

The order of things is very important when making meatballs. You will want to complete the panade and flavor base before adding the meat. That way you can do less mixing, which ensures a more tender meatball.

You can also watch me make these Instant Pot Meatballs on a 30 minute episode of Pinterest TV!

Follow these steps:

In a large bowl mix together the panko breadcrumbs, lightly beaten egg, milk, and extra virgin olive oil. This is your panade, let it rest and soak for about 5 minutes.

panade for Instant Pot Meatballs

Add in the kosher salt, black pepper, onion powder, dried basil, minced garlic, and coarsely grated parmesan. Stir to combine.

Now add the ground pork and ground beef and lightly mix everything together, either with a fork or clean hands. (I always prefer using my hands)

**SMELL the meatballs mixture at this point…I know it’s raw meat but you can tell these are going to be delicious meatballs!

Time to form the meatballs. I will usually use a cookie scoop to make sure the meatballs are somewhat uniform size.

raw meatballs in a bowl

Prep the Instant Pot by spraying the bottom of the pot with nonstick spray or pouring in a little olive oil.

Pour in half a 24 oz jar of marinara sauce. Then layer in the meatballs. Finally pour the remaining marinara sauce over the meatballs.

Use your family’s favorite store bought marinara sauce… we love Rao’s Tomato Basil.

Close the lid and set to cook for 8 minutes on high pressure, then do a 5 minute natural release. Finish by releasing remaining pressure with a quick release.

When you open the pot I recommend using a spoon and lightly moving the meatballs around. If some are stuck together lightly separate them.

Pro Tip: For serving I personally like to remove all the meatballs to a separate plate. See if there is excess grease to skim off the top of the sauce. Then give the sauce a stir. Serve the sauce over spaghetti and then top with the meatballs.

meatballs cooked in the Instant Pot with a wooden spoon stirring

Serving

Hello spaghetti and meatballs! It’s a classic. Just sprinkle on some parmesan cheese!

Here are some other ideas on ways to eat your Instant Pot Meatballs:

  1. Meatballs over creamy polenta with warm crusty bread or garlic bread.
  2. Meatball Sub Sandwich
  3. For a lower carb option serve them over zucchini noodles (or the hearts of palm noodles from Trader Joes!!)
  4. Meatball Sliders, you can make them similar to these Meatloaf Sliders.
  5. Roll the meatballs a little smaller and serve as an appetizer.
Meatballs in a bowl with parmesan sprinkled on top, Instant Pot and spaghetti in the back

Storing & Freezing

Store your leftover Meatballs in the fridge, in an airtight container, for up to 5 days.

You can absolutely pop your meatballs and sauce in the freezer too! They will keep for 3 months.

To serve the meatballs from the freezer let them thaw in the fridge overnight and then warm on the stovetop with extra sauce.

Pro Tip: Divide the meatballs and sauce out into smaller portions in freezer baggies. That way you can use them as you need, instead of using the whole recipe at once!

Other Delicious Italian Instant Pot Recipes To Try

  • a white bowl of the very best chicken alfredo that is creamy and cheesy, being twirled on a fork
    Instant Pot Creamy Chicken Alfredo
  • ragu over pappardelle pasta
    Instant Pot Beef Ragu
  • Instant Pot Shrimp Risotto in a grey bowl with a black and white napkin to the side
    Instant Pot Shrimp Risotto with Asparagus
  • Sausage Rigatoni with tomato cream sauce in a bowl with parsley and parmesan
    Instant Pot Sausage Rigatoni with Tomato Cream Sauce
  • spaghetti with red sauce in a bowl
    Instant Pot Spaghetti with Jar Sauce
  • Instant Pot Mushroom Risotto on a plate
    Creamy Instant Pot Mushroom Risotto

Susie leaning on the kitchen counter

๐Ÿ’›๐Ÿ’›๐Ÿ’›๐Ÿ’›๐Ÿ’›

Did you make this recipe?

I would love to hear your review, especially if you have tips and tricks to add! Pop down to the comment section and connect with me

Rate This Recipeโ†’
meatballs in a bowl with a spoon

Amazing Instant Pot Italian Meatball Recipe

Tender, juicy and super flavorful Italian Meatballs made right in your Instant Pot. No browning or sautรฉing required! You will have authentic Italian Meatballs in under 30 minutes!
Watch me make this Instant Pot Meatball Recipe on a 30 minute episode of Pinterest TV!
5 from 3 votes
Print Pin Rate Save Saved!
Prep Time: 10 minutes minutes
Cook Time: 8 minutes minutes
Natural Release: 5 minutes minutes
Servings: 22 Meatballs
Calories: 144kcal
Author: Susie Weinrich

Equipment

  • Instant Pot or Electric Pressure Cooker
  • Cookie Scoop (optional)

Ingredients

  • 1 lb ground beef
  • 1 lb ground pork
  • ยฝ cup panko bread crumbs
  • 2 tablespoon milk
  • 1 large egg - lightly beaten
  • 2 tablespoon extra virgin olive oil
  • ยฝ cup parmesan cheese - coarsely ground
  • 2-3 plump garlic cloves - minced (but also, use as much garlic as you like!!)
  • 1 ยฝ teaspoon dried basil
  • ยพ teaspoon onion powder
  • 1 teaspoon kosher salt
  • ยฝ teaspoon black pepper
  • 24 oz jarred marinara - (we like Rao's Marinara)
  • non stick spray - or can use oil (vegetable, canola or olive)

Serving

  • Dinner- on top of cooked pasta or creamy polenta. Also great in a meatball sub
  • For a lower carb option serve over zucchini noodles.
  • Our favorite is serving these meatballs with a 50/50 combo of spaghetti and the Trader Joe's Heart of Palm pasta.
  • Appetizer – with warm crostini

Instructions
 

Preparing The Meatballs

  • Start by combining the panko breadcrumbs, lightly beaten egg, milk and extra virgin olive oil in a small bowl. Give it all a good stir and let sit for 5 minutes to soften.
    (while it sets measure out all your seasonings, coarsely grind the parmesan and mince your garlic)
    ยฝ cup panko bread crumbs, 2 tablespoon milk, 1 large egg, 2 tablespoon extra virgin olive oil
  • Add the minced garlic, parmesan, dried basil, onion powder, kosher salt and black pepper to the breadcrumb mixture. Give it a good stir.
    ยฝ cup parmesan cheese, 2-3 plump garlic cloves, 1 ยฝ teaspoon dried basil, ยพ teaspoon onion powder, 1 teaspoon kosher salt, ยฝ teaspoon black pepper
  • Now add the ground beef and ground pork. Lightly mix everything together so it is evenly distributed.
    (I like to do this with clean hands)
    1 lb ground beef, 1 lb ground pork
  • Form the meatballs. You should have between 20-24 meatballs.
    PRO TIP: use a cookie scoop to measure out the meatball mixture. It will ensure more uniform meatballs.

Cooking in the Instant Pot

  • Prepare your Instant Pot by spraying the bottom with nonstick spray, or you can coat it with a tablespoon or two of oil.
    PRO TIP – The oil/spray will help prevent the burn warning. But if you feel you have a sensitive pot that gives you the burn warning often, see the notes below!
    non stick spray
  • Pour in half the jar of marinara sauce.
    24 oz jarred marinara
  • Layer in the meatballs and then pour the remaining sauce over top.
  • Close the lid, turn the pressure valve to "seal". Set to cook on high pressure for 8 minutes.
  • When the time is up do a 5 minute natural release, letting the pot count back up to 5. Then release the remaining pressure with a quick release.
  • Very lightly stir the meatballs breaking apart any that are stuck together.

Serving

  • I personally like to remove all the meatballs from the Instant Pot. Then I check to see if there is extra grease on top of the sauce, skim off any excess. Give the sauce a good stir.
  • Serve with cooked pasta (hello spaghetti and meatballs), over creamy polenta, or on a meatball sub.
  • Or as an appetizer serve with crostini or chunks of warm ciabatta… burrata would be great with it too!

Storing

  • These meatballs will keep perfectly in the fridge for up to 4 days.
  • You can also freeze them for up to 3 months.
    To use: thaw in the fridge overnight and then warm over medium low heat until warmed through.

Recipe Tips and Notes:

Parmesan Cheese Pro Tip – pulse parmesan cheese in a food processor or blender until it is coarsely ground, like pea gravel. This will give you nice pockets of parmesan cheese in your meatballs!ย 
Burn Warning – This is my own opinion but I truly believe that some of the newer Instant Pots have a more sensitive burn warning. If you think your pot might be a little more sensitive consider using your trivet. Spray the nonstick spray and pour in half the sauce, then use the trivet and layer the meatballs on top of the trivet.ย 
In The Oven – If you would rather make these meatballs in the oven, pop over to The Best Baked Italian Meatball Recipe!
Did you make this recipe?Connect with me and let me know by commenting below!
Jump to Comments
Serving: 1meatball | Calories: 144kcal | Carbohydrates: 3g | Protein: 9g | Fat: 11g | Saturated Fat: 4g | Polyunsaturated Fat: 1g | Monounsaturated Fat: 5g | Trans Fat: 1g | Cholesterol: 39mg | Sodium: 343mg | Potassium: 230mg | Fiber: 1g | Sugar: 1g | Vitamin A: 165IU | Vitamin C: 2mg | Calcium: 44mg | Iron: 1mg

Marinated Rosemary Pork Tenderloin

February 3, 2022 by Susie Weinrich 4 Comments

sliced pork tenderloin on a plate with herbs

Marinated Rosemary Pork Tenderloin is such a delicious dinner. Fancy enough for entertaining, but easy enough for a weeknight (plan ahead for marinating). Two Pork Tenderloins are marinated in a savory marinade and then coated in a glaze and fresh rosemary and baked to perfection. Pair it with mashed potatoes and a veggie for a spectacular dinner!

pork tenderloin cut into slices

Tenderloin is not the same thing as Pork Loin, as you will read in the next section. If you purchased a pork loin pop over to this recipe for Rosemary Pork Loin. Or check out all the pork recipes on Mom’s Dinner!

[feast_advanced_jump_to]

This Recipe is…

  • An easy recipe! The majority of the “work” is waiting for it marinate.
  • A fast cooking dinner that could be great for busy weeknights.
  • Made with simple ingredients that you probably have in your kitchen.
  • An excellent entertaining dinner recipe.
  • Full of flavor from the marinade and the glaze!

Pork Tenderloin vs. Pork Loin

A pork tenderloin and a pork loin are not the same cut of pork. They benefit from very different cooking methods and should not be substituted for each out in recipes. A loin is best cooked low and slow or braised. A tenderloin is better cooked fast with fairly high heat.

Visually a tenderloin is long and skinny and will weigh between 1-1.5 lbs. A loin looks more like a roast, about 4 inches in diameter and will have a fat cap on one side. They can come in a full loin which will be quite large around 8 lbs., or a half loin around 4 lbs..

The nice thing is that compared to cuts of beef, pork is a very economical choice of meat.

Temperatures for Pork

The days are past that you needed to cook your pork until it resembled shoe leather! The USDA has lowered it’s recommended cooking temp for whole cuts of pork to 145 degrees F.

I highly recommend using the Thermoworks ThermaPen or ThermoPop! It is the best meat thermometer for registering internal temp. It is an instant read thermometer that works quickly.

Ingredients

There are two sets of ingredients when making this Marinated Pork Tenderloin: the marinade and the glaze.

Pictured are the ingredients you will need. Besides the pork and rosemary you probably have most of these ingredients in your kitchen!

Ingredients for pork tenderloin marinade
ingredients for the glaze that goes on the pork tenderloin before baking

How To Make Marinated Pork Tenderloin

There isn’t a ton of work to be done for this recipe. Start by making the marinade.

two pork tenderloins in a marinade in a Ziploc baggie

Step 1

Place the pork tenderloins in a large Ziploc baggie, pour the marinade over the pork and pop in the fridge for 8 hours up to 24 hours.

Marinade PRO TIP: For the marinade just crush the fresh garlic cloves so the oils get into the marinade. If you mince the garlic it will stick to the pork and possibly burn in the oven

a bowl of glaze for a pork tenderloin

Step 2

In a small bowl make the glaze by combining the honey, molasses, olive oil, brown sugar, Dijon mustard, soy sauce, ground ginger and pepper.

sprinkling rosemary over two glazed pork tenderloins

Step 3

Pour the glaze over both pork tenderloins, then sprinkle on the chopped rosemary. Bake in a 375 degree oven for 30 minutes until the internal temperature is 145 degrees.

TENDERLOIN PRO TIP: pork tenderloin tends to have one very skinny end. When placing on the baking sheet tuck the skinny end under the roast so that it doesn’t overcook.

sliced pork tenderloin on a plate with herbs

Step 4

Remove from the oven and let it rest for 5 minutes before slicing.

MOM’S TIP: I highly recommend using a Thermoworks ThermaPen or ThermoPop to make sure all meat is at the correct temperature!

Serving For Dinner

After the pork tenderloin rests slice it into ยฝ-1 inch pieces, like shown below. Serve 2-3 pieces per person.

This recipe goes perfectly with mashed potatoes and a veggie:

  • Instant Pot Mashed Potatoes
  • Yukon Gold Mashed Potatoes
  • Roasted Garlic Mashed Potatoes
  • Or instead of potatoes it would be great with Stuffing!!
  • Oven Roasted Asparagus
  • Roasted Fennel

More Pork Recipes

  • a slice of Instant Pot Pork Roast on a plate with gravy and veggies
    Instant Pot Pork Roast with Vegetables & Gravy
  • pork milanese topped with a tomato relish
    Pork Milanese with Tomatoes and Garlic
  • a sliced pork loin topped with garlic and herbs
    Roasted Rosemary Pork Loin
  • grilled pork burger with lettuce, onion, tomato on a bun
    Grilled Pork Burgers with Garlic Cream Sauce

Susie leaning on the kitchen counter

๐Ÿ’›๐Ÿ’›๐Ÿ’›๐Ÿ’›๐Ÿ’›

Did you make this recipe?

I would love to hear your review, especially if you have tips and tricks to add! Pop down to the comment section and connect with me

Rate This Recipeโ†’
sliced pork tenderloin on a plate with herbs

Marinated Rosemary Pork Tenderloin Recipe

A delicious marinated pork tenderloin recipe with flavors of garlic, Dijon and rosemary. Easy enough for a weeknight, but elegant enough for entertaining!
4.34 from 3 votes
Print Pin Rate Save Saved!
Prep Time: 15 minutes minutes
Cook Time: 30 minutes minutes
Marinating: 1 day day
Total Time: 1 day day 45 minutes minutes
Servings: 6
Author: Susie Weinrich

Equipment

  • Large Ziploc Bag
  • Large rimmed baking sheet
  • Parchment paper or foil
  • Instant Read Thermometer optional

Ingredients

Marinade

  • 2 larger sized fresh pork tenderloins - – about 1.5 lbs. each. Choose two about the same size so that they cook equally.
  • ยฝ cup olive oil
  • ยผ cup red wine vinegar
  • 4 garlic cloves - crushed
  • 2 Tbsp. Dijon mustard
  • 1 Tbsp. brown sugar
  • 1 ยฝ tsp. fresh rosemary - chopped
  • 1 tsp. kosher salt
  • ยฝ tsp. pepper
  • ยผ tsp. red pepper flakes

Glaze

  • ยผ cup honey
  • ยผ cup brown sugar
  • 1 Tbsp. molasses
  • 1 Tbsp. olive oil
  • 1 Tbsp. Dijon mustard
  • 1 tsp. soy sauce
  • ยฝ tsp. pepper
  • ยผ tsp. ground ginger
  • 1 Tbsp. chopped fresh rosemary leaves
  • non-stick spray

Instructions
 

Marinade

  • In a bowl mix all the marinade ingredients together. Pour the marinade over the pork tenderloins in a Ziploc bag.
    Pro Tip: instead of chopping or mincing the garlic just crush the cloves so they release their oil into the marinade. This prevents pieces from sticking to the pork and possibly burning in the oven.
    ยฝ cup olive oil, ยผ cup red wine vinegar, 4 garlic cloves, 2 Tbsp. Dijon mustard, 1 Tbsp. brown sugar, 1 ยฝ tsp. fresh rosemary, 1 tsp. kosher salt, ยฝ tsp. pepper, ยผ tsp. red pepper flakes
    two pork tenderloins in a marinade in a Ziploc baggie
  • Keep in the fridge for 8 hours up to 24 hours.

Glaze & Baking

  • Preheat the oven to 375ยฐ. Prepare a rimmed baking sheet by lining it with parchment paper or foil, spray with non-stick spray.
  • Pull the pork tenderloin out of the marinade and pat dry. Discard the marinade
  • Place the marinated pork tenderloins on the baking sheet.
    Pro Tip: The tenderloin may have one very skinny end, tuck that under the tenderloin so it doesn't over cook.
  • In a bowl combine all the glaze ingredients together, except the rosemary.
    Pour on the tenderloins, then sprinkle on the rosemary.
    ยผ cup honey, ยผ cup brown sugar, 1 Tbsp. molasses, 1 Tbsp. olive oil, 1 Tbsp. Dijon mustard, 1 tsp. soy sauce, ยฝ tsp. pepper, ยผ tsp. ground ginger
    sprinkling rosemary over two glazed pork tenderloins
  • Bake for 30 minutes until the internal temp is 145ยฐ, do not overbake!
  • Remove from the oven and let meat rest for 5-10 minutes, then slice into ยฝ-1 inch pieces.

Serving

  • Serve 2-3 slices per person.
    sliced pork tenderloin on a plate with herbs
  • This Pork Tenderloin goes great with mashed potatoes and roasted veggies! (see notes for recipe links)

Recipe Tips and Notes:

Pork Loin – A pork loin is not the same thing as a pork tenderloin and will have different baking instructions. A tenderloin is a smaller and more tender cut of pork. For a pork loin pop over to this Rosemary Pork Loin recipe.
Excellent Side Dishes:
  • Instant Pot Mashed Potatoes
  • Yukon Gold Mashed Potatoes
  • Gravy without Drippings
  • Or instead of potatoes it would be great with Stuffing!!
  • Oven Roasted Asparagus
  • Roasted Fennel
For more pork recipes visit the Pork Category on Mom’s Dinner!
Did you make this recipe?Connect with me and let me know by commenting below!
Jump to Comments

Homemade Peppermint Hot Chocolate

January 19, 2022 by Susie Weinrich Leave a Comment

a mug of peppermint hot chocolate spilling over the edges with a candy cane on the side and whipped cream on top

Homemade Peppermint Hot Chocolate is a delicious treat perfect for a cold winter day, a snow day or the Holidays. It is a rich and creamy homemade hot chocolate with peppermint extract added. Chocolate and peppermint could not be a more classic winter flavor pairing.

homemade peppermint hot chocolate with whipped cream and candy canes

Top it off with some whipped cream or a candy cane on the side. The whole family is going to love it.

…and if you have a lot of snow outside, have the kids make this snow ice cream!!!

This Recipe Is…

  • a super rich and creamy peppermint hot chocolate.
  • perfectly balanced with flavors of chocolate, cream and peppermint.
  • easy to put together with ingredients you probably already have on hand!

Ingredients

You will find most of the ingredients you need in your baking cabinet, plus some milk from the fridge.

ingredients with text overlay for making peppermint hot cocoa
  • Whole Milk – this results in the creamiest hot chocolate without being too thick. If you prefer a non dairy milk I would stick to oat milk or cashew milk since they tend to be creamier. A lower fat milk will work too, it just won’t be a creamy.
  • Powdered Milk – powdered milk mixed with the whole milk makes for an extra creamy and rich hot chocolate! You can find powdered milk in the baking aisle at your grocery store.
  • Peppermint Extract – can be a very assertive flavor so you will want to make sure that you only use ยฝ tsp, then taste and see if you want more. I have not tested this recipe with an edible peppermint oil.
  • Cocoa Powder – you want to make sure you use an UNSWEETENED Cocoa Powder. You just want the chocolate flavor, not the extra sugar.
  • Chocolate Chips – we recommend using a semi sweet chocolate chip, it is sweet enough when combined with the powdered sugar. If you like a more bitter chocolate, try using a dark chocolate chip.

Step by Step Picture Instructions

It is pretty easy to make homemade peppermint cocoa, follow these steps:

Place a small saucepan over medium low heat, warm the 3 cups of whole milk.

While that warms through, in a medium sized bowl whisk together the powdered milk, cocoa powder, and powdered sugar.

homemade hot cocoa mix in a bowl

Slowly sprinkle the cocoa mixture into the warm milk, whisk until it is fully combined.

Stir in the ยฝ teaspoon peppermint extract.

Pour in the semi sweet chocolate chips (or dark chocolate chips) and stir until they are fully melted.

peppermint hot cocoa in a sauce pan

Remove from the heat give it a taste for more peppermint.

Serve in mugs or heat proof glasses.

Toppings

Peppermint Hot Chocolate is only made better with all the toppings. Here are some great options:

  • Whipped Cream
  • Candy Canes
  • Chocolate Syrup
  • Marshmallows
  • Marshmallow bits
  • Andes Peppermint Crunch Bits
a mug of peppermint hot chocolate spilling over the edges with a candy cane on the side and whipped cream on top

Adult Hot Chocolate

If some of the adults want a boozy version of peppermint hot cocoa add any of these liquors for a delicious twist:

  • Peppermint Schnapps
  • Kahlua
  • Peppermint Rumchata
  • Whipped Cream Vodka
  • Marshmallow Vodka
  • Chocolate Liqueur

If some adults want a warming cocktail that is not chocolate, or is dairy free, check out this Tequila Hot Toddy. It tastes like warm apple cider!

More Peppermint Recipes!

  • peppermint bark oreos in a pile with a bite taken out of two cookies
    Homemade Peppermint Bark Oreos
  • a pile of peppermint brownie brittle and some candy canes
    Crispy Peppermint Brownie Brittle
  • Copycat thin mints in a baking pan
    Copycat Thin Mint Cookies

Susie leaning on the kitchen counter

๐Ÿ’›๐Ÿ’›๐Ÿ’›๐Ÿ’›๐Ÿ’›

Did you make this recipe?

I would love to hear your review, especially if you have tips and tricks to add! Pop down to the comment section and connect with me

Rate This Recipeโ†’
a mug of peppermint hot chocolate spilling over the edges with a candy cane on the side and whipped cream on top

Homemade Peppermint Hot Chocolate Recipe

Rich and creamy hot chocolate that is flavored with peppermint. Top with whipped cream or crushed candy canes for a delicious cold weather drink!
5 from 1 vote
Print Pin Rate Save Saved!
Prep Time: 5 minutes minutes
Cook Time: 10 minutes minutes
Total Time: 15 minutes minutes
Servings: 3 cups
Calories: 599kcal
Author: Susie Weinrich

Equipment

  • Saucepan
  • whisk

Ingredients

  • 3 cups whole milk
  • ยผ cup powdered milk
  • ยผ cup unsweetened cocoa powder
  • 3 tablespoon powdered sugar
  • ยฝ teaspoon peppermint extract
  • 1 cup semisweet chocolate chips

Instructions
 

  • In a small saucepan over medium low heat, warm the 3 cups milk.
  • Meanwhile, whisk together the powdered milk, cocoa powder, and powdered sugar. Make sure all clumps are stirred out.
  • Slowly whisk the cocoa powder mixture into the warm milk until it is smooth and fully combined.
  • Stir in the ยฝ teaspoon peppermint extract.
  • Pour the chocolate chips in and stir until they are fully melted.
  • Remove from the heat and serve!
  • Top with all your favorite peppermint hot chocolate toppings: mini marshmallows, whipped cream, crushed candy canes, Andes Peppermint Crunch bits, mini candy canes…

Recipe Tips and Notes:

For the Adults: Add a little peppermint schnapps, peppermint Rumchata, or peppermint vodka for a boozy peppermint drink!ย 
Traditional Hot Cocoa: to make hot chocolate without the peppermint, pop over to this recipe for Homemade Hot Chocolate.
Did you make this recipe?Connect with me and let me know by commenting below!
Jump to Comments
Serving: 1cup | Calories: 599kcal | Carbohydrates: 59g | Protein: 16g | Fat: 35g | Saturated Fat: 20g | Polyunsaturated Fat: 1g | Monounsaturated Fat: 10g | Trans Fat: 1g | Cholesterol: 38mg | Sodium: 152mg | Potassium: 915mg | Fiber: 7g | Sugar: 46g | Vitamin A: 525IU | Vitamin C: 1mg | Calcium: 420mg | Iron: 5mg

The Best Margarita Mocktail

January 18, 2022 by Susie Weinrich 4 Comments

mock margarita in a bodega glass with salt on the rim and a lime wheel

There are a few Margarita Mocktail recipes around, but let me tell you this will be the best one you will find! This virgin margarita tastes pretty darn close the real thing (and maybe even a little better). Whether you’re participating in Dry January, you are trying to cut back on the drinks, you’re pregnant, you’re not quite 21, or you just don’t drink, this is a mocktail recipe you can enjoy ANY time!

a clear glass with a mock margarita with a salt rim and lime wheel

This Virgin Margarita is perfectly balanced with fresh citrus flavors including lime and orange, a touch of sweetness from agave, and a pinch of kosher salt. That all gets topped with some tonic water, giving it the perfect margarita tang!

When you are ready for the real thing, check out this Classic Margarita on the Rocks or any of the tequila cocktails on Mom’s Dinner!

Ingredients

Grab these 5 ingredients and shake yourself up a delicious Non Alcoholic Margarita.

Ingredients to make a virgin margarita

Fresh Juices – definitely squeeze fresh juice; lime and orange. It really makes a big difference, giving you a really fresh and tasty mocktail.

Kosher Salt – this is NOT the same as table salt or iodized salt. You will NOT want to rim your mock margarita with table salt. Kosher salt is a courser salt that has a MUCH milder and smoother saltiness.

We really recommend Diamond Crystal Kosher Salt… it is like salt snow! You will LOVE it!

Agave – adds a nice flavor that simple syrup won’t add. Some recipes call for maple syrup, but I really don’t want my margarita to taste like pancakes! Agave is the perfect option here.

I do like to use an agave that is lighter in color. It has a milder flavor.

Tonic Water – tonic water is a carbonated and lightly sweetened water that has quinine added, giving it a little bit of a bitter flavor. See the section below why this is an important addition to your Mocktail Margarita!

The Secret’s in the Tonic

A lot of nonalcoholic margaritas call for club soda. But I am telling you using Tonic Water in your Mock Margarita is the secret ingredient to getting it JUST RIGHT.

The quinine added to tonic water creates the perfect salty-bitterness that mimics a traditional margarita and tequila perfectly!

margarita mocktail on a tray

Even if you think you don’t like tonic, definitely use it in this cocktail. The bitterness of tonic is perfectly balanced by the agave and fresh juices.

How to Make a Virgin Margarita- Step by Step

Start by prepping your drinking glass with a salt rim;

  • Place kosher salt on a flat plate.
  • Run a wedge of lime around the edge of your glass.
  • Dip the rim of your glass in the salt, making sure it sticks.
  • Fill the glass with ice and set aside.
Dipping a glass rim into kosher salt

Make the Margarita Mocktail in a shaker;

  • Fill the cocktail shaker โ…“ full with ice. (you can also use a mason jar if you don’t have a shaker)
  • Measure in the lime juice, orange juice, agave syrup and pinch of kosher salt.
  • Shake vigorously for 20 seconds.
fresh lime juice being poured in a shaker
fresh orange juice being poured in a shaker
pouring agave syrup in a shaker

Assemble Your Drink;

  • Strain the Zero Proof Margarita into the prepared glass.
  • Top with 3 oz. of tonic water.
  • Garnish with a lime wheel or wedge.
straining a non alcoholic margarita into a glass
pouring tonic into a mock margarita
placing a lime wheel on a virgin margarita

More Non Alcoholic Options

  • a pitcher of Christmas Punch
    Christmas Punch (with or without alcohol)
  • lemonade in a pitcher
    Perfect Fresh Lemonade
  • Cranberry Punch in a pitcher
    Cranberry Punch
  • up close photo of a glass of watermelon juice
    Refreshing Watermelon Juice

Margaritas (with alcohol this time)

When you are ready to have a Margarita with alcohol, here are some great recipes:

  • an orange margarita in a glass with an orange wedge
    Perfect Orange Margarita
  • a glass of roasted strawberry margarita garnished with salt and berries
    Roasted Strawberry Margaritas
  • blueberry margarita cocktail in a glass with a lime wheel and fresh blueberries
    Blueberry Margarita
  • pineapple jalapeno spicy margarita in a glass with jalapenos to the side
    Pineapple Jalapeno Margarita
  • a salt rimmed glass with a classic margarita garnished with a lime
    Classic Margarita on the Rocks
  • pineapple margarita in an etched glass, garnished with a pineapple wedge
    Perfect Pineapple Margarita
  • pomegranate margarita in a tall glass with orange and arils
    Pomegranate Margarita
  • Apple Cider Margarita Cocktail in a glass with apple slice and cinnamon sitcks
    Spiced Apple Cider Margarita

Susie leaning on the kitchen counter

๐Ÿ’›๐Ÿ’›๐Ÿ’›๐Ÿ’›๐Ÿ’›

Did you make this recipe?

I would love to hear your review, especially if you have tips and tricks to add! Pop down to the comment section and connect with me

Rate This Recipeโ†’
mock margarita in a bodega glass with salt on the rim and a lime wheel

Margarita Mocktail Recipe + Video

A deliciously flavored and fresh Margarita Mocktail recipe made with fresh citrus juices, agave, kosher salt and tonic. It mimics a traditional margarita PERFECTLY!
5 from 6 votes
Print Pin Rate Save Saved!
Prep Time: 5 minutes minutes
Cook Time: 0 minutes minutes
Servings: 1 drink
Calories: 63kcal
Author: Susie Weinrich

Equipment

  • Cocktail Shaker (in a jam you can use a mason jar with a lid!)
  • 10-12 oz glass – see notes*

Ingredients

  • 2 oz fresh lime juice
  • .5 oz orange juice
  • .5 oz agave syrup - – reduce to .25 oz for a more tart drink (see notes (we like an agave that is lighter in color, it tends to have a milder flavor)
  • 3 oz tonic water - *see notes
  • healthy pinch of kosher salt - highly recommend Diamond Crystal Kosher Salt!

Garnish

  • kosher salt & lime wedges

Instructions
 

  • Pour some kosher salt on a flat plate. Wet the rim of a glass with a lime wedge or dipping it in juice or agave.
  • Dip the rim of the glass in the kosher salt, making sure it sticks. Fill the glass with ice, set aside.
  • To make the Margarita Mocktail fill a cocktail shaker ยผ full of ice. Pour in 2 oz fresh squeezed lime juice, .5 oz fresh squeezed orange juice, .5 oz agave syrup (less for a more tart mocktail), and a pinch of kosher salt.
  • Shake vigorously for about 20 seconds.
  • Strain into your prepared glass.
  • Top with 3 oz tonic water. Give it a little stir.
  • Garnish with a lime wheel or wedge.

Recipe Tips and Notes:

Tonic Water – ONE of the secrets to a really good Mock Margarita is in the tonic water! ((Believe it or not I really don’t like tonic water, but it is essential in this drink!)) So don’t sub soda water or club soda for the tonic.
The quinine added to the tonic gives the cocktail a salty andย  slightly bitter flavor that mimics a traditional margarita PERFECTLY!!!ย ย 
Favorite Glass!!! – I LOVE these 11 oz Bodega Glasses from World Market. They are a sleek design and perfect for Margaritas. You can also find something similar on Amazon, check out these Bodega Glasses.ย 
Traditional Margarita – If there comes a time that you want a Margarita with Tequila, pop over to this Margarita on the Rocks.
Did you make this recipe?Connect with me and let me know by commenting below!
Jump to Comments
Serving: 1drink | Calories: 63kcal | Carbohydrates: 12g | Protein: 1g | Fat: 1g | Polyunsaturated Fat: 1g | Monounsaturated Fat: 1g | Sodium: 2mg | Potassium: 95mg | Fiber: 1g | Sugar: 7g | Vitamin A: 57IU | Vitamin C: 24mg | Calcium: 10mg | Iron: 1mg

Homemade Lasagna

January 17, 2022 by Susie Weinrich 15 Comments

The very best lasagna recipe in a 9x13 pan

This will be the BEST Homemade Lasagna recipe you will make and your whole family will love! It is full of delicious layers of lasagna noodles, rich meaty sauce, melty cheese, and herby ricotta. Perfect classic Italian dinner!

It’s the comfort food my family requests for special occasions! The real bonus of this lasagna recipe, is that it can be made ahead or frozen for easier dinner prep.

a 9x13 pan of the best lasagna ever made

Now if you are looking for an easy lasagna recipe, then pop over to this Skillet Lasagna recipe, it is on heavy rotation at our house because it is a super easy weeknight dinner.

Another similar layered pasta dish that is a little less work than a full lasagna is a Baked Penne Pasta.

This Lasagna Recipe is…

  1. super traditional with layers of rich Italian sausage tomato sauce, herby ricotta cheese, tender lasagna noodles and creamy whole milk mozzarella cheese.
  2. such amazing comfort food, perfect for a family dinner on Sunday night!
  3. a little easier to make using oven ready noodles and high quality store-bought sauce, like Rao’s. Those two short cuts will cut your prep time in half!
  4. a great meal prep dinner recipe because it can be made up to 48 hours in advance and kept in the fridge, or 3 month ahead and kept in the freezer. You can also make it in 2 smaller 8×8 pans and keep one in the freezer for later!
  5. an EXCELLENT dinner to take to as a meal train (a meal train is a meal for someone that just had a baby, has a sick family member, or death in the family, etc..) !!

Is it Lasagna or Lasagne?

Why do we sometimes see it spelled with an “a” Lasagna and then sometimes with an “e” Lasagne? They may seem interchangeable, especially in the United States, but there actually is a difference between the two!

In Italian, lasagne with an E is the plural version, meaning many flat rectangular pasta sheets. While lasagna with an A is the singular version.

Now in the United States we adopted Lasagna with an A, and the plural version being Lasagnas, meaning the casserole-like, layered pasta dish .

Clear as mud… that’s what I thought.

Ingredients

Lasagna can be a labor of love, as in it takes a bit of time to put together and bake. Pictured are the ingredients that you need to gather, plus some pro tips on a few supplies.

Sauce

This lasagna is layered with a semi-homemade sausage sauce. Here is what you need:

ingredients to make Italian Sausage Sauce for Lasagna

Italian Sausage – there is a lot of flexibility when it comes to the sausage in this recipe. Use a bulk sausage that your family loves- sweet, mild, hot, pork, or turkey, they all work. I have even used a combination of Italian sausage mixed with ยฝ lb. of ground pork or ground beef.

Store Bought Marinara – a big time saver in this recipe is the store bought marinara. We really like using Rao’s, their Homemade Marinara and Tomato Basil Marinara are both EXCELLENT, completely worth the higher price tag!!

Optional Fennel – We LOVE fennel around here, so I like to add 1 teaspoon of fennel seed (sometimes more) to the sauce. It isn’t necessary, but if you like fennel then definitely add it.

Ricotta Filling

Ingredients for ricotta filling for lasagna

Ricotta – use a high quality whole milk ricotta for the best results in this Lasagna. It bakes up the creamiest and smoothest!

Cottage Cheese Sub. – I am from the Midwest and grew up eating lasagna with cottage cheese, so of course I still like it with cottage cheese from time to time. Subbing a 2% or 4% milk fat cottage cheese in this recipe will work just fine! If your cottage cheese looks watery, drain a little liquid before using. Actually cottage cheese tends to stay creamier in a lasagna… give it a try some time!

Egg – Don’t skip adding the egg to the ricotta (or cottage cheese), it is a binder that keeps the ricotta from spilling out of your lasagna layers.

Additional Assembly Ingredients

lasagna noodles and cheese to assemble lasagna

Lasagna Noodles – another time saver in this Homemade Lasagna are the oven ready or no-boil noodles. We highly recommend Barilla brand. It will cut your prep time in half.

Mozzarella & Parmesan– if you can find whole milk mozzarella definitely purchase that as it will melt creamier and richer. Most shredded mozzarella is low- moisture part skim, which will work, it just won’t be as creamy.

Parmesan cheese is also better when shredded fresh.

Raw Garlic Tip

Handling a lot of raw garlic, like in this Homemade Lasagna recipe, can make for stinky hands. To remove the garlic smell from your skin simply rub it on anything that is stainless steele. I usually rub my hands on the bottom of my sink and then wash my hands.

Step by Step Picture Instructions

There are 4 main steps to making Homemade Lasagna; making the Italian Sausage Tomato Sauce, putting together the Ricotta Filling, Layering, and then baking.

Italian Sausage Sauce

Start by sauteing the onion and Italian sausage in olive oil. Crumbling the sausage into smaller pieces as it cooks. Drain any excess grease.

Turn the heat to low and add the garlic, heat for 1 minute.

Finish the sauce by stirring in the sugar, black pepper, kosher salt, vinegar, Italian seasoning, (2) jars of your favorite marinara, and optional fennel seeds.

marinara sauce with italian sausage and herbs for lasagna

Simmer over low heat until it is time to assemble.

Ricotta Filling

To make the ricotta mixture simply stir together all the ingredients; whole milk ricotta, parmesan, egg, garlic clove, salt, pepper, and optional basil.

ricotta mixed with egg, herbs and cheese

Time to Assemble!

Set up an assembly area; place your 9×13 deep baking dish in the center, spray with non stick spray or grease with olive oil. Then grab the sauce, ricotta filling, lasagna noodles, shredded mozzarella and parmesan cheeses.

assembly area for lasagna with pan, sauce, noodles, cheese and ricotta

Pour approximately 1 ยฝ cups sauce into the bottom of the dish. Top with 3 noodles. Spread โ…“ of the ricotta filling over the noodles.

pouring a cup of sauce into the pan
3 lasagna noodles on top of sauce
spreading ricotta on top of lasagna noodles

Sprinkle with ยพ cup mozzarella cheese.

sprinkling cheese over the layers of lasagna

Repeat this layering process 2 more times (sauce, noodles, ricotta, mozzarella).

For the last layer finish the lasagna with 3 more noodles and spread the rest of the sauce over top, sprinkle with the remaining mozzarella cheese and the ยผ cup of grated parmesan.

a fully assembled lasagna ready for the oven

Cover tightly with aluminum foil.

Pro Tip: spray the under side of your foil with non stick spray, that way your cheese won’t bake to the foil!

Baking

Place the lasagna dish on a large rimmed baking pan. This will catch any boil overs or spills in the oven!

Bake covered with foil for 30 minutes then remove the foil and bake for another 25 minutes.

Optionally, if you like those slightly golden brown pieces of cheese you can broil for 2 minutes.

Let the baked lasagna cool for at least 15-20 minutes before cutting. It needs time to set up before slicing.

Layering Video

Watch this quick video to learn how to assemble and layer a lasagna perfectly!

Serving

Cut the lasagna into squares, 3×4 so you have 12 servings. Or for a really hungry bunch cut the lasagna into 2×4 so you have 8 larger pieces.

a table with a baked lasagna in the middle and wine, bread and salad around

Lasagna is a classic Italian dinner that goes perfectly with a Caesar salad (this is our favorite homemade Caesar dressing), or green salad with a tart vinaigrette, like this basil vinaigrette. And don’t forget the garlic bread!

How to Make Ahead

This Homemade Lasagna recipe can be made up to 2 days in advance! Which is great at the Holidays when there is a lot of meals to make!

Simply assemble completely, but do not bake. Cover the unbaked lasagna with foil and place in the fridge.

To bake: preheat the oven to 375 degrees. Bake for 40 minutes. Then remove the foil and bake for another 25 minutes.

How to Freeze

Lasagna freezes really well and so it can make for great meal prep. If you are cooking for a smaller crowd make your lasagna in two smaller 8×8 pans!

Assemble the lasagna completely but do not bake. Cover tightly with a couple layers of plastic wrap and then a layer of foil. Keep frozen for up to 3 months.

Pro Tip: Don’t forget to label and date the lasagna for food safety!

To bake your frozen lasagna, you will want to place it in the fridge overnight to slightly thaw.

Bake covered with foil at 375 degrees for 40 minutes, then remove the foil and bake for another 25 minutes.

a slice removed from the lasagna showing the inside layers

Tips for the BEST Homemade Lasagna

  1. This is a layered dish that requires space, so make sure you use a 9×13 dish that is about 2 inches deep.
  2. Use quality ingredients, like Rao’s marinara sauces, whole milk ricotta, and whole milk mozzarella.
  3. Fresh shredded cheese is always best because it melts the creamiest.
  4. Don’t skip the sugar in the sauce. It counters the acidity in the tomatoes and balances the sauce perfectly.
  5. Set the 9×13 lasagna pan on a rimmed baking sheet to catch spills in the oven.
  6. Don’t cut into your lasagna until it has cooled for at least 15-20 minutes, it needs time to set.
  7. If you are feeding a smaller group, divide the recipe into two smaller 8×8 pans and freeze one for later!

More Lasagna Recipes to Try!

  • lasagna skillet with a fork
    30 minute Easy Skillet Lasagna
  • Veggie Lasagna Recipe in an 8x8 or 9x9 pan
    The Ultimate Veggie Lasagna
  • pesto lasagna with mozzarella and pine nuts
    Sausage & Pesto Lasagna Skillet
  • a glass baking dish full of sausage lasagna roll ups topped with sauce and melted cheese.
    Sausage Lasagna Roll Ups
  • a red dutch oven full of lasagna
    One Pot Dutch Oven Lasagna
  • a red dutch oven of spinach artichoke lasagna
    Dutch Oven Spinach Artichoke Lasagna

Susie leaning on the kitchen counter

๐Ÿ’›๐Ÿ’›๐Ÿ’›๐Ÿ’›๐Ÿ’›

Did you make this recipe?

I would love to hear your review, especially if you have tips and tricks to add! Pop down to the comment section and connect with me

Rate This Recipeโ†’
The very best lasagna recipe in a 9x13 pan

Homemade Lasagna Recipe

The BEST Homemade Lasagna recipe you will make that your family will request again and again. Delicious layers of lasagna noodles, rich Italian sausage tomato sauce, herby ricotta and melty cheese bake up perfectly together. It is a great family dinner for any occasion.
Bonus, it can be made ahead and even frozen for easy dinner prep!
5 from 12 votes
Print Pin Rate Save Saved!
Prep Time: 25 minutes minutes
Cook Time: 55 minutes minutes
Cooling: 20 minutes minutes
Total Time: 1 hour hour 40 minutes minutes
Servings: 10 people
Calories: 583kcal
Author: Susie Weinrich

Equipment

  • 9×13 baking dish (deep dish – 2 inches)
  • foil
  • Large skillet
  • Large rimmed baking sheet (to catch spills in the oven!!)

Ingredients

Lasagna Sauce

  • 2 Tbsp. olive oil
  • 1 ยฝ pounds Italian sausage - * see notes
  • 1 onion chopped
  • 4 garlic cloves - minced
  • 2 - 24 oz jars good quality marinara sauce - I like Rao's Homemade Marinara
  • ยฝ tsp. pepper
  • 1 Tbsp. sugar
  • 1 ยฝ tsp. Italian seasoning
  • 1 Tbsp. vinegar
  • *Optional – 1 teaspoon fennel seeds

Lasagna Ricotta Filling

  • 1 - 15oz container whole milk ricotta
  • 1 large egg
  • 1 garlic clove - minced
  • ยพ cup parmesan cheese - shredded
  • ยพ teaspoon Kosher salt
  • ยผ teaspoon pepper
  • Optional- 2 teaspoon dried basil or ยผ cup fresh basil, chopped

Assembly

  • 12 oven ready-no boil lasagna noodles - (I highly recommend using Barilla Brand)
  • 16 oz. shredded mozzarella cheese - whole milk is best if you can find it
  • ยผ cup parmesan cheese - shredded
  • non-stick spray - or can use olive oil

Instructions
 

  • Preheat oven to 375 degrees. Grab a deep (2 inches) 9×13 pan.

Sauce

  • In a large, deep skillet heat 2 Tbsp. olive oil over medium heat. Add the sausage and chopped onion, crumble and brown the sausage. Breaking it up into small pieces. Once the sausage is cooked through, drain any excess grease.
  • Turn the heat to low. Add the minced garlic to the sausage and heat through, stirring for 1 minute.
  • Pour in the 2 jars of marinara sauce and add the pepper, sugar, Italian seasoning and vinegar (and optional fennel seed).
  • Let simmer, uncovered, over low heat while you prepare the ricotta mixture.

Ricotta Filling

  • For the ricotta mixture, combine the ricotta, egg, garlic parmesan cheese, salt, pepper and optional basil. Stir until thoroughly combined and the mixture is smooth and creamy.
  • Set aside.

Assembly & Layering

  • For assembly, spray the 9×13 inch baking dish with cooking spray.
  • Pour approximately 1 ยฝ cups sauce into the bottom of the baking dish and spread it out evenly. Arrange 3 noodles over the sauce. Place โ…“ of the ricotta filling over the noodles and spread it out as evenly as possible. Sprinkle the mixture with ยพ cup mozzarella cheese.
  • Repeat this layering process 2 more times (sauce, noodles, ricotta, mozzarella).
  • Top the final layer with 3 more lasagna noodles and pour the rest of the sauce over the noodles, spreading it out evenly and into the edges.
  • Sprinkle with the remaining mozzarella cheese and the ยผ cup of grated parmesan.

Baking

  • Spray a large piece of foil with non stick spray, then cover the baking dish tightly with the foil, sprayed side down.
    This prevents the cheese from baking to the foil.
  • Place the pan on a large rimmed baking sheet to catch any spills!!
  • Bake for 30 minutes. Remove the foil from the lasagna and bake for another 25 minutes. Finish by broiling for 2 minutes.
    The edges should be bubbling and the noodles should be tender.
  • Remove from the oven and let stand for at least 15-20 minutes before cutting and serving.

Make Ahead – up to 2 days!

  • To make this recipe ahead assemble completely, but do not bake. Cover and pop in the fridge for up to 2 days.
  • When it is time to bake, cover with foil and bake at 375ยฐ for 40 minutes. Remove the foil and bake an additional 25 minutes.

Freezing Lasagna

  • Lasagna freezes really well! Make it in a freezer safe 9×13 dish, or for smaller portions and more meals make in (2) 8×8 pans.
  • Assemble completely in a freezer safe container, but do not bake. Wrap tightly with plastic wrap and then foil.
    Pro Tip: don't forget to label and date the lasagna so you know what it is in the freezer!!
  • Place in the freezer for up to 3 months.
  • To bake, thaw in the fridge overnight. Then bake, covered with foil, at 375ยฐ for 40 minutes. Remove the foil and bake an additional 25 minutes.

Recipe Tips and Notes:

Italian Sausage- this recipe calls for 1.5 lbs. Italian Sausage. Use sweet, mild, hot, pork, or turkey, whatever you prefer! I have also used a mix of 1 lb. Sausage with ยฝ lb. ground beef or ground pork, any combo will work.ย 
Cottage Cheese Sub. – you can absolutely sub a 2% or 4% cottage cheese for the ricotta. Sub it in 1:1. If it looks watery just drain it a little before using.ย 
Did you make this recipe?Connect with me and let me know by commenting below!
Jump to Comments
Serving: 1serving | Calories: 583kcal | Carbohydrates: 31g | Protein: 29g | Fat: 38g | Saturated Fat: 16g | Polyunsaturated Fat: 4g | Monounsaturated Fat: 16g | Trans Fat: 1g | Cholesterol: 111mg | Sodium: 1127mg | Potassium: 333mg | Fiber: 2g | Sugar: 3g | Vitamin A: 424IU | Vitamin C: 3mg | Calcium: 388mg | Iron: 2mg

Morning Glory Muffins

January 12, 2022 by Susie Weinrich 17 Comments

a morning glory muffin cut open to show all the fruits, veggies and nuts

Every year as soon as November rolls around, I bake a big batch of Morning Glory Muffins. They're what I would consider a "hearty" muffin – moist, and packed with fruit, carrots, and warm spices. They make a perfect cozy breakfast treat for fall and the holidays. Of course, I always enjoy a few fresh from the oven (who can resist?), but the rest go straight into the freezer. These muffins freeze beautifully, which makes them an absolute lifesaver during the busy holiday season. When we have a rotating door of weekend guests, I simply pull them out and set them on a breakfast buffet. They're always a huge hit – everyone loves them and without fail, they ask me for the recipe!

a plate of morning glory muffins with one cut open

These muffins are similar to the reader-loved Grandma’s Carrot Cake, but in muffin form!

[feast_advanced_jump_to]

Are morning glory muffins healthy?

But, as far as baked goods or morning pastries go I would definitely say, Yes! You can feel a lot less guilty about eating Morning Glory Muffins over a donut or bagel. They are FILLED with fruit, veggies, nuts and spices.

Ingredients

These muffins have a bit of a longer ingredient list, but they all come together to make the most delicious and moist muffin you have ever had!

ingredients for morning glory muffins on table with text overlay
Ingredients shown clockwise: carrots, brown sugar, oil, all purpose flour, crushed pineapple, eggs, vanilla, ground ginger, pecans, kosher salt, baking soda, raisins, orange, and green apple.
  • Crushed Pineapple: Purchase crushed pineapple in 100% juice.
  • Green Apple: A granny smith apple works perfectly here! Use a fine or medium grater for the apple.
  • Raisins: If raisins are not your thing you can absolutely sub dried cranberries, blueberries or cherries in their place.
  • Nuts: Pecans or walnuts (or a mix of the two) work great in this recipe. Just make sure to chop them into smaller pieces.
  • Carrots: Use a fine or medium grater for the carrots. You can also use grated zucchini in place of the carrot.
  • Oil: I recommend using vegetable or canola oil. You can use olive oil, but do not use extra virgin olive oil, the flavor will be too strong.

How to Make Morning Glory Muffins

This is a pretty simple muffin to put together. The majority of the work is gathering the ingredients and grating the carrots and apples:

  1. Prep
  2. Preheat the oven to 350 and prepare a muffin tin with paper liners.

  3. Stir wet and dry ingredients
  4. In a large bowl stir together all the dry ingredients.

    In a second bowl whisk together the wet ingredients: eggs, oil, vanilla, orange zest and juice.

    Pour the wet ingredients into the dry ingredients and lightly mix.

  5. Add carrots and fruit
  6. Now grate the carrots and apple.

    Add the grated carrots, grated apple, raisins, nuts and drained crushed pineapple to the batter and gently fold in.

    morning glory muffin batter in a bowl
  7. Fill muffin cups and bake
  8. Fill each muffin cup about ยพ full. Bake for 25-24 minutes.

    Cool for about 5 minutes and then enjoy!

morning glory muffins baked in a muffin tin

These muffins are excellent for breakfast with a cup of coffee or tea! They also make a great mid-day or afterschool snack.

Morning Glory Muffins Recipe Variations

This is a very forgiving muffin recipe. Make any of these variations to suit your families taste:

Flour: use an all-purpose flour or whole wheat flour, both work great!

Carrots: grated zucchini makes a great substitution for the carrot, or use a 50/50 mix of the two.

Raisins: if raisins aren’t your jam, sub in other dried fruit like; cranberries, blueberries, cherries or chopped apricots.

Nuts: use walnuts or pecans, or a mix of the two. Pepitas, pistachios, or sunflower seeds will work too!

How to Store Morning Glory Muffins

Store your Morning Glory Muffins at room temp in a sealed container. They will be good for about 5 days. They will become more moist as the days pass.

They also freeze BEAUTIFULLY! Pop them in a freezer safe bag or container and keep frozen for up to 3 months. To thaw just place at room temp for a couple hours.

a morning glory muffin cut open to show all the fruits, veggies and nuts

I made these a month before Christmas and kept them in the freezer. Then when we had Holiday guests I pulled them out the night before and we had delicious muffins for breakfast! Everyone LOVED them! – Susie

More like these Healthy Morning Glory Muffins

  • Overnight Ham and Egg Breakfast Casserole
  • Coffee Cake Muffins
  • cranberry orange muffins topped with a cinnamon crumble, on a black and white napkin, fresh cranberries to the side
    Cranberry Orange Muffins
  • sausage egg cups on a breakfast buffet
    Sausage Egg Cups

Susie leaning on the kitchen counter

๐Ÿ’›๐Ÿ’›๐Ÿ’›๐Ÿ’›๐Ÿ’›

Did you make this recipe?

I would love to hear your review, especially if you have tips and tricks to add! Pop down to the comment section and connect with me

Rate This Recipeโ†’
a morning glory muffin cut open to show all the fruits, veggies and nuts

Apple Carrot Morning Glory Muffins (Healthy Recipe)

Super tender & moist Morning Glory Muffins are filled with wholesome ingredients like; carrots, apple, orange, pineapple, raisins, and nuts.
4.84 from 12 votes
Print Pin Rate Save Saved!
Prep Time: 20 minutes minutes
Cook Time: 25 minutes minutes
Cooling: 10 minutes minutes
Total Time: 55 minutes minutes
Servings: 24 muffins
Calories: 209kcal
Author: Susie Weinrich

Equipment

  • 12 cup muffin tin
  • Paper Muffin Liners
  • box grater

Ingredients

  • 2 cups all purpose flour
  • 1 ยผ cups brown sugar
  • 2 teaspoon baking soda
  • 1 tsp kosher salt
  • 2 tsp cinnamon
  • ยฝ teaspoon ground ginger
  • 3 eggs
  • 1 cup vegetable oil
  • 1 teaspoon vanilla
  • 1 large fresh orange - (you will need 1 teaspoon zest and the juice, which will be approx ยผ-1/3 cup)
  • 2 cups peeled and grated carrots
  • 1 tart apple peeled, cored and grated - Granny Smith works great
  • ยพ cup raisins
  • ยฝ cup pecans or walnuts - chopped
  • (1) 8 oz can crushed pineapple in juice - drained well

Instructions
 

  • Preheat the oven to 350ยฐ, prep a muffin tin with paper muffin cups.
  • In a large bowl stir together the dry ingredients: flour, sugar, baking soda, salt, cinnamon and ginger.
    2 cups all purpose flour, 1 ยผ cups brown sugar, 2 teaspoon baking soda, 1 teaspoon kosher salt, 2 teaspoon cinnamon, ยฝ teaspoon ground ginger
  • In a separate bowl whisk together the wet ingredients: eggs, oil, vanilla, orange zest and orange juice.
    (you should have ยผ-1/3 cup fresh squeezed orange juice)
    3 eggs, 1 cup vegetable oil, 1 teaspoon vanilla, 1 large fresh orange
  • Add the wet mixture to the dry mixture and stir just until it is blended, only about 5-6 stirs. Don't overmix at this point.
  • Grate the apple and carrots.
  • Add in the grated carrot, apple, raisins, nuts and drained crushed pineapple. Fold everything in, just until combined. Don't overmix.
    2 cups peeled and grated carrots, 1 tart apple peeled, cored and grated, ยพ cup raisins, ยฝ cup pecans or walnuts, (1) 8 oz can crushed pineapple in juice
  • Scoop the mixture into the prepared muffin tin, filling each cup about ยพ full.
  • Bake for 25-27 minutes until they are golden and baked through.
    Insert a toothpick into the center and if it comes out clean without batter, they are done.

Storing

  • Store your muffins at room temp, in a covered container, for up to 5 days.

Freezing

  • These muffins freeze really well! Place them in a freezer safe container and keep frozen for up to 3 months.
  • To thaw place a room temperature for a couple hours.

Recipe Tips and Notes:

If you love these muffins, you will LOVE My Grandma’s Carrot Cake Recipe!ย 
Did you make this recipe?Connect with me and let me know by commenting below!
Jump to Comments
Serving: 1muffin | Calories: 209kcal | Carbohydrates: 26g | Protein: 2g | Fat: 11g | Saturated Fat: 2g | Polyunsaturated Fat: 6g | Monounsaturated Fat: 3g | Trans Fat: 0.1g | Cholesterol: 20mg | Sodium: 208mg | Potassium: 134mg | Fiber: 1g | Sugar: 13g | Vitamin A: 1830IU | Vitamin C: 4mg | Calcium: 25mg | Iron: 1mg

Instant Pot Beef and Noodles

January 10, 2022 by Susie Weinrich 11 Comments

Instant Pot Beef and Noodles Recipe in a bowl with a salad to the side

Instant Pot Beef and Noodles is a traditional, comforting and hearty family dinner recipe that has been updated to use in your electric pressure cooker (Instant Pot). This recipe is a perfect balance of tender beef pieces and hearty egg noodles coated in a rich gravy. If you are craving comfort food, this Beef and Noodles recipe will be your new go-to!

a bowl of beef and noodles being held above a table

If you would rather make this with chicken, pop over to this recipe for Creamy Chicken and Noodles.

Some other favorite Instant Pot Beef Recipes are Beef and Barley Stew, Red Beans & Rice, or Instant Pot Beef Pot Roast.

When I first made this I said “we will never not be eating beef and noodles!”, it’s that good, it’s one of my favorite Instant Pot recipes!

-Susie

Why It’s SO Good

  1. It is made with really simple ingredients that can be found at ANY grocery store.
  2. The recipe calls for those THICK frozen egg noodles, just like this recipe for Homemade Chicken Noodle Soup. I use Reames brand Egg Noodles
  3. Campbell’s condensed French Onion Soup also adds incredible flavor!!
  4. No “cream-of” soups used here!
  5. With beef prices on the rise it is nice to have a delicious recipe that uses a cheaper cut, like stew meat.

It’s Not Stroganoff

If you are looking for a beef stroganoff recipe , this is not it.

This is definitely a traditional Beef and Noodles recipe. Stroganoff generally has a dairy component and can include mushrooms and sometimes peas. A classic Beef and Noodles recipe is made with a broth gravy.

Ingredients

Like I said before, only simple ingredients goes into this Instant Pot Beef and Noodles recipe. Pictured are the ingredients that you need, plus some tips on a few ingredients:

Ingredients for Beef and Noodles in the Instant Pot

Stew Meat – beef stew meat is a cheaper cut of beef that does well with a long cooking time. In this case we are using high heat and pressure to help tenderize it quickly.

Beef Base – I love using beef base (or chicken base) in any brothy recipe. It adds a deeper layer of flavor. “Base” comes in a paste form, usually in a tub or jar. It will be near the bouillon in the soup aisle. I like to use Better Than Bouillon Brand.

Condensed French Onion Soup – this is the heavy lifter in this beef and noodles recipe. A LOT of the flavor comes from this can of condensed soup. We like Campbell’s brand. Don’t try to sub just beef broth, it will not be the same!

Egg Noodles – We are not talking about dry egg noodles here… we are talking thick and hearty frozen egg noodles. They are not the same, not even comparable! If you have never used frozen egg noodles, it’s time to start. You will NOT be disappointed. We like to use Reames brand.

Step by Step Picture Instructions

  1. Brown The Beef Pieces
  2. Start with your Instant Pot on high sautรฉ function, add the butter and olive oil.

    To get to “high” mode, tap the sautรฉ button and you will see it scroll through the different settings on the display screen. tap the button until it reads “high”.

    Make sure your stew meat is cut roughly into 1 inch pieces, season with garlic powder, onion powder and pepper.

    Brown the beef in two batches to not over crowd the pot, removing each batch of seared beef to a separate plate.

  3. Deglaze The Instant Pot
  4. In the now empty, hot pot pour ยฝ cup of the beef broth and use a wooden spoon to deglaze the bottom of the pot, scraping up all the browned bits.

    Complete the deglazing thoroughly. It will help reduce the chance of getting the burn warning.

    Turn the sautรฉ mode off. Add the beef and all juices back to the bot. Stir in the Worcestershire sauce, beef base and remaining beef broth, French onion soup and water to the pot.

  5. Pressure Cook
  6. Set the Instant Pot to cook on high pressure for 22 minutes. Do a 10 minute natural pressure release, then quick release the remaining pressure. While the beef is cooking, set the noodles out at room temp.

  7. Simmer The Egg Noodles With The Beef
  8. Open the lid and turn the instant pot back onto low/less sautรฉ mode.

    Press the sautรฉ button until it reads less or low in the display screen.

    Add the egg noodles to the pot and simmer for 15-20 minutes, stirring often, until the noodles are soft.

    The starch from the noodles will thicken the sauce perfectly!

    Instant Pot with beef and noodles
  9. Time To Eat

Serving Beef and Noodles

I like to serve Instant Pot Beef and Noodles just as is, with a side of crusty bread and maybe a side salad.

beef and noodles cooked in the instant Pot

You can also serve it on spooned over top of mashed potatoes! If you choose this route, any of these mashed potato recipes would be GREAT:

  • mashed potatoes in a bowl
    Best Instant Pot Mashed Potatoes
  • A large serving bowl of Yukon Gold Mashed Potatoes topped with melting butter
    The BEST Yukon Gold Mashed Potatoes
  • Red Skin Mashed Potatoes in a bowl with a spoon to the side
    Amazing Red Skin Mashed Potatoes
  • a large bowl of roasted garlic mashed potatoes topped with butter
    Outrageous Roasted Garlic Mashed Potatoes

Storing

Store any leftovers in the fridge in a sealed container for up to 4 days. It will thicken quite a bit in the fridge. You may need to add some broth or water to reconstitute when reheating.

a large bowl of beef and noodles garnished with parsley

Instant Pot Beef and Noodles Sauce Troubleshooting

  • Sauce too thick? Add some water or broth until it is the consistency you want.
  • Sauce too thin? Make a cornstarch slurry; mix together 1 tablespoon cornstarch with 1 tablespoon cool water, drizzle into the simmering sauce, it should thicken within 30 seconds.

More Delicious Comfort Food Dinner Recipes!

  • Ground Turkey Shepherd's Pie in a cast iron skillet
    Ground Turkey Shepherd’s Pie
  • a large bowl filled with mashed potatoes topped with Swedish Meatballs
    Recipe for Swedish Meatballs
  • turkey pot pie with a slice taken out
    Homemade Turkey Pot Pie
  • a bowl of chicken and dumplings with a dumpling split open
    Creamy Chicken Stew and Dumplings
Instant Pot Beef and Noodles Recipe in a bowl with a salad to the side

Instant Pot Beef and Noodles Recipe

A delicious family dinner recipe that you will make again and again. Tender beef pieces and thick egg noodles are coated in a rich and savory gravy, all cooked in your Instant Pot or Electric Pressure Cooker.
4.75 from 12 votes
Print Pin Rate Save Saved!
Prep Time: 20 minutes minutes
Cook Time: 50 minutes minutes
Pressure and Release Time: 15 minutes minutes
Total Time: 1 hour hour 25 minutes minutes
Servings: 6 people
Calories: 305kcal
Author: Susie Weinrich

Equipment

  • Instant Pot or Electric Pressure Cooker

Ingredients

  • 2 tablespoon olive oil
  • 2 tablespoon butter
  • 2 lbs beef stew meat - cubed
  • 2 teaspoon garlic powder
  • 1 tsp onion powder
  • ยฝ teaspoon black pepper
  • 2 teaspoon beef base - (I use Better Than Bouillon)
  • 1 tablespoon Worcestershire Sauce
  • (2) 14.5 oz cans beef broth
  • (1) 10.5 oz can condensed French Onion Soup - (I use Campbell's)
  • 1 cup water
  • (1) 24 oz bag frozen egg noodles - (I use Reames)

Instructions
 

  • Start by turning your Instant Pot on to high sautรฉ mode and let it heat up.
    Pro Tip: To get to "high" mode, tap the sautรฉ button and watch it scroll through the settings on the display screen, tap until it gets to high.
  • Meanwhile season the beef pieces with the garlic powder, onion powder and pepper.
    2 lbs beef stew meat, 2 teaspoon garlic powder, 1 teaspoon onion powder, ยฝ teaspoon black pepper
  • Add the butter and olive oil to the Instant Pot.
    Once the butter melts, add half the seasoned beef to the pot and sear/brown the meat. Remove to a separate plate and then brown the other half and then remove to the plate.
    2 tablespoon butter, 2 tablespoon olive oil
  • In the now empty pot pour ยฝ cup beef broth and completely deglaze the bottom of the pot with a wooden spoon, scraping up all the browned bits.
    Pro Tip: Deglazing the pot thoroughly will reduce the chance of getting the burn notice.
    (2) 14.5 oz cans beef broth
  • Turn the sautรฉ mode off.
  • Now add the browned beef and all juices back to the pot, along with the Worcestershire sauce, beef base, remaining beef broth, French onion soup and water. Give everything a good stir.
    2 teaspoon beef base, 1 tablespoon Worcestershire Sauce, (1) 10.5 oz can condensed French Onion Soup, 1 cup water
  • Pop the lid on the pot and lock in place, turn the pressure vent to seal. Set the pot to cook on manual pressure, high, for 22 minutes.
  • Do a 10 minute natural pressure release, and then release the remaining pressure with a quick release.
    **don't be alarmed that the broth is not thick… adding the egg noodles in the next steps will thicken it up perfectly!
  • Turn the Instant Pot on to low sautรฉ mode.
    Pro Tip: To get to "low" mode, tap the sautรฉ button and watch it scroll through the settings on the display screen, tap until it gets to low.
  • Add the egg noodles to the pot and simmer for 15-20 minutes, stirring often, until they are al dente.
    (1) 24 oz bag frozen egg noodles
  • Turn off the sautรฉ mode and let the pot cool for 5-10 minutes, the sauce will thicken even more as it cools.
  • After the pot has cooled, if you still want your gravy thicker turn the sautรฉ function back on, mix together 1 tablespoon cornstarch with 1 tablespoon cool water and pour it into the beef and noodles while it simmers. It will thicken within 1 minute. Repeat if necessary.

Serving

  • Serve right away, optionally garnish with parsley.
  • This beef and noodle dish is great served as is with crusty bread and a side salad.
    Some will also serve this spooned over mashed potatoes.

Storing

  • Store leftovers in the fridge in a sealed container for up to 4 days.
  • It will thicken in the fridge, you may need to add some broth or water when reheating.

Recipe Tips and Notes:

Some like to serve Beef and Noodles spooned over mashed potatoes. Here are some EXCELLENT mashed potato recipes to use!ย 
  • Yukon Gold Mashed Potatoesย 
  • Instant Pot Mashed Potatoes
To make a similar recipe with chicken, pop over to this recipe for Creamy Chicken & Noodles.
Did you make this recipe?Connect with me and let me know by commenting below!
Jump to Comments
Serving: 1serving | Calories: 305kcal | Carbohydrates: 2g | Protein: 36g | Fat: 16g | Saturated Fat: 6g | Polyunsaturated Fat: 1g | Monounsaturated Fat: 8g | Trans Fat: 1g | Cholesterol: 104mg | Sodium: 849mg | Potassium: 639mg | Fiber: 1g | Sugar: 1g | Vitamin A: 120IU | Vitamin C: 1mg | Calcium: 46mg | Iron: 4mg

Chocolate Christmas Trifle

December 15, 2021 by Susie Weinrich 8 Comments

Layered chocolate and peppermint trifle with a candy cane on the side

I hosted Christmas for my entire family a few years ago and let me tell you, my family is DESSERT-CENTRIC!!! We love a good dessert, especially during the holidays when you can indulge completely guilt free. I needed a dessert that would impress in both presentation and flavor – these Christmas Trifles knocked it out of the park! There were gasps upon entering the dining room and plenty of mmmm's and aaaahhh's upon eating. If you need a stand out dessert this Holiday Season, you cannot go wrong with these Chocolate Christmas Trifles.

an individual chocolate trifle with layers of brownie, fudge, peppermint whipped cream and candy cane

These individual trifles have layers of chocolate brownies, fudge, peppermint cream cheese and Andes Peppermint Crunch Candies to top it off. Unlike this Thanksgiving Trifle, which is made in one large bowl, this dessert is made into individual trifle glasses. It is an incredibly easy trifle recipe and makes a super impressive Christmas dessert.

What is a Christmas Trifle?

A trifle is a traditional English layered dessert. It generally has multiple cake layers, pudding or custard layers and fruit layers.

You can see a great example of a one bowl trifle with this Thanksgiving Pumpkin Trifle.

This Trifle recipe for Christmas is a little different. Here we are subbing some of the traditional layers for more festive flavors: brownies, fudge, peppermint whipped cream and peppermint crunch.

This is a rich and indulgent dessert, perfect for the season!!

Holiday Trifle Ingredients

Here are the ingredients that you need to make your Peppermint Christmas Trifle, plus some tips on a few ingredients:

Ingredients to make a Christmas Trifle
  • Brownies: use the brownies that you like…fudgy, dark chocolate, triple chocolate, etc… Also, if you want to use store bought prepared brownies, go for it!!
  • Cream Cheese: purchase full fat cream cheese, and make sure that it is completely softened so your whipped cream is smooth.
  • Heavy Cream: make sure your cream is nice and cold, it helps your whipping cream come together faster and creamier!
  • Fudge: use a store bought fudge, we really like Mrs. Richardson’s. Or if you want to go the extra mile you can make Homemade Hot Fudge Sauce.
  • Andes Peppermint Crunch Baking Chips: If you have decided to make this dessert, then run out and buy this asap. It sells out quickly at the holidays. It is basically peppermint white chocolate pieces that have just a sparkle of crunchy candy cane bits. You will find this either in the baking aisle or by the Holiday candy.

If you cannot find the Andes Peppermint Crunch Baking Chips you can sub some of these options:

  1. Wilton candy melts- candy cane flavor
  2. white chocolate and candy canes chopped/crushed together
  3. chopped up Andes Peppermint Crunch Thins

Individual Trifle Cups

Unlike a traditional Trifle Dish, this dessert is made in individual cups. Since it is such a rich dessert you can make them in a 6-8 oz. cup or if you really love dessert make them in larger 9-11 oz. cup (but I don’t recommend filling it all the way).

The glasses pictured are 11 oz. cups that I did not fill all the way. I got them at World Market, they are the Small Bodega Glass.

How to Make Chocolate Trifle

If you are not buying premade brownies, start by making your brownies in a 9×9 or 8×8 cake pan. Then cool completely.

Cut the brownies into ยฝ inch pieces and set aside.

Now it’s time to make the peppermint whipped cream!

Start by adding a ยผ cup of the cold heavy cream and the 4 oz. softened cream cheese to a mixing bowl of a stand mixer with a whisk attachment. Whisk together for at least one minute until it is completely smooth.

Add in the peppermint extract and powdered sugar and whisk until combined, then gradually pour in the remaining heavy cream and whisk until it forms soft peaks. It will be the consistency of thick pudding.

peppermint whipped cream in a bowl

Warm the fudge in the microwave until it is drizzling consistency.

That’s it…it’s time to layer your trifles! In each glass layer:

  • 3-4 pieces of brownie
  • 1-2 tablespoon fudge sauce
  • cover with a layer of peppermint whipped cream
  • now a generous layer of the Andes Peppermint Crunch Baking Chips
  • Repeat all the steps one more time.
brownies in the bottom of a cup
fudge being drizzled on brownies in a cup
peppermint whipped cream on top of brownies and fudge
drizzling peppermint crunch on top of whipped cream

Pop the individual trifles in the fridge for 12-24 hours.

Serve them cold, right out of the fridge.

Christmas Trifle Recipe Variations

There are a lot of ways to customize these Chocolate Christmas Trifles to suit your holiday table. Here are some different ideas:

  • Use a flavored brownie – fudge brownie, double chocolate, chocolate chunk, dark chocolate.
  • Skip the peppermint in the whipped cream, use caramel instead of fudge, and crumble heath candy bars over top.
  • Instead of Andes Peppermint Crunch on top, crumble Mint Oreos over each Trifle.
  • Instead of the whipped cream/cream cheese, sub in vanilla ice cream or peppermint crunch ice cream. These will need to be assembled right before serving.

How to Store Peppermint Trifle

Keep any leftover Trifle Cups in the fridge, covered tightly, for up to 4 days.

Christmas Brownie Trifle in a glass with a candy cane on the side

WATCH: How to Make Christmas Trifle

You can watch me make this Chocolate Trifle on a 30 minute Episode of Pinterest TV! This is a great way to learn how to make this dessert if you are a visual learner.

More Delicious Desserts to Try

  • Grandma's Carrot Cake with Cream Cheese Buttercream in a 9x13 pan
    Grandma’s Carrot Cake with Cream Cheese Buttercream
  • pile of three pieces of cake with a bite taken out of the top piece
    Homemade Chocolate Sheet Cake & Chocolate Frosting
  • a piece of apple spice cake with sauce drizzled over the top
    Apple Spice Cake with Butter Rum Sauce
  • Thanksgiving Pumpkin Trifle Dessert topped with toffee bits
    Thanksgiving Pumpkin Trifle Dessert

Susie leaning on the kitchen counter

๐Ÿ’›๐Ÿ’›๐Ÿ’›๐Ÿ’›๐Ÿ’›

Did you make this recipe?

I would love to hear your review, especially if you have tips and tricks to add! Pop down to the comment section and connect with me

Rate This Recipeโ†’
Layered chocolate and peppermint trifle with a candy cane on the side

Christmas Trifle Recipe

A rich Chocolate Trifle perfect for Christmas. Layers of chocolatey brownie are topped with fudge, peppermint whipped cream and Andes Peppermint Crunch. Your dessert will be the star of Christmas!
LISTEN TO THE FULL AUDIO RECIPE WITH THE PLAYER BELOW!
5 from 2 votes
Print Pin Rate Save Saved!
Prep Time: 30 minutes minutes
Cook Time: 0 minutes minutes
Brownies & Refrigeration: 1 day day
Total Time: 1 day day 30 minutes minutes
Servings: 10 people
Author: Susie Weinrich

Equipment

  • Dessert Glass (see notes)
  • stand mixer or hand held mixer

Ingredients

  • prepared brownies, cooled completely - – 8×8 or 9×9 pan
  • 4 oz cream cheese - softened
  • 1 ยฝ cups heavy cream - (cold), divided
  • 1 teaspoon peppermint extract
  • ยฝ cup (heaping) powdered sugar
  • 15.5 oz. jar hot fudge sauce - (Mrs. Richardson's is a great brand) or see notes for homemade
  • 10 oz. Andes Peppermint Crunch Baking Chips - (see notes if you cannot find this product)

Instructions
 

  • Either purchase already prepared brownies or prepare and bake your favorite brownie mix, any flavor will work.
    Cool them completely and then cut into ยฝ inch pieces. Set aside.
    prepared brownies, cooled completely
  • In a large bowl of a stand mixer with a whisk attachment (or a large bowl and a hand held mixer), whisk ยผ cup cold heavy cream and the 4 oz. softened cream cheese until it is completely smooth.
    Pro Tip: This will take at least 1 minute, don't skimp on this step, you want your whipped cream to be smooth!
    4 oz cream cheese
  • Now add the peppermint extract and powdered sugar, whisk until combined.
    1 teaspoon peppermint extract, ยฝ cup (heaping) powdered sugar
  • Slowly stream in the remaining cold heavy cream. Whisk until very soft peaks form, which will look like very thick pudding and it will barely hold a peak when you pull the whisk out.
    Pro Tip: drizzle the cream down the side of the bowl so it doesn't catch the whisk and spray out of the bowl!
    1 ยฝ cups heavy cream
  • Warm the fudge in the microwave until it is a pourable consistency, if it is too hot let it cool for a minute before assembling your trifles, you don't want it to melt the whipped cream.
    Pro Tip: If your fudge is in a glass jar you can pop it right in the microwave! It will warm from the bottom up, so warm in 30 second increments and stir after each time.
    15.5 oz. jar hot fudge sauce

Assembly

  • Time to layer your Chocolate Trifles!
  • In each glass add:
    3-4 pieces of brownie
    1-2 tablespoon fudge sauce
    cover with a layer of peppermint whipped cream
    now a generous layer of the Andes Peppermint Crunch Chips
    Repeat all the steps one more time.
    10 oz. Andes Peppermint Crunch Baking Chips
  • Pop the glasses in the fridge, covered, for 12-24 hours.
  • Serve cold! Goes great with a cup of hot coffee!

Recipe Tips and Notes:

Andes Peppermint Crunch Baking Chips: You will want to look in the baking aisle or the holiday candy area for these. They do sell quickly because they are delicious. If you cannot find them, sub in one of these options:
  • Wilton candy melts- candy cane flavor, chopped into pieces
  • white chocolate chips and candy canes chopped/crushed together
  • chopped up Andes Peppermint Crunch Thins
HOMEMADE HOT FUDGE: if you want to go the extra mile and make your own fudge, this recipe for Hot Fudge Sauce is perfect! ps. it also makes a great edible holiday gift.
Dessert Glasses: Use a glass that is 6-11 oz. in size. If you use something 6-8 oz. the glass will probably be full to the top. In a 9-11 oz. glass you will not want to fill it completely as this is a rich dessert.
**Pictured is the 11 oz. Bodega Glass from World Market.ย ย 
PIN TV: you can watch me make this delicious dessert on a 30 minute episode of Pinterest TV!ย 
Did you make this recipe?Connect with me and let me know by commenting below!
Jump to Comments

Simple Christmas Chocolate Chip Cookies

December 14, 2021 by Susie Weinrich 1 Comment

a large plate full of Christmas Chocolate Chip Cookies with Christmas red and green M&M's

Christmas Chocolate Chip Cookies are just the cookie recipe you need to get you in the Holiday Spirit! They are a classic Chocolate Chip Cookie with Holiday M&M’s added, which makes them a crowd pleaser that kids and adults will love. They are also a great cookie to sit by the Christmas tree for Santa on Christmas Eve!

A plate of Christmas Chocolate Chip Cookies with red and green M&M's

Some other kid friendly Christmas Cookies to make are: Peanut Clusters, Chocolate Star Cookies, Sugar Cookies and Christmas Hugs.

RELATED: All Christmas Recipes!

It’s A Great Christmas Cookie

  • They are so easy to make, even the kids can help.
  • The recipe only calls for simple ingredients that can all be found at your local grocery store.
  • It is basically a classic chocolate chip cookie recipe with M&M’s added, so kids will LOVE them!
  • The red and green color makes them perfect for the holiday season.

Ingredients

Pictured are the ingredients that you need to make Chocolate Chip Christmas Cookies, plus some tips on a few ingredients:

Ingredients for Christmas Chocolate Chip Cookies on a table
Ingredients Shown Clockwise: brown sugar, sugar, flour, butter, chocolate chips and Christmas M&M’s, butter, more Christmas M&M’s, kosher salt, baking soda, baking powder, vanilla and eggs.

Semisweet Chocolate Chips – These are traditionally used in chocolate chip cookies. However you can absolutely swap out dark chocolate chunks, milk chocolate chips, or white chocolate chips.

M&M’s – Purchase a 10oz bag of red and green M&M’s for this recipe. You may have to look in the Holiday Candy section or the baking aisle.

Baking Soda and Baking Powder – using both makes for a perfectly puffed cookie that is chewy on the inside with crisp edges, it also helps maximize the flavor of all the ingredients.

A Couple Secrets to Pretty Cookies

Do you ever make a cookie and then think, “why don’t they look like the pretty pictures on the recipe!?”?

Tip 1.

The first secret to making pretty cookies is saving some of the mix-in ingredients (like chocolate chips, M&M’s, marshmallows, or nuts) to press onto the outside of the cookie dough balls. See below for visual reference:

Christmas Chocolate Chip Cookies in balls ready for the oven

That way the pretty parts of the cookie are showing…like the Holiday M&M’s in this recipe, and they don’t all bake into the dough.

I use this trick in my other M&M Cookie recipe, as well as my Hot Cocoa Cookies and Fruitcake Cookies!

Tip 2.

The second tip for really pretty cookies is slightly undercooking in the oven, and letting them finish cooking on the hot baking sheet. This makes sure they are chewy and tender and the bottom of the cookies are JUST golden and not overbaked.

Tip 3.

The third tip to make your cookies extra bea-u-ti-ful is about a minute after they come out of the oven and they are still hot and pliable, place a large drinking glass over the cookies and shimmy them into a perfect circle! All your cookies will be uniform! see photo below for visual reference:

shaping hot cookies with a drinking glass

Step by Step Picture Instructions

  1. Prep
  2. Preheat the oven to 375 degrees and line a baking sheet with parchment paper or a reusable silpat.

  3. Cream butter and sugar.
  4. In a large bowl of a stand mixer with a paddle attachment or hand held electric mixer cream together the butter, sugar and brown sugar for about 2 minutes.

    Add the vanilla extract and then the eggs, one at a time, until well combined.

  5. Mix dry ingredients.
  6. In a medium sized bowl or on a piece of parchment paper mix the dry ingredients together: all purpose flour, baking soda, baking powder and kosher salt.

    dry ingredients on a piece of parchment paper
  7. Add dry ingredients to dough.
  8. Slowly add the flour mixture to the cookie batter. Do not overmix at this point, just until combined.

    Chocolate Chip Cookie Dough for Christmas in a stand mixer bowl
  9. Stir in chocolate chips and M&M’s.
  10. Now with a wooden spoon stir in the chocolate chip and 1 cup of the holiday M&M’s (reserving the rest for the outside of the cookies!).

    MAKE AHEAD: At this point you can chill the dough for up to 3 days or you can bake them right away. If you choose to chill the dough for more than 4 hours you may need to let it sit at room temp for 20 minutes before scooping into cookies.

  11. Scoop & Bake.
  12. Scoop rounded tablespoons full of cookie dough and drop onto the prepared cookie sheet. Using a cookie scoop makes quick work of this task (it also makes a great stocking stuffer)!

    Now use the leftover M&M’s to dot the top and sides of the cookie dough balls.

    Bake for 12 minutes. Then let the cookies finish on the hot baking sheet for about 5 minutes. Then transfer to a cooling rack.

Storing

Store your Christmas Chocolate Chip Cookies at room temperature in a covered container for up to 5 days.

You can also freeze your cookies for up to 3 months.

a hand grabbing a Christmas Chocolate Chip Cookie

Serving

Christmas Cookies are best served on a platter of assorted holiday treats! They go great with a cold glass of milk or a cup of hot chocolate.

They also make an excellent cookie to leave for Santa!

More Yummy Christmas Cookies

  • a white plate with fruitcake cookies
    Classic Holiday Fruitcake Cookies
  • saltine cracker toffee in a bowl
    Saltine Toffee (Christmas Crack!)
  • a stack of sugar cookies with a glass of milk
    Mom’s Sugar Cookie Recipe
  • a pile of brownie brittle pieces and a glass of milk
    Chocolate Brownie Brittle
  • peppermint bark oreos in a pile with a bite taken out of two cookies
    Homemade Peppermint Bark Oreos
  • Peanut Cluster on a sheet of wax paper
    Old Fashioned Peanut Cluster Recipe

Susie leaning on the kitchen counter

๐Ÿ’›๐Ÿ’›๐Ÿ’›๐Ÿ’›๐Ÿ’›

Did you make this recipe?

I would love to hear your review, especially if you have tips and tricks to add! Pop down to the comment section and connect with me

Rate This Recipeโ†’
a large plate full of Christmas Chocolate Chip Cookies with Christmas red and green M&M's

Christmas Chocolate Chip Cookie Recipe + Video

A chewy chocolate chip cookie that has red and green Christmas M&M's added. Perfect for the Holiday season and for Santa's Cookie Plate on Christmas Eve!!
5 from 3 votes
Print Pin Rate Save Saved!
Prep Time: 15 minutes minutes
Cook Time: 10 minutes minutes
Cooling: 15 minutes minutes
Total Time: 40 minutes minutes
Servings: 24 cookies (approx)
Calories: 264kcal
Author: Susie Weinrich

Equipment

  • Large rimmed baking sheet
  • stand mixer or hand held mixer
  • Parchment paper
  • Cookie Scoop (optional)

Ingredients

  • 1 cup butter - softened (2 sticks)
  • 1 cup sugar
  • 1 cup brown sugar
  • 2 tsp vanilla extract
  • 2 large eggs
  • 3 cups all purpose flour
  • 1 teaspoon baking powder
  • ยฝ teaspoon baking soda
  • 1 teaspoon kosher salt
  • 1 cup semisweet chocolate chips
  • 10 oz bag Christmas M&M's (red and green) - Divided

Instructions
 

  • Start by preheating the oven to 375ยฐ. Line a baking sheet with parchment paper or a reusable silpat.
  • In the bowl of a stand mixer with a paddle attachment (or a bowl with a hand mixer), cream together the softened butter, sugar and brown sugar for about 2 minutes.
    1 cup butter, 1 cup sugar, 1 cup brown sugar
  • Add the vanilla extract and then one egg at a time, mix until it is completely combined, about 1 minute.
    Pro Tip: crack your eggs into a separate dish and then pour into the mixing bowl, this ensures you don't have any shell pieces in your cookies!
    2 teaspoon vanilla extract, 2 large eggs
  • In a medium sized bowl or on a piece of parchment paper stir together the flour, baking powder, baking soda and salt.
    Pro Tip: we like to use a piece of parchment paper and then pick it up like a funnel to easily get the dry ingredients into the mixing bowl!
    3 cups all purpose flour, 1 teaspoon baking powder, 1 teaspoon kosher salt, ยฝ teaspoon baking soda
  • Now slowly add the flour mixture, just mix until it all comes together, don't overmix at this point.
  • With a wooden spoon stir in the 1 cup chocolate chips and 1 cup M&M's into the cookie dough.
    Chocolate Chip Cookie Dough for Christmas in a stand mixer bowl
  • Drop heaping tablespoons full onto the prepared baking sheet. A cookie scoop is a great tool to use for this task.
    Pro Tip: use the extra M&M's to dot the outside of the cookies, lightly press them onto the tops and sides so they stick. This makes for a more pronounced red and green Holiday look!
    Christmas Chocolate Chip Cookies in balls ready for the oven
  • Bake for about 12 minutes, 9-10 minutes for darker baking sheets, they may look a little under-cooked, that is ok.
    Pro Tip: If you are baking in batches place the remaining cookie dough in the fridge until you are ready for the second batch.
  • Let the cookies finish cooking on the baking sheet for 5 minutes. Then move to a wire rack to cool and set up completely.
    Pro Tip: to make uniform round cookies use a drinking glass upside down and shimmy/shape the warm cookies into perfect circles. see photo:
    shaping hot cookies with a drinking glass

Serving

  • These M&M Cookies are excellent served with a cold glass of milk for dunking or a hot glass of cocoa!

Storing

  • Store your Chocolate Chip Christmas Cookies at room temperature, in a covered container, for up to 5 days.
  • They can also be frozen for up to 3 months. Thaw at room temp for about an hour before serving (although they are great frozen too).

Recipe Tips and Notes:

Semisweet Chocolate Chips: You can also swap these out for dark chocolate chunks, milk chocolate chips, or white chocolate chips! Or use a mix, just measure it out to 1 cup.
Did you make this recipe?Connect with me and let me know by commenting below!
Jump to Comments
Serving: 1cookie | Calories: 264kcal | Carbohydrates: 34g | Protein: 2g | Fat: 13g | Saturated Fat: 8g | Polyunsaturated Fat: 1g | Monounsaturated Fat: 3g | Trans Fat: 1g | Cholesterol: 23mg | Sodium: 221mg | Potassium: 67mg | Fiber: 1g | Sugar: 23g | Vitamin A: 267IU | Vitamin C: 1mg | Calcium: 28mg | Iron: 1mg

Iced Oatmeal Cookies

December 13, 2021 by Susie Weinrich Leave a Comment

a close photo of iced oatmeal cookies

Old fashioned Iced Oatmeal Cookies are such a treat! They are a really good oatmeal cookie spiced with molasses and cinnamon. They have the perfect chewy texture and lightly crisp edges. The best part is the sweet icing that coats the crackled top. It is definitely a nostalgic cookie recipe that is a family favorite, perfect for the Holiday Season.

a couple iced oatmeal cookies in piles

After you make a batch of these old-fashioned iced oatmeal cookies check out these other cookie recipes: Old Fashioned Molasses Cookies, Fruitcake Cookies, Chocolate Star Cookies and Peanut Clusters.

Ingredients

Pictured are the ingredients you need to gather to make your Iced Oatmeal Cookies, plus some tips on a few ingredients:

Ingredients for Old Fashioned Iced Oatmeal cookies with text labels

Molasses– make sure you buy an unsulphured molasses, Grandma’s is a popular brand that works well. “Unsulphered” just means that the molasses was made from ripe sugar cane.

Make sure you don’t use blackstrap molasses, it doesn’t have the sugar content needed for the cookies.

Baking Soda- Make sure that your baking soda is still fresh so your cookies turn out. If you aren’t sure you can spoon a little into a bowl and pour in a little acid (lemon or vinegar), if it bubbles vigorously then you are good to go! If it doesn’t bubble it’s time to grab some fresh baking soda.

Oats for Oatmeal Cookies

This recipe calls for Old Fashioned Oats, which are whole oats.

Optionally you can pulse the oats in a food processor or blender 10-15 times if you like a less hearty texture of the oats. However this is not totally necessary.

If you like more of an old fashioned oat cookie, mix the whole oats into your cookies.

Step by Step Picture Instructions

Preheat your oven to 400, line a cookie sheet with parchment paper or a reusable silpat.

Whisk together the dry ingredients: all purpose flour, baking soda, kosher salt, cinnamon, and oats, and set aside.

With a hand mixer or stand mixer cream the butter and sugar together for 2 minutes.

Add the eggs and mix about 30 seconds.

Turn the speed to low and drizzle in the molasses. Tip: Turn the mixer off and scrape the sides of the bowl down as necessary.

Oatmeal Cookie Dough

Add the flour/oat mixture a little at a time just until it is combined. Don’t overmix the cookie dough at this point.

Using a cookie scoop, drop about 1.5 tablespoon of dough on the lined baking sheet.

  • Oatmeal Cookie dough scooped into balls
  • Oatmeal Cookies baked on a cookie sheet

Bake for 8-10 mins

Cool on the baking sheet for about 4-5 minutes, then transfer to a wire rack to completely cool.

Icing

Make sure that the cookies are completely cooled before icing.

In a shallow bowl (one that you can dip a cookie into), add the sifted powdered sugar, vanilla and milk.

Stir until it all comes together. It will be THICK, that is what you want.

Icing in a bowl for Oatmeal Cookies with icing

Lightly dip each Oatmeal Cookie into the icing, let any excess drip off, then set at room temp for the icing to set.

The icing should completely set in 1-2 hours. Then you can stack them for storing or gifting.

Storing

Store your Iced Oatmeal Cookies in an airtight container at room temperature for up to 5 days. Or keep in the fridge for up to 10 days!

a hand grabbing an iced oatmeal cookie

Recipe Tips

  • If you do not want a hearty cookie with whole oats, pulse the oats in a food processor or blender just a few times.
  • Sift the powdered sugar for the icing so it is nice and smooth.
  • When icing the cookies give the tops a quick/light dip to achieve the crinkly icing look.

More Delicious Cookies to Bake!

  • An old fashioned molasses crinkle cookie on a plate
    Old Fashioned Molasses Crinkle Cookies
  • a white plate with fruitcake cookies
    Classic Holiday Fruitcake Cookies
  • Chocolate star cookie cooling on parchment paper
    Peanut Butter Chocolate Star Cookies
  • a pecan snowball cookie that is broken in half to see the middle
    Pecan Snowball Cookies
a close photo of iced oatmeal cookies

Iced Oatmeal Cookie Recipe

A soft and chewy oatmeal cookie that has rich flavors of molasses and cinnamon, all topped with a vanilla icing.
5 from 1 vote
Print Pin Rate Save Saved!
Prep Time: 15 minutes minutes
Cook Time: 10 minutes minutes
Cooling & Icing: 1 hour hour
Total Time: 1 hour hour 25 minutes minutes
Servings: 2 dozen
Author: Susie Weinrich

Equipment

  • stand mixer or hand held mixer
  • Large rimmed baking sheet
  • Cookie Scoop (optional)
  • Parchment paper

Ingredients

  • ยฝ cup butter - softened
  • 1 ยผ cup sugar
  • 2 eggs
  • โ…“ cup molasses
  • 1 ยพ cup all purpose flour
  • 1 teaspoon baking soda
  • ยฝ teaspoon kosher salt
  • 1 teaspoon cinnamon
  • 2 cup old fashioned rolled oats

Icing

  • ยพ cup powdered sugar - sifted
  • ยฝ teaspoon vanilla
  • 1 tablespoon plus ยฝ teaspoon – milk or cream

Instructions
 

  • Preheat the oven to 400 and line a baking sheet with parchment paper or a reusable silpat.
  • Optionally pulse the oats in a food processor or blender about 10-15 times. Or if you like the heartier texture of the oats, skip this step.
  • In a bowl whisk together the flour, baking soda, kosher salt, cinnamon, and oats, set aside.
  • In a mixer cream the butter and sugar together on medium speed for 2 minutes.
  • Add the eggs and mix about 30 seconds.
  • Turn the speed to low and drizzle in the molasses.
    Tip: Turn the mixer off and scrape the sides down as necessary.
  • Add the flour/oat mixture a little at a time just until it is combined. Don't overmix at this point.
  • Using a cookie scoop, drop about 1.5 tablespoon of dough on the lined baking sheet.
  • Bake for 8-10 mins just until the edges are JUST starting to turn golden.
    Tip: If you are baking in batches, pop the rest of the dough in the fridge while the other cookies bake.
  • Cool on the baking sheet for about 4-5 minutes, then transfer to a cooling rack.
  • Cool completely before icing.

Icing

  • When the cookies are completely cool, it is time to add the icing!
    tip: place a used parchment paper sheet under the cookie cooking rack to catch icing drips, it will make for quicker clean up!
  • In a bowl whisk or stir the powdered sugar, milk and vanilla together. It will be a VERY thick icing. If all the powdered sugar won't mix in add a drop or two of milk until it comes together.
    tip: Choose a shallow bowl that you can dip the cookies into.
  • To get the crackly icing look- very lightly and quickly dip the top of the cookie into the icing. Let the excess icing drain off the cookie, you can shake it a little to speed up the process.
    tip: if you are heavy handed with the icing you may need to make another half or whole batch of icing.
  • Then let the icing harden for a 1-2 hours at room temp.
  • Once the icing sets the cookies will be stackable for storing or gifting.

Storing

  • Keep your Iced Oatmeal Cookies in a covered container at room temp for up to 5 days, although they probably won't last that long!
  • You can keep them longer, up to 10 days, in the fridge.
Did you make this recipe?Connect with me and let me know by commenting below!
Jump to Comments

Old Fashioned Molasses Crinkle Cookies

December 8, 2021 by Susie Weinrich 2 Comments

An old fashioned molasses crinkle cookie on a plate

These Old Fashioned Molasses Crinkle Cookies are just like you remember eating at your Grandma’s house during the Holidays! They are soft and chewy, taste of molasses, cinnamon, clove and ginger, and the top is dipped in sugar and full of crackly crinkles.

a plate with a lot of molasses cookies

Some other old fashioned cookie recipes that we love around here are these fruit cake cookies, peanut clusters, and chocolate star cookies.

Old Fashioned Recipes Are The Best

  • Old Fashioned recipes that came from our Grandparents (like this Carrot Cake Recipe) are just the best!!!
  • The old fashioned cookies are probably the ones you remember eating when you were little and bring back SO MANY memories.
  • They embody the saying “tried and true” more than anything else!

Ingredients

Pictured are the ingredients that you need to make Old Fashioned Molasses Crinkle Cookies, plus some pro tips on a few ingredients:

Ingredients on a table to make molasses cookies

Molasses: The key ingredient in Molasses Cookies!! Buy an unsluphered molasses. Grandma’s is a popular brand at the store. Learn more about molasses below.

And if you have molasses left over, pop over and make these Iced Oatmeal Cookies too!

Brown Sugar: Make sure you use brown sugar not white sugar in the dough. The molasses flavor of the brown sugar adds the perfect flavor here.

Cinnamon, Clove, and Ginger: It may seem like a lot of spices in this cookie, but it really makes a difference. It infuses the cookies with a nice warm spiciness.

Kosher Salt: make sure to use kosher salt, not table salt or iodized salt. Kosher salt is less salty and has a milder flavor.

More About Molasses

Molasses is basically a byproduct of producing sugar from natural sugar cane. There are five different types. The most popular ones you will find are light, dark, and blackstrap molasses.

We recommend always buying an unsulphured molasses if you can. Which means it is made from mature/ripe sugar cane.

Sulphured molasses is made from green, under ripe sugar cane and a sulphur is added during the refining.

Step by Step Picture Instructions

This recipe does not start with preheating your oven because before you bake the cookies you pop the dough in the fridge to chill for 1 hour.

Start by whisking together the dry ingredients: all purpose flour, baking soda, salt, cinnamon, clove, and ginger and set aside.

Now cream the butter and sugar together for 2 minutes.

Add the egg and vanilla.

Pour in the molasses and mix in. Scrape down the sides as necessary.

Slowly mix in the flour mixture, just until combined. The dough will be thick!

molasses cookie dough

Pop in the fridge to chill for 1 hour.

Preheat the oven to 350, line a baking sheet with parchment paper or reusable silpat.

Roll a 2 inch dough ball, roll in sugar and place on the baking sheet. (for extra crinkles and sugar, read through to the next section)

process of making molasses cookies and dipping in sugar

Bake for 10-12 minutes. Cool for 5 minutes on the cookie sheet.

Then move to a cooling rack. Enjoy your chewy molasses cookies!

Extra Crinkles & Sugar

There are two options to get the crinkles on top of your Old Fashioned Molasses Cookies. Both work, so choose the one that suits your taste! See the photo below for the difference:

showing the two options of adding sugar to the top of molasses crinkle cookies
  1. Regular sugar and crinkles: After forming the cookie balls dip the top in sugar. Then before baking sprinkle a little water over the top of the cookies.
  2. Lots of sugar and crinkles: After forming the cookie balls dip the tops in water and then dip in sugar.

Storing

Store the leftover cookies at room temp in a covered container for up a week. Or you can keep longer in the fridge for up to 10 days.

Freezing

Molasses Cookies will also freeze. Keep them in the freezer in a sealed container for up to 3 months.

molasses crinkle cookies on a plate with milk in the background

Recipe Tips

  • Don’t skip chilling the dough. It solidifies the fats, giving you a nice soft and chewy cookie.
  • Choose the sugar application that is best for you
  • Don’t skimp on the spices!! It adds such a nice warm flavor.
  • Make sure your butter is softened completely, but not melted.
  • If you are baking in batches, pop the extra dough in the fridge while the first batch bakes.

More Yummy Old Fashioned Cookie Recipes

  • a photo of a Reece's peanut butter cup in a muffin tin
    Reese’s Peanut Butter Cup Cookies
  • chocolate no bake cookie on a white tray
    Fudgy Chocolate No Bake Cookies
  • Chocolate star cookie cooling on parchment paper
    Peanut Butter Chocolate Star Cookies
  • Peanut Cluster on a sheet of wax paper
    Old Fashioned Peanut Cluster Recipe

Susie leaning on the kitchen counter

๐Ÿ’›๐Ÿ’›๐Ÿ’›๐Ÿ’›๐Ÿ’›

Did you make this recipe?

I would love to hear your review, especially if you have tips and tricks to add! Pop down to the comment section and connect with me

Rate This Recipeโ†’
An old fashioned molasses crinkle cookie on a plate

Old Fashioned Molasses Crinkle Cookie Recipe

Delicious Molasses Cookies just like you remember your Grandma making. They are soft and chewy and taste of molasses, cinnamon, clove and ginger. The tops are nice and crinkled with sugar.
5 from 2 votes
Print Pin Rate Save Saved!
Prep Time: 10 minutes minutes
Cook Time: 12 minutes minutes
Chill Time: 1 hour hour
Total Time: 1 hour hour 22 minutes minutes
Servings: 20 cookies
Calories: 194kcal
Author: Susie Weinrich

Equipment

  • Large rimmed baking sheet (13×18)
  • Parchment paper
  • Cookie Scoop (optional)

Ingredients

  • ยพ cup softened butter
  • 1 cup brown sugar
  • 1 egg
  • 1 tsp vanilla
  • ยผ cup unsulphured molasses - I like Grandma's brand
  • 2 ยผ cup all purpose flour
  • 2 teaspoon baking soda
  • ยผ teaspoon kosher salt
  • 1 teaspoon ground cinnamon
  • ยฝ teaspoon ground clove
  • ยฝ teaspoon ground ginger

Topping

  • ยฝ cup sugar
  • water

Instructions
 

  • Preheat the oven to 350ยฐ, line a baking sheet with parchment paper or a reusable silpat.
  • In a bowl, whisk together the flour, baking soda, salt, cinnamon, clove and ginger. Set aside.
    2 ยผ cup all purpose flour, 2 teaspoon baking soda, ยผ teaspoon kosher salt, 1 teaspoon ground cinnamon, ยฝ teaspoon ground clove, ยฝ teaspoon ground ginger
  • In a stand mixer or hand held mixer cream the butter and sugar together on medium speed for 2 minutes.
    ยพ cup softened butter, 1 cup brown sugar
  • Add the egg and vanilla and mix for another 20 seconds.
    1 egg, 1 teaspoon vanilla
  • Slow the mixer down and drizzle in the molasses. Scrape the sides down as necessary.
    Tip: spray your measuring cup with non-stick spray before measuring the molasses!
    ยผ cup unsulphured molasses
  • Slowly add in the flour mixture, just until the dough comes together.
    The dough will be very thick.
  • Cover the mixing bowl and pop the dough in the fridge for 1 hour.
    If the dough is in the fridge for more than 4 hours you may need to leave it at room temp for 30 minutes to take the chill off before baking.
  • Roll the dough into 2 inch balls.
    There are two options for sugaring the cookies at this point.
    1. Lots of sugar, lots of crinkles: Dip the tops of the dough ball in water, then roll the dough ball in sugar. Place on the baking sheet wet sugar side up.
    2. Regular sugar, regular crinkles: Roll the ball in sugar, place them on the baking sheet. With clean hands sprinkle a little water over the cookies.
    ยฝ cup sugar, water
  • Bake 350 for 10-12 minutes until set, but not hard.
    If baking the cookies in batches place the dough back in the fridge while the first batch bakes.
  • Cool for 5 minutes on the baking sheet and then move to a cooling rack.

Storing

  • Store at room temp in a covered container for up to a week, or keep in the fridge for up to 10 days.

Freezing

  • Molasses Crinkle Cookies will also freeze well. Keep them in a freezer safe, sealed, container for up to 3 months.

Recipe Tips and Notes:

Molasses: buy a light or dark molasses that is unsulphured. Grandma’s is a common brand that is delicious.ย 
Recipe Tips:
  • Don’t skip chilling the dough. It solidifies the fats, giving you a nice soft and chewy cookie.
  • Choose the sugar application that is best for you
  • Don’t skimp on the spices!! It adds such a nice warm flavor.
  • Make sure your butter is softened completely, but not melted.
  • If you are baking in batches, pop the extra dough in the fridge while the first batch bakes.
Did you make this recipe?Connect with me and let me know by commenting below!
Jump to Comments
Serving: 1cookie | Calories: 194kcal | Carbohydrates: 31g | Protein: 2g | Fat: 7g | Saturated Fat: 4g | Polyunsaturated Fat: 1g | Monounsaturated Fat: 2g | Trans Fat: 1g | Cholesterol: 26mg | Sodium: 208mg | Potassium: 119mg | Fiber: 1g | Sugar: 20g | Vitamin A: 225IU | Vitamin C: 1mg | Calcium: 27mg | Iron: 1mg

The Best Homemade Hot Chocolate

December 7, 2021 by Susie Weinrich 2 Comments

a white mug with hot chocolate dripping down the sides and filled with hot cocoa topped with marshmallows

This Homemade Hot Chocolate Recipe is super creamy and rich with chocolate flavor, way better than a store bought powder mix. It is made with chocolate chips, milk, powdered sugar, powdered milk and cocoa. It mixes together on the stove top in minutes. Load it up with some whipped cream, marshmallows, and a dusting of cocoa powder. It will be the best hot chocolate you have ever had!

hot chocolate in a mug with marshmallows and cocoa on top

If you love all things Hot Chocolate, then you will love this Peppermint Hot Chocolate and these Hot Cocoa Cookies!

For a fun boozy adult hot cocoa, pop over to this recipe RumChata Hot Chocolate.

Why it’s So GOOD!

  • It has the perfect amount of sweetness, enough to enhance the chocolate flavor but not too much to be overwhelming.
  • The semi-sweet chocolate and cocoa powder lend the perfect rich chocolate flavor somewhere between milk and dark.
  • Customize the toppings with whatever you like.
  • This homemade hot chocolate blows the socks off the powder mix you get at the store. Promise!
  • It warms your bones on a snowy day, perfect after a day of playing in the snow. (and if you have lots of snow DEFINITELY make this SNOW ICE CREAM!!!)

Ingredients

Here are the ingredients you need to make Homemade Hot Chocolate, plus some tips on a few ingredients:

ingredients on a table to make hot chocolate
Clockwise: powdered milk, powdered sugar, chocolate chips, unsweetened cocoa powder, and whole milk.

Chocolate Chips – I recommend using semi-sweet chocolate chips . They are sweet enough to give your drink a rich chocolatey flavor. You can also try dark chocolate. However I think milk chocolate chips may be too sweet here.

Cocoa Powder – Make sure to buy 100% cocoa, unsweetened cocoa powder. You will find it in the baking aisle.

Powdered Milk– You will usually find this in the baking aisle. It will be in a box or canister.

Milk– I recommend using whole milk to make a creamier hot cocoa, but 2% will definitely work too.

How To Make Homemade Hot Chocolate

In a small saucepan warm the milk over medium-low heat.

In a separate bowl whisk together the dry milk, cocoa powder and powder sugar.

homemade hot cocoa mix in a bowl

Whisk it into the warm milk, until it is completely mixed in.

Now add the chocolate chips and stir until they are melted in.

homemade hot chocolate in a saucepan

Remove from the heat and pour into mugs.

This recipe will fill two full mugs completely, or you can fill three mugs about โ…” and fill the rest with toppings.

Hot Chocolate Toppings and Mix-In’s

There is nothing better than a hot cup of hot chocolate topped with all your favorite toppings.

For me, I love mini marshmallows that have melted half way into the hot cocoa and have a left a creamy coating across the top.

Here are some other options:

  • Fresh Whipped Cream
  • Marshmallows
  • Marshmallow Bits
  • Candy Canes
  • Cocoa Powder
  • A drop of peppermint extract adds a fun flavor! (pop over to this Peppermint Hot Chocolate Recipe!)

Making it Boozy

If you are serving adults that would love a little booze added to their hot chocolate, here are some liquors that will be delicious added to your cocoa:

  • Peppermint schnapps
  • Bailey’s Irish Cream
  • Rumchata (Cinnamon and Cream)
  • Kahlua
  • Whipped Cream Vodka
  • Marshmallow Vodka
  • Fireball (Cinnamon)
  • Chocolate Liqueur

Add any one of these when the hot cocoa comes off the heat. Start with 3 oz. and then taste to see if you would like to add more.

If some adults want something a little stronger, pop over to this recipe for a Tequila Hot Toddy!

overhead view of mugs of hot chocolate and cookies

Make Ahead

You can absolutely make this mix ahead, then it will be ready when you come in from a cold night or snowy day and are ready to warm up with a nice hot drink!

Simply mix together the cocoa, powdered sugar, powdered milk and chocolate chips. Keep in a sealed container at room temp for a week or two.

Whisk the mix into 3 cups of hot milk when you are ready.

More Recipes Perfect for Cold Nights!

  • a bowl of Instant Pot Beef and Barley Soup
    Instant Pot Beef and Barley Soup
  • two bowls of chicken noodle soup for kids with legos and crackers around the table
    Chicken Noodle Soup for Kids
  • hot toddy made with tequila in a stemmed glass
    Tequila Hot Toddy
  • Hot cocoa cookies in stacks on brown parchment paper
    Easy Hot Cocoa Cookies

Susie leaning on the kitchen counter

๐Ÿ’›๐Ÿ’›๐Ÿ’›๐Ÿ’›๐Ÿ’›

Did you make this recipe?

I would love to hear your review, especially if you have tips and tricks to add! Pop down to the comment section and connect with me

Rate This Recipeโ†’
a white mug with hot chocolate dripping down the sides and filled with hot cocoa topped with marshmallows

Homemade Hot Chocolate Recipe

A deluxe recipe for Hot Chocolate that is creamy, perfectly sweet (but not too sweet) and full of chocolate flavor. Load it up with your favorite cocoa toppings!
LISTEN TO THE AUDIO RECIPE WITH THE PLAYER BELOW.
5 from 2 votes
Print Pin Rate Save Saved!
Prep Time: 5 minutes minutes
Cook Time: 5 minutes minutes
Servings: 3 cups
Calories: 597kcal
Author: Susie Weinrich

Equipment

  • whisk
  • saucepan or pot

Ingredients

  • 3 cups whole milk
  • ยผ cup powdered milk
  • ยผ cup unsweetened cocoa powder
  • 3 tablespoon powdered sugar
  • 1 cup semisweet chocolate chips

Instructions
 

  • In a small saucepan over medium low heat, warm the 3 cups milk.
    3 cups whole milk
  • Meanwhile, whisk together the powdered milk, cocoa powder, and powdered sugar.
    ยผ cup powdered milk, ยผ cup unsweetened cocoa powder, 3 tablespoon powdered sugar
  • Slowly whisk the cocoa mixture into the warm milk until it is smooth and fully combined.
  • Pour the chocolate chips in and stir until they are fully melted.
    1 cup semisweet chocolate chips
  • Remove from the heat and serve!
  • Top with all your favorite hot cocoa toppings: mini marshmallows, whipped cream, chocolate sauce, cocoa powder, marshmallow bits….

Recipe Tips and Notes:

Powdered Milk can usually be found in the baking aisle at your local grocery store.ย 
To Make Ahead: Stir together the cocoa powder, dry milk, powdered sugar and chocolate chips. Store in a sealed container for up to 2 weeks.ย 
To serve warm 3 cups of milk and whisk everything in.
To Make Boozy: Stir in a little liqueur or liquor for the adults, just like this RumChata Hot Chocolate. Stir it in once the hot chocolate is removed from the heat, Start with 3 oz., taste, and see if you want to add more. Try any of these spirits:
  • Peppermint schnapps
  • Bailey’s Irish Cream
  • Rumchata – Rumchata Hot Chocolate Recipe
  • Kahlua
  • Whipped Cream Vodka
  • Marshmallow Vodka
  • Fireball (Cinnamon)
  • Chocolate Liqueur
Mint: for a minty twist pop over to this Peppermint Hot Chocolate.
Did you make this recipe?Connect with me and let me know by commenting below!
Jump to Comments
Serving: 1serving | Calories: 597kcal | Carbohydrates: 59g | Protein: 16g | Fat: 35g | Saturated Fat: 20g | Polyunsaturated Fat: 1g | Monounsaturated Fat: 10g | Trans Fat: 1g | Cholesterol: 38mg | Sodium: 152mg | Potassium: 914mg | Fiber: 7g | Sugar: 46g | Vitamin A: 525IU | Vitamin C: 1mg | Calcium: 419mg | Iron: 5mg
  • « Previous Page
  • 1
  • …
  • 28
  • 29
  • 30
  • 31
  • 32
  • …
  • 63
  • Next Page »
Susie in the kitchen with an apron on getting ready to cook

Meet The Author:

Susie Weinrich is a professional food photographer and recipe developer. Her thoroughly tested recipes and step-by-step guides give readers confidence in the kitchen.

YOU will feel like a huge success at dinner time with any of the simple recipes on Mom's Dinner! Read More

Helpful Meal Planning Resources

  • a table with white place settings and green garland
    Easy Meals for House Guests
  • a round table with a large family eating dinner
    30 Easy Meals for Large Family Vacations & Gatherings
woman owned small business certificate by Sertify

Amazing New Recipes

  • chicken in a cream sauce with stuffing over top, in a 9x13 baking dish
    Chicken and Stuffing Casserole
  • Plate of spaghetti and meatballs that was prepared in the instant pot.
    Instant Pot Spaghetti and Homemade Meatballs
  • Parsley topped garlic cheesy bread with half of the loaf sliced into individual pieces to serve.
    Simple Cheesy Garlic Bread
  • Close up of hot melty cheese over stuffed beef manicotti in a baking dish.
    Outstanding Beef Manicotti

Footer

^ back to top

About

  • Susie Weinrich
  • Privacy Policy
  • Accessibility Policy

Contact

  • Sign Up! for emails
  • Contact Me!
  • Join Me On YouTube

Recipes

  • Recipe By Category
  • Instant Pot Recipes
  • Dinner Recipes

Copyright ยฉ 2025 Mom's Dinner

Rate & Review This Recipe

Your vote:


A rating is required
A name is required
An email is required