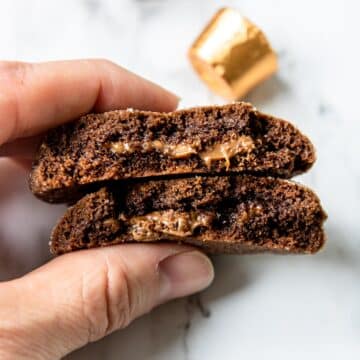
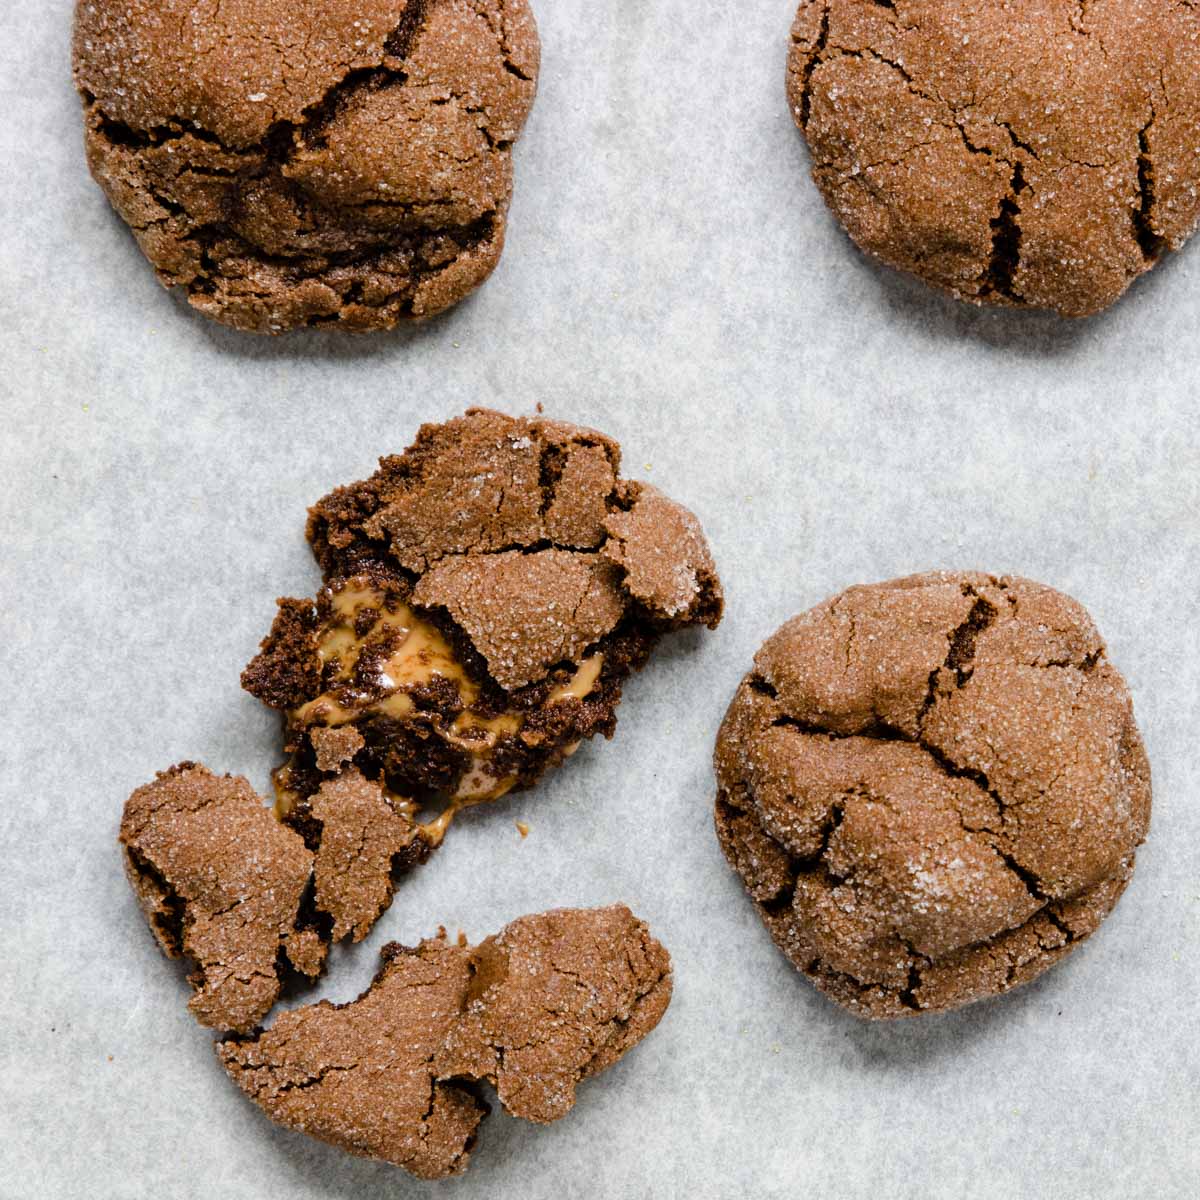
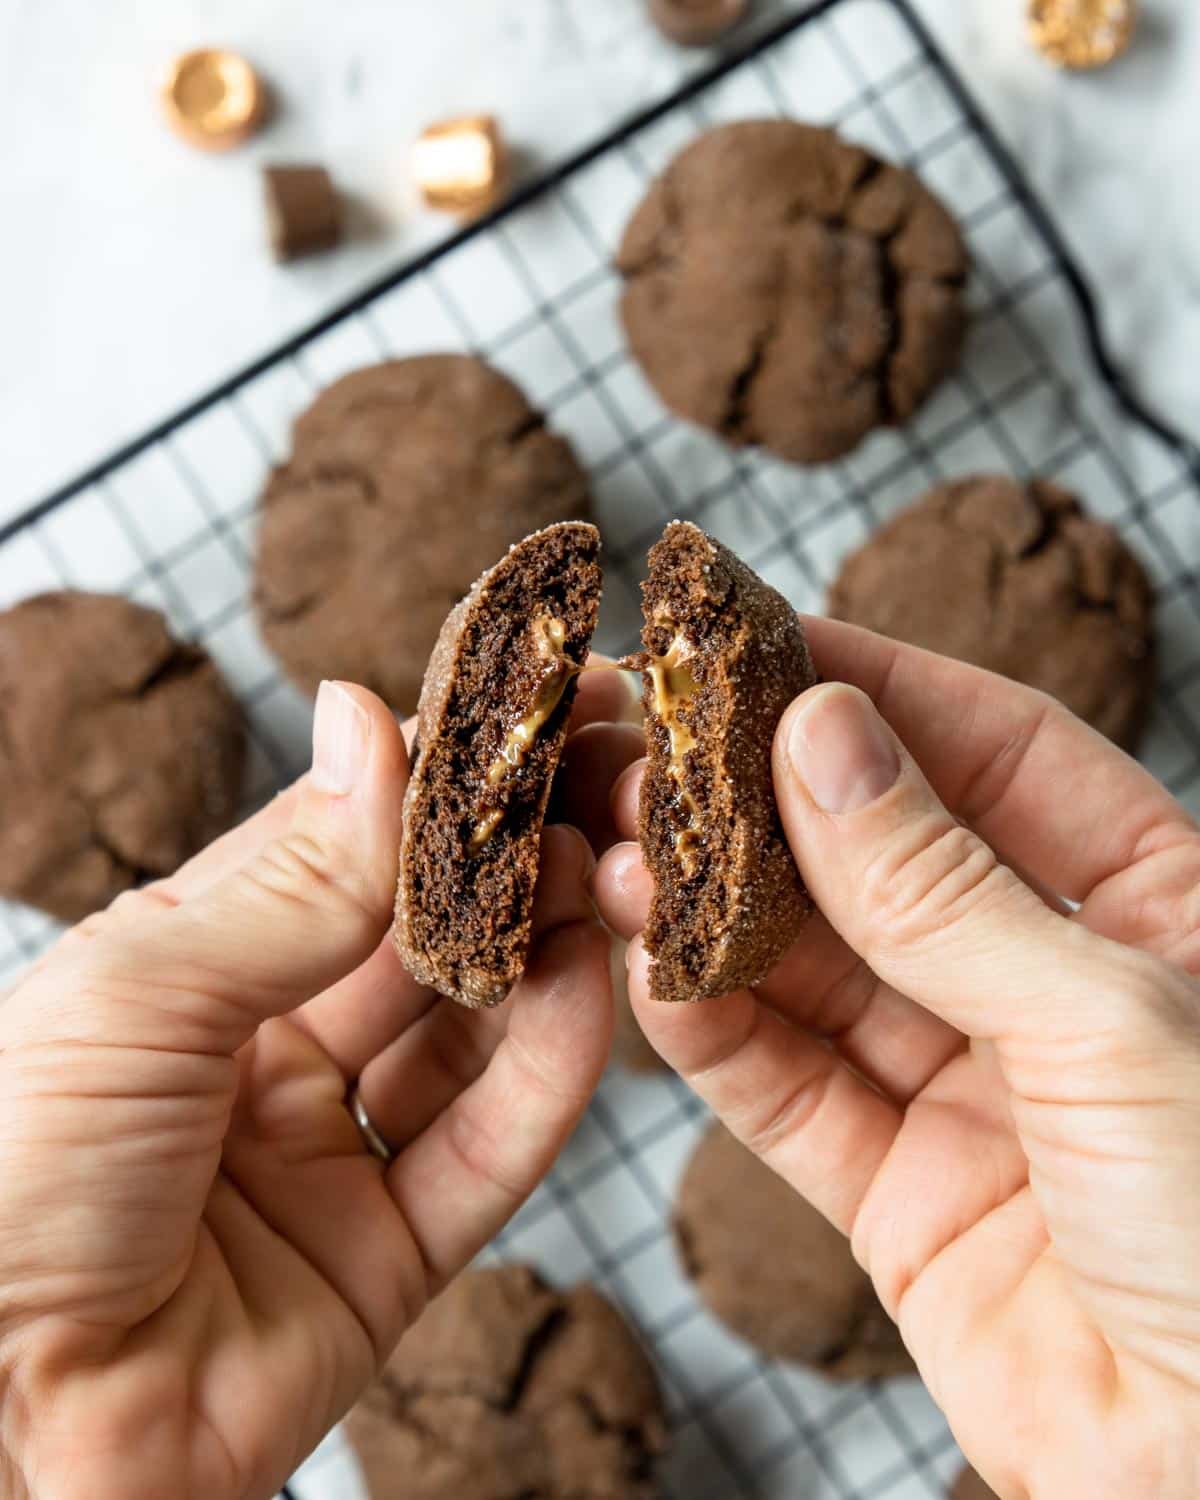
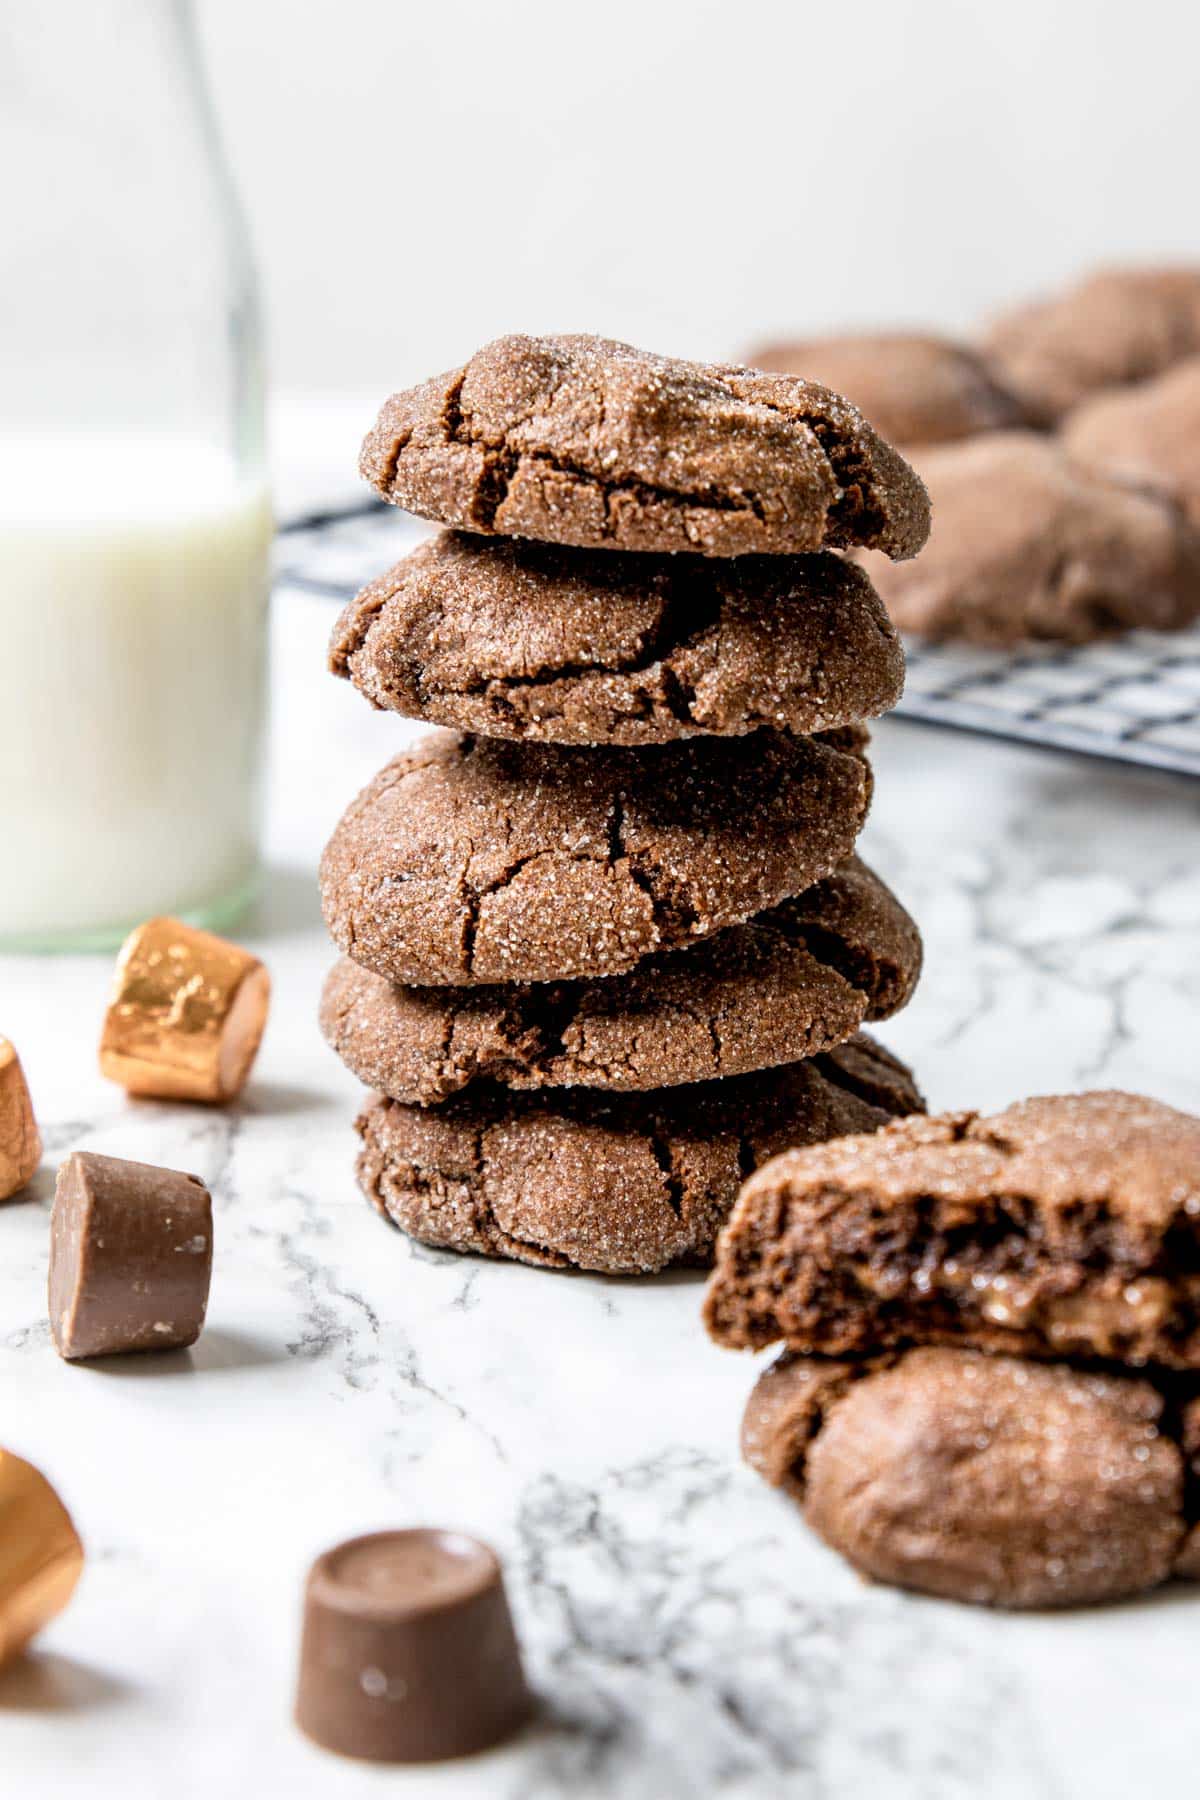
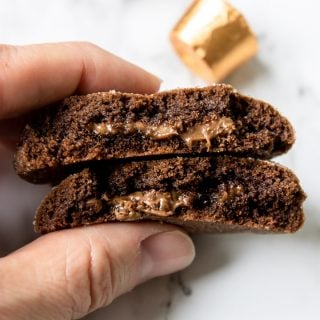
Rolo Cookies are soft and chewy chocolate cookies stuffed with a Rolo candy. When the cookies bake the Rolo melts and creates a fudgy middle that is filled with a gooey caramel center. They are kind of a “surprise cookie” because they look like a plain chocolate cookie on the outside but they hold delicious treat in the middle!

If you love Rolo candies, you will also want check out this recipe for Rolo Pretzel Turtles. Both the Chocolate Rolo Cookie and the Rolo Turtle make amazing Christmas Cookies!
Ingredients
These Rolo Cookies are made with mostly traditional cookie ingredients. So if you have a well stocked baking cabinet, plus eggs and butter, you can probably make these.
You will just need to get Rolo Candies. More on those below.
- all purpose flour
- unsweetened cocoa powder
- baking soda
- salt
- sugar
- brown sugar
- butter softened at room temperature
- vanilla extract
- eggs
- Rolo Candies
Rolo Candies
This is a main ingredient, the star of the show! So make sure you get the right thing (see photo below)!
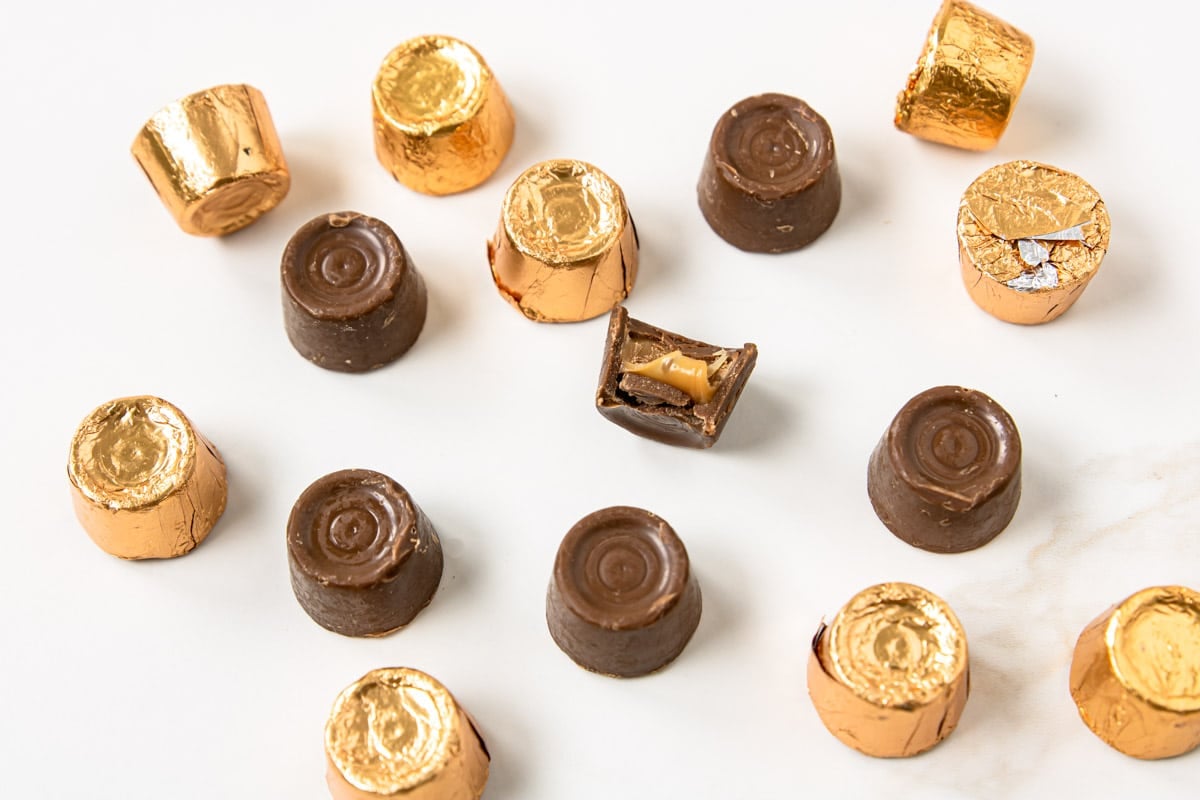
You can find Rolo candies in the candy aisle at your grocery store. When I am making these cookies I find that buying the 10.6 oz bag of Rolos is the best bet. You will have a couple left over, but they make a great after lunch sweet treat!
Kitchen Tip: Unwrap about 36 Rolo candies before you start this recipe (it’s a great job for kids, if you don’t mind them eating a few). Having them unwrapped and ready to go will make quick work of this recipe.
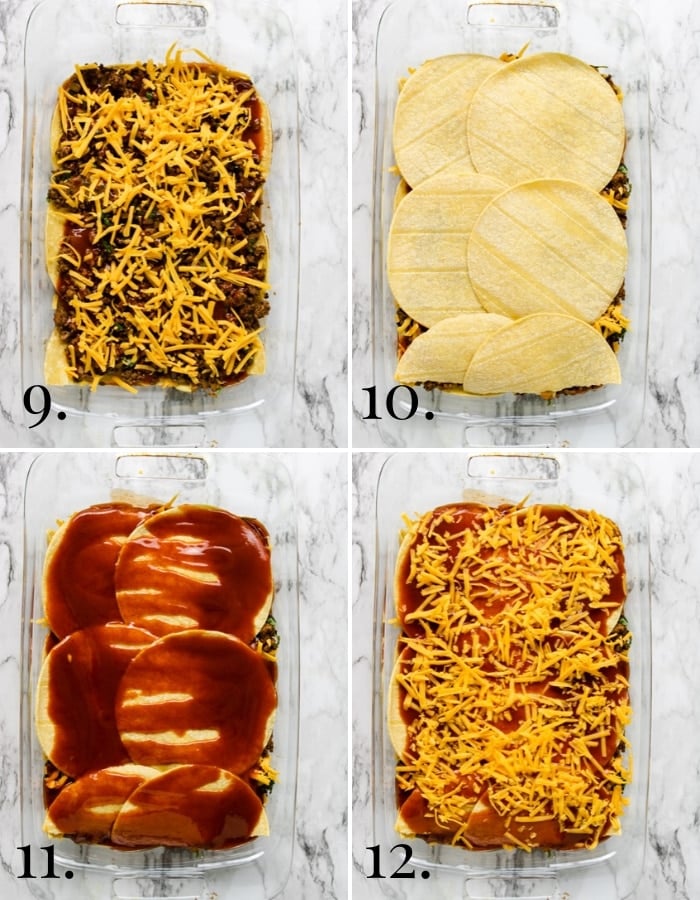
How to Make Rolo Cookies
These Rolo cookies are pretty easy to make. Simply make the dough, stuff each cookie with a Rolo, and bake! Let’s get started:
To get prepped:
- Preheat your oven to 375 degrees.
- Line one or two baking sheets with parchment paper or a reusable silpat.
- Fill a small bowl with ¼ cup sugar to dip the cookies in, set aside.
- Unwrap about 34 Rolo Candies and set aside.
- Using a fine mesh sieve, sift the flour, cocoa powder, salt and baking soda together. Set aside.
In a stand mixer (or a bowl and a handheld mixer) cream together the softened butter, brown sugar, and white sugar. Mix until it it completely creamy and fluffy, about 4 minutes.
Pro Tip: if your butter is not softened cut it into small ½ inch cubes and let it set in a warm area for about an hour.
Add the vanilla and eggs to the butter mixture. Blend until everything is well combines, about 1 minute.
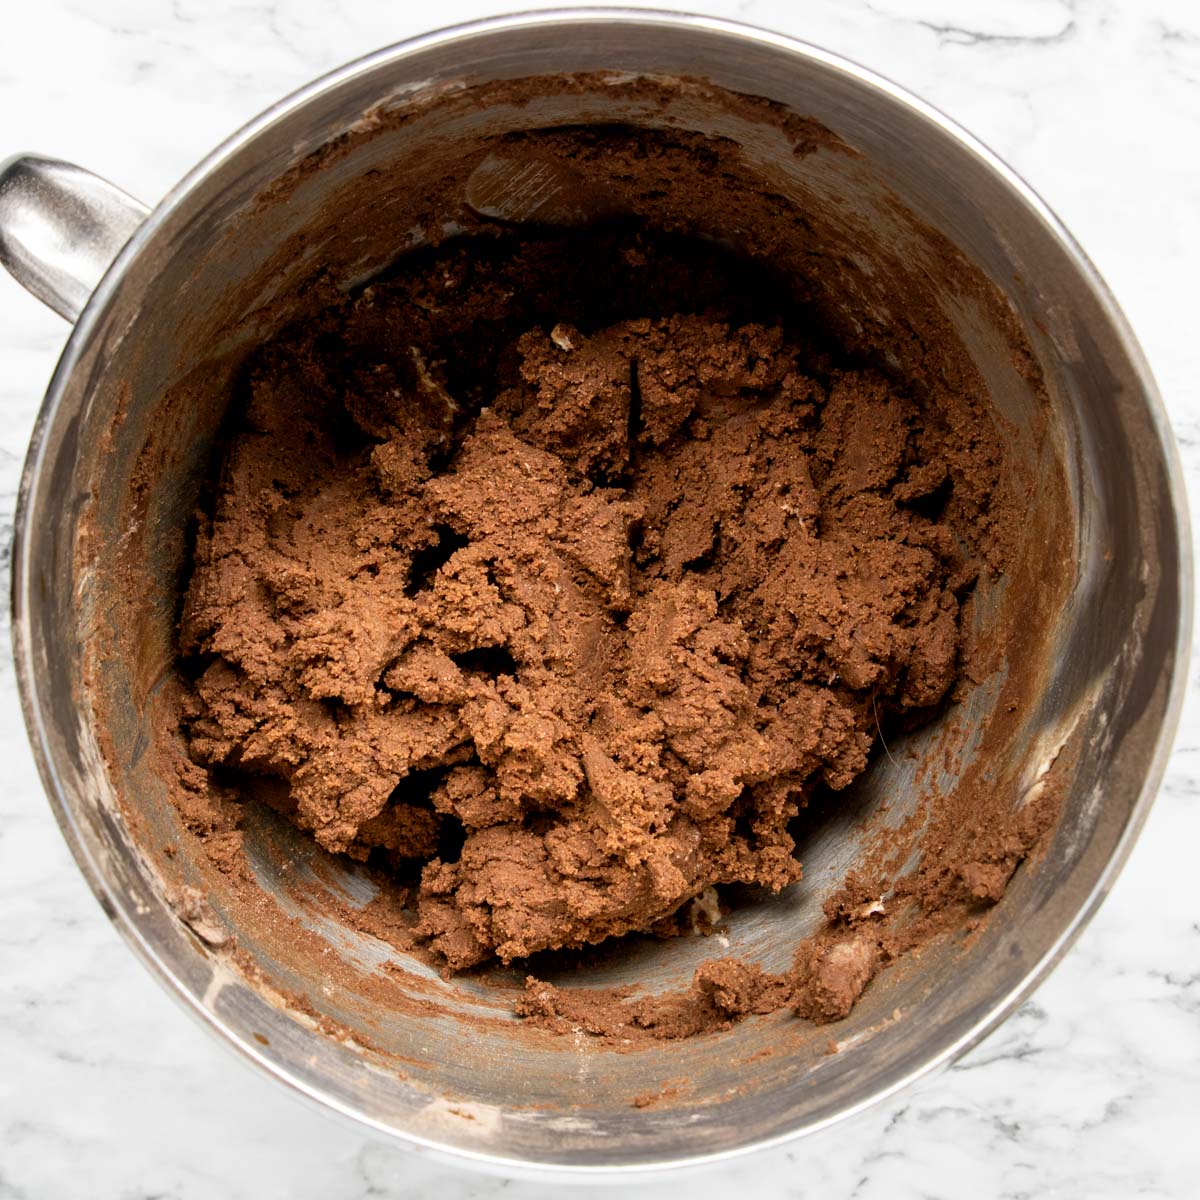
Add the sifted flour mixture, a little at a time, to the cookie dough. The dough will be thick!
Pro Tip: Sift the flour mixture onto a piece of parchment paper and use it as a slide/tube/funnel to easily pour the dry ingredients into the mixing bowl.
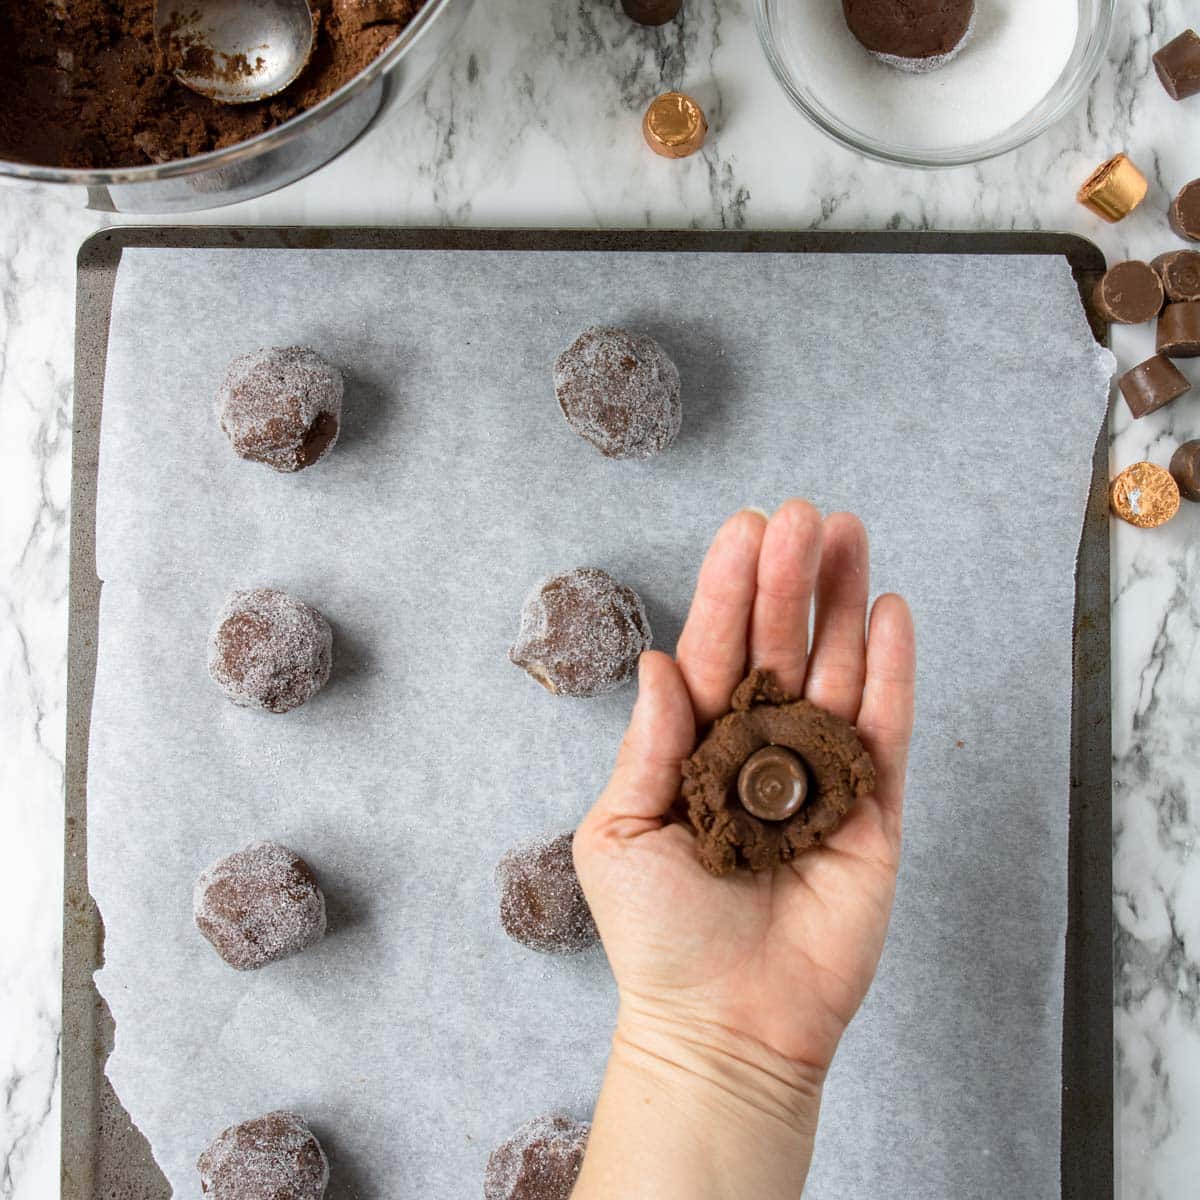
Using a tablespoon scoop out a generous tablespoon of dough. Place it in the palm of your hand and press one Rolo in the middle of the cookie. Then form the dough around the candy, covering it completely.
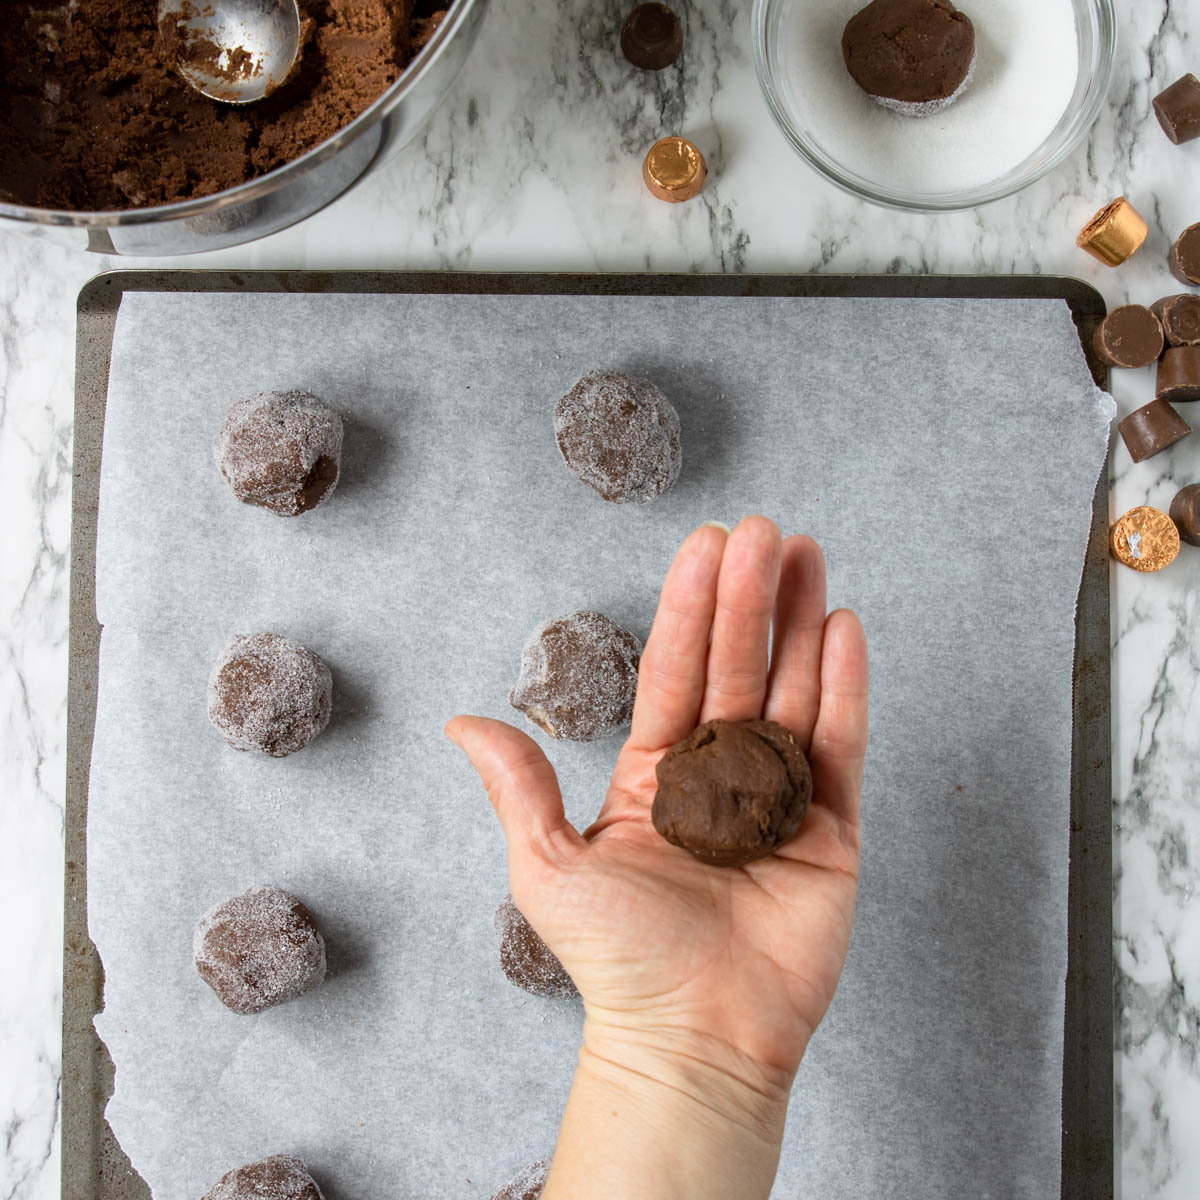
Roll the cookie in the sugar bowl to coat completely and place on the parchment-lined baking sheets.
Your bake time will vary per your cookie sheet:
- Dark colored cookie sheet – approx 10 minutes.
- Light colored cookie sheet – approx 11-12 minutes.
At the end, if you like a sweet and salty treat, you can sprinkle a little flaky sea salt over top!
Storing
Keep your Chocolate Rolo Cookies in an airtight container, at room temp, for up to 5 days. They will be softest in the first couple days.
Freezing
You can absolutely freeze your Rolo Cookie dough or the baked cookies!
Freeze Rolo Cookie DOUGH
Make the dough completely and roll into balls filled with the Rolo candies.
Do not roll in the sugar, wait and do that before you bake the cookies. Freeze the dough balls in an airtight/ freezer safe container for up to 3 months.
When it is time to bake, make sure to bake from frozen! Roll the dough balls in white sugar and bake at 375 for 10-12 minutes. They may need a minute longer since they were frozen.
Freeze BAKED Rolo Cookies
You can also freeze the baked cookies. Let them cool completely at room temp. Then wrap them in an airtight/freezer safe container and keep them in the freezer for up to 3 months!
Bring to room temp and enjoy. Or warm for 30 seconds in the microwave for a warm cookie treat!
More Homemade Cookies
If you are always looking for easy & delicious cookie recipes, here are a few to check out on Mom’s Dinner:

Did you make this recipe?
⭐⭐⭐⭐⭐
I would love to hear your review, especially if you have tips and tricks to add! Pop down to the comment section and connect with me
Homemade Chocolate Rolo Cookies Recipe
Equipment
Ingredients
- 2 ½ cups all purpose flour
- ¾ cup unsweetened cocoa powder
- 1 teaspoon baking soda
- ¼ teaspoon salt
- 1 cup sugar
- 1 cup brown sugar
- 1 cup butter - softened
- 2 teaspoon vanilla
- 2 large eggs
- Rolo candies - The 10.6 oz bag is the best buy for these cookies
- ¼ cup sugar - for rolling the cookies
Optional Garnish
- flaky sea salt - like Maldon Flake Sea Salt
Instructions
Prep
- Preheat the oven to 375°. Line one or two cookie sheets with parchment paper or reusable silpats. Pour ¼ cup sugar in a small bowl – set aside.Unwrap about 30 Rolo candies.
- Sift together the flour, unsweetened cocoa powder, salt, and baking soda.Pro Tip: sift onto a large piece of parchment paper. Then pick it up two sides, like a tube, so you can easily slide the ingredients into the mixing bowl.2 ½ cups all purpose flour, ¾ cup unsweetened cocoa powder, 1 teaspoon baking soda, ¼ teaspoon salt
Chocolate Cookie Dough
- In a stand mixer with the paddle attachment (or a bowl with a hand mixer) cream together the 1 cup softened butter, 1 cup brown sugar, 1 cup white sugar, until it is creamy and fluffy, about 4 minutes.
- Add the 2 teaspoon vanilla and 2 eggs to the butter mixture, mix together until it is well combined, about 1 minute.
- Add the sifted flour/cocoa mixture to the butter mixture, in batches. Only beat until it is combined.
- Using a tablespoon scoop out a generous tablespoon of cookie dough and place it in the palm of your hand. Press one Rolo into the center of the dough. Form the dough around the Rolo, covering it completely.
- Roll the cookie in the sugar, covering all sides. Place on the cookie sheet.
Baking
- Bake the cookies 9-12 minutes. Time will depend on your cookie sheet:Dark colored cookie sheets – 9-10 minutesLight colored cookie sheets – 11-12 minutes.
- Pro Tip: if cooking in batches, place the cookie dough in the fridge while each batch bakes.
- If you like a sweet and salty cookie, right when the cookies come out of the oven you can sprinkle a little flaky sea salt over top!
- Let the cookies cool for a few minutes and then enjoy!
Freezing
- See Notes.
Recipe Tips and Notes:
- Baked Cookies – cool completely and then place in an airtight & freezer safe container. Freeze for up to 3 months.
- Cookie Dough – Prepare the cookies completely but do not roll in the sugar. Place in an airtight & freezer safe container and keep frozen for up to 3 months. When you are ready to bake them, bake from frozen- roll in sugar and bake for 11-12 minutes. May need a minute or two longer since they were frozen.