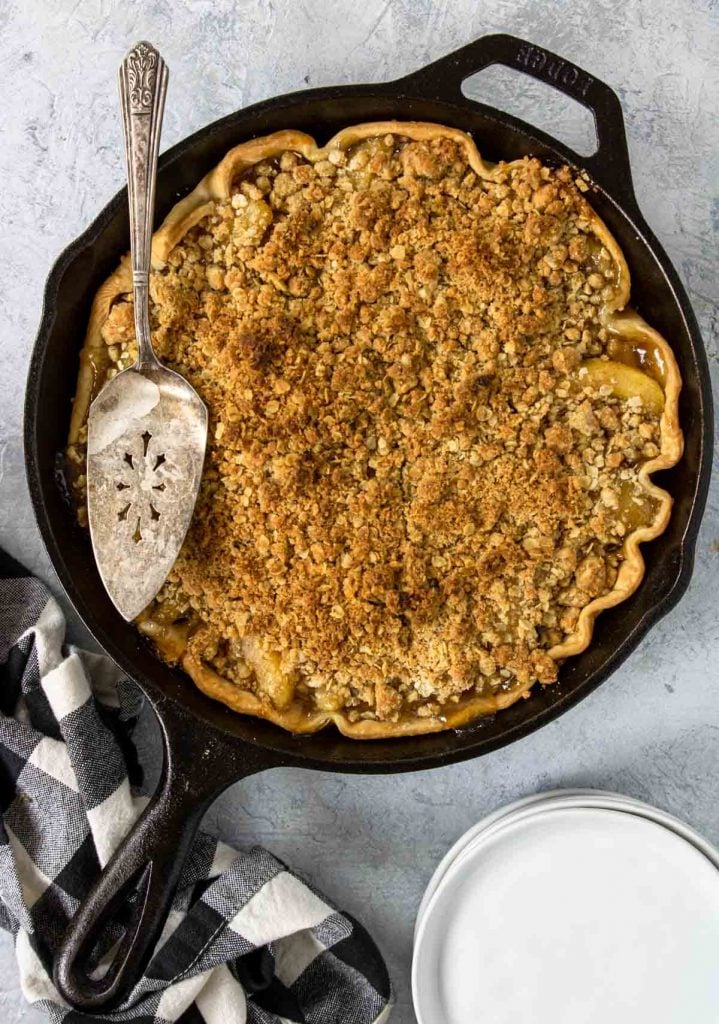
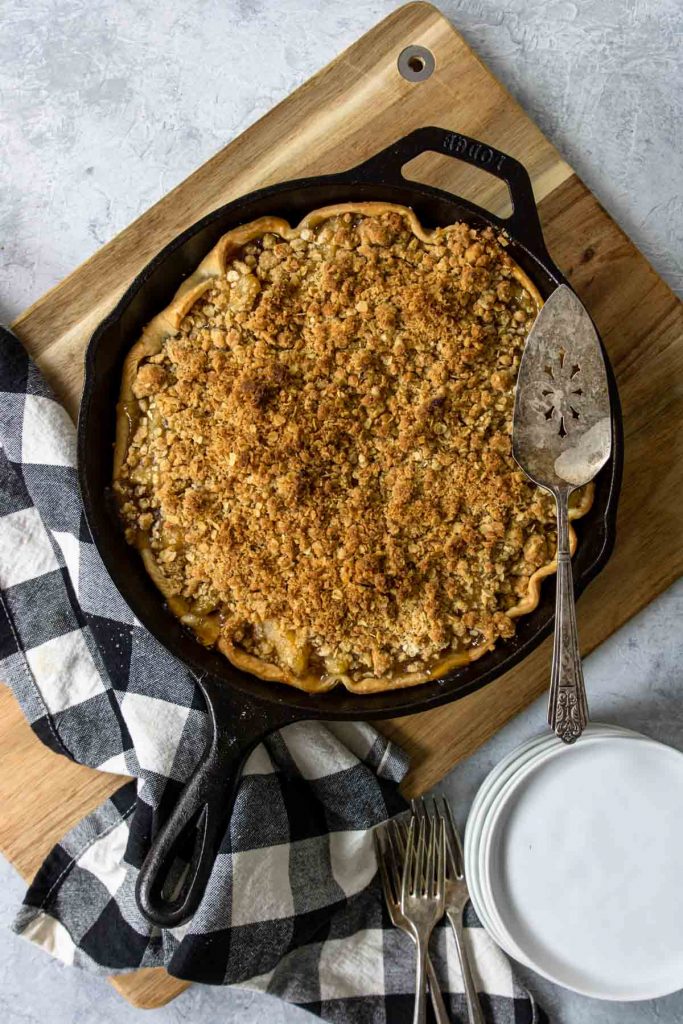
Skillet Apple Pie is a great way to make apple pie without all the work. In this recipe you take a couple shortcuts of buying apple pie filling, buying store bought crust, and making a crumble topping insteading of topping with pie crust. It is all baked in a cast iron skillet in 40 minutes! Just top it with some ice cream or a caramel drizzle and you have an amazing apple pie dessert.
You should also check out my Apple Pie Bars if you are in the market for all the apple desserts! Or if you want to change it up a bit, these Cherry Pie Bars are amazing too.
Skillet
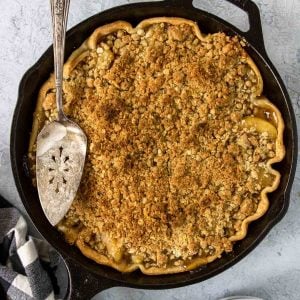
For this Skillet Apple Pie I recommend that you use a seasoned 8 inch cast iron skillet. You can also use a 10 inch skillet you just won’t have as much crust on the sides of the pie. But it will still work!!
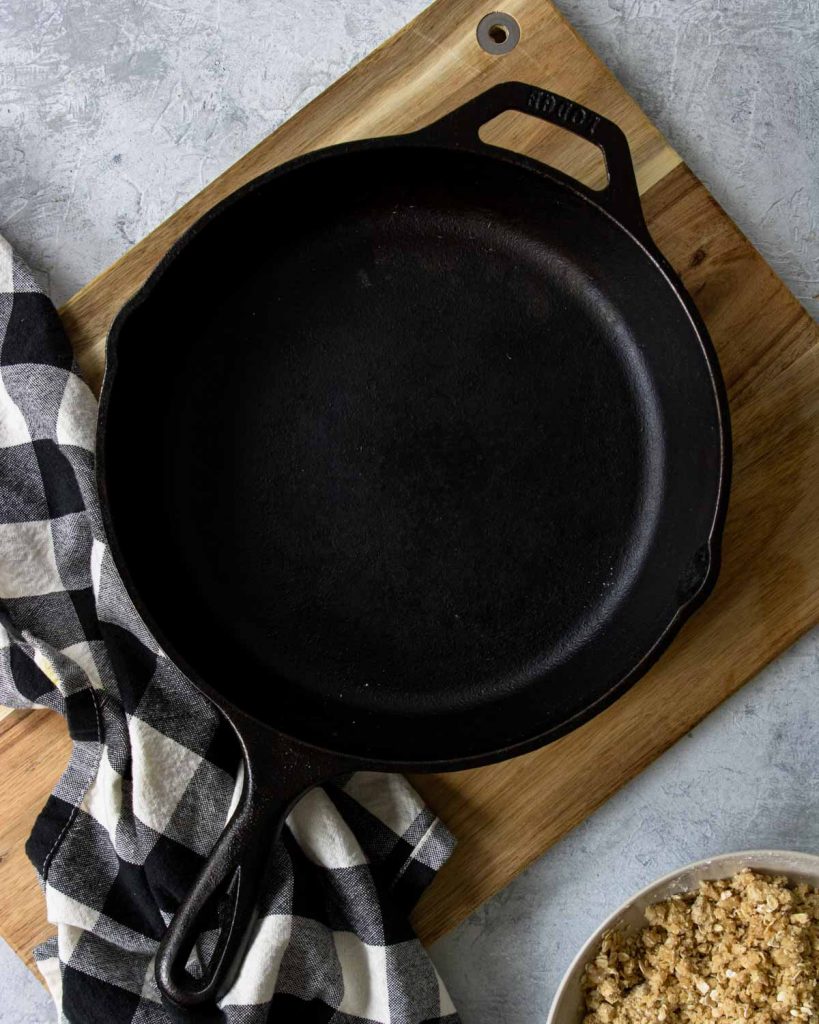
The recipe would also work in a pie pan or dutch oven. I just love the rustic look of the cast iron skillet!
How to Make Skillet Apple Pie
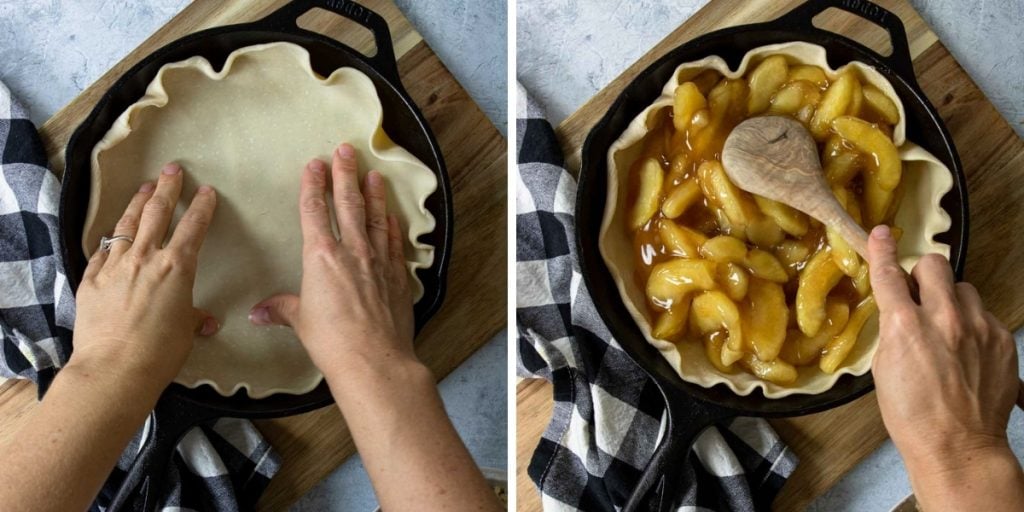
Start by preheat the oven to 350 degrees and taking your pie crust out of the fridge so it will unroll without breaking.
Oil or grease your skillet then unroll the crust and lightly press it into the shape of the skillet.
Fill the crust with your apples. If you like, you can stir in a little extra cinnamon.
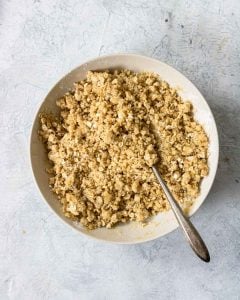
In a seperate bowl mix together the crumble topping ingredients
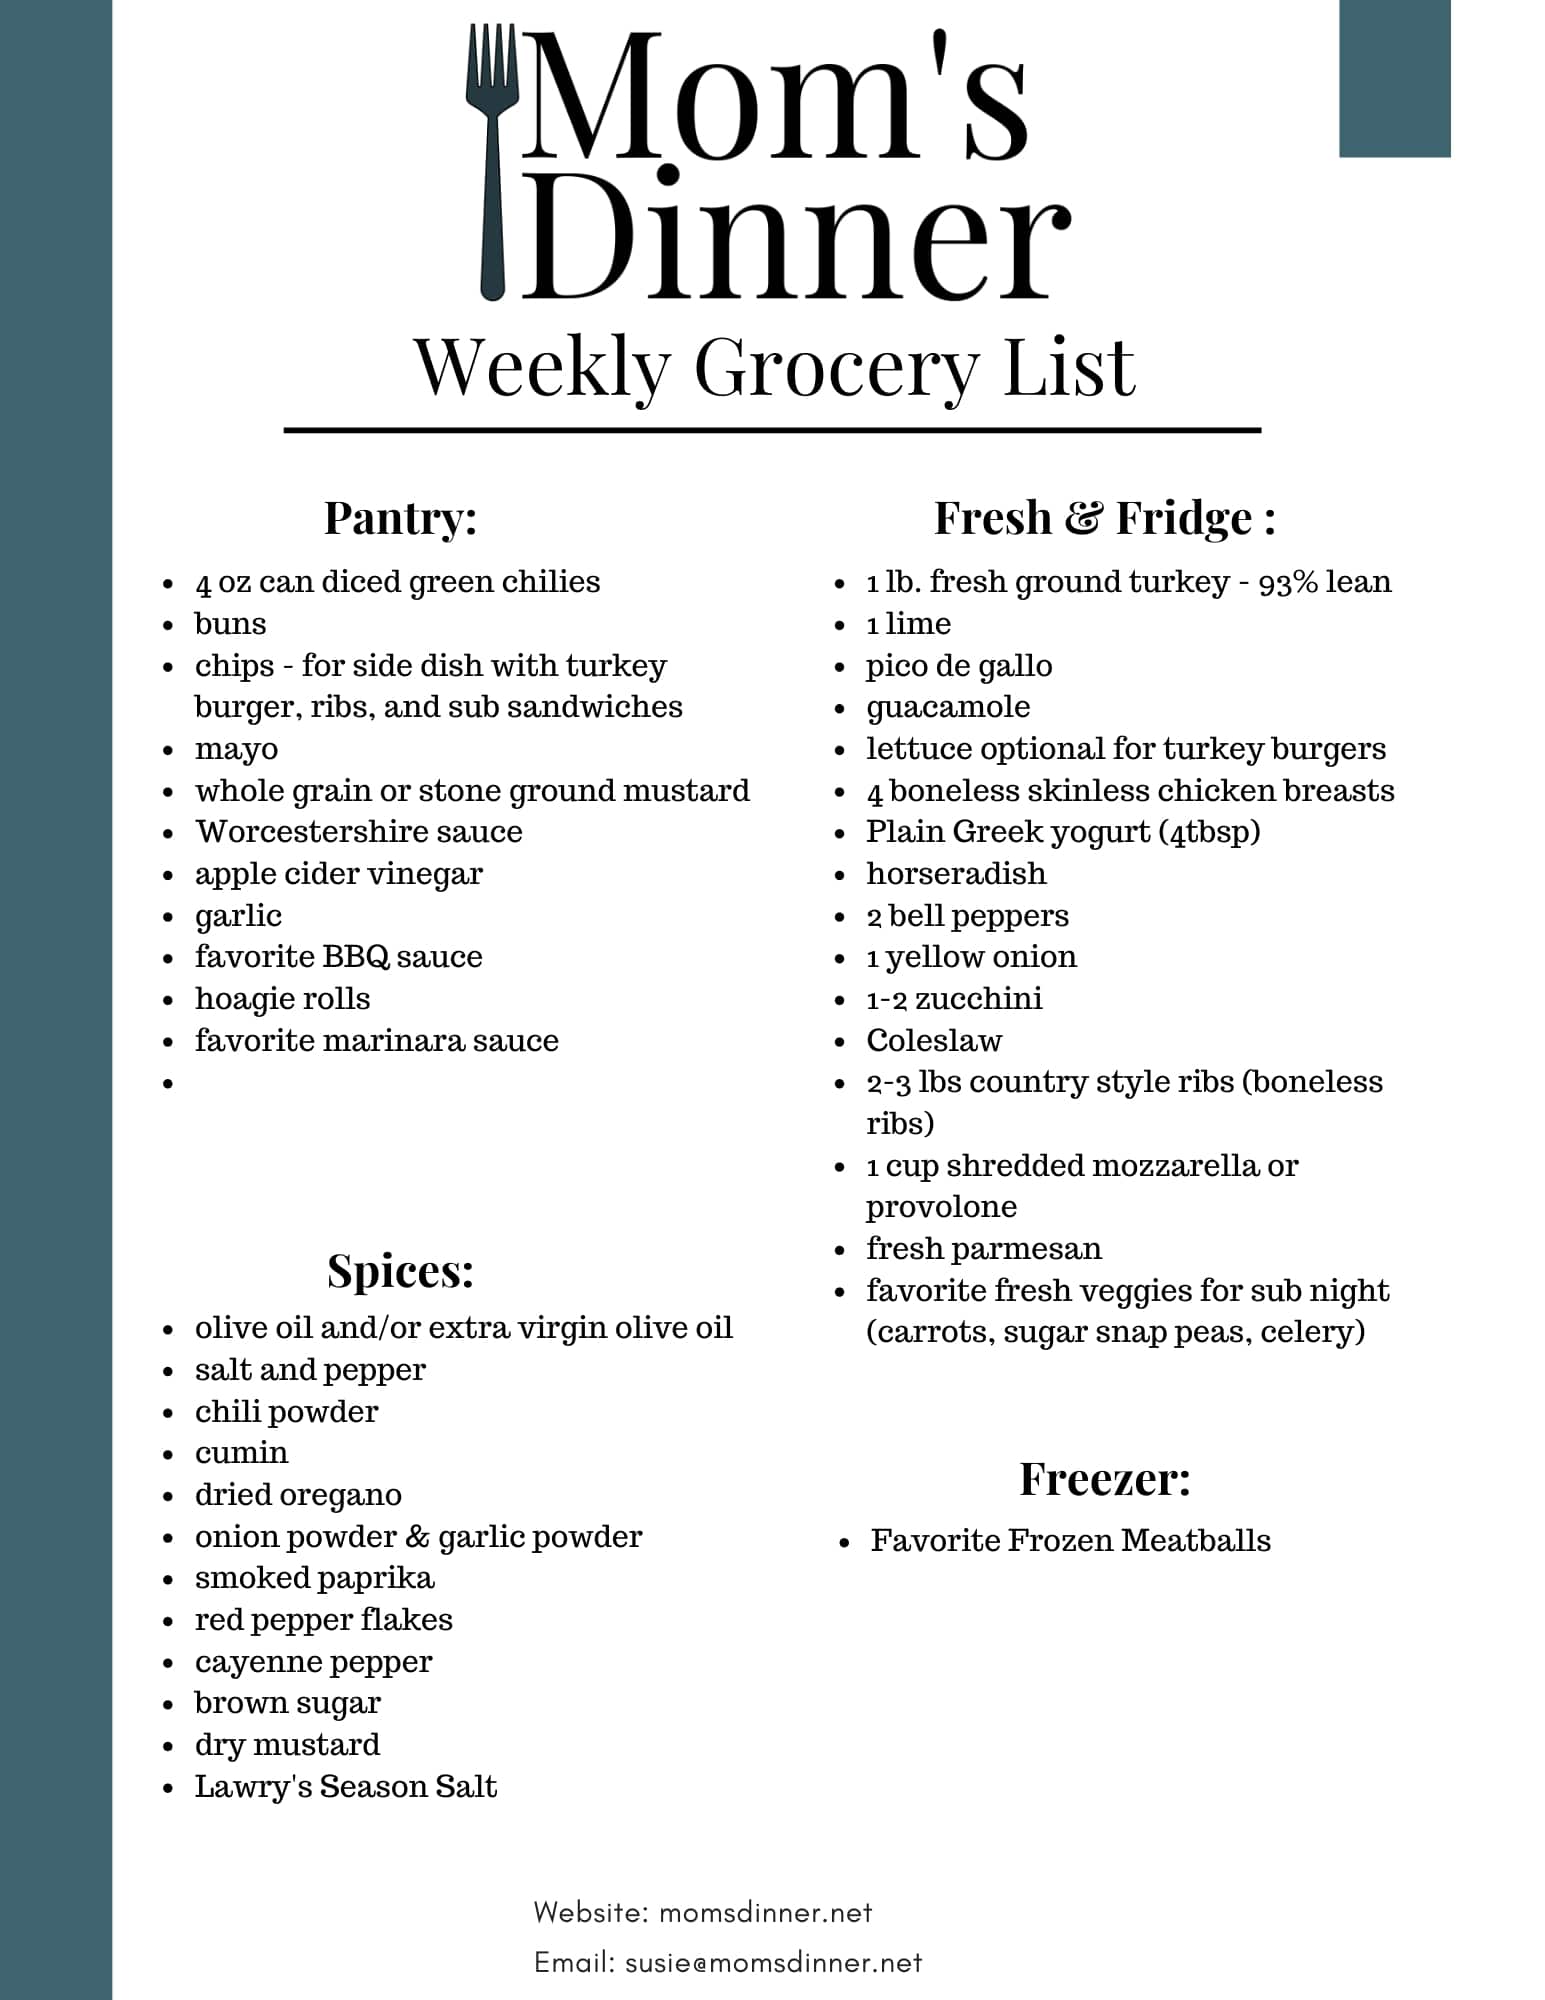
- ¾ cup oats
- ¾ cup flour
- ½ cup brown sugar
- ⅓ cup melted butter
- ½ teaspoon cinnamon
- ¼ teaspoon baking soda
- ¼ teaspoon baking powder
- salt
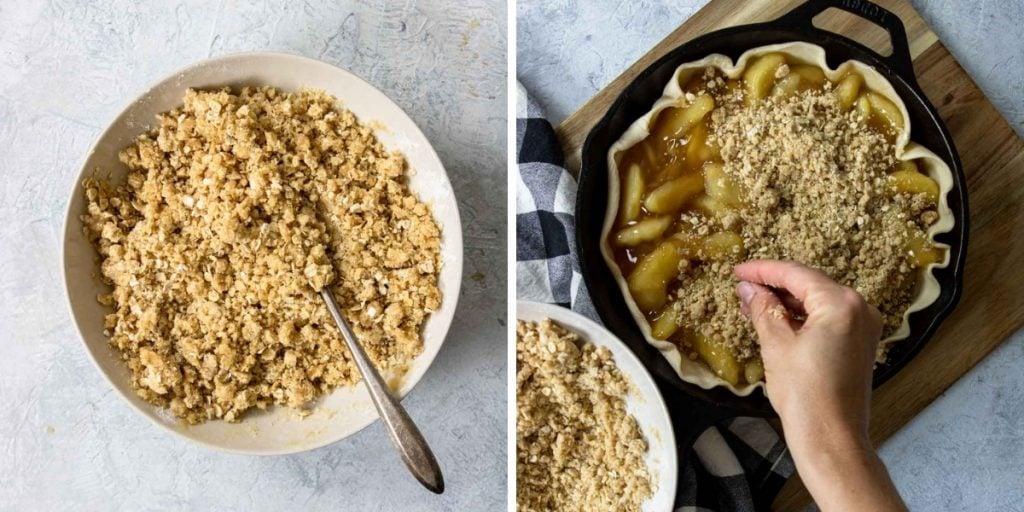
Mix together with a fork so it is combined and crumbled.
Sprinkle the crumble topping across the pie.
Pop in the oven and bake for 40 minutes. NOTE – you may want to check at 30 minutes and see if you need to tent foil over top so the crumble doesn’t burn.
Let cool for 15-20 minutes before serving. Serve with ice cream!
Storing
Store any leftover pie for up to 4 days, covered, at room temp. I have found that if you are keeping it for more than 2 days it is better to store in a separate pan, other than your cast iron. If you keep it in your cast iron the pie can start to take on a “metal” taste.
Easy Skillet Apple Pie Recipe
Easy Skillet Apple Pie
Equipment
- 8 inch cast iron skillet
Ingredients
- 2 – 21 oz apple pie filling - if your apples don't have cinnamon added, sprinkle ½ teaspoon and stir it into the apple filling.
- 1 – 10 inch store bought pie crust
- baking spray or oil
Crumble Topping
- ¾ cup oats
- ¾ cup flour
- ½ cup brown sugar
- ⅓ cup melted butter
- ½ teaspoon cinnamon
- ¼ teaspoon baking soda
- ¼ teaspoon baking powder
- pinch of kosher salt
Instructions
- Preheat the oven to 350°. Remove your pie crust from the fridge and let it sit at room temp for 10-15 minutes so it will unroll without ripping.
- Make the crumble topping by combining all the ingredients and stirring with a fork until it is completely combined. Set aside

- Spray your cast iron skillet with some baking spray.
- Fit the unbaked pie crust into the skillet.
- Pour the apple pie filling into the pie shell and spread it out to fill the crust.
- Sprinkle all the crumble topping over the apples.
- Bake at 350° for 35 minutes.Let the pie cool for 15 minutes before serving.
- Serve with ice cream! (or a drizzle of caramel sauce – you can half the caramel sauce recipe)