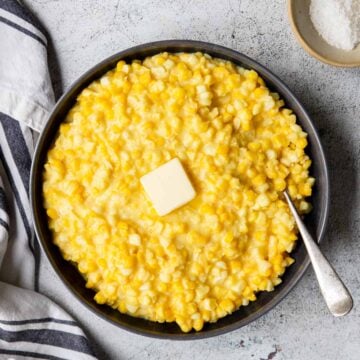
This is the ultimate Corn Chowder recipe that is thick, creamy and comforting. It has triple corn flavor from the fresh sweet corn on the cob, the milk and pulp from the cob, and corn meal to add rich thickness and flavor. Serve this chowder topped with crispy bacon, sour cream, green onions and a shot or two of hot sauce.

If you have a bumper crop of sweet corn or are lucky enough to have an abundance of local growers near you (like in the Midwest!), here are some other fresh corn recipes:
[feast_advanced_jump_to]Why This Recipe is Amazing!
- The recipe starts with crisp bacon and bacon grease. Hello flavor!
- It has a really pronounced flavor of sweet corn from the fresh corn cut from the cob AND the milk and pulp scraped from the cob.
- It is triple thickened with a puree of the soup, half and half, and corn meal. This means your chowder will be thick and creamy.
- The corn boils just the right amount to be tender-crisp. The perfect texture.
Listen To or Watch The Recipe!
You can also listen to the full recipe with all the tips and tricks on the Let’s Make Dinner Podcast. There is an audio player included in the recipe card below!
Or pop down to the recipe card and watch Susie make this Corn Chowder on an 11 minute You Tube video. Available in the recipe card below.
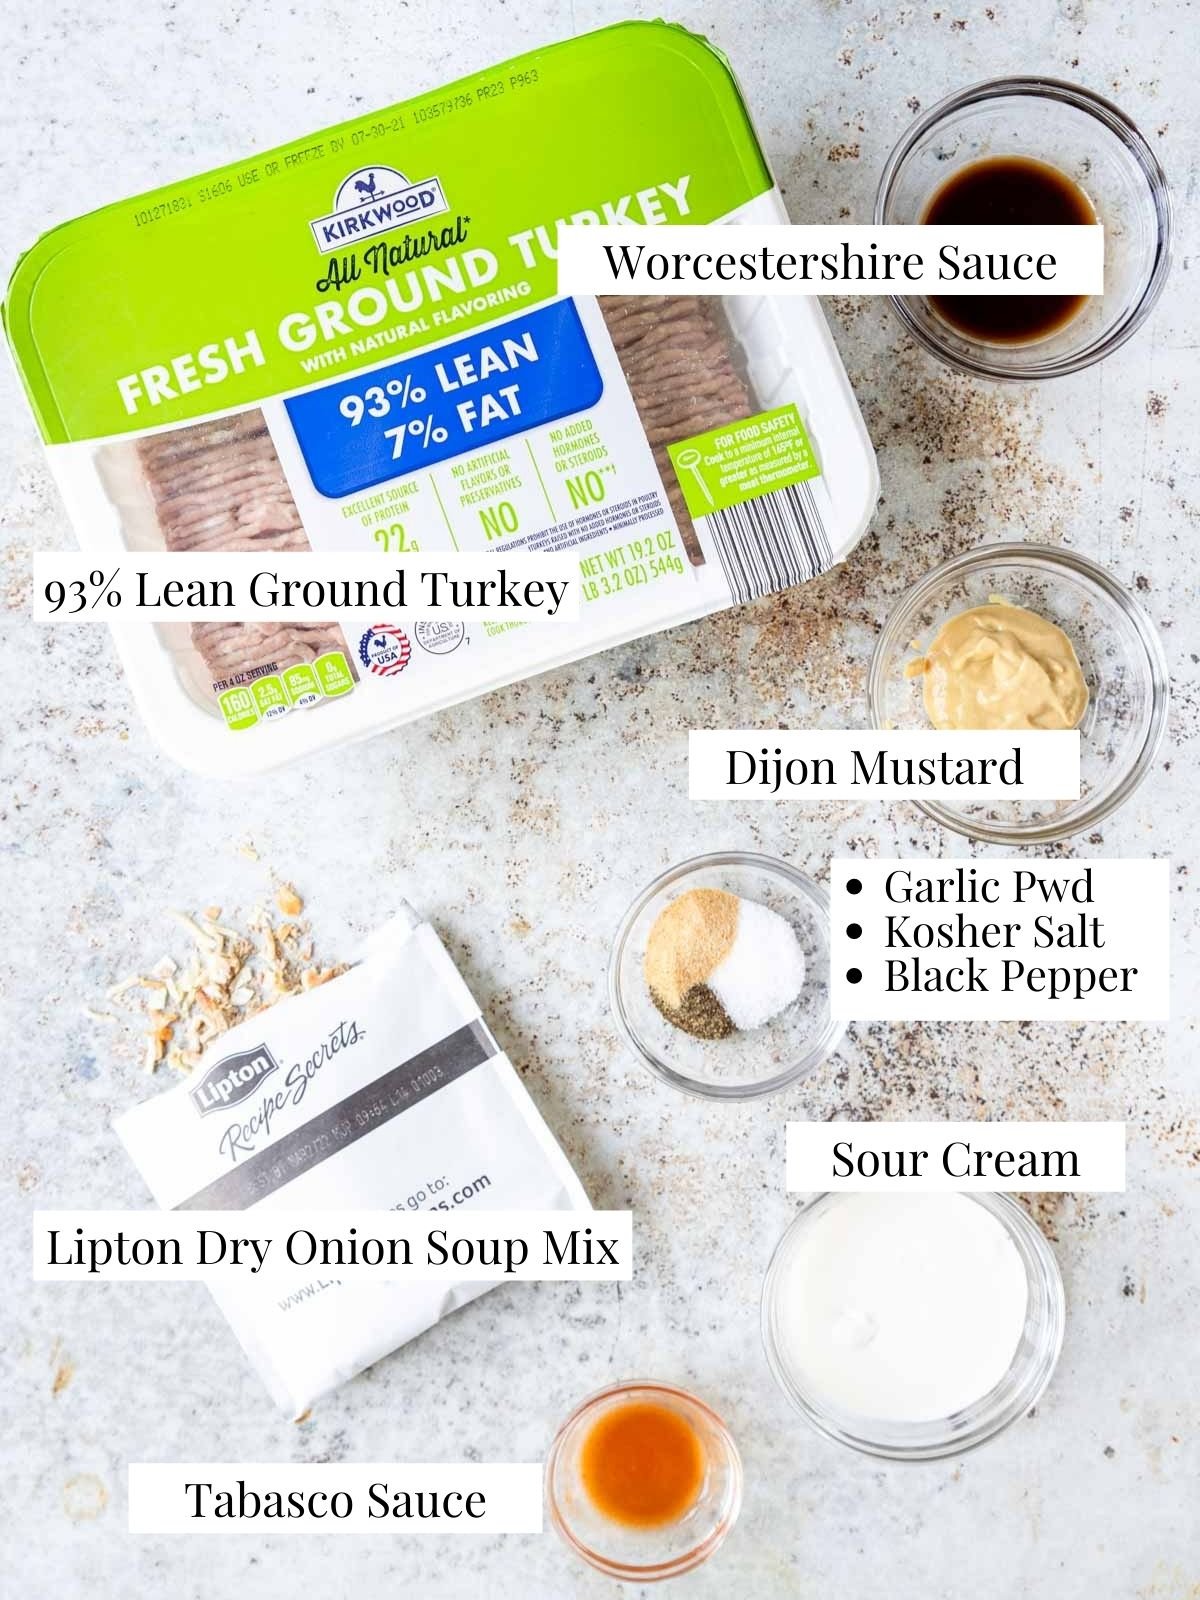
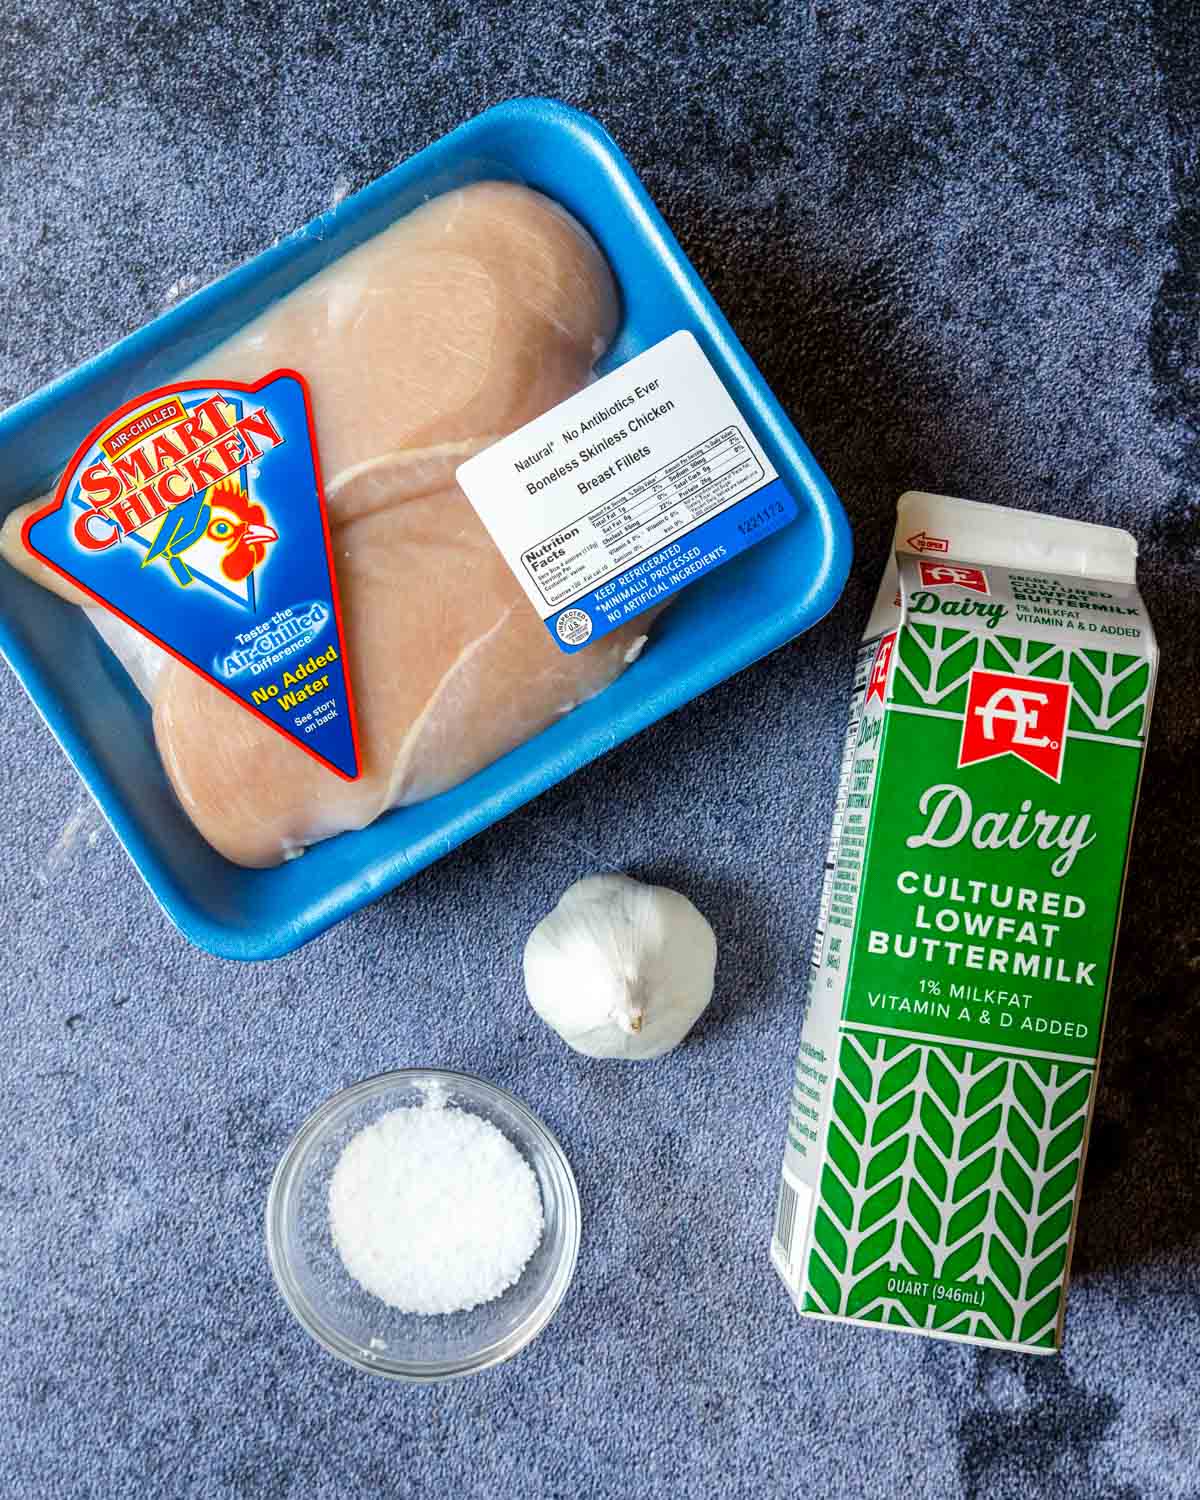
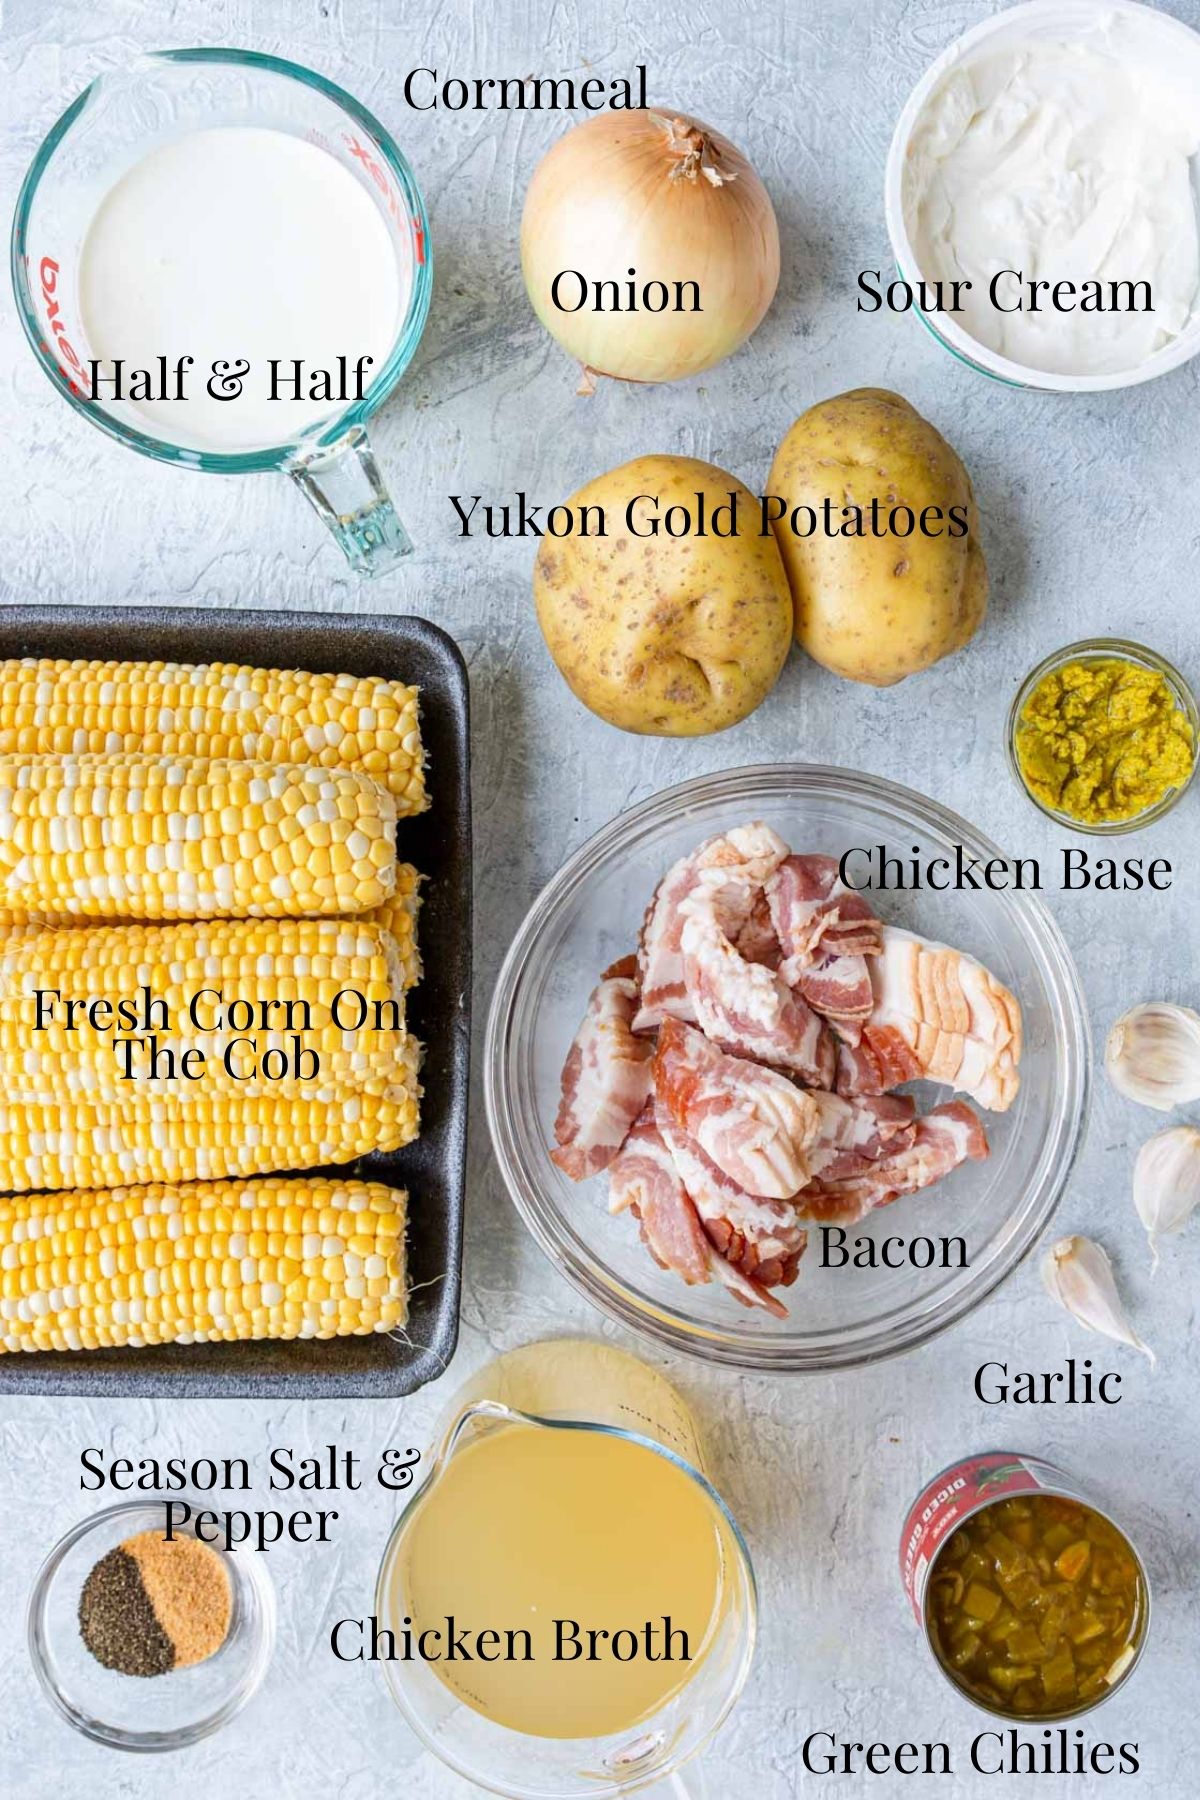
Ingredients
Here are the ingredients you will need to make this Creamy Corn Chowder:
Cornmeal for Thickening
In this recipe you will use cornmeal to further thicken the broth at the end. Just a couple tablespoons of cornmeal thickens it up perfectly, and adds even more delish corn flavor!
How TO Make Corn Chowder
Sauté the Bacon in a large pot. If you need to, do it in batches so it gets nice and crispy. Set the bacon aside, but leave about 2-3 tablespoon grease in the pot.
Sauté the Onions, Garlic and Green Chilies in the bacon grease, for about 5 minutes. Scrape up any bacon bits and browning from the bottom of the pot.
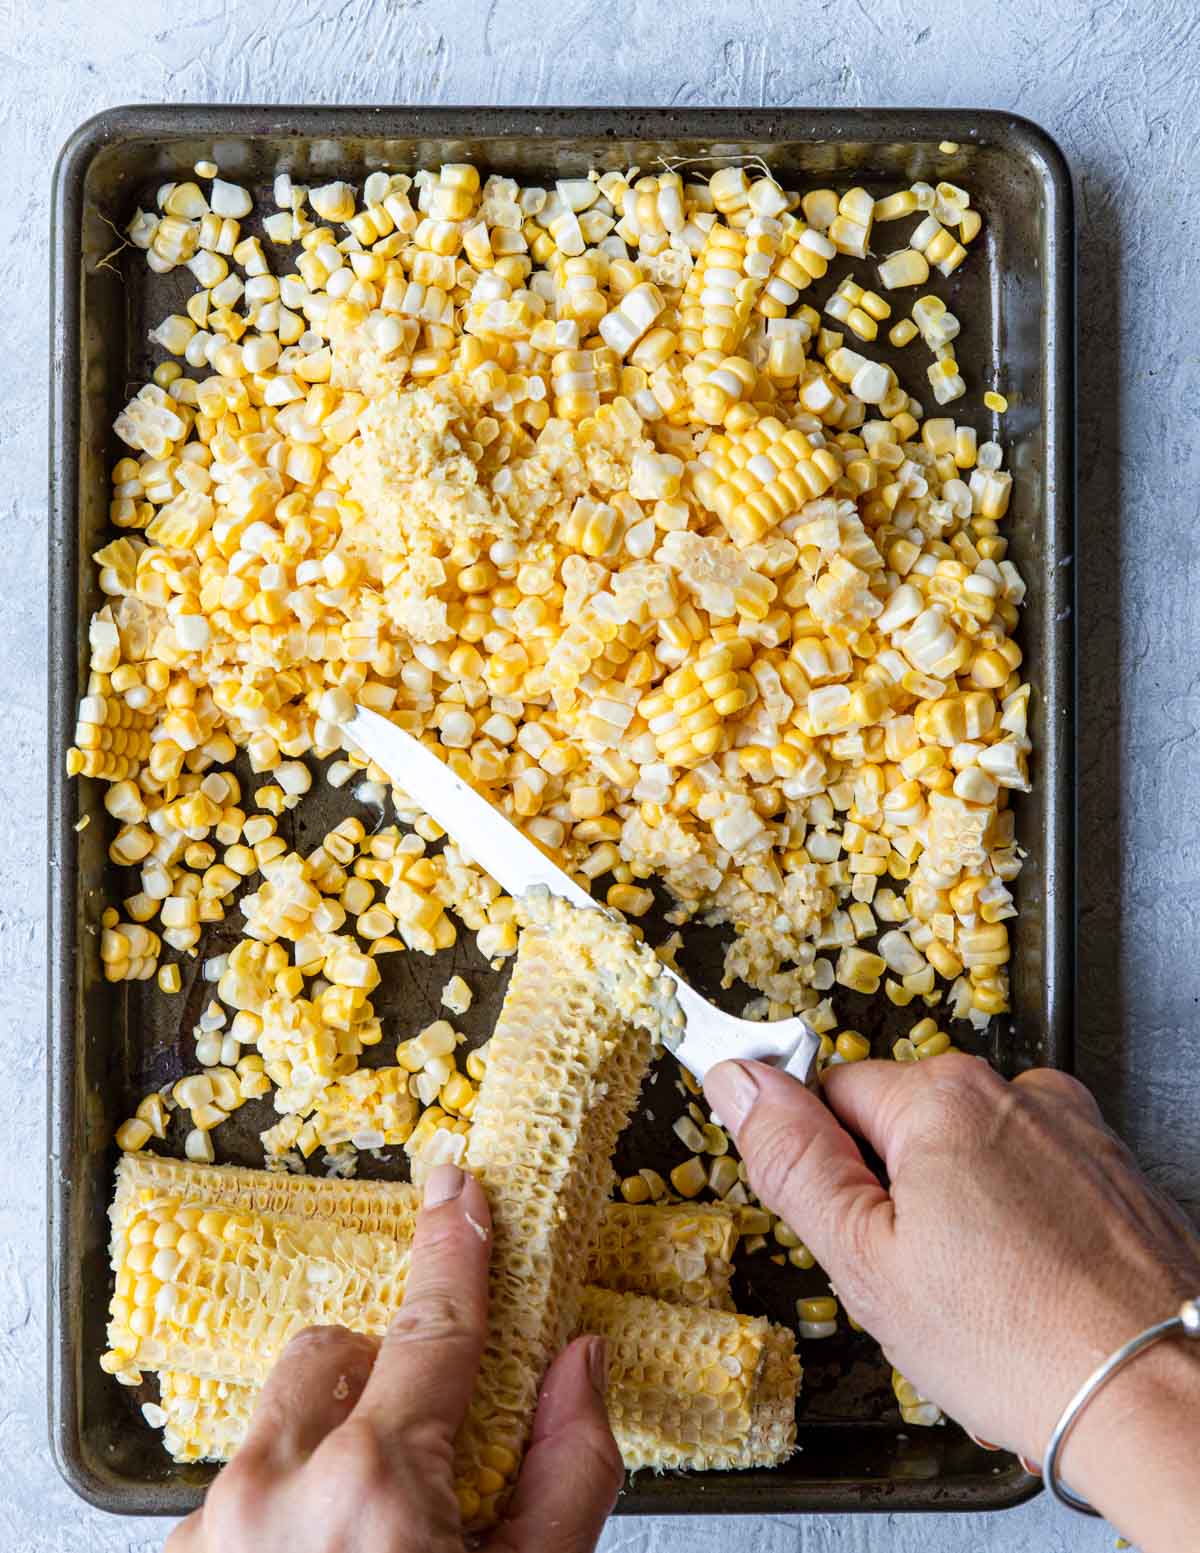
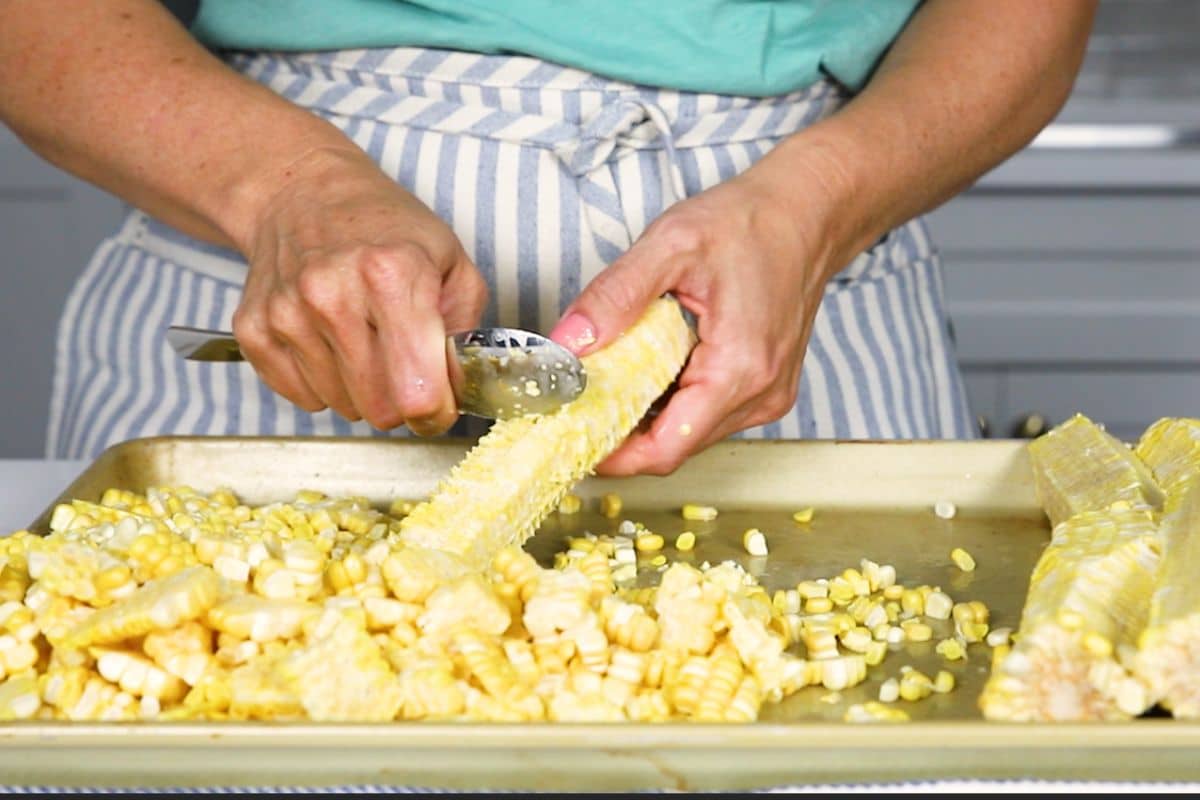
Remove the corn kernels from 5-6 cobs. Then take the blunt side of the knife and scrape it across the cob, removing the milk and pulp from the cob.
Add the chicken base, potatoes, corn (with corn milk & pulp), broth, season salt and pepper to the pot. Bring to a boil then reduce the heat to low. Simmer for 20 minutes.
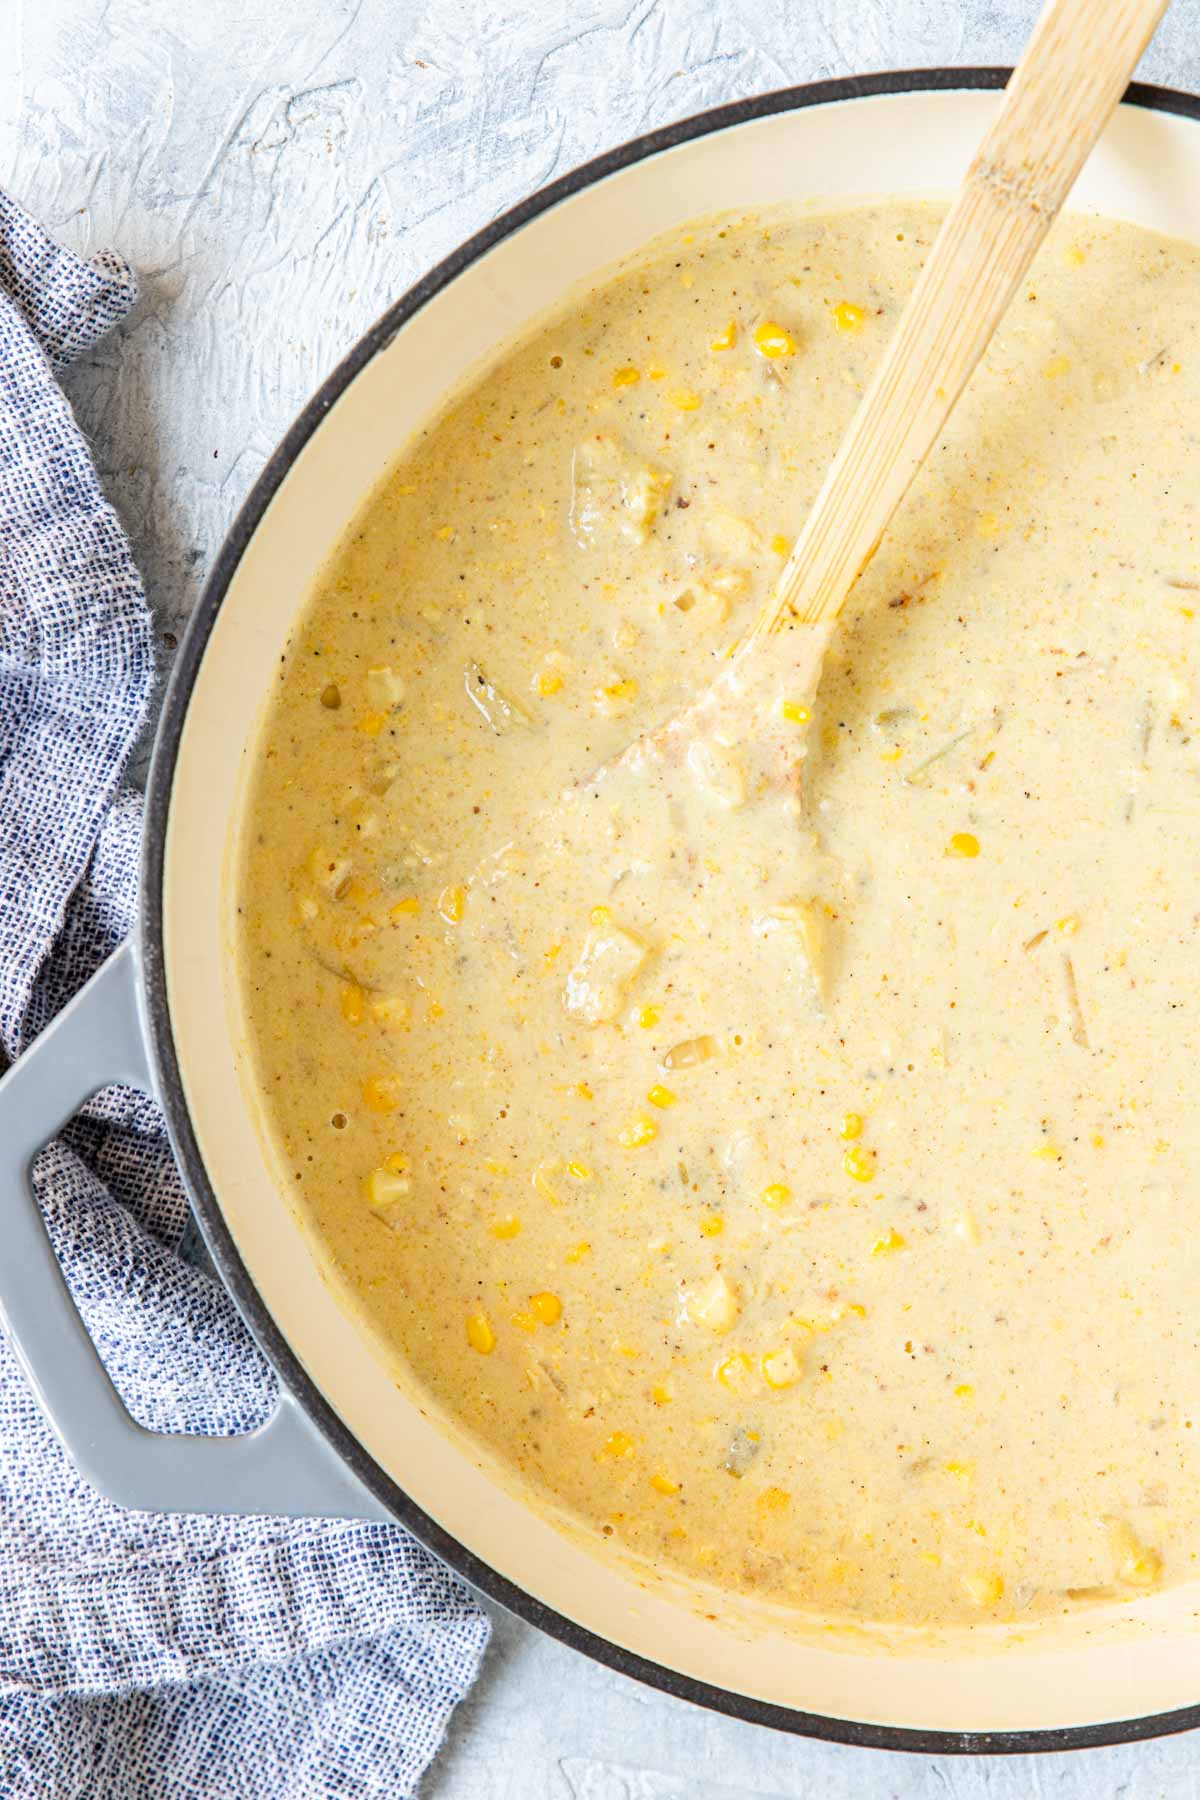
Puree 2 ½ cups of the soup until it is fairly smooth and creamy. Add back to the pot.

Whisk in the half & half, sour cream and cornmeal. Warm over low for another 10 minutes.
Taste for additional seasoning (salt and pepper).
Using Frozen Corn
The very best type of corn for corn chowder is fresh corn on the cob, hands-down! However, if it is not available to you you can use frozen corn. Here are the changes I would make to use frozen corn:
- Increase to 4 cups frozen corn.
- Wait to add the corn, after the potatoes have simmered for 20 minutes.
- Stir in 1 tablespoon honey with the cornmeal, to account for not having the corn milk and pulp.
Serving
Serve your corn chowder topped with the crispy bacon, sour cream, green onions, and/or hot sauce! Here are some great side dish ideas:
- Warm crusty bread, like ciabatta.
- Corn Muffins or Sweet Corn Bread or Buttermilk Corn Bread
- A side salad with a tart vinaigrette, like this Basil Vinaigrette.
- We love kettle cooked chips on the side (like Panera!)

Storing Leftovers
Store leftover Corn Chowder in an airtight container in the fridge for up to 4 days. It may thicken in the fridge, to reheat add milk or chicken broth to reconstitute.
Freezing Leftover Corn Chowder
I wouldn’t recommend freezing the Corn Chowder as it is because of the dairy content which doesn’t tend to thaw well.
However, if you make a few changes you can freeze this recipe:
- Leave the half & half, sour cream, and cornmeal out of the recipe.
- Freeze the soup.
- Thaw in the fridge overnight.
- Add the half & half and cornmeal, warm over low heat for about 15 minutes. Stir in the sour cream and heat another 5 minutes.
If the texture still didn’t come out quite right, puree the whole soup and eat it as a creamy corn soup.
Troubleshooting
Too Thick? Add a little extra cream or broth and simmer it in for a couple minutes.
Too Thin? Add another tablespoon or two of cornmeal and let it simmer for another 10 minutes.
Slow Cooker
You can absolutely use your slow cooker to make this Corn Chowder. Jump down to the notes section in the recipe card for all the details!
More Soup & Related Recipes


Did you make this recipe?
⭐⭐⭐⭐⭐
I would love to hear your review, especially if you have tips and tricks to add! Pop down to the comment section and connect with me
Updated Recipe Notes
I decided to completely revamp this recipe (originally posted Sept 2020, updated Sept 2021). Here is why and how I made changes:
- I wanted a little more corn flavor. Originally the recipe called for boiling the cobs after removing the corn. I found that if you scrape the blunt side of a knife across the cobs you get this delicious milk and pith that is FULLLLLLLL of corn flavor.
- I also thought it needed a little extra corn. So instead of 3-4 ears of corn, the recipe calls for 5-6 ears of corn.
- I wanted a thicker more chowder-ey texture that the corn meal alone was not providing. So we added potatoes and did a puree of 2 ½ cups of the soup, plus added the corn meal at the end. Perfection!!
- The celery added a texture that competed with the corn, so we omitted it in the updated recipe.

Corn Chowder Recipe + Video
Ingredients
- 6 pieces bacon, diced
- 1 yellow or white onion, chopped
- 3 garlic cloves, chopped
- 4 oz can chopped green chilies
- 2 teaspoon chicken base - I use Better Than Bouillon brand
- 32 oz chicken stock or broth
- 5-6 ears fresh corn - (about 3 ½ cups)
- 2 cups Yukon gold potatoes - peeled, ½ inch dice
- ½ teaspoon Lawry's Season Salt
- ½ teaspoon black pepper
- 3 tablespoon cornmeal
- 1 cups half & half
- ½ cup sour cream
- couple dashes Tabasco
Serving
- top with cooked crispy bacon, green onions, sour cream and hot sauce.
Instructions
- On a rimmed baking sheet cut all the corn from the cobs. Turn your knife over to the blunt side (or use a spoon), and scrape the cobs. You will get a lot of corn milk and pulp. Add that to the corn kernels.5-6 ears fresh corn

- In a large pot cook the diced bacon until crispy. Using a slotted spoon remove the bacon and set aside. Leave 2-3 tablespoon bacon grease in the pot.6 pieces bacon, diced
- Over medium heat, add the 1 chopped onion and 3 chopped garlic cloves to the pot. Sauté in the bacon grease for 5 minutes, scraping up any browned bits on the bottom of the pot.1 yellow or white onion, chopped, 3 garlic cloves, chopped
- Add the 4 oz can green chilies, and 2 teaspoon chicken base. Stir around the pot.4 oz can chopped green chilies, 2 teaspoon chicken base
- Pour in the 32 oz. chicken broth, corn (with corn milk and pulp), potatoes, season salt, and pepper. Bring to a boil over medium-high heat, then lower to low and simmer for 20 minutes.32 oz chicken stock or broth, 2 cups Yukon gold potatoes, ½ teaspoon Lawry's Season Salt, ½ teaspoon black pepper
- Remove 2 ½ cups of the soup and blend in a blender or food processor until smooth. Careful when blending hot liquids! You can also use an immersion blender and blend about ⅓ of the soup right in the pot.
- Add the puree back to the soup and give it a good stir.
- Whisk in the half & half, sour cream, and cornmeal. Give it a couple dashes of Tabasco. Cook over low for another 10 minutes.3 tablespoon cornmeal, 1 cups half & half, ½ cup sour cream, couple dashes Tabasco
- Taste for additional seasoning/salt.
- Let cool for 5 minutes and serve.
Serving
- Serve topped with sour cream, bacon, green onions, and/or hot sauce.
Recipe Tips and Notes:
- Leave the half & half, sour cream, and cornmeal out of the recipe.
- Freeze the soup, up to 6 months.
- Thaw in the fridge overnight.
- Add the half & half and cornmeal, warm over low heat for about 15 minutes. Stir in the sour cream and heat another 5 minutes.