When you want super creamy and flavorful Refried Beans this recipe for Instant Pot Refried Beans will be your go-to. You do not have to soak your dry pinto beans overnight for this refried bean recipe. Simply prep everything and cook in the instant pot for about 50 minutes. The cooked pinto beans blend up creamy and delicious. Just add some Mexican Rice and it is a perfect side dish for every Mexican Dinner!
Hands down the best refried beans EVER! We loved how they turned out and this will be my go-to recipe for refried beans from now on. I substituted a Serrano pepper for the jalapeño because it's all I had. Left the seeds in because we like hot and spicy. I also didn't have chicken base - just used chicken broth and water. Sooooo good! Thanks for sharing this recipe! -Karin
Why These Instant Pot Refried Beans are the Best
- You do not have to soak the beans overnight…saving you time!
- The Instant Pot does most of the work…no watching and stirring pots on the stove.
- We use layers of flavor for this recipe… onions, garlic, jalapeno, chicken base and spices.
- The recipe calls for olive oil and chicken base instead of lard.
- They blend up super creamy.
- You can use them as a side dish… and the leftovers make a killer bean burrito or enchiladas.
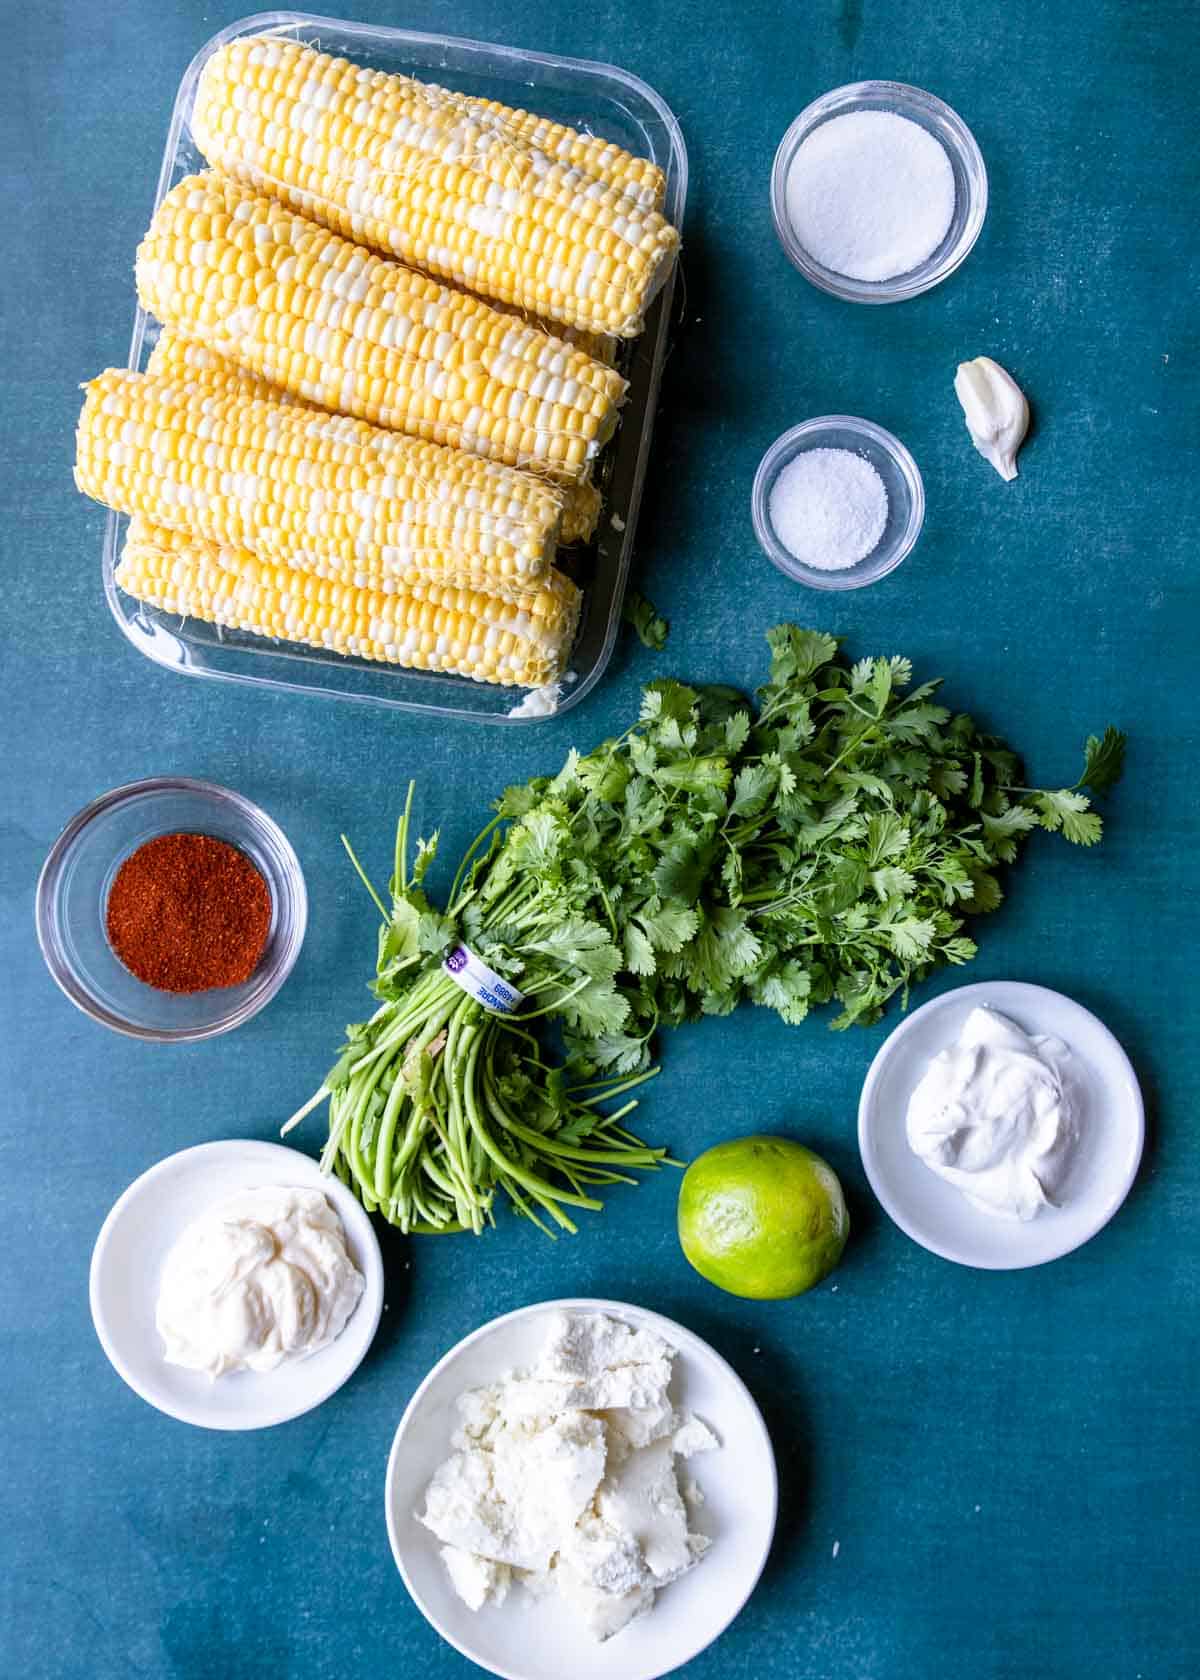
Ingredients for Refried Beans (Instant Pot)
These Refried Beans are made with really simple ingredients, plus some spices from your spice cabinet.
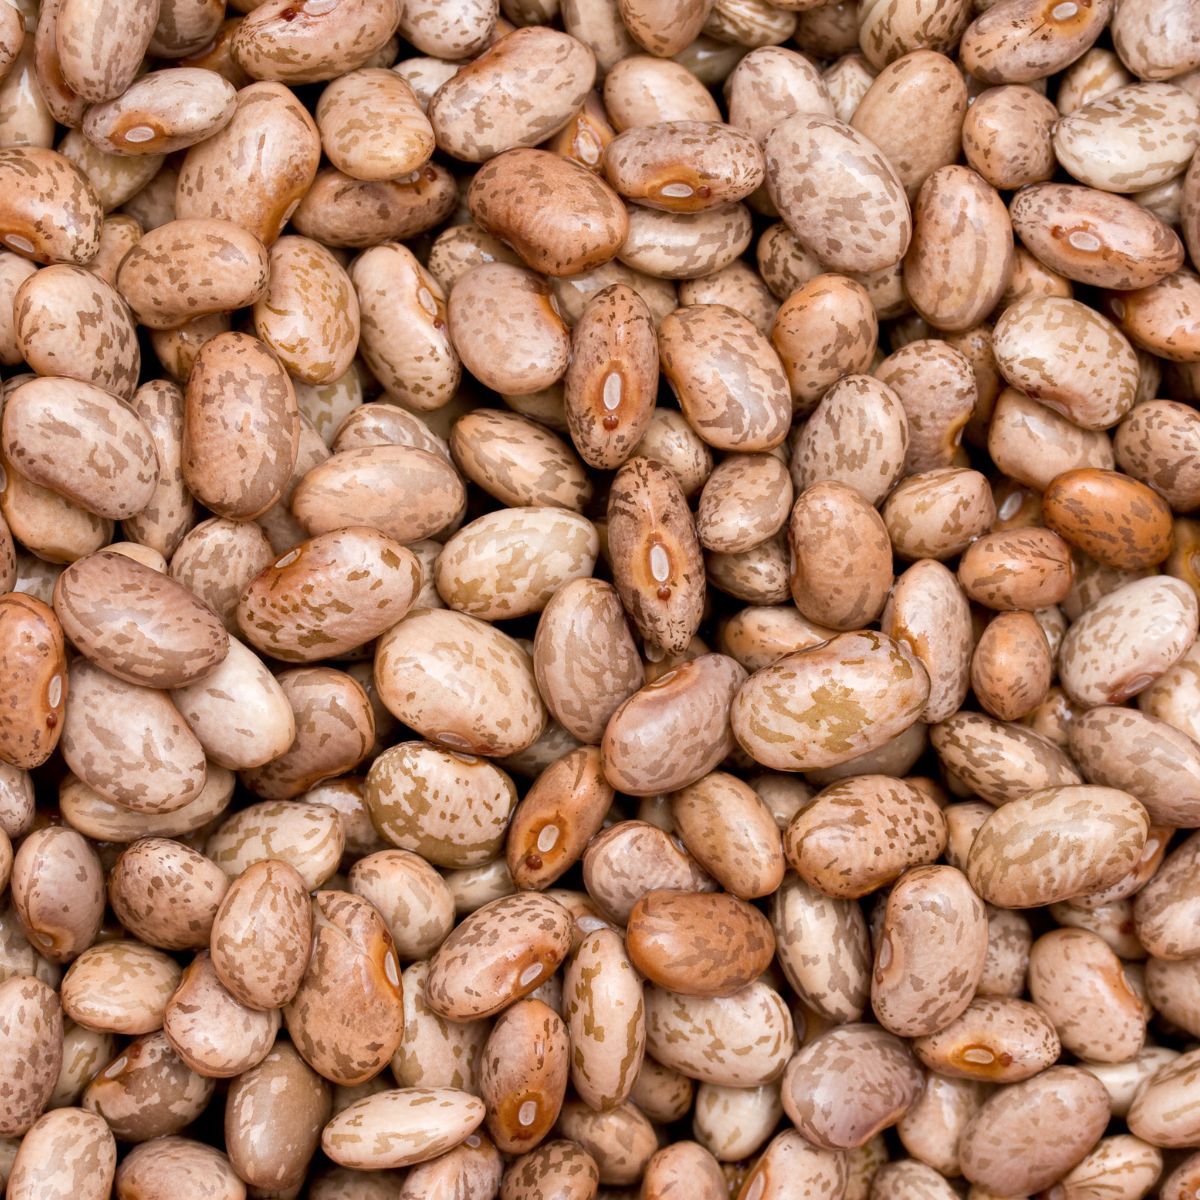
Pinto Beans – You want to buy dry pinto beans for this recipe, not canned pinto beans. They are a light brown bean with slight spotting. See photo:
Chicken Broth or Stock – this is the cooking liquid you will use in the Instant Pot. It imparts really great flavor to your beans.
Chicken Base – this is the secret weapon of a lot of Mom’s Dinner recipes. You will find chicken base in the soup aisle at the grocery store, near the bouillon. It generally comes in a jar or plastic tub. We love the Better Than Bouillon brand.
Jalapeno – you are not adding enough jalapeno to make your beans spicy (unless you want them spicy, you can up the amount of jalapeno you add). It is just enough to add a layer of flavor in the refried beans.
White Onion – we love the flavor of white onion in refried beans… so much so that a lot of time I add raw white onion at the end as a garnish. This is a flavor that you don’t want to skip in your beans!
Lime Juice – the lime juice is added at the end and does two things; brightens and balances the flavor of your beans, it also enhances all the other flavors.
Spices – a mix of chili powder, onion powder, and cumin lend a perfect depth of flavor that matches well with the pinto beans.
Dry Pinto Beans for Refried Beans in Instant Pot
Refried beans are made with pinto beans, in this case dry pinto beans (see photo above). You can find dry pinto beans at any grocery store (even Aldi) with the other dry beans or in the Mexican food aisle.
You will want to rinse the beans in a colander or fine mesh sieve. Pick out any stems or unwanted bits in the bunch.
Traditionally you soak the beans in water overnight before cooking. However the Instant Pot makes quick work of softening and cooking the beans, so you can eliminate this step completely. This recipe saves you a TON of time!
Instant Pot
Instant Pot is actually the brand name for an electric pressure cooker. We exclusively use the Instant Pot in the Mom’s Dinner kitchens. Here are the two models we use:
Any other brand of electric pressure cooker will work just as well!
Instant Pot Refried Beans Recipe Step by Step How To
- Prep Beans
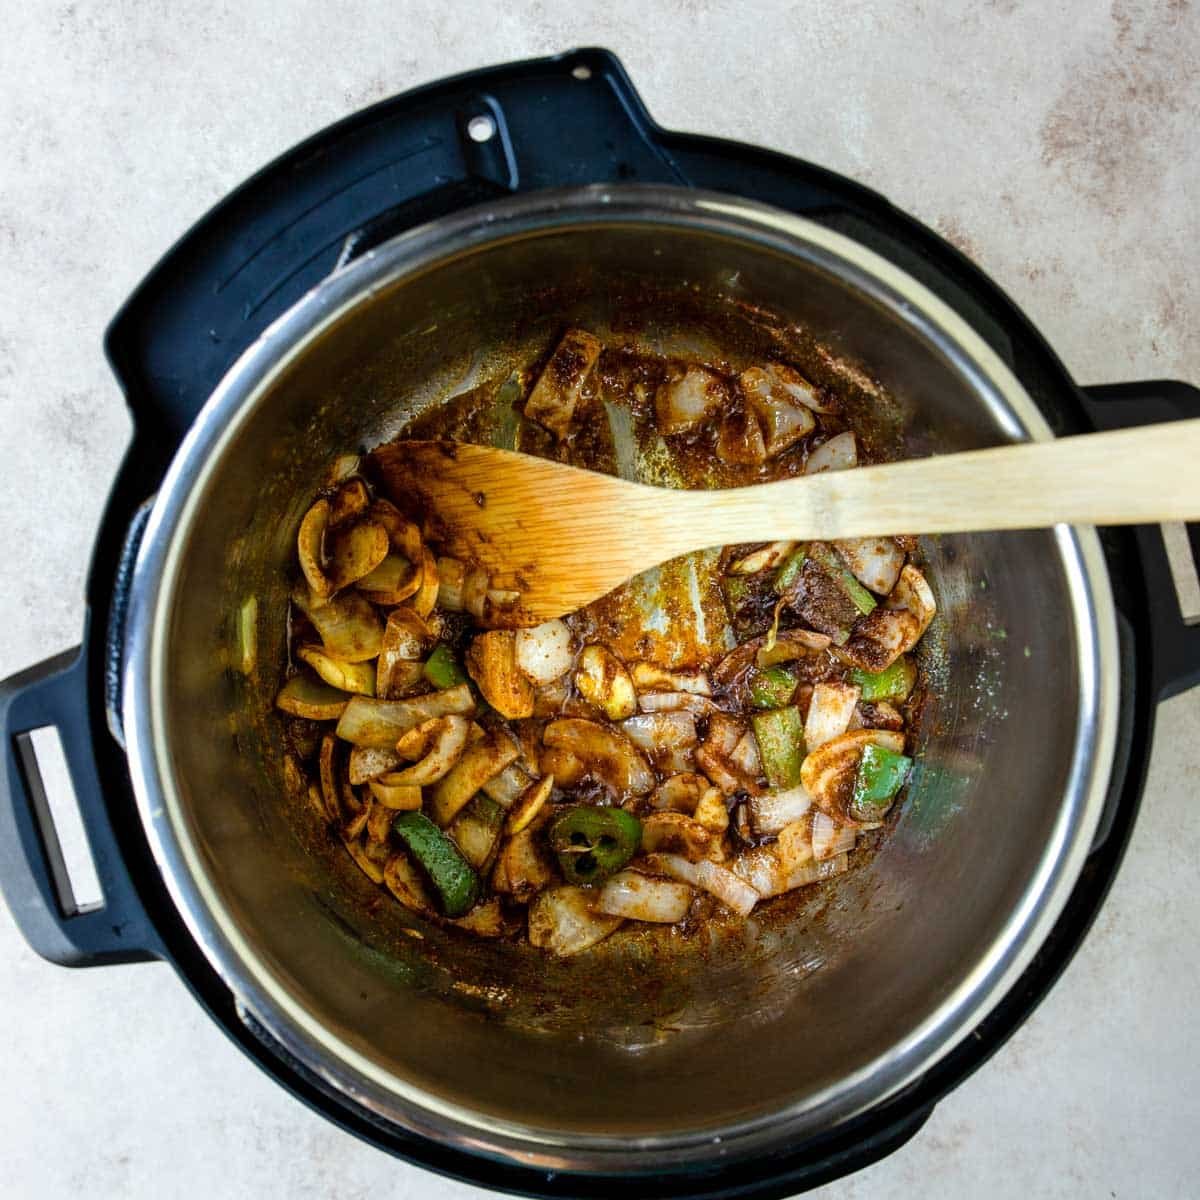
- Sauté Onions, Garlic and Jalapeno
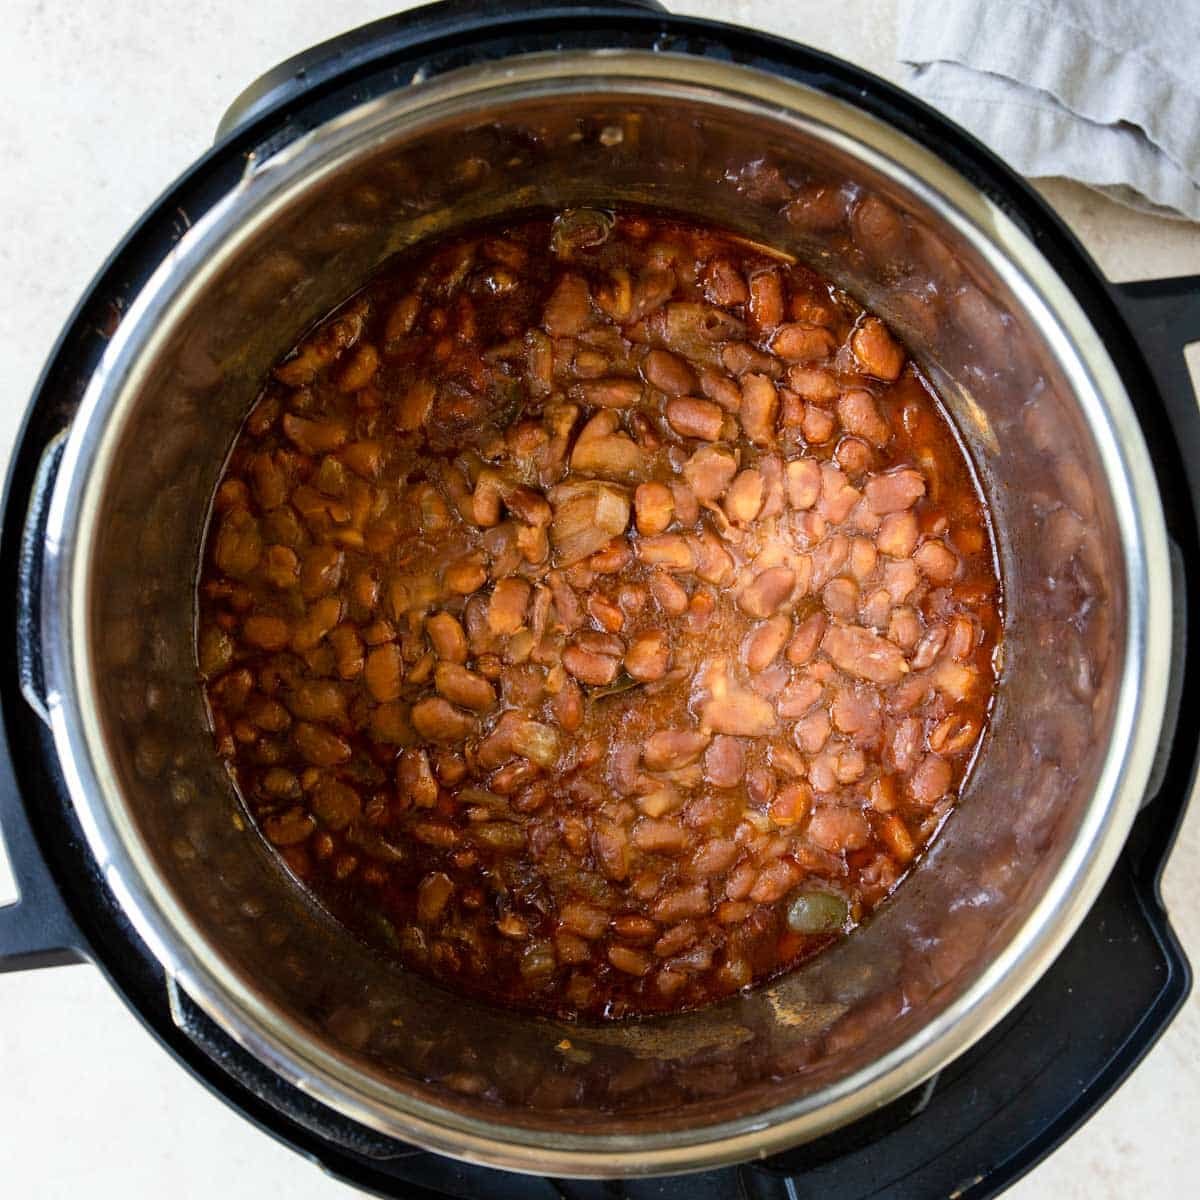
- Add Beans
- Pressure Cook
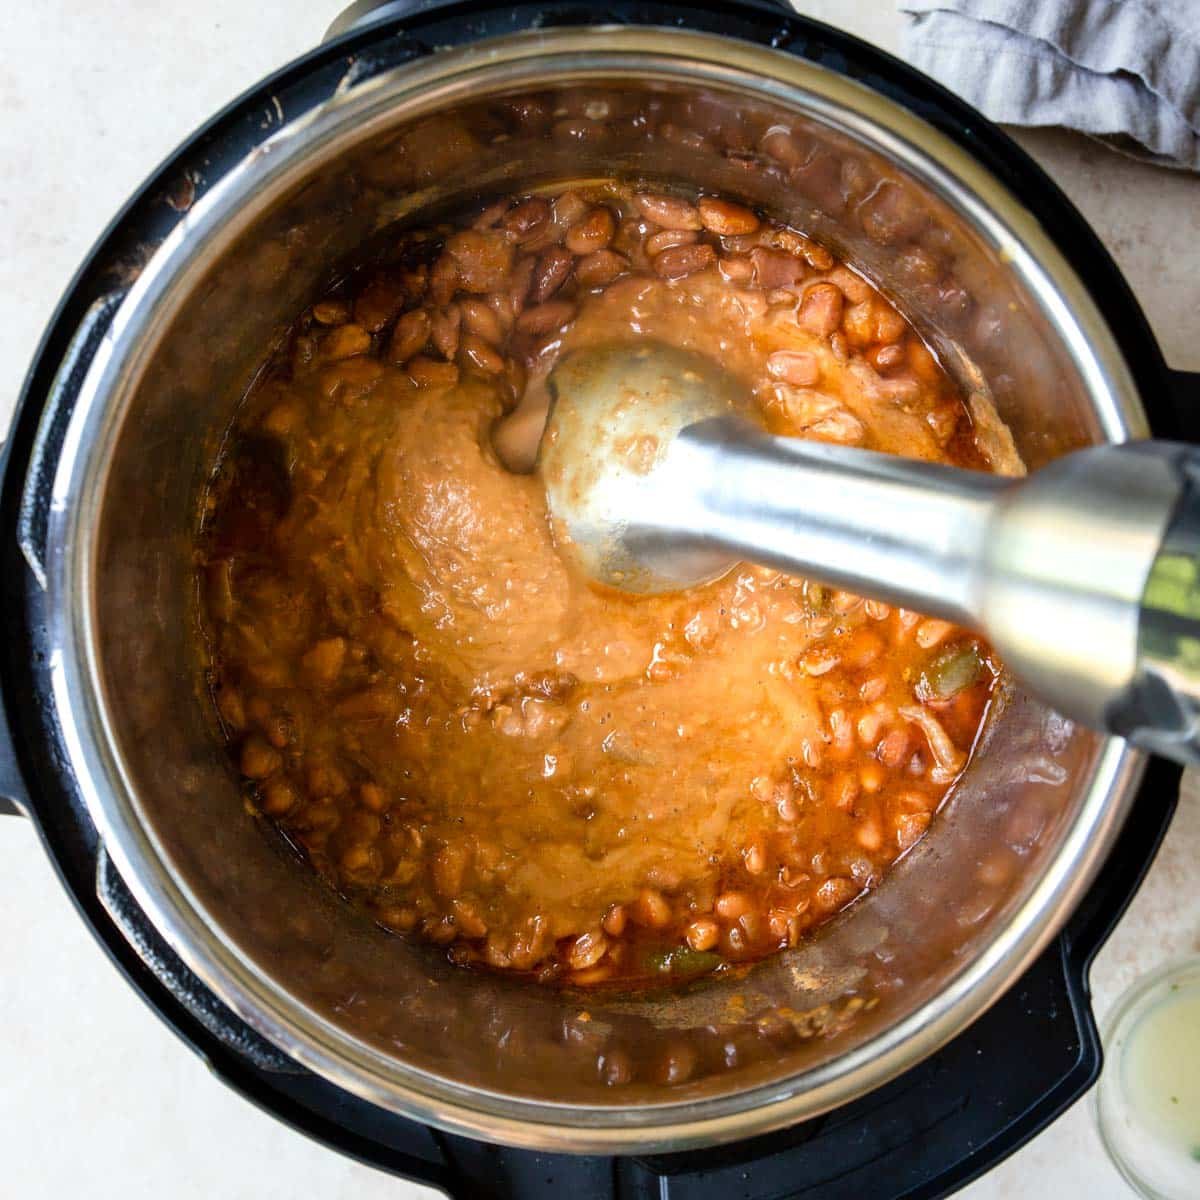
- Puree
- Serve
Wash the dry pinto beans in a colander. Remove and discard and stems or unwarted bits. Set aside.
Turn the Instant Pot onto sauté mode and add the olive oil, onion, garlic, and jalapeno. Sauté for 4-5 minutes.
Add the chicken base and spices, stir to coat the onions and jalapeno.
Pour in the chicken broth, water and pinto beans, drop in the bay leaf. Give everything a stir.
Set the pressure cooker to cook on manual mode, high pressure, normal heat for 50 minutes.
At the end do a 15 minute natural release.
Remove the bay leaf and discard. Remove up to 2 cups of liquid from the pot if there is excess liquid, but reserve it in case you need to thin the beans. Leave the rest of the liquid in the pot, it will mix in with the beans.
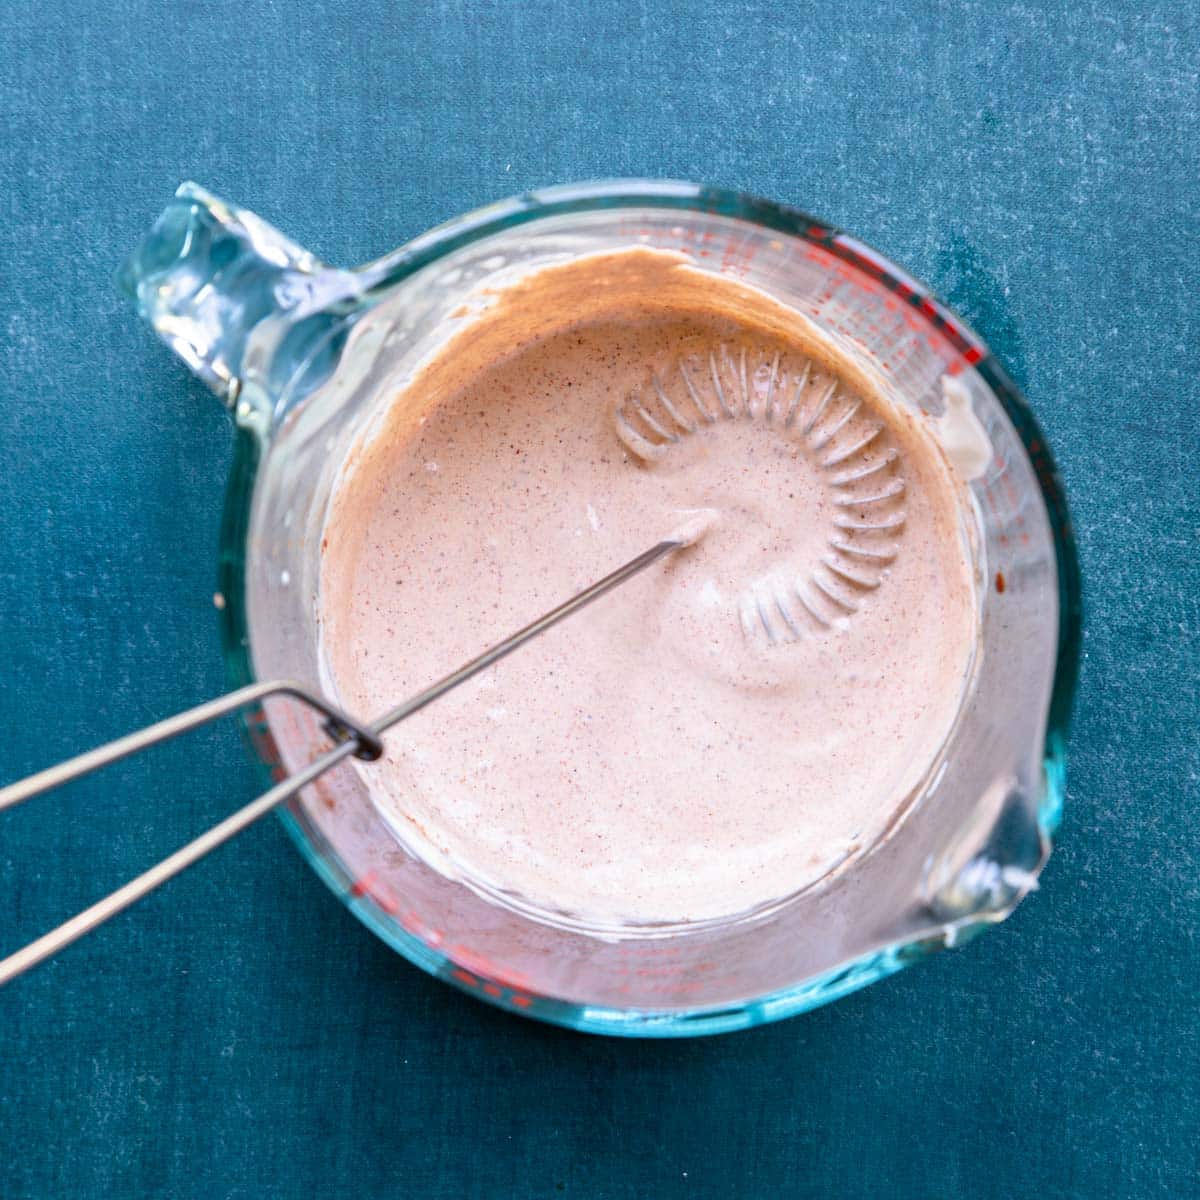
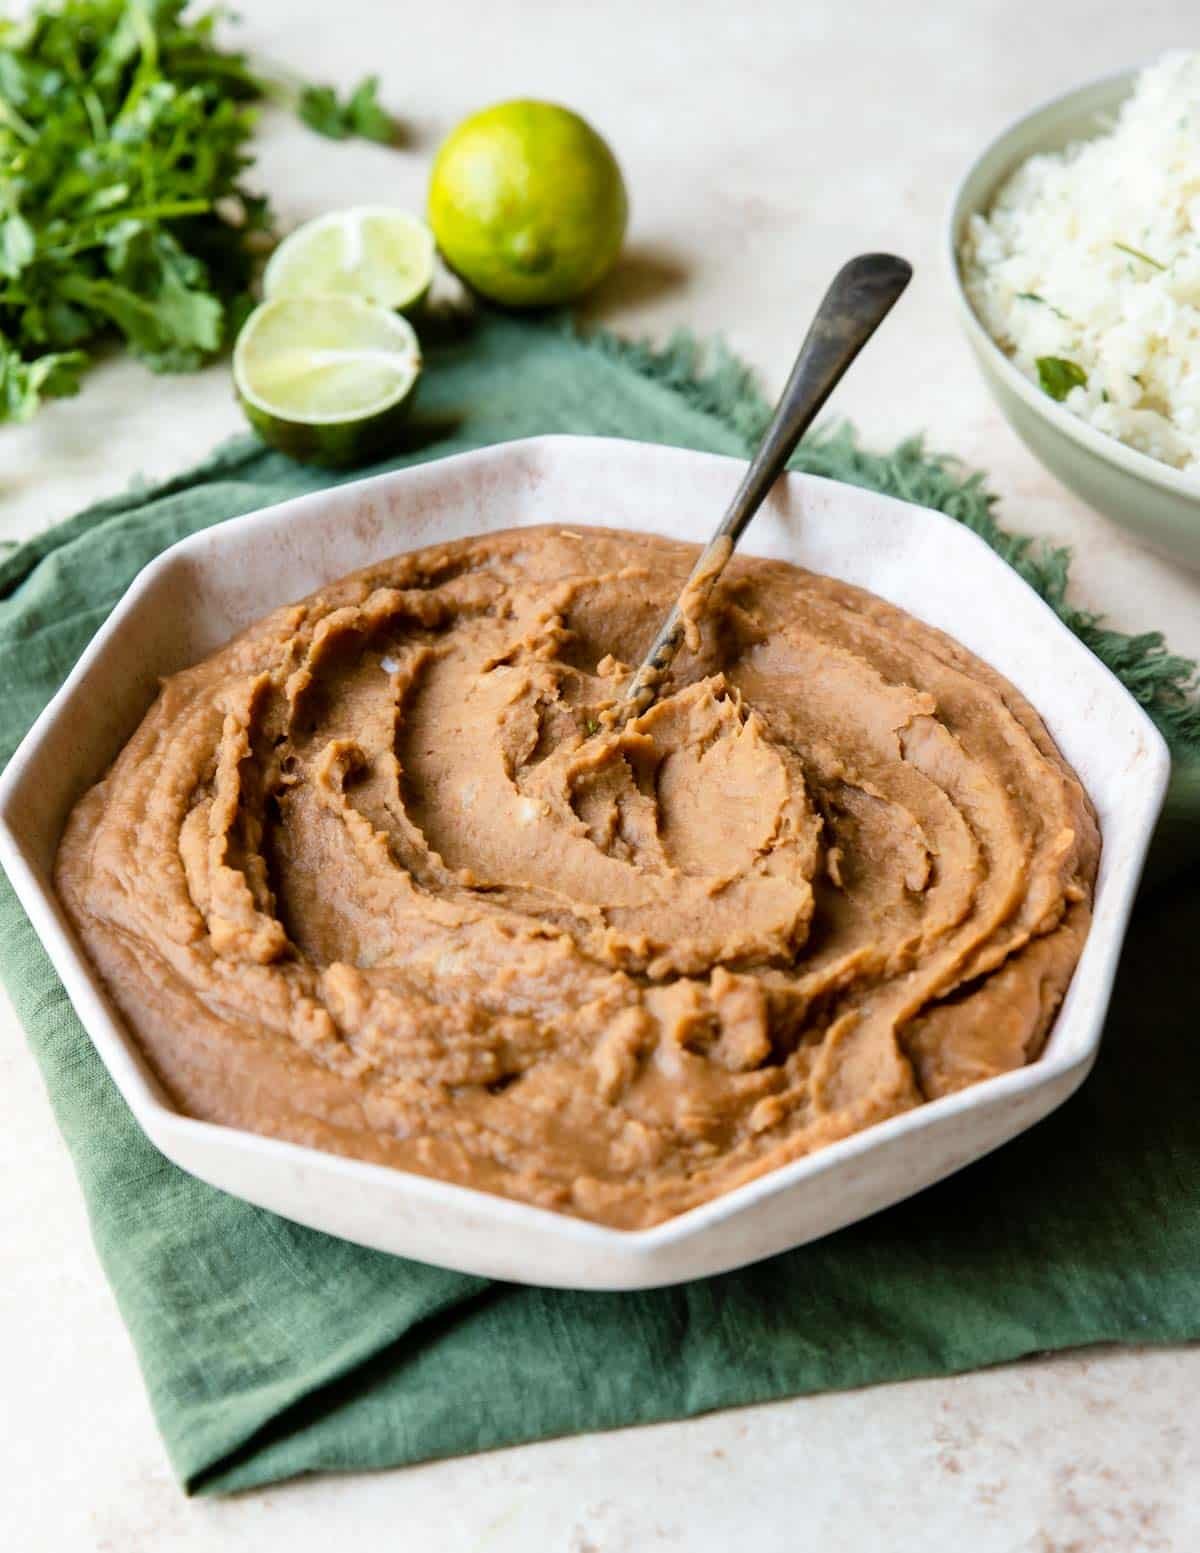
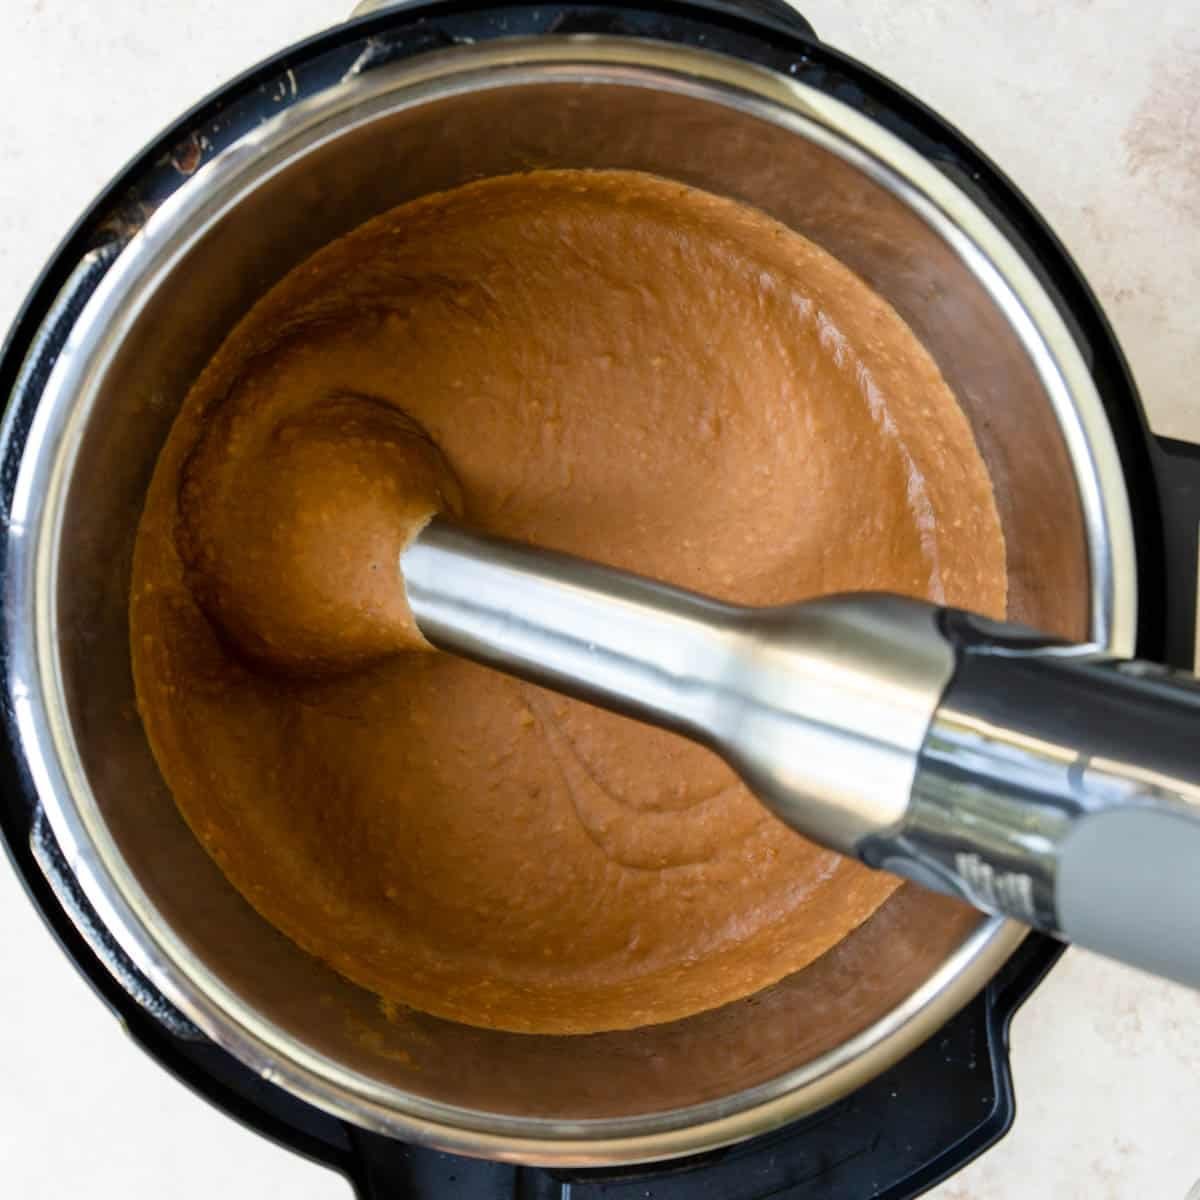
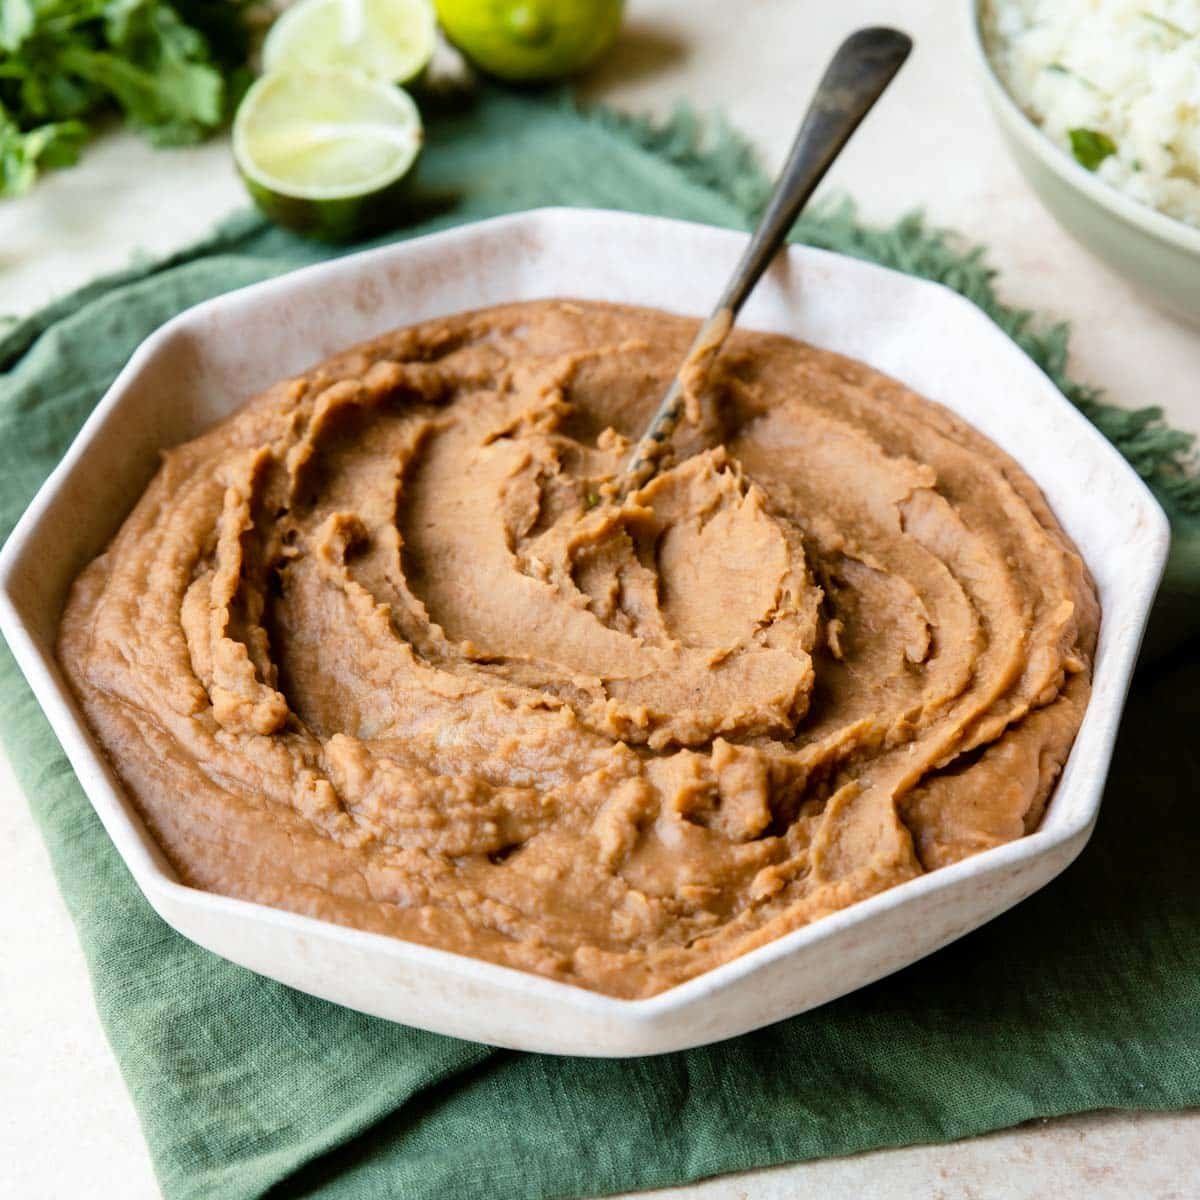
Puree the beans to your desired texture. An immersion blender can help make this process super easy!
Stir in a little fresh lime juice, then taste for more seasoning.
Serve the beans right away. They will thicken as they sit.
Storing Your Instant Pot Refried Beans
For storing in the fridge:
- Allow the beans to cool thoroughly.
- Transfer beans to airtight containers, choosing your preferred size.
- Store in the fridge for up to 4 days.
- You may need to add some water or chicken broth when reheating.
For storing in the freezer:
- Ensure the beans are fully cooled.
- Portion them into dated ziptop freezer bags.
- Press out as much air as possible from the bags, and spread the beans evenly so the bag lies flat.
- Freeze in this flat position for a maximum of 3 months.
For reheating:
- If frozen, thaw the beans overnight in the fridge.
- Gently warm them on the stovetop or microwave. If they’ve thickened upon cooling and you’d like a thinner consistency, incorporate a splash of water or chicken broth.
FAQs for Refried Beans (Instant Pot)
Yes, you can absolutely make this Instant Pot refried beans recipe with other types of beans besides pinto. Pinto beans are the classic choice, but plenty of other beans work well.
Black Beans These are the most popular alternative. They make rich, darker refried beans with a slightly earthier flavor. Great for burritos, taco bowls, and dips.
White Beans or Cannellini Beans If you want something milder, white beans are a great option. They blend up super smooth and make lighter-colored refried beans with a neutral flavor that takes on seasoning well.
Mixed Beans Using a combo (like pinto + black) adds nice depth and texture. This is a great way to use up partial bags in your pantry.
A few tips when swapping beans :
Most dry beans cook in about the same time in the Instant Pot, but older beans may need a few extra minutes.
Thicker-skinned beans may need more blending or mashing.
Different beans may benefit from a little extra seasoning to keep that classic "refried bean" flavor.
Bring that heat with some extra jalapeno (or spicier peppers), making sure you keep in the seeds and pith. Add a diced fresh jalapeno with the seeds right before you puree the beans. This will add a big punch of heat and flavor. You can also shake in some cayenne pepper!
Nope, you do not have to soak the beans for this Instant Pot refried beans recipe. That's one of the big perks of making them in the Instant Pot, you can go straight from dry beans to cooked, creamy refried beans with no planning ahead.
Getting a BURN message on your Instant Pot is super frustrating but it's fixable, and it doesn't mean your beans are ruined.
Here's exactly what to do and how to prevent it next time.
What To Do Right Now
1. Turn off the Instant Pot Hit Cancel so it stops heating.
2. Release the pressure carefully. Let it naturally release for a few minutes if possible, then do a quick release.
3. Open the lid and check the bottom. You'll probably see some beans stuck or lightly scorched on the stainless insert.
4. Scrape and deglaze. Use a wooden spoon to scrape everything off the bottom. Add ½-1 cup of water or broth and really loosen any stuck bits. The drizzle in an extra tablespoon of oil.
5. Stir well and restart. Make sure nothing is stuck to the bottom, then seal and pressure cook again.
Most of the time, once you scrape and add liquid, it finishes cooking just fine.
Why It Happened (With Refried Beans Especially)
Beans are one of the most common foods to trigger the BURN warning because:
– They're starchy and thicken as they cook
– Onion, garlic, and spices can sink and stick
– Not quite enough thin liquid was in the pot
– Some Instant Pot models are more sensitive than others
So it's usually not "user error" it's just how beans behave.
Great Side Dish For…
Refried Beans make a great side dish for any Mexican Dinner. Just like in your favorite Mexican restaurant, everything is served with “refried beans and rice”. Here are some of our favorite Mexican Dinners:


Did you make this recipe?
⭐⭐⭐⭐⭐
I would love to hear your review, especially if you have tips and tricks to add! Pop down to the comment section and connect with me
Refried Beans (Instant Pot)
Equipment
- Immersion Blender (optional.. can also use a blender, food processor, or food mill)
Ingredients
- 1 lb. dry pinto beans - rinsed
- 3 tablespoon olive oil
- 1 white onion - cut into 1 inch pieces
- 4 garlic cloves - peeled and smashed
- 1 jalapeno - green parts, chopped
- 1 tablespoon chicken base
- 2 teaspoon chili powder
- 2 teaspoon cumin
- 1 teaspoon onion powder
- 1 teaspoon kosher salt
- 4 cups chicken broth or stock
- 1 cup water
- 1 Bay leaf
- 2 teaspoon fresh lime juice
Instructions
- Rinse the dry pinto beans well. A fine mesh sieve or colander works well for this task. Set them aside.
- Turn the instant Pot on to sauté mode. Add the olive oil, onion, garlic, and jalapeno. Saute for about 4-5 minutes.3 tablespoon olive oil, 1 white onion, 4 garlic cloves, 1 jalapeno
- Add in the chicken base and spices, stir to coat the onions/garlic/jalapeno.1 tablespoon chicken base, 2 teaspoon chili powder, 2 teaspoon cumin, 1 teaspoon onion powder, 1 teaspoon kosher salt

- Pour in the chicken broth and water, scrape up any bits that are stuck to the bottom of the pot. (this is called deglazing and helps prevent the burn notice)4 cups chicken broth or stock, 1 cup water
- Now add in the beans and bay leaf. Give everything a good stir.1 Bay leaf, 1 lb. dry pinto beans
- Close the lid on your Instant Pot. Set the pressure valve to seal and set to cook on manual pressure cook, high pressure, normal heat for 55 minutes.
- At the end of 55 minutes do a 15 minute natural pressure release, then finish with a quick release of pressure.
- Remove the bay leaf and discard. (If there are a few beans on top that didn't stay in the liquid you can skim those off and discard, they may still be hard)
- Remove up to 2 cups of liquid from the beans if they still look like there is a lot of liquid (reserve if needed to thin the beans as they will thicken as they cool). Leave the rest of the liquid in the beans. This will help puree the beans perfectly! Puree the beans with an immersion blender or potato masher to your desired consistency. You can also transfer the beans and liquid to a food processor, food mill or blender. Make sure they are slightly cooled if using a blender.
- Squeeze a little fresh lime juice into the beans and give them a stir. Taste for additional seasoning (salt or more lime juice).2 teaspoon fresh lime juice
- The refried beans will thicken up quite a bit while cooling. Stir in reserved liquid or extra chicken broth to thin as needed.
Reheating
- To reheat add a little chicken broth or water to reconstitute the beans. Reheat on the stovetop over low heat or in the microwave in a bowl covered with a damp paper towel.
Storing
- Your refried beans will keep in the fridge for up to 4 days or in the freezer for up to 3 months.
- When reheating from frozen let the beans thaw in the fridge overnight. You may need to add a little chicken broth or water if they have thickened while frozen.