Mom's Dinner

  • Home
  • All Recipes
  • Instant Pot
    • All Instant Pot Recipes
    • Instant Pot Soup
    • Instant Pot Beef
    • Instant Pot Chicken
    • Instant Pot Pork
    • Instant Pot Turkey
    • Instant Pot Pasta
    • Instant Pot Vegetarian
  • Dinner
    • Beef
    • Chicken
    • Pork
    • Turkey
    • Fish & Seafood
    • Mexican
    • Pasta
    • Vegetarian
  • Subscribe
menu icon
go to homepage
  • RECIPES
  • DINNER
  • ABOUT
  • SUBSCRIBE

subscribe
search icon
Homepage link
  • RECIPES
  • DINNER
  • ABOUT
  • SUBSCRIBE

ร—
You are here: Home

Loaded Potato Skins with Roasted Garlic Sour Cream

September 21, 2023 by Susie Weinrich 3 Comments

a plate of potato skins with one being dipped in sour cream dip

Loaded Potato Skins are made with tender baked potatoes, scooped out, brushed with a seasoned butter and crisped up in the oven. Then they are filled with a combo of shredded cheese and crispy bacon, baked again to get all melty and crispy. Serve them topped with green onions, AND the extra bonus here is the recipe for Roasted Garlic Sour Cream Dip. This Loaded Potato Skins Recipe is over-the-top!

loaded potato skin being dipped in a sour cream dip

Serve these up as a fantastic appetizer, especially for game day or a cocktail party.

This can also be a great recipe for leftover baked potatoes!

We absolutely love a potato recipe around here. They are so filling and comforting. You can make this mashed potato recipe with the potato you scoop from the baked potatoes. Next try these loaded twice baked potatoes or twice baked potato casserole.

RELATED: Perfect Baked Potatoes

Why These Aren’t Your Average Potato Skin

  • The potato skin start getting extra crispy when you bake the potatoes, by coating them in a little oil.
  • After the potatoes are scooped out they get coated in a seasoned butter sauce.
  • The edges and skins get nice and crispy.
  • The potatoes are generously filled with fresh shredded cheese that melts super creamy.
  • Real crispy bacon, not bacon bits, is key here!
  • The final kicker is the roasted garlic sour cream dip, it really sets this Potato Skin Recipe apart from others.

Simple Ingredients

Loaded Potato Skins start with russet potatoes, try to pick smaller russet potatoes for a 2-3 bite potato skin.

russet potatoes in a sack

You will also need some butter, seasonings from your spice cabinet like, onion powder, garlic powder, kosher salt and black pepper. That makes up the butter sauce that not only gets the potato skins nice and crispy, it also adds a layer of flavor.

Fresh shredded cheese is a must! It will melt up creamier and more flavorful than the pre-shredded stuff. A cheddar or colby jack will work great here.

I highly recommend that you use a real bacon, not bacon bits from a bottle. I use Costco microwave bacon, so I think that is a good compromise between skillet cooking or using the bits.

Green onions may look like a garnish, but they definitely add flavor to this appetizer.

Step by Step- Picture Instructions

  1. Bake the potatoes.
  2. Scrub your russet potatoes and prick them on all sides so the steam can escape while baking.

    Rub the potatoes lightly with olive oil or canola oil. This will start the crisping process!

    Bake at 400ยฐ for 50 minutes up to an hour. You can test if your potatoes are cooked with an instant read thermometer, they should be at 210ยฐF to be cooked through.

    russet potatoes in the oven

    Optionally- you can make the baked potato in the air fryer or in the Instant Pot. But I still recommend finishing the Loaded Potato Skins in the oven.

  3. Roast the garlic.
  4. Cut the top off the garlic head, exposing a little of the garlic. Place in a piece of foil and drizzle with a little oil. Fold the foil over the garlic enclosing it completely.

    Place in the oven for about 20 minutes while the potatoes cook.

    garlic head in foil with oil
    garlic head wrapped in foil
    roasted garlic straight out of the oven
  5. Scoop out potatoes.
  6. Let the baked potatoes cool a bit before cutting.

    cutting a baked potato in half, lengthwise

    Once you can handle them, cut them lengthwise. Then with a small spoon scoop the potato out of the skin, leaving about ยผ inch of potato around the edge. See photo:

    potato skins scooped out, ready for the oven

    (Increase the oven temp to 425ยฐ at this point)

    Save that scooped out potatoes for mashed potatoes!

  7. Make butter sauce.
  8. In a small bowl add the butter, microwave for about 15-30 seconds to melt. Add in the onion powder, garlic powder, kosher salt and black pepper.

  9. Oil the potatoes again.
  10. With a bbq brush or pastry brush coat the potatoes, inside and out, with the butter sauce. Place cut side down on a rimmed baking sheet.

  11. Bake potato shells.
  12. Place the potatoes in the oven for 10 minutes. Flip the potatoes and pop back in the oven for 5 more minutes.

    potato skins that have crisped in the oven
  13. Fill with toppings and bake.
  14. Now divide the cheese and bacon among the potatoes and place back in the oven for 5 minutes.

    potato skins that are filled with cheese and bacon
  15. Garnish and serve.
  16. Garnish the potato skins with chopped green onions.

    Combine the smashed roasted garlic with the sour cream, onion powder, and kosher salt. Serve on the side as a dip for the Loaded Potato Skins

    a plate of loaded potato skins topped with green onions and two beers to the side

Reheating Loaded Potato Skins

If you have leftover Potato Skins pop them in the fridge, in a covered container for up to 4 days. To reheat pop them in a 400ยฐ oven for about 10 minutes, then broil for the last couple minutes to get a crispy edge!

More Indulgent Appetizers

  • buffalo chicken nachos with toppings being grabbed by a hand
    Loaded Buffalo Chicken Nachos
  • feta cheese that has been baked in a red baking dish, topped with tomatoes and garlic
    Creamy Baked Feta with Tomatoes

Susie leaning on the kitchen counter

WATCH SUSIE ON FOOD NETWORK!

โญโญโญโญโญ

The new gameshow, 100 Cooks, premieres on Food Network June 7th, 2026 at 9est/8cst. I hope you will tune in!

a plate of potato skins with one being dipped in sour cream dip

Loaded Potato Skins Recipe

Crispy baked potato skins are filled with fresh shredded cheese and crispy bacon. The cheese is melted in the oven and then they are served topped with green onions and a side of Roasted Garlic Sour Cream Dip.
These are an over-the-top appetizer perfect for game day or a cocktail party!
5 from 4 votes
Print Pin Rate Save Saved!
Prep Time: 20 minutes minutes
Cook Time: 1 hour hour 10 minutes minutes
Total Time: 1 hour hour 30 minutes minutes
Servings: 12 potato skins
Calories: 252kcal
Author: Susie Weinrich

Equipment

  • Large rimmed baking sheet
  • foil
  • Pasty brush or BBQ brush

Ingredients

Loaded Potato Skins

  • 6 small russet potatoes
  • olive oil - or canola oil
  • 3 tablespoon butter
  • ยผ teaspoon kosher salt
  • ยผ teaspoon onion powder
  • ยผ teaspoon garlic powder
  • ยผ teaspoon black pepper
  • 1 ยฝ cups shredded cheddar cheese
  • 6 slices bacon - cooked crispy, and crumbled
  • 3 green onions - chopped

Roasted Garlic Sour Cream

  • ยฝ head of garlic
  • olive oil
  • ยฝ cup sour cream
  • healthy pinch or two of kosher salt
  • healthy pinch or two of onion powder

Instructions
 

  • Preheat the oven to 400โ„‰.
  • Wash the potatoes and then lightly dry them. Prick each potatoes a few times on each side.
    Rub with olive oil or canola oil.
    6 small russet potatoes , olive oil
  • Pop in the oven directly on the oven rack and bake for about 50 minutes to 1 hour.
    You will know when your potatoes are cooked through when they reach 210โ„‰ internal temperature, easily check with an Instant Read Thermometer.
  • Let the potatoes cool before handling.
    Cut the potatoes in half lengthwise. Scoop out the potato, leaving about ยผ inch of potato still attached to the skin. (see photo)
    (save the potato to make mashed potatoes!)
    potato skins scooped out, ready for the oven
  • Increase the oven temp to 425โ„‰
  • In a small bowl melt the butter in the microwave for 30 seconds. Stir in the garlic powder, onion powder, kosher salt, and pepper.
    Brush the butter mixture on all sides of the cut potato halves (skin and cut side).
    3 Tbsp butter , ยผ tsp kosher salt , ยผ tsp onion powder , ยผ tsp garlic powder , ยผ tsp black pepper
  • Place the potatoes on a rimmed baking sheet, cut side down. Bake for 10 minutes until the edges get golden and crispy.
  • Flip the potatoes over and bake an additional 5 minutes.
  • Now divide the cheese and bacon between all the potatoes. Pop back in the oven for about 5 minutes until the cheese is nice and bubbly and melted.
    1 ยฝ cups shredded cheddar cheese, 6 slices bacon
    potato skins that are filled with cheese and bacon
  • Top with sliced green onions and serve with plenty of sour cream for dipping.
    3 green onions

Roasted Garlic Sour Cream Dip

  • Cut the very top off half a head of garlic.
    ยฝ head of garlic
  • Place half a head of garlic in a small piece of foil. Drizzle lightly with olive oil. Enclose the package so that the garlic and oil are in a packet.
    olive oil
    garlic head in foil with oil
  • Place in the oven for 20 minutes.
  • When the garlic is cool enough to handle, squeeze the soft garlic out of the shells into a small bowl.
    Mash it with a spoon
    roasted garlic straight out of the oven
  • Add the sour cream, kosher salt and onion powder, stir to combine.
    ยฝ cup sour cream, healthy pinch or two of kosher salt, healthy pinch or two of onion powder

Leftovers- Reheating

  • If you have leftover Potato Skins pop them in the fridge, in a covered container, for up to 4 days.
  • To reheat pop them in a 400ยฐ oven for about 10 minutes, then broil for the last couple minutes to get a crispy edge!

Recipe Tips and Notes:

ย 
This is a great recipe for leftover Baked Potatoes!
Did you make this recipe?Connect with me and let me know by commenting below!
Jump to Comments
Serving: 1potato skin | Calories: 252kcal | Carbohydrates: 20g | Protein: 8g | Fat: 16g | Saturated Fat: 8g | Polyunsaturated Fat: 1g | Monounsaturated Fat: 4g | Trans Fat: 0.1g | Cholesterol: 39mg | Sodium: 275mg | Potassium: 495mg | Fiber: 1g | Sugar: 1g | Vitamin A: 341IU | Vitamin C: 6mg | Calcium: 159mg | Iron: 1mg

Super Stuffed Bell Peppers with Ground Beef

September 19, 2023 by Susie Weinrich Leave a Comment

a red bell pepper filled with ground beef, rice and bean mixture

These Stuffed Bell Peppers are filled with a mixture of ground beef, rice, pinto beans and tomatoes, seasoned with taco spices and topped with plenty of cheese. They are filled to the brim, making a hearty dinner. The peppers bake to perfection, they soften slightly and the filling is warm and cheesy.

stuffed peppers in a casserole pan, topped with melted with cheese

These Stuffed Peppers also make amazing meal prep or leftovers! They can be made 1-2 days ahead and kept in the fridge until it is time to cook. Then, leftovers heat up perfectly in the microwave.

We love to stuff zucchini with delicious fillings; like in these Enchilada Stuffed Zucchini and Pizza Stuffed Zucchini. So why not stuff a bell pepper it is like a veggie bowl waiting to be stuffed!

Ingredients

Bell peppers are stuffed with the most delicious filling in this recipe. It is super hearty and is full of rice, beans, ground beef, tomatoes, cheese and lots of seasonings. Pictured below are the ingredients you need to grab, and some tips on all the ingredients:

ingredients to make stuffed peppers

Bell Peppers– Choose nice big and firm bell peppers. You will be able to fill them nice and full with all the delicious stuffing. Any color pepper will work.

Rice- You will need 1 cup of cooked rice for this Stuffed Pepper recipe. This is a great time to use leftover rice OR our favorite is to buy frozen rice and cook it in the microwave. It is a huge time saver with this recipe!

Pinto Beans- These are a very classic bean for Mexican cuisine. Refried beans are made from pinto beans. However in this recipe we are using whole pinto beans, canned will work great!

Cheese- As always, fresh shredded cheese is preferred. It melts up creamier and more flavorful. BUT pre-shredded will work if you are trying to save time.

Taco Spice Packet- Buy the small 0.7oz Taco Packet seasonings. It is a great shortcut to get all the seasonings in one package.

Rotel Tomatoes- You can find this by the canned tomatoes or in the Mexican food aisle at your grocery store. It is a combo of diced tomatoes and green chilies.

Tomato Paste- Using tomato paste gives a nice flavor to the pepper stuffing, without making it overly soggy. Some recipes will have you using tomato sauce or salsa, but that makes everything a little too wet.

Step by Step

  1. Prep the bell peppers.
  2. Wash the peppers and cut the top off with the stem. Pull the top off and any seeds/ribs from inside.

    Place them in a 9×13 baking dish making sure they are all able to stand up on their own. You may need to trim a little off the bottom to help them stand, take care not to cut all the way through the bottom.

    Set aside.

  3. Make the filling
  4. Cook and crumble the ground beef and onion, drain excess fat. Sprinkle in ยฝ teaspoon kosher salt and minced garlic. Add the tomato paste, garlic and kosher salt. Cook for 1 minute. Add in the taco seasoning, Rotel and green chilies and cook.

    ground beef and onions in a skillet
    ground beef, onions, garlic, tomatoes and chilies in a skillet

    Finally add the pinto beans, onion powder, chili powder and cooked rice.

    Remove from heat. Add in 1 cup shredded pepper jack or Monterey jack cheese. Stir until the cheese is melted and combined.

    stuffed pepper filling in a skillet
    stuffed pepper filling with cheese in a skillet
  5. Fill the peppers.
  6. With a spoon divide the filling among the 6 peppers, filling them to the top. You may need to press the filling a little to get all the filling in the peppers.

    spoon ground beef mixture in bell peppers
  7. Bake.
  8. Cover the pan tightly with foil and bake for 30 minutes. Then remove from the oven, uncover, and generously top each pepper with the remaining shredded cheese.

    Pop back in the oven for 10 minutes.

    Time to eat!

    stuffed peppers topped with cheese

Make Ahead

These peppers can absolutely be prepped and stuffed a day or two ahead of baking. Simply prepare completely but don’t top with the cheese. Cover with plastic wrap and pop in the fridge for up to 2 days.

You may need to add 5-10 minutes to the cooking time when baking straight out of the fridge.

Reheating Leftover Stuffed Bell Peppers

These Stuffed Bell Peppers make amazing leftovers! They reheat perfectly in the microwave.

Cut them down the center to expose the filling. Then microwave for a minute or two until the filling is warmed through.

a 9x13 pan full of stuffed bell peppers topped with melted cheese

What to Serve with Stuffed Peppers

Since the peppers are already stuffed with a starch and protein, the traditional Mexican side dish of “rice and beans” is not really a great option. We like to serve these Stuffed Peppers with chips, salsa and guacamole, maybe this cilantro lime slaw , equites corn salad or this herbed pineapple.

  • a bowl of Street Corn Salad (aka. Esquites) garnished with limes and cilantro
    Easy Mexican Street Corn Salad
  • a wooden bowl of cilantro lime slaw
    Cilantro Lime Coleslaw
  • fresh pineapple in a bowl with a citrus cilantro glaze over top
    Fresh Pineapple with Citrus Cilantro Glaze

Recipe Tips To Remember

  • Choose large firm bell peppers.
  • Trim your bell peppers so they stand upright in the baking dish.
  • Use a frozen rice for easier dinner prep! (Trader Joe’s has a great one)
  • 85/15 ground beef will have enough fat to be flavorful, but not greasy.
  • Fresh grate your cheese for the creamiest and most flavorful topping.
  • Make some extras to keep in the fridge, they reheat perfectly.

More Mexican Dinner Ideas

  • a pan of baked Chicken Enchilada Suiza garnished with cilantro
    Easy Enchilada Suizas
  • Tilapia fish tacos topped with cilantro, corn and cream sauce
    Tilapia Fish Taco Recipe
  • cream cheese chicken enchiladas on a plate with red chili sauce, cheese, and avocados
    Chicken Enchiladas with Cream Cheese
  • beef enchilada Casserole with a slice cut out so you can see the layers of corn tortillas, beef, cheese and sauce
    Ground Beef Enchilada Casserole

Subscribe To Stay Connected!

Sign up for the Mom's Dinner Newsletter and get dinner help delivered straight to your inbox. From new recipes and videos to weekly dinner ideas and kitchen tips, it's your go-to resource for feeling confident at dinnertime.

Sign Up Now โ†’
a red bell pepper filled with ground beef, rice and bean mixture

Stuffed Bell Pepper Recipe

Fresh bell peppers are stuffed with a hearty mixture of ground beef, rice, pinto beans, tomatoes and taco spices. It is cooked up perfectly and topped with plenty of melted cheese!
5 from 1 vote
Print Pin Rate Save Saved!
Prep Time: 20 minutes minutes
Cook Time: 40 minutes minutes
Total Time: 1 hour hour
Servings: 6 people
Calories: 520kcal
Author: Susie Weinrich

Equipment

  • 9×13 baking dish
  • foil

Ingredients

  • 6 large bell peppers - that stand up nicely - cut open at top
  • 1 lb. 85/15 ground beef
  • 1 onion - chopped
  • ยฝ teaspoon kosher salt
  • 2 Tbsp. tomato paste
  • 3 cloves garlic - minced
  • 1 pkt. Taco seasoning
  • 10 oz (can) Original Rotel tomatoes - lightly drained
  • 4 oz (can) chopped green chilies
  • 15.5 oz (can) pinto beans - drained
  • 1 tsp. onion powder
  • 1 tsp. chili powder
  • 1 cup cooked rice
  • 3 cups shredded pepper jack or Monterey jack cheese - divided
  • non-stick spray

Instructions
 

  • Preheat the oven to 375 degrees.
  • Cut off the top of each pepper and remove the seeds. Place the peppers (standing upright) into a 9×13 glass baking dish sprayed with nonstick cooking spray.
    Set aside.
    If you need to trim a little off the bottom so they will stand, take care not to cut all the way through.
    6 large bell peppers - that stand up nicely
  • In a large skillet cook the ground beef, onion and ยฝ teaspoon kosher salt until the ground beef is cooked through. Drain excess fat.
    1 onion, 1 lb. 85/15 ground beef, ยฝ tsp kosher salt
  • Return the skillet over medium-low heat stir in the tomato paste and the minced garlic. Cook for about 1 minute.
    2 Tbsp. tomato paste, 3 cloves garlic
  • Add in the taco seasoning, Rotel and green chilies and cook over low heat for 2 minutes.
    1 pkt. Taco seasoning, 10 oz (can) Original Rotel tomatoes, 4 oz (can) chopped green chilies
  • Finally add the pinto beans, onion powder, chili powder and cooked rice and stir to combine.
    15.5 oz (can) pinto beans, 1 tsp. onion powder, 1 tsp. chili powder, 1 cup cooked rice
  • Remove from heat. Add in 1 cup shredded cheese. Stir until the cheese is melted and creamy. Taste and adjust seasonings if needed.
  • Divide the ground beef filling evenly among the 6 peppers. You may need to lightly press the filling to fit more in, making sure you use all the filling.
    DON'T top with the cheese just yet!
    spoon ground beef mixture in bell peppers
  • Cover the 9×13 stuffed peppers pan tightly with aluminum foil and bake for 30 minutes. Remove from oven and uncover. Top the peppers with the remaining 2 cups cheese, dividing it equally.
    stuffed peppers topped with cheese
  • Return to the oven, uncovered, and bake for 10 minutes until the cheese is melted and bubbly.
  • Serve immediately.

Make Ahead

  • Prepare the stuffed peppers without topping with cheese. Cover with plastic wrap and refrigerate for 1-2 days.
  • You may need to add a few minutes to the cooking time if you are cooking straight out of the fridge.

Reheating

  • Cut the pepper in half, exposing the filling.
  • Pop in the microwave for 1-2 minutes until the filling is heated through.

Recipe Tips and Notes:

SIDE DISH IDEAS:ย 
a bowl of Street Corn Salad (aka. Esquites) garnished with limes and cilantro
a wooden bowl of cilantro lime slaw
fresh pineapple in a bowl with a citrus cilantro glaze over top
Did you make this recipe?Connect with me and let me know by commenting below!
Jump to Comments
Serving: 1stuffed pepper | Calories: 520kcal | Carbohydrates: 34g | Protein: 34g | Fat: 28g | Saturated Fat: 14g | Polyunsaturated Fat: 1g | Monounsaturated Fat: 10g | Trans Fat: 1g | Cholesterol: 105mg | Sodium: 920mg | Potassium: 929mg | Fiber: 8g | Sugar: 10g | Vitamin A: 4485IU | Vitamin C: 163mg | Calcium: 455mg | Iron: 4mg

Salmon Burgers with Lemon Caper Mayo

September 18, 2023 by Susie Weinrich 3 Comments

salmon burger on a brioche bun with a caper lemon mayo, and chips on the side

We set out to make a foolproof Salmon Burger Recipe with fresh salmon filet, and we nailed it. They taste great and are tender and juicy. Extra bonus, they stay together on the grill, but you can also cook them in a skillet if that is preferred! There is a perfect mixture of small salmon pieces, ground salmon, and panade to keep them moist. The burger itself is full of flavor, but we take it to the next level and top it off with a delicious lemon caper mayo when serving.

salmon burger topped with lemon caper mayo

Next time you are craving a burger, consider making this Salmon Burger instead of a traditional ground beef burger.

RELATED: Grilled Pork Burger and Pizza Burgers

Ingredients

Salmon- use fresh salmon filet, not canned salmon! Skinless is preferred if you can find it. If your salmon has skin-on, remove that before blending in the food processor.

Ritz Crackers- a lot of our burgers and ground meat recipes use something called a panade, a starch and liquid mixed together to keep ground meat recipes moist and tender. For this salmon burger recipe the panade is made with Ritz crackers.

Mayonnaise & Dijon Mustard– this helps keep the salmon burgers nice and moist and they won’t dry out on the grill!

Capers– such a great flavor and texture added to the burgers. Plus they are used in the lemon caper mayo, so the flavor is repeated.

ingredients for salmon burgers on a table
Ingredients shown clockwise: red onion, salt, pepper, onion powder, fresh salmon, dill, capers, Ritz crackers, garlic, lemon, mayo, Dijon mustard.

Lemon- classic ingredient used with salmon. It not only adds flavor, but adds moisture to the panade.

Dill– opt for fresh dill in your burgers. The flavor blends perfect with the lemon, garlic and capers.

Red Onion- make sure that you finely mince the red onion so you don’t have crunchy onion pieces in your salmon burger. The onions not only add nice flavor, they add a lot of moisture too!

Garlic- fresh minced garlic is SUCH a great addition to just about any burger. It lends a more intense and delightful garlic flavor than garlic powder.

Seasonings- salt, pepper and onion powder all enhance the other flavors added to the salmon patty mixture.

Make Ahead

The nice thing about these Salmon Burgers are that they can be made a day or two ahead. Simply prep the salmon patties and place on a parchment lined rimmed baking sheet. Cover tightly with plastic wrap and pop in the fridge.

If the salmon patties have been in the fridge for more than 24 hours remove from the fridge and let them sit at room temp for about 15 minutes before cooking.

Step By Step Salmon Burgers

  1. Blend crackers and seasonings.
  2. In a food processor add the ritz crackers, dill, garlic, lemon zest, salt, pepper and onion powder. Pulse until the Ritz resembles breadcrumbs.

    Pour into a separate bowl.

    Ritz crumbs with herbs and spices
  3. Add wet ingredients.
  4. Add the mayo, Dijon mustard, lemon juice, capers and red onion to the Ritz mixture. Stir everything together, making a panade.

    A panade is a starch and liquid mixture that prevents the protein fibers in meat from constricting and stiffening. Bread and milk make up the iconic duo that is a traditional panade. In fact, the word panade comes from the French for "bread mash."

    Ritz bread crumbs with wet ingredients, not mixed
    panade for salmon burgers without the salmon
  5. Puree some of the salmon.
  6. If the salmon has skin, remove that before moving on.

    Cube all of the salmon into ยฝ inch pieces. Add about โ…“ of a pound of the salmon to the food processor. Run the machine for about 15 seconds until the salmon becomes a nice paste.

    salmon puree
  7. Add more salmon.
  8. Add the remaining salmon cubes and pulse about 15 times so that the salmon pieces break down to about โ…›-1/4 inch in size.

    salmon mixed in a food processor for salmon burgers
  9. Mix salmon with panade.
  10. Combine the salmon mixture with the panade and stir together.

    salmon patty mixture in a bowl
  11. Prep baking sheet.
  12. Prep a rimmed baking sheet with squares of parchment or wax paper. Spraying each one with non-stick spray.

  13. Form the salmon patties.
  14. Using a ยฝ cup measuring cup, scoop out portions of the salmon mixture. Divide it out onto the pieces of parchment. Then form into patties.

    This should make 5 equal patties.

    ยฝ cup portion of salmon patty mixture on wax paper
    raw salmon burger
  15. Pop salmon burgers in the fridge.
  16. Pop the salmon burger patties in the fridge for 30 minutes. You can also make them a couple days ahead, in that case cover the baking sheet with plastic wrap.

  17. Cook.
  18. These salmon burgers can be cooked on the grill or in a skillet. See below for more detail. You want to use an instant read thermometer to make sure they reach 145ยฐ internal temp.

Cooking on the Grill

Preheat your grill to medium-high heat, direct heat cooking. Spray the top side of the salmon burgers with non-stick spray. Cook over direct heat for about 3 minutes per side. Use an instant read thermometer to make sure they reach 145ยฐ internal temp.

three salmon burgers on the grill

Cooking in a Skillet

Drizzle 1-2 Tbsp. oil in a non-stick skillet over medium to medium-high heat. Once the oil is shimmery and hot add the salmon burgers. Cook for about 4 minutes per side. Use an instant read thermometer to make sure they reach 145ยฐ internal temp.

Toppings For Salmon Burgers

There is a delicious recipe for a Lemon Caper Mayo in the recipe card below. Place a generous amount on both pieces of a toasted brioche bun, then add some greens or lettuce, a salted tomato slice, and some thinly sliced red onion. You will love the flavor combos!

It would also be great topped with this Dill Slaw for Burgers!

salmon burger with lemon caper mayo on the top with chips and a pickle to the side

Side Dish Ideas

This Salmon Burger is nice and filling, so no need to go crazy with the side dishes. Of course “burger and fries” is always a good combo, especially sweet potato fries with this burger, but let’s get into some other ideas:

  • Side Salad with Warm Balsamic Dressing
  • Caesar Salad
  • Cucumber and Onion Salad
  • Cheese Tortellini Pasta Salad
  • Broccoli Bacon Salad
  • Crispy Skillet Potatoes
  • Roasted Asparagus
  • Cilantro Lime Slaw

TL;DR Recipe Tips To Remember

  1. Remove the skin from the salmon before making the salmon patty mixture.
  2. Use a food processor to make quick work of making the salmon patty mixture.
  3. Use fresh dill and fresh garlic for the best flavor.
  4. Zest the lemon with a zester or microplane before squeezing the juice.
  5. Make sure to refrigerate the patties before cooking, this helps them set up.
  6. Use an instant read thermometer to make sure the burgers reach 145ยฐ internal temp.

More Recipes To Love

  • Pizza Burger on a bun topped with cheese, pepperoni, red onion, and green peppers
    Grilled Pizza Burger Recipe
  • a small cast iron skillet with garlic butter shrimp and a couple lemon wedges
    15 Minute Garlic Butter Shrimp
  • Asian Salmon Recipe
  • Grilled Chicken Burger with chipotle aioli and pepper jack cheese
    Grilled Chipotle Chicken Burger with Adobo Aioli
salmon burger on a brioche bun with a caper lemon mayo, and chips on the side

Salmon Burger Recipe with Lemon Caper Mayo

This is a foolproof recipe for salmon burgers that are made with fresh salmon filet. They taste great and are tender and juicy. Extra bonus, they stay together on the grill!
Serve them on a toasted brioche bun with lettuce, tomato, onion and plenty of lemon caper mayo.
5 from 3 votes
Print Pin Rate Save Saved!
Prep Time: 20 minutes minutes
Cook Time: 5 minutes minutes
Refrigeration: 30 minutes minutes
Total Time: 55 minutes minutes
Servings: 5 salmon burger
Author: Susie Weinrich

Equipment

  • Food Processor
  • Grill (or non-stick skillet)
  • Parchment paper or wax paper
  • Instant Read Thermometer optional
  • Measuring Cups

Ingredients

  • 14 Ritz crackers - crushed
  • 1 Tbsp. fresh dill - lightly chopped
  • 2 garlic cloves - minced
  • 1 teaspoon lemon zest
  • 1 tsp. onion powder
  • 1 tsp. kosher salt
  • ยฝ tsp. black pepper
  • 2 Tbsp. mayonnaise
  • 2 tablespoon capers - chopped
  • 1 Tbsp. red onion - finely minced
  • 1 Tbsp. fresh lemon juice
  • 1 Tbsp. Dijon mustard
  • 1.25 pound skinless salmon fillet - - cut into small ยฝ inch cubes
  • non-stick spray
  • Lemon Caper Mayo (Recipe below)

    Brioche buns, lettuce, tomato and red onion

Lemon Caper Mayo- For Serving

  • ยฝ cup mayonnaise
  • 2 Tbsp. capers
  • 2 tsp. fresh squeezed lemon juice
  • 2 garlic cloves - minced

Instructions
 

  • In a food processor, pulse together the Ritz crackers, dill, chopped garlic cloves, lemon zest, onion powder, salt and pepper, until the crackers look like breadcrumbs. Pour into a separate bowl.
    14 Ritz crackers, 1 Tbsp. fresh dill , 1 tsp lemon zest, 2 garlic cloves , 1 tsp. onion powder, 1 tsp. kosher salt, ยฝ tsp. black pepper
    Ritz crumbs with herbs and spices
  • To that cracker mixture add the mayo, onion, Dijon mustard, capers, and lemon juice, stir to combine.
    2 Tbsp. mayonnaise, 1 Tbsp. red onion, 1 Tbsp. fresh lemon juice, 1 Tbsp. Dijon mustard, 2 Tbsp capers
  • In the empty food processor add about ยผ of the salmon pieces. Run until the salmon is a nice paste, about 15 seconds.
    Then add the remaining salmon and just pulse about 15 times until there is mixture of paste and โ…›-1/4 inch pieces.
    *If you do not have a food processor you can finely chop the salmon with a sharp knife.
    1.25 pound skinless salmon fillet
    salmon mixed in a food processor for salmon burgers
  • Add the salmon mixture to the cracker panade and stir to combine.
    salmon patty mixture in a bowl
  • Place 5 squares of wax paper or parchment paper on a rimmed baking sheet. Spray the paper with non-stick spray.
    *these squares will help you transfer the salmon patties to the grill or pan.
  • Lightly fill a ยฝ cup measuring cup with the salmon mixture and place on each square of paper. Then form each ยฝ cup portion into a burger patty that is thicker in size (you should be able to make 5 patties).
    raw salmon burger
  • Spray the top of the patties with cooking spray and place the tray with the patties into the refrigerator for 30 minutes up to 4 hours to help them set up.

Cooking on the Grill

  • While the patties are in the refrigerator heat the grill to medium-high.
  • Remove the patties from the refrigerator and place them on the hot grill. Cook for approximately 3 minutes per side (internal temperature reads 145โ„‰ with an instant read thermometer)
    three salmon burgers on the grill

Cooking in a skillet

  • Add a tablespoon or two of oil to a non-stick skillet over medium heat.
  • Once the oil is hot and shimmery add the salmon burgers.
  • Cook for approximately 4 minutes per side (internal temperature reads 145โ„‰ with an instant read thermometer)

Lemon Caper Mayo

  • In a bowl mix together the ingredients. Can be made up to a week ahead!
    ยฝ cup mayonnaise, 2 tsp. fresh squeezed lemon juice, 2 garlic cloves, 2 Tbsp. capers

Serving

  • Serve the burgers on lightly toasted brioche buns with a generous amount of lemon caper mayo, lettuce, tomato and red onion.
  • Would also be great topped with this Slaw for Burgers.
Did you make this recipe?Connect with me and let me know by commenting below!
Jump to Comments

Leftover Baked Potato Recipe

September 11, 2023 by Susie Weinrich 2 Comments

Leftover baked potatoes sliced and sauteed in a skillet

This is an excellent recipe to use up those leftover baked potatoes from your fridge. They fry up nice and crispy and buttery in a skillet. They make a great breakfast potato or side dish for dinner.

cast iron skillet with sliced leftover baked potatoes

Ingredients

Just 4 ingredients to make these skillet potatoes. So simple and so delicious!

leftover baked potatoes, butter, oil and salt
  • Leftover Baked Potatoes: leftover baked russet potatoes are what you need for this recipe, store your baked potatoes in the fridge and they slice up beautifully for this recipe.
  • Extra Virgin Olive Oil: or olive oil will be the perfect oil to sautรฉ and lightly crispy the potatoes.
  • Lawry’s Salt: the seasoning is key to enhance the flavor the potatoes.
  • Butter: everything is better with butter : )
How to Make Baked Potatoes in the Oven

Step by Step

  1. Slice Potatoes
  2. With a sharp knife slice the leftover baked potatoes into ยฝ inch rounds. It is ok if some fall apart, they will still be delicious!

    leftover baked potatoes sliced into ยฝ inch rounds
  3. Heat Skillet & Fry Potatoes
  4. Heat a large cast iron skillet or non stick skillet and the oil over medium heat. Once the oil is hot or shimmery add the potatoes.

    Pan fry the leftover baked potato slices, tossing occasionally, until they are turning golden and getting slightly crispy.

    baked potato slices in a cast iron skillet
  5. Add Salt & Butter
  6. Remove the pan from the heat and add the knob of butter. Let it melt over the potatoes, tossing them gently. Sprinkle on the seasoning salt.

    Taste for additional seasoning.

    sliced leftover baked potatoes in a skillet

More Potato Recipes

  • a loaded baked potato on a cutting board
    Deluxe Loaded Baked Potato Recipe
  • a large cast iron skillet full of cooked crispy little potatoes
    Crispy Cast Iron Skillet Potatoes
  • serving creamy scalloped potatoes and ham
    Homemade Scalloped Potatoes and Ham
  • A large serving bowl of Yukon Gold Mashed Potatoes topped with melting butter
    The BEST Yukon Gold Mashed Potatoes

Subscribe To Stay Connected!

Sign up for the Mom's Dinner Newsletter and get dinner help delivered straight to your inbox. From new recipes and videos to weekly dinner ideas and kitchen tips, it's your go-to resource for feeling confident at dinnertime.

Sign Up Now โ†’
Leftover baked potatoes sliced and sauteed in a skillet

Leftover Baked Potato Recipe (skillet potatoes)

This is an excellent recipe to use up those leftover baked potatoes from your fridge. They fry up nice and crispy and buttery in a skillet. Makes a great breakfast potato or side dish for dinner.
5 from 1 vote
Print Pin Rate Save Saved!
Prep Time: 2 minutes minutes
Cook Time: 10 minutes minutes
Total Time: 12 minutes minutes
Servings: 4 servings
Author: Susie Weinrich

Equipment

  • Large cast iron pan

Ingredients

  • 2 cups leftover baked potatoes - ยฝ inch sliced
  • 2 Tbsp. extra virgin olive oil
  • ยฝ teaspoon Lawry's seasoning salt
  • 1 Tbsp. butter

Instructions
 

  • Slice the cold leftover baked potatoes into ยฝ inch slices.
    2 cups leftover baked potatoes
    leftover baked potatoes sliced into ยฝ inch rounds
  • Place a large cast iron skillet over medium high heat, add the extra virgin olive oil.
    2 Tbsp. extra virgin olive oil
  • Once the oil is shimmery add the leftover baked potato slices and sautรฉ for 5-8 minutes until browned and crispy.
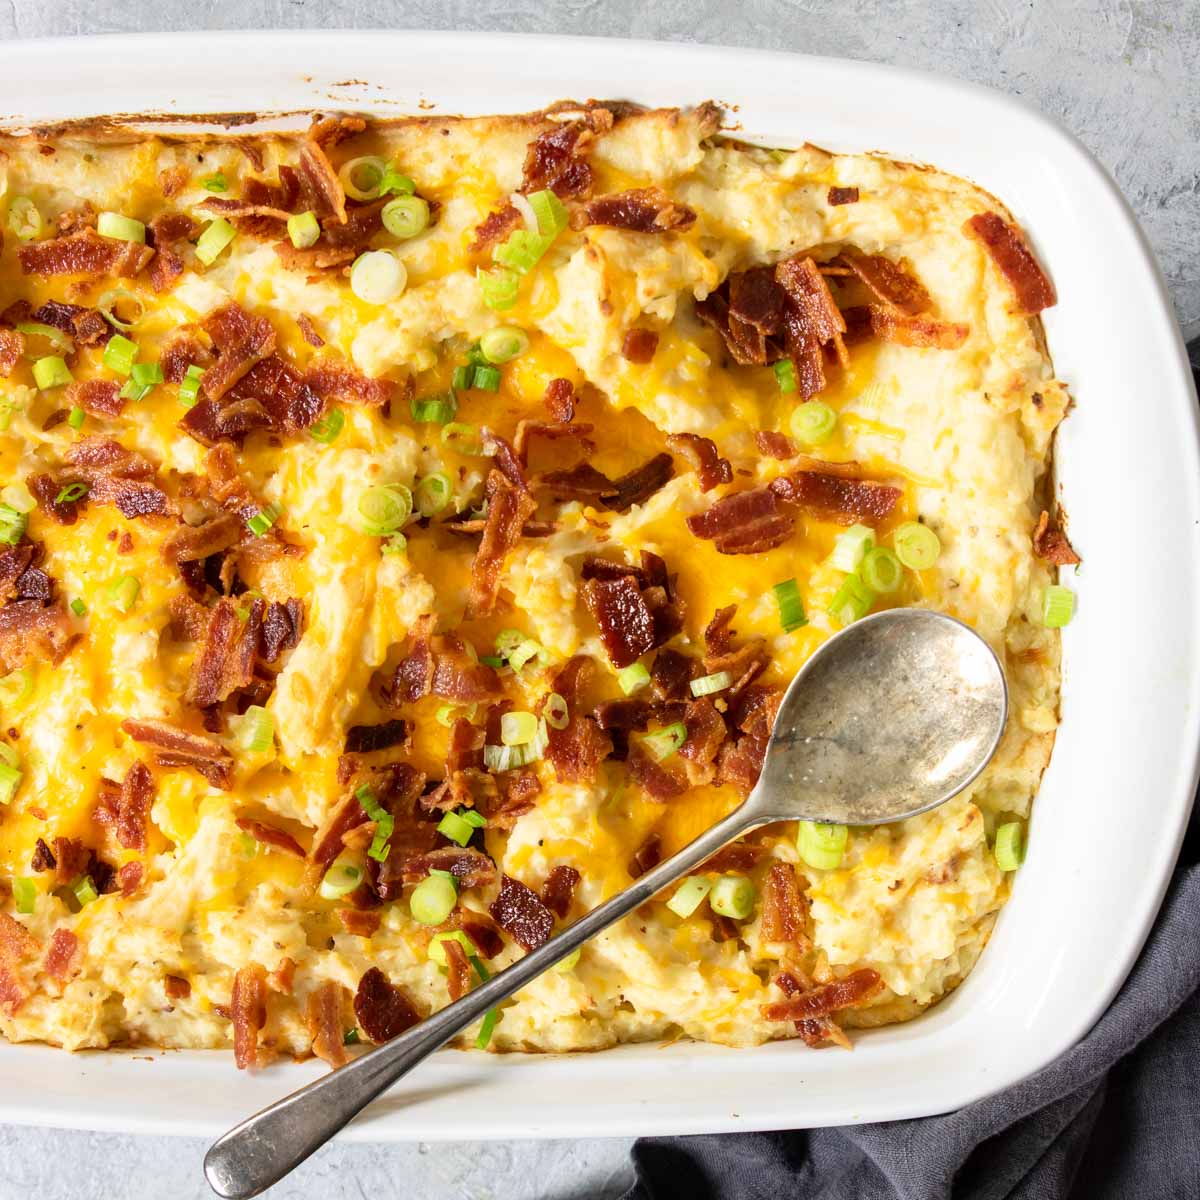
    (if the pan becomes too dry, add a little more olive oil during cooking)
  • Remove from the heat, sprinkle on the Lawry's salt and add the knob of butter, stir around the pan/potatoes.
    ยฝ tsp Lawry's seasoning salt, 1 Tbsp. butter
  • Taste the potatoes and see if you want more season salt.

Recipe Tips and Notes:

ย 
RELATED: If you need to first make the potatoes, pop over to this recipe for How To Make a Baked Potato.
If you don’t have leftover baked potatoes, check out this Crispy Cast Iron Skillet Potato recipe!
Did you make this recipe?Connect with me and let me know by commenting below!
Jump to Comments

More recipes you will love

  • Roasted Broccoli Recipe Oven
  • Almond Bark Peanut Clusters
  • Best Baked Potatoes
  • Homemade French Bread Pizza in Oven
  • Banana Greek Yogurt Muffins
  • Best Scotcheroos Recipe
  • What To Make For Easter Dinner
  • Things To Make With Ham
  • Instant Pot Shredded Buffalo Chicken
  • How to Make Creamy Coleslaw
  • Apple Pie Bar Recipe
  • Grilled Pork Burgers
  • Chili Dog Chili Recipe
  • Easy Beer Bread Recipe
  • Potato Salad With Egg Recipe
  • Marshmallow Cinnamon Rolls
  • Simple Zucchini Bread
  • Lemon Rice Pilaf Recipe
  • Ribeye Burgers

How to Make Baked Potatoes in the Oven

September 9, 2023 by Susie Weinrich 1 Comment

A baked potato filled with sour cream, cheese, bacon and green onions

Whether it is served as your side dish or main entree an Oven Baked Potato with soft and fluffy insides and crispy skin is always a good idea. This recipe for baking potatoes in the oven is foolproof and will yield soft and delicious potatoes every time. Plus you are going to LOVE how easy they are to make.

two baked potatoes cut open and stuffed with sour cream, cheese and bacon

If you are short on time you can always make Baked Potatoes in the Instant Pot. They turn out fluffy and delicious, they are just missing that crispy skin.

I was raised in Iowa, heart of “meat and potato” country, so you know a good baked potato is a crucial part to a good dinner at my house. We love to load them up with all sorts of fillings… everything from sour cream and bacon to cheese and broccoli.

You can check out this Baked Potato Bar article for more topping ideas! Or check out this recipe for Twice Baked Potatoes for another way to use your baked potatoes.

…And tomorrow you can make this recipe with the leftover baked potatoes.

[feast_advanced_jump_to]

Why You’ll Love These Oven Baked Potatoes

The texture is exactly what you want crackly, seasoned skin on the outside with a fluffy center.

They're hands-off and foolproof a quick rub with oil and seasoning, then the oven does all the work. No foil, no guessing, no soggy skins.

They go with absolutely everything steaks, chicken, chili, grilled veggiesโ€ฆ or just butter, salt, and pepper for a simple weeknight side.

They're customizable keep them classic or pile on toppings like sour cream, cheese, chives, bacon, ranch, or broccoli cheddar.

They're budget-friendly easy to scale for family dinners, game day meals, or hosting without spending much at all.

Ingredients

Just three simple ingredients are all you need to make a perfect Oven Baked Potato:

  • Russet Potatoes – traditionally used for making baked potatoes. You will also find them called baking potatoes, white potatoes, Idaho potatoes, or even “old” potatoes.
  • Extra Virgin Olive Oil – this is usually what I have in the kitchen. But a canola or olive oil will work too. It helps give the skin of the potato a nice crunch.
  • Kosher Salt – a little kosher salt sprinkled on the outside of the potato lends a ton of flavor, especially if you eat the skins!

How To Tell When Baked Potatoes Are Done

You can go the old school method by piercing your baked potatoes with a knife or fork. If it doesn’t meet any hard resistance, chances are your potato is done.

But the foolproof method for making sure your potatoes are soft and fluffy and cooked through to the middle:

Using an instant read thermometer, check the temp of the thickest part of the potato. If it reads at least 210ยฐF your oven baked potatoes are done!

checking the temp of a baked potato with an instant read thermometer
don’t judge my dirty oven door. LOL!

How to Make Baked Potatoes in the Oven

Russet potatoes can be pretty dirty. Make sure you wash or even scrub your potatoes clean, especially if you plan on eating the skin too.

Dry them a little with a clean kitchen towel.

washing russet potatoes in a sink

Step 1

With a sharp paring knife or fork tines pierce the potato on all sides. I usually do 6 per side.

This helps vent the steam in the potatoes while they cook.

russet potatoes that are pierced with a knife and coated in olive oil and kosher salt

Step 2

Coat the potatoes very lightly in a little oil; extra virgin olive oil, regular olive oil or canola oil will all work. This helps get the skin kind of crispy while the potatoes bake!

Then sprinkle a little kosher salt (and pepper if you like) on all sides.

checking the temp of a baked potato with an instant read thermometer

Step 3

Bake your potato for 1 hour at 400ยฐF directly on the oven rack. Then check the temp with an instant read thermometer.

Depending on the size of your potato they could need 30 minutes longer.

Using an instant read thermometer, check the temp of the thickest part of the potato. If it reads at least 210ยฐF your oven baked potatoes are done!

PotatoesWebStory

Step 4

Let the potatoes cool slightly and then serve them with all the optional toppings, starting with butter, sour cream, green onions and salt/pepper.

What to Serve with Baked Potato

Baked Potatoes are super versatile, they go with everything from homestyle meatloaf to grilled steak. Here are some other dinners you will love to have with your Baked Potatoes:

  • BBQ Pork Tenderloin
  • Grilled Hamburgers
  • Roasted Chicken
  • Braised Tri Tip
  • Beef Pot Roast
  • Country Style Ribs

If you have some potatoes leftover, pop them in the fridge and then you can make this recipe for leftover baked potatoes tomorrow.

Toppings for Oven Baked Potato

Oven Baked Potatoes are great as a side dish, but also as the main entree! You just need to make sure you offer some amazing toppers to load them up:

This post for putting together a Baked Potato Bar has some great potato topper ideas. Besides the usual suspects; butter, sour cream, green onions, bacon and cheese, I will share some of our favorites here:

  • Roasted Broccoli & cheese sauce
  • cottage cheese and Lawry’s season salt
  • taco meat, guacamole and salsa
  • chili, cheese, and sour cream
  • bbq pulled pork, cheese, french fried onions
  • butter, vinaigrette dressing, and black olives **my favorite that is super bizarre, LOL

STORING

Leftover baked potatoes keep really well, making them great for meal prep. Let them cool completely, then store them in an airtight container in the fridge for up to 4 days.

How to Reheat Oven Baked Potatoes

For the best texture, skip the microwave and use the oven:

  • Oven Method (best overall): Place the potato directly on the oven rack or on a baking sheet and heat at 350ยฐF for 15 to 20 minutes. This brings back the crispy skin and keeps the inside fluffy.
  • Skillet Method (quick + crisp): Slice the potato and warm it in a hot skillet with a little oil or butter. The edges get golden and crisp great for turning leftovers into a tasty side.

Perfect Baked Potatoes FAQs

Why don’t you use foil to bake these?

– Foil traps steam, which softens the skin instead of letting it crisp. You end up with a tender potato but a soggy, rubbery exterior.
– The potato essentially "steams" instead of bakes, so the inside can turn a bit dense rather than fluffy.
– It slows down cooking, because the oven heat has to work through the foil first.
– Foil can cause the skin to taste metallic if it sits too long during baking or cooling.

Do I need to use oil on the potatoes?

You don't have to use oil on the potato skins, but it definitely makes a difference. A light rub of oil helps the skins crisp up perfectly and hold onto any seasoning you add. If you skip it, the potatoes will still bake just fine, they just won't have that flavorful, crackly exterior that makes a great baked potato feel a little extra special.

More Potato Recipes

  • a loaded baked potato on a cutting board
    Deluxe Loaded Baked Potato Recipe
  • a large cast iron skillet full of cooked crispy little potatoes
    Crispy Cast Iron Skillet Potatoes
  • serving creamy scalloped potatoes and ham
    Homemade Scalloped Potatoes and Ham
  • A large serving bowl of Yukon Gold Mashed Potatoes topped with melting butter
    The BEST Yukon Gold Mashed Potatoes
  • a bowl of creamy potato soup with a spoon
    Instant Pot Creamy Potato Soup
  • loaded twice baked potato casserole topped with bacon and green onions
    Twice Baked Potato Casserole

Subscribe To Stay Connected!

Sign up for the Mom's Dinner Newsletter and get dinner help delivered straight to your inbox. From new recipes and videos to weekly dinner ideas and kitchen tips, it's your go-to resource for feeling confident at dinnertime.

Sign Up Now โ†’
A baked potato filled with sour cream, cheese, bacon and green onions

How to Make Perfect Baked Potato

Learn how to make amazing Oven Baked Potatoes that are soft and fluffy on the inside and have nice crispy skin. Plus a foolproof way to tell if your potatoes are cooked through.
Serve your Baked Potatoes as a side dish or dinner entree!
5 from 2 votes
Print Pin Rate Save Saved!
Prep Time: 5 minutes minutes
Cook Time: 1 hour hour
Servings: 1 potato
Calories: 188kcal
Author: Susie Weinrich

Ingredients

  • russet potatoes
  • extra virgin olive oil
  • kosher salt

Serving

  • optional toppings: butter, sour cream, cheese, green onions, bacon, etc…
  • Check out this post for Baked Potato Bar for more topping options!

Instructions
 

Make 2 or 10 baked potatoes with this method, whatever you need!

  • Preheat the oven to 400โ„‰
  • Wash your russet potatoes well, lightly dry them with a clean kitchen towel before moving on.
    russet potatoes
  • Prick the clean russet potatoes about 6 times on both sides with a fork or sharp paring knife.
  • Brush or rub each potato with a little extra virgin olive oil on all sides and then sprinkle with kosher salt.
    extra virgin olive oil, kosher salt
  • Place in the preheated oven directly on the oven rack.
  • Bake for 1 hour, then check for doneness. Cooking time will depend on how large your potatoes are. They could possibly take up to 1 hour 30 minutes for really large potatoes.
  • MOM'S TIP: The BEST way to tell if your potatoes are done is using an instant read thermometer, when they reach 210โ„‰ in the center they are perfect.
    If you do not have an instant read thermometer you can check with a fork or knife by poking all the way to the center, you should not meet any hard resistance.
  • Let the potatoes cool and serve cut open with all the toppings for loaded baked potatoes.
    sour cream, butter, green onions, cheese, bacon, salt, pepper, etc…

Leftovers

  • Keep leftover baked potatoes in the fridge, then you can make these skillet potatoes later in the week.

Recipe Tips and Notes:

ย 
RELATED: Instant Pot Baked Potatoes
LEFTOVERS: Pop your leftover baked potatoes in the fridge, then slice them up and make this recipe for leftover baked potatoes.
Did you make this recipe?Connect with me and let me know by commenting below!
Jump to Comments
Serving: 1potato | Calories: 188kcal | Carbohydrates: 38g | Protein: 5g | Fat: 2g | Saturated Fat: 0.4g | Polyunsaturated Fat: 0.3g | Monounsaturated Fat: 2g | Sodium: 11mg | Potassium: 888mg | Fiber: 3g | Sugar: 1g | Vitamin A: 2IU | Vitamin C: 12mg | Calcium: 28mg | Iron: 2mg

Episode 107 Marinated Grilled Tri Tip

August 31, 2023 by Susie Weinrich Leave a Comment

Grilled Tri Tip photo with text overlay for Let's Make Dinner Podcast

On episode 107 we are getting the grills fired up. You will learn how to marinate and grill a delicious tri tip. It is a great dinner on the grill!

Transcript Text

Intro: Welcome, welcome everybody to another episode of Let’s Make Dinner, your audio library of amazing dinner recipes you can always get on the table. I’m your host, Suzy Weinrich. 

Susie Weinrich: What’s up everybody? We have a great recipe today that is going to be perfect for all of your grilling. If you’re listening to this in real time, it’s starting to transition to fall and a little bit cooler weather. So that’s when I love to get out and get behind my grill. Plus you add football season in there and it’s just a great mix. So today we are going to make a Grilled Tri Tip that is marinated and served with a Mustard Butter. You’re gonna love this one. The nice thing is, is that this is fancy enough for a weekend dinner or serving to guests, but it’s simple enough on the grill to make during the week.

Let’s talk a little bit about what a tri tip is. So a tri tip is a cut of beef. It’s going to be usually around three pounds per cut, per piece. It’s going to be kind of big, and it’s going to be in the shape of a triangle, and that is a tri tip. Now, I think you can also get tri tip steaks, but for this recipe, we’re using an entire tri tip. We’re going to marinate it, and then we’re going to talk about how to slice it. Because tri tip comes actually with two separate grains and with any cut of beef, you want to make sure you’re cutting against the grain so that you can actually chew it. If you cut beef or steak with the grain, it’s going to be incredibly chewy.

If you happen to fall in love with the tri tip, I also have a wonderful recipe for a braised tri tip with a red wine glaze, and I will link that in the show notes for you. We’re going to go over a lot of tips and tricks with this recipe, but we’re going to talk about most of them while we’re going through the actual recipe, so we’re just going to go ahead and get right into it.

Grilled Tri Tip Recipe: When you bring your tri tip home, usually there’s going to be one side that has a very large fat cap, unless you bought it already trimmed. What you want to do is remove the majority of that fat cap and then sometimes underneath that fat cap there’s going to be some silver skin. First to remove the fat cap, you want to just grab at one of the three points, grab that fat cap and take a very sharp knife and slide it under and then just keep working all the way up as you peel that fat cap back.

Now, underneath that fat cap, if there’s some Cloudy parts or shiny parts, that’s probably silver skin. Silver skin is something that you will not be able to cook down or chew through. So do your best to get rid of that. What I like to do is slip the tip of a really sharp knife just right in between the silver skin and the meat and then start to peel it away. Usually that works really well. There are some online videos on YouTube that show how to get rid of silver skin really easily. So you can search on there for visual tips on how to do that. 

Now, once you have all of that removed, what I like to do is lay out some large sheets of plastic wrap, pop that tri tip on top of there, because we’re going to marinate the tri tip and then wrap it up really tight in that plastic wrap.

For the marinade, you want to mix together in just a little small bowl, two tablespoons of Worcestershire sauce, two tablespoons of extra virgin olive oil, two garlic cloves that are just chopped up roughly, one teaspoon of smoked paprika, or you could use regular paprika here. Two teaspoons of onion powder. One teaspoon each of brown sugar, kosher salt, and coarse ground black pepper. Give that a really good stir, and then you’re going to coat the entire tri tip with that marinade, and then wrap it up really well with that plastic wrap. Then just pop it in the fridge for, you can do 8 hours up to 24 hours, whatever you have time for.

Now, you want to make the mustard butter that you will use for serving. It only has three ingredients. You need six tablespoons of salted butter that’s softened at room temperature. Two teaspoons of Dijon mustard and a quarter teaspoon of black pepper. So you just want to blend that all together just with a fork or a spoon or you could even use a mixer. Then you’re going to scoop that out onto a large sheet of plastic wrap. Shape it into a one inch log. And then wrap that plastic wrap around it and twist the ends so it’s just enclosed and looks like a log of butter. You can pop that in the fridge and it will be good for a week, two weeks, until you’re ready to use it.

So now it’s actually time to grill your tri tip. So you want to set your grill to have direct heat and an indirect heat side. You want to set your grill up for high heat temperature. While your grill is warming up, you want to go ahead and remove the tri tip from the fridge and just allow it to stand at room temperature for at least about 30 minutes. This is called tempering, and it’s just warming up or bringing to room temperature a large cut of meat so that it cooks more evenly on the grill. So once the grill is ready, you’re going to start that tri tip over direct heat for about five minutes per side on a covered grill. Now you’ll notice that your tri tip is in a triangle and so there’s one smaller little tail point. When you position your tri tip on the grill, position it so that that little tail is closer to the indirect heat side, because that little tip will cook through way faster than the big part of the tri tip. 

Now, after you’ve grilled it over that direct heat for five minutes per side, now we’re going to move the tri tip to the indirect heat side, and this is where you want to cook to temperature, not time. So the last time that I made the tri tip, it only took about eight minutes on the indirect side to come to 135 degrees Fahrenheit at its thickest point, which will be about a medium rare to medium rare plus cut of beef. So you want to make sure that you’re kind of watching. It could take anywhere from five minutes up to 15 minutes on the indirect side to get to the temperature that you want.

Now, once it’s done and it’s at the temperature you want, you want to bring that tri tip in and then cut two large, one inch slices of that mustard butter and allow it just to melt over the top of that tri tip while it rests. 

Now, this is the part that’s going to be hard to explain verbally. It’s kind of a visual thing. So, when you were trimming your tri tip, you noticed that it had two different grains. The grain starts at one tip of the tri tip and then kind of fans out. When you’re cutting, what I like to do is start up at that point where the grain starts. On the diagonal, cut it against the grain. Then as you’re moving closer to where the grain starts to straighten out, you’re going to start to turn your knife so that you’re always cutting against the grain all the way to the bottom. That will ensure you have super tender and juicy slices of tri tip. 

When you serve this, you want to serve it with some mustard butter slices on the side and make sure that the steak is still nice and hot so that mustard butter will just melt over top. One tri tip that’s, I don’t know, two to three pounds is going to serve probably about four or five people.

Some great side dishes to think about with your grilled tri tip are a really nice side salad that has a tangy vinaigrette and I have a great recipe that has a warm balsamic vinaigrette over top. Super easy, super simple and really delicious. Either garlic mashed potatoes or a crispy cast iron potato or baked potatoes would be excellent. Then any kind of green vegetable, like roasted broccoli, roasted asparagus, green beans. Or, in the summer, corn on the cob is perfect. But if you are looking in the fall, you might want to think about adding deviled eggs. Perfect side dish. 

So that does it for this episode. As always, I will link all of the recipes that I talked about in this episode right in the show notes for you.

Outro: So until next time, I hope this episode of Let’s Make Dinner makes your dinner time a little easier. See ya!

Alright everybody, now is normally the time that I would do the double dip. But, we are going to take a little bit of a break from the podcast. I think I’m going to take a couple months off here. I am focusing really heavily on video right now, which is consuming all of my time. So if you are enjoying these podcast episodes, I would really encourage you to go over and find me on YouTube and watch some of my actual videos so you can see my face, still learn about all of the wonderful dinner recipes, tips, tricks, kitchen hacks, all of those things that help you feel really successful at dinner time. 

I also encourage you to sign up for our newsletter so that when I do start the podcast up again that you will be notified of the latest episodes. So until then, hopefully I’ll see you over on YouTube.

Recipes Mentioned

  • Grilled Tri Tip
  • Braised Tri Tip with Red Wine
  • Perfect Side Salad
  • Garlic Mashed Potatoes
  • Cast Iron Potatoes
  • Asparagus
  • Roasted Broccoli
  • Deviled Eggs

Stay Connected

This will be the last episode for a few months. I am going to focus on video in the next couple months. I hope you will join me over at You Tube and subscribe.

Also subscribe to our newsletter so you know when the podcast does pick back up!

Episode 106 Refried Beans Instant Pot

August 24, 2023 by Susie Weinrich Leave a Comment

Let's Make Dinner text with a picture of refried beans in a bowl

In episode 106 instead of a dinner entrรฉe we are making a killer side dish- Instant Pot Refried Beans. It is an incredibly inexpensive dish to make that is also super easy to make! A pound of dry refried beans will usually be under $3. This recipe makes super creamy and flavorful refried beans.

Serve it up on the side with some Mexican Rice and you will have an amazing dinner. 

Transcript

Click for the full transcript.

Intro: Welcome, welcome everybody to another episode of Let’s Make Dinner, your audio library of amazing dinner recipes you can always get on the table. I’m your host, Susie Weinrich.

Susie Weinrich: Beans, beans, the magical fruit. Is it magical or musical? I always said it was the magical fruit, but then somebody on Instagram had a post where they said musical fruit, which would make sense because it’s talking about farts.

Welcome to this episode of Let’s Make Dinner. Alright, so you guessed it. Today we are making a bean dish. We’re making Instant Pot Refried Beans. If you have never made your own refried beans, if you’ve been intimidated or you’ve tried to make them and they don’t really turn out, this is a fool proof, fool poof, fool proof recipe for refried beans that you make in your instant pot, which is so great because it’s mostly hands off and they’re so delicious when I make them, I eat them straight out of the Instant Pot, and then I regret it later because I have a stomach ache. 

Tips and Tricks: Okay, so not a ton of tips and tricks here. The Instant Pot that I use is a 6 quart Instant Pot, and so I will link that for you in the show notes. If you don’t have an Instant Pot, I highly recommend getting one. I love my instant pot, especially in the fall when I’m making soups or large cuts of meat like pot roast or shredded beef or shredded pork, anything like that, it is just wonderful for. 

Instant Pot Refried Bean Recipe: So let’s go ahead and just get straight into the recipe for your Instant Pot Refried Beans. We are going to start this recipe by taking care of the pinto beans. That is what refried beans are made of. So you need one pound of dry pinto beans. What you want to do is just put those dry pinto beans into a mesh sieve or a colander and give them a really good rinse. If there’s any stems or any weird pieces in there, take those out. and then you can just set them aside.

Now you need to grab your instant pot and we’re going to pop that onto saute mode and you’re going to add three tablespoons of olive oil or you could use a vegetable oil that would work here as well. Then once that’s nice and warm you’re going to saute one white onion, four garlic cloves, and one jalapeno. All of those can just be roughly chopped because they’re going to be pureed down later on.

So saute those for about four to five minutes just to start to enhance their flavors and get them softening. After that, you’re going to add in one tablespoon of chicken base. Chicken base is like a paste form of bouillon and you can find it in the soup aisle. It’s a way more flavorful option than regular bouillon, and we love the brand, it’s actually called Better Than Bouillon. Okay. So that’s a great one to look for in the grocery store. 

Then you’re also going to add two teaspoons of chili powder, two teaspoons of cumin. One teaspoon each of onion powder and kosher salt. Just give that all a stir so that it coats the onions and garlic and jalapeno.

Next, you’re going to pour in four cups of chicken broth or stock and one and a half cups of water. If you have any bits that have browned to the bottom of the Instant Pot, you want to scrape those up at this point. Now you can turn off that sautรฉ mode and you can add in those rinsed, dry pinto beans and one bay leaf. Now give everything a really good stir. 

Now we’re going to get to the cooking part. You’re going to close the lid on the Instant Pot. Make sure you set that pressure valve to seal. You’re going to set it to cook on just your manual normal pressure cook, high pressure, normal heat for 50 minutes. Then at the end of the 50 minutes, you’re going to do a 15 minute natural pressure release and then finish with a quick release. 

Now once you open up your Instant Pot, if some of the very top layer of beans didn’t stay down in the liquid, some of those may have a little crunch or a little dryness to them still. You can skim off that top layer of beans and just use the beans that cooked really well and soft down in the liquid.

At this point, you also want to remove the bay leaf and discard that. Now, some recipes will have you draining the liquid off the beans and then adding it back. We don’t need to do that. There is the perfect amount of liquid in the beans so that they puree up really, oh my gosh, so creamy and so good. You are absolutely going to love these.

So what I like to do is actually use my immersion blender and just start to puree everything up. We like our refried beans really smooth, so I puree them until they are creamy and smooth. If you don’t have an immersion blender and you like your refried beans a little bit more chunky, you could just use a handheld potato masher. But if you do like the smooth consistency and you don’t have that immersion blender, you can transfer the beans and the liquid to either a food processor, or a food mill, or a really strong blender. If you’re using the blender, make sure that the beans and the liquid are slightly cooled before you add them, or your blender may explode. No worries. Your Instant Pot’s not going to explode, but your blender might explode. 

Okay. So once you’ve got them pureed up, you’re going to squeeze some fresh lime juice into the beans. I usually like to do one small lime and I just squeeze the entire thing in, stir it up, and then give it a taste. See if you want a little more kosher salt. Do you want a little more lime juice? Do you want a little more spice? At this point, if you like them a little bit more spicy, I would put in a couple dashes of cayenne pepper. 

So the trick is with your refried beans, if you want to serve them immediately, once they’re sitting, they will start to thicken up and firm up and then the top will also dry out. So if you do need to hold them for a little bit, I recommend putting a little plastic wrap right on top of those beans so it doesn’t get that dry layer on top. So of course, refried beans go excellent with any Mexican dinner. So you’re talking tacos, burritos, enchiladas, quesadillas. Think about when you go to a Mexican restaurant, and the side dish is usually rice and beans. So that’s where we like to serve these. I’ll tell you what, these refried beans, leftover, they’re thick and delicious, and they make the most killer refried bean burrito, ever. So you can use the leftovers for that too because this does make quite a few beans. I will link some delicious Mexican dinner recipes in the show notes for you as well so that you can have something to pair these refried beans with. 

Outro: So that does it for the full recipe and as always I hope this episode of Let’s Make Dinner makes your dinner time a little easier. See ya!

Double Dip: All right, everybody. Thank you so much for sticking around. Now it’s time for your double dip. Every week I share the recipe that we will be making next Thursday on the podcast so that you can have all of the ingredients ready and cook along with me next week. So we will be making a Marinated Grilled Tri Tip with mustard Butter next week.

This is a great recipe as the temperatures start to cool and you’re ready to get out and cook on your grill again. So for this recipe next week, you’re going to need a 2 to 3 pound beef tri tip, 2 tablespoons of Worcestershire sauce, some extra virgin olive oil, 2 garlic cloves, smoked paprika, onion powder, brown sugar, kosher salt, and a coarse ground black pepper.

Then for the mustard butter, you only need three ingredients and you probably already have all of them. Salted butter, Dijon mustard, and black pepper. So, basically what we’re doing is we are marinating a tri tip and you can marinate it in the morning and then cook it in the evening or you can marinate it on Thursday and grill it on Friday for dinner.

The mustard butter can also be made ahead of time, so if you want to make that in the morning and have it for dinner in the evening, or you can make it on Thursday and have it ready in the fridge for dinner on Friday. But that is all you need. So I hope you will join me then. But until that episode, I hope you guys have a wonderful week ahead.

Recipes & Equipment Mentioned

  • Instant Pot 6 quart
  • Immersion Blender
  • Instant Pot Refried Beans
  • Easy Mexican Rice
  • All Mexican Recipes

Next Week

I hope you will join us every Thursday for a new episode. Next week we are making Marinated Grilled Tri Tip Steak.

Follow Along

Join the Community by subscribing to the weekly newsletter. Never miss and episode, new recipe, or video!

Subscribe To Stay Connected!

Sign up for the Mom's Dinner Newsletter and get dinner help delivered straight to your inbox. From new recipes and videos to weekly dinner ideas and kitchen tips, it's your go-to resource for feeling confident at dinnertime.

Sign Up Now โ†’

Cucumber and Onion in Vinegar

August 21, 2023 by Susie Weinrich 4 Comments

Cucumbers and Onions Salad in a bowl with a fork

Cucumber and Onion Salad is an old fashioned side dish that is a delicious combo of (like the name) sliced cucumbers, sweet onions marinated in a vinegar mixture. It is similar to a quick pickle and it makes a great “vinegary crunch” side dish for any dinner. Very fresh and light.

cucumber and onions in a bowl with watermelon in the background

I grew up in small town Iowa and one thing we have down pat are really, really good side dishes! Think pot lucks, BBQ's, Sunday family dinner at Grandma's. This Cucumber Vinegar Salad is a staple recipe that I love to make when we have a gathering that is full of rich dishes! It is tangy, crunchy and fresh, simple, but it hits all the right notes. . Without fail, every single time I make it, someone tracks me down to ask for the recipe.

These cucumbers and onions in vinegar are especially delicious served with anything from the grill or BBQ, like this BBQ Pork Tenderloin or Grilled Tri Tip. When you have heavier side dishes like cheesy potatoes and beans, these cucumbers and onions are a very refreshing addition.

[feast_advanced_jump_to]

Cucumber and Onion Recipe Ingredients

Since this Cucumber and Onion Salad is an old fashioned recipe it only has the simplest of ingredients. Aren’t those the best?!

Ingredients for cucumber and onion salad on a table
Ingredients shown clockwise: onions, cucumbers, vinegar, celery seeds, kosher salt and sugar.

Cucumbers I recommend using a hot house or English cucumbers for this recipe. They are less watery and don’t have as many seeds as a traditional or garden cucumber. They also have thinner skin so they don’t need to be peeled.

You CAN use garden cucumbers, I just recommend peeling them or partially peeling them (so they look striped).

Onion Choose a sweet onion like yellow or Vidalia onions. I like to cut the onion in half and then slice it into thin strips about โ…›-1/4 inch thick. A red onion can work as well.

PRO TIP FOR ONION: if you have a really strong onion, after cutting it in half lightly rinse it under cool water lightly separating the layers. This rinses away the enzyme that will have the strong onion flavor taking over your whole dish.

Vinegar Rice vinegar is a great choice for this cucumber and onion salad. It has great flavor on it’s own and makes a delicious “marinade” for the salad. If you don’t have rice vinegar you can sub apple cider vinegar.

Sugar Simple granulated white sugar is what you need here. It balances the tang of the vinegar and gives a bit of sweetness to the dish.

Kosher Salt enhances the flavor of the entire dish!

Celery Seed adds a great flavor to the vinegar mixture.

How To Make Old Fashioned Cucumbers and Onions in Vinegar

This is SUCH a simple recipe! It only takes about 10 minutes to put it together, then pop it in the fridge to marinate or pickle until it’s time to eat.

  1. Prep Cucumbers & Onions
  2. Slice the cucumbers and onions about โ…›-1/4 inch thick and place in a bowl or pan. Set aside

    sliced cucumbers and sliced onions in a bowl
  3. Boil Vinegar Mixture
  4. In a saucepan over medium heat combine the vinegar, sugar, kosher salt and celery seed.

    Bring to a boil (this will happen quickly) and let boil for about 30 seconds.

    vinegar, sugar, kosher salt, and celery seed in a saucepan
    vinegar, sugar, kosher salt, and celery seed boiling in a saucepan
  5. Pour Vinegar Over Veggies
  6. Pour the hot vinegar mixture over the cucumbers and onions. Give them a good toss to coat.

    pouring vinegar mixture over cucumbers and onion
  7. Refrigerate
  8. Cover the bowl and refrigerate for 8-12 hours, tossing occasionally if you have time.

    sliced cucumbers and sliced onions in a bowl coated in a vinegar and celery seed mixture

Cucumber and Onion Recipe Tips

Don't wait too long to eat the cucumbers and onions, the cucumbers will get soggy after a few days (although they will still be DELICIOUS).

An English or Hot House cucumber are great options because they don't have large seeds and have thinner skin.

If using garden cucumbers, the skin is thicker so peel them for a better texture.

Use a yellow or sweet Vidalia onion for the best flavor.

Slice the cucumbers and onions about the same thickness for the best texture.

Serving ideas

Cucumber and Onion in Vinegar is a wonderful tangy side dish that pairs really really well with a rich meal. Here are a few things we like to serve this with:

  • BBQ Chicken Skewers
  • Grilled BBQ Pork Tenderloin
  • ALL the Burgers
  • Pulled Pork Sandwiches
  • Grilled Tri Tip

Storing

Keep the Cucumber and Onion Salad covered in the fridge for up to 2 days. It will last longer but the more time that passes the cucumbers start to become very soggy. Best eaten within 2 days.

More Cucumber Recipes

  • Pasta Salad with Cheese Tortellini
  • Cucumber margarita in a glass with a cucumber rosette garnish
    Refreshing Cucumber Margarita
  • Italian Salad recipe on a platter with serving spoons
    Big ‘ol Italian Salad

Susie leaning on the kitchen counter

WATCH SUSIE ON FOOD NETWORK!

โญโญโญโญโญ

The new gameshow, 100 Cooks, premieres on Food Network June 7th, 2026 at 9est/8cst. I hope you will tune in!

Cucumbers and Onions Salad in a bowl with a fork

Onion and Cucumber in Vinegar

Cucumber and Onion Salad is a great side dish to add to ANY dinner. It is similar to a quick pickle and is simply cucumbers and onions in a vinegar mixture. It makes a great "vinegary crunch" addition to your meals. Very fresh and light.
5 from 5 votes
Print Pin Rate Save Saved!
Prep Time: 10 minutes minutes
Cook Time: 2 minutes minutes
Marinating: 8 hours hours
Total Time: 8 hours hours 12 minutes minutes
Servings: 8 people
Calories: 65kcal
Author: Susie Weinrich

Ingredients

  • 4 cups sliced cucumber - Hot House or English cucumber (one large or two small should be about 4 cups)
  • 1 yellow onion - sliced
  • ยฝ cup rice vinegar
  • ยฝ cup sugar
  • 1 teaspoon kosher salt
  • ยฝ teaspoon celery seed

Instructions
 

  • Slice your cucumbers about โ…›-1/4 inch thick, same for the onions.
    If you are using hot house, english or persian cucumbers you don't need to peel them, if you are using traditional cucumbers or garden cucumbers you can peel them completely or partially by peeling stripes.
    4 cups sliced cucumber, 1 yellow onion
  • Place the sliced cucumbers and onions in a shallow bowl or pan. Set aside.
  • In a saucepan over medium heat, bring the sugar, salt, vinegar and celery seeds to a boil. Once it comes to a rapid boil, let it boil for about 30 seconds.
    ยฝ cup sugar , 1 tsp kosher salt , ยฝ cup rice vinegar , ยฝ tsp celery seed
  • Pour over the cucumbers and onions. Toss to coat. Then try to have all the cucumbers and onions touching the vinegar liquid.
  • Cover and refrigerate for 8-12 hours.
    If you have time you can toss the cucumbers and onions a few times while they marinate in the fridge.
  • It is great garnished with black pepper when serving!

Storing

  • Store in a covered container in the fridge for up to 2 days.
    It will last longer but the more time that passes the cucumbers start to become very soggy.
Did you make this recipe?Connect with me and let me know by commenting below!
Jump to Comments
Serving: 1serving | Calories: 65kcal | Carbohydrates: 16g | Protein: 1g | Fat: 0.1g | Saturated Fat: 0.03g | Polyunsaturated Fat: 0.02g | Monounsaturated Fat: 0.02g | Sodium: 293mg | Potassium: 99mg | Fiber: 1g | Sugar: 14g | Vitamin A: 55IU | Vitamin C: 2mg | Calcium: 15mg | Iron: 0.2mg

Classic Arnold Palmer Drink

August 17, 2023 by Susie Weinrich Leave a Comment

An Arnold Palmer in a glass with a straw and lemon wedge

Named after the legendary golfer, Arnold Palmer, this drink is a delightful mix of iced tea and lemonade. It is a perfect drink to sip on, especially in the summer. Whether you’re lounging by the pool or looking for an alternative to soda, this drink promises a refreshing taste that has wooed generations (has become a very popular combo at Chick-fil-A).

Arnold Palmer in a glass with a straw and lemon wedge

Other non-alcoholic drinks that are named after famous people in history are the Shirley Temple (lemon-lime soda and grenadine) or the Roy Rogers (cola and grenadine).

RELATED: Homemade Fresh Lemonade

Ingredients for an Arnold Palmer

You only need two ingredients to make a proper Arnold Palmer drink; ice tea and lemonade! Now whether you want it super sweet with sweet tea, or more bitter using unsweetened tea is up to you (more about that in the next section).

Ingredients for an Arnold Palmer- iced tea, lemonade and lemons
Ingredients Shown from Left to Right: Iced Tea, Lemonade, Fresh Lemons

Flavor Troubleshooting

The important part of an Arnold Palmer is the ratio; 1 part lemonade to 2 parts iced tea. If you swap up the ratio 1:1 or half and half you get an “Arnie Palmer”.

However, you can customize the taste and sweetness to your preference by the type of tea and lemonade that you choose.

Less Sweet: choose a “no sugar”, diet, or ยฝ calorie lemonade. Also choose an unsweetened ice tea.

More Sweetness: Use sweet tea and full sugar lemonade.

Homemade: You can also make a homemade lemonade and Sun Tea to make it as sweet or tart as you like!

Step by Step How To

To make one glass:

  1. Fill Glass with Ice
  2. Fill a tall glass with ice and grab your ingredients- iced tea and lemonade.

  3. Mix Drink
  4. Pour in 1 part lemonade (ยผ cup) and then pour in 2 parts ice tea (ยฝ cup).

    pouring lemonade in a glass
    pouring iced tea over lemonade in a glass full of ice
  5. Garnish and Enjoy
  6. Garnish the drink with a fresh lemon wedge or wheel and enjoy!

To make a pitcher:

  1. Grab a Pitcher
  2. Grab a large pitcher, do not add ice to the pitcher or you will water down the drink.

  3. Mix Drink
  4. Measure in 1 part lemonade to 2 parts ice tea, enough to fill the pitcher.

    example:

    • 1 cup lemonade and 2 cups iced tea
    • 2 cups lemonade and 4 cups iced tea
    • 4 cups lemonade and 8 cups iced tea
  5. Refrigerate
  6. You can refrigerate the pitcher for a day or two or until it is time to serve. Garnish the pitcher with some lemon wheels.

John Daly – Adding Alcohol

When you add alcohol to an Arnold Palmer it becomes a John Daly (another famous professional golfer).

  • Fill a glass with ice
  • Add 1-2 oz. of vodka or your preferred liquor.
  • Add in ยผ cup lemonade and ยฝ cup ice tea.
  • Stir well and serve over ice with a lemon garnish.

While vodka is a common choice for spiking, some might prefer rum, tequila, or even whiskey.

More Drink Recipes To Try

  • two Shirley temple kiddie drinks
    Cherry Shirley Temple Drink
  • Roy Rogers cocktail (cherry coke) in a glass with a cherry on top and a straw, coca cola in the background
    Roy Rogers Drink (mocktail)
  • lemonade in a pitcher
    Perfect Fresh Lemonade

Susie leaning on the kitchen counter

WATCH SUSIE ON FOOD NETWORK!

โญโญโญโญโญ

The new gameshow, 100 Cooks, premieres on Food Network June 7th, 2026 at 9est/8cst. I hope you will tune in!

An Arnold Palmer in a glass with a straw and lemon wedge

Arnold Palmer Drink Recipe

A perfect blend of Iced Tea and Lemonade that creates a super refreshing non-alcoholic drink. This is a great alternative to soda.
Named after the professional golfer, Arnold Palmer.
5 from 1 vote
Print Pin Rate Save Saved!
Prep Time: 2 minutes minutes
Cook Time: 0 minutes minutes
Author: Susie Weinrich

Ingredients

  • ยผ cup lemonade
  • ยฝ cup iced tea
  • ice
  • lemon wedge or wheel garnish

Instructions
 

For One Glass

  • Fill a glass with ice.
    ice
  • Pour in the lemonade and top with ice tea. Give it a mix with a straw or spoon.
    ยผ cup lemonade , ยฝ cup iced tea
  • Garnish with a lemon wedge or wheel. Enjoy!
    lemon wedge or wheel garnish

For a Pitcher

  • To fill your pitcher plan on 1 part lemonade to 2 parts iced tea. Do not add ice or you will dilute your drink.
  • Example:
    1 cup lemonade and 2 cups iced tea
    2 cups lemonade and 4 cups iced tea
    4 cups lemonade and 8 cups iced tea

Recipe Tips and Notes:

ย 
ARNIE PALMER: change the ratio to 1:1 or half & half.
  • ยฝ cup lemonade
  • ยฝ cup iced tea
  • lemon garnish
ย 
JOHN DALY: add alcohol to your Arnold Palmer.
  • 1-2 oz. vodka, whiskey, rum or tequila
  • ยผ cup lemonade
  • ยฝ cup iced tea
  • lemon garnish
ย 
FLAVOR TROUBLESHOOTING:
  • More sweet – use sweetened iced tea and full sugar lemonade.ย 
  • Less sweet – use a diet lemonade and unsweetened iced tea.
  • Homemade – use a homemade lemonade and sun tea.
Did you make this recipe?Connect with me and let me know by commenting below!
Jump to Comments

Marinated Grilled Tri Tip w/ Mustard Butter

August 17, 2023 by Susie Weinrich Leave a Comment

Grilled Tri Tip that is sliced into stirps with butter melting over top

In this recipe, Tri Tip is coated in a delicious marinade and then grilled to perfection over an open flame. The Grilled Tri Tip has wonderful beef flavor and slices up tender and juicy. When it comes time to serve you enhance the flavors with a homemade mustard butter. You are going to love this flavor combination and find yourself revisiting this recipe whenever you want to grill a delicious tri tip!

Grilled Tri Tip sliced on a platter with mustard butter melting over the slices

In this post we don’t stop with the recipe… we are sharing all the tips and tricks from trimming your tri tip to slicing it correctly for maximum tenderness. This is the ultimate guide to Grilled Tri Tip.

After you have tried and loved this Grilled Tri Tip recipe, we highly recommend giving this recipe for Braised Tri Tip with Red Wine Glaze a try too!

Ingredients

There are three sections of ingredients to gather to make your Marinated Grilled Tri Tip: the marinade ingredients, the tri tip, and the mustard butter. Everything is made with simple ingredients you either have on hand or can easily grab at the store.

Ingredients for Tri Tip Marinade and a raw tri tip
Ingredients shown clockwise: tri tip, olive oil, worcestershire sauce, brown sugar, spices, garlic.

Just three ingredients to make the Mustard Butter; Dijon mustard, softened butter and black pepper.

Ingredients for mustard butter on a cutting board

What Is Tri Tip

Tri Tip, originally called the California Cut, is a cut of beef from the bottom sirloin. It is called the tri tip because it literally has 3 tips, and looks like a triangle.

It is becoming increasingly popular because it is a lean cut of beef that is still super flavorful AND economical.

This cut is traditionally cooked on a grill or smoked. But, we have found that tri tip cooks up beautifully in a braising liquid too.

It has rich beef flavor similar to a chuck roast. It also has beautiful marbling throughout which lends to the buttery flavor.

Trimming A Tri Tip

Unless you purchased your tri tip already trimmed up, it will come with a decently sized fat cap on one side and possibly some silver skin. You will want to remove both of these before marinating and grilling.

With a really sharp knife start at one tip on the tri tip, grab the fat cap and start slicing underneath of it, being careful not to remove much meat with it. Keep peeling and slicing as you move across the tri tip.

trimming fat cap from tri tip

That may reveal some silver skin underneath (see the second photo below). That is a little harder to remove. You will want to slip your knife tip between the silver skin and the meat, slide your knife so it removes the silver skin.

showing silver skin on a tri tip

This is a great You Tube video showing how to remove the fat cap from a Tr Tip.

completely trimmed tri tip
Completely trimmed tri tip.

Simple Step by Step

  1. Trim the Tri Tip
  2. Trim the fat cap and silver skin from the tri tip. See the section above for more in depth details.

  3. Mix the Marinade
  4. In a small bowl mix together worcestershire sauce, extra virgin olive oil, garlic, smoked paprika, onion powder, brown sugar, kosher salt and black pepper.

  5. Coat the Tri Tip & Wrap
  6. Lay the trimmed tri tip on large sheets of plastic wrap. Slather the wet rub on all sides of the tri tip. Wrap it up completely in the plastic wrap.

    Refrigerate for 8 hours up to 24 hours.

    rubbing a marinade on a tri tip
    a tri tip coated in marinade and wrapped in plastic wrap.
  7. Make the Mustard Butter
  8. Mix together the Dijon mustard, black pepper and softened butter. Pour onto a large sheet of plastic wrap. Form the butter mixture into a log by rolling in the plastic wrap.

    Twist the ends to close the wrapping. Refrigerate until needed.

    mustard butter blended up and piled on plastic wrap
    mustard butter wrapped in plastic wrap
  9. Grill the Tri Tip
  10. Preheat the grill to high heat. Leave unwrapped tri tip at room temperature for 30 minutes while the grill heats up.

    Grill the tri tip over direct heat for 5 minutes, each side, on a covered grill.

    a marinated tri tip on a grill over hot coals
    The lemons in this photo are for a Grilled Lemon Tequila Cocktail. Would be a perfect drink with Grilled Tr Tip!

    Now move the tri tip to the indirect heat side for about 5-10 minutes. You want to remove the tri tip when it reaches 135โ„‰ at it’s thickest point. This is medium rare to medium. Use an instant read thermometer to check temp.

  11. Cut and Serve
  12. Remove the steak from the grill and top with two pats of the mustard butter. Let it sit at room temp for about 5 minutes.

    Slice the tri tip into thin slices against the grain (noting that there are two grain patterns, see section below).

    Serve with extra mustard butter slices on the side.

Slicing a Tri Tip For Serving

As always, it is crucial to cut beef against the grain. Doing so ensures the most tender chew on any cut.

Because of where the tri tip is cut from it has two different grains, you will want to take note of this before you grill.

showing the second "against the grain" on a tri tip
Showing the first direction to slice for “against the grain”
showing "against the grain" on a tri tip
Showing the second direction to cut half way down the tri tip

Correctly Cutting a Grilled Tri Tip

Start at the smallest tip of the tri tip, cutting 1 inch-ยฝ inch slices. Slice against the grain about half way up, if you look at each slice they will look like dots of fibers, not long strands.

Then turn your knife 90 degrees and continue cutting across the widest part of the tri tip.

This is an AMAZINGย video from Jess Pryles showing how to cut a tri tip.

Side Dishes for Grilled Tri Tip

You can treat your Grilled Tri Tip just like grilled steak, the same delicious side dishes apply. We love to serve this with a starter of The Perfect Side Salad. Then for side dishes; Steakhouse Mushrooms with Garlic Mashed Potatoes and Green Beans, or Crispy Cast Iron Potatoes and Baked Beans.

Or course grilled tri tip steak is always great with Baked Potatoes and Roasted Asparagus, just like you would get at a steak house!

In the summer corn on the cob is delicious, and deviled eggs are killer in the fall!

More Popular Beef Recipes

  • juicy burger on a bun with mustard, ketchup, lettuce and tomato
    Perfect Grilled Burger Recipe
  • Grilled Steak Tacos assembled with pico de gallo and chipotle crema
    Grilled Steak Tacos Recipe with Chipotle Crema
  • Beef Chuck Roast (Instant Pot)
  • sliced tri tip with red wine glaze and herbs
    Braised Tri Tip with Red Wine Glaze

Susie leaning on the kitchen counter

WATCH SUSIE ON FOOD NETWORK!

โญโญโญโญโญ

The new gameshow, 100 Cooks, premieres on Food Network June 7th, 2026 at 9est/8cst. I hope you will tune in!

Grilled Tri Tip that is sliced into stirps with butter melting over top

Marinated Grilled Tri Tip Recipe with Mustard Butter

Make a delicious wet rub marinade for your tri tip, then grill it up to perfection. Serve it with a homemade mustard butter.
Listen to the audio recipe using the player below.
5 from 1 vote
Print Pin Rate Save Saved!
Prep Time: 10 minutes minutes
Cook Time: 20 minutes minutes
Marinade Time: 8 hours hours
Total Time: 8 hours hours 30 minutes minutes
Servings: 5 people
Author: Susie Weinrich

Equipment

  • Grill

Ingredients

Marinated Tri Tip

  • 2-3 lb. Beef Tri-Tip
  • 2 Tbsp. worcestershire sauce
  • 2 Tbsp. extra virgin olive oil
  • 2 large garlic cloves - chopped
  • 1 tsp. smoked paprika
  • 2 tsp. onion powder
  • 1 tsp. brown sugar
  • 1 tsp. kosher salt
  • 1 tsp. coarse ground black pepper

Mustard Butter

  • 6 Tbsp. salted butter - softened
  • 2 Tbsp. dijon mustard
  • ยผ tsp. black pepper

Instructions
 

Trim the Tri Tip

  • To prepare the tri tip for marinating remove the fat cap and silver skin, unless it is sold already trimmed.
  • One side of the tri tip will have a layer of hard fat. With a sharp knife remove as much of the fat as you can without removing much meat.
  • If your tri tip has silver skin under the fat cap, a thin membrane that is tough to chew and looks cloudy or slivery (see photo), you will want to remove that as well.
    Slip the tip of a sharp knife under the silver skin and try to carefully peel it off.
    showing silver skin on a tri tip
  • For a visual watch this You Tube Video on trimming a tri tip.

Tri Tip Marinade

  • For the marinade, mix all the wet rub marinade ingredients together in a small bowl.
    2 Tbsp. worcestershire sauce, 2 Tbsp. extra virgin olive oil, 2 large garlic cloves , 1 tsp. smoked paprika, 2 tsp. onion powder, 1 tsp. brown sugar, 1 tsp. kosher salt, 1 tsp. coarse ground black pepper
  • Place a few sheets of plastic wrap on the counter (enough to cover the tri tip completely) and place the trimmed tri tip on top.
    2-3 lb. Beef Tri-Tip
  • Generously spread the mixture over all sides of the steaks and cover with plastic wrap.
    Refrigerate for 8 hours up to 24 hours.

Mustard Butter – can be made up to a week ahead

  • To make the mustard butter, in a small bowl, combine the softened butter, Dijon mustard and pepper and mash the ingredients together.
    6 Tbsp. salted butter, 2 Tbsp. dijon mustard, ยผ tsp. black pepper
  • Scoop the mixture out onto a sheet of plastic wrap and shape the mixture into a log about 1 inch in diameter.
  • Twist the ends of the plastic wrap to form a tightly enclosed cylinder. Refrigerate until ready to use.
    mustard butter wrapped in plastic wrap

Grilling Tri Tip

  • When ready to grill, preheat the grill to high heat. Remove the tri tip from the refrigerator and unwrap, allow to stand at room temperature for 30 minutes while the grill heats up.
  • Start the tri tip over direct heat for 5 minutes on a covered grill. Then flip and grill the other side for another 5 minutes, on a covered grill.
    Note: position the tri tip so the smaller point is closer to the indirect heat of the grill. The smaller tip will cook through fast!
  • Now move the tri tip to the indirect heat side for about 5-10 minutes (keeping the smaller tip away from the direct heat side of the grill) .
    You want to remove the tri tip when it reaches 135โ„‰ at it's thickest point. This is medium rare to medium.
    Use an instant read thermometer to check temp.
  • Top the tri tip with 2 large 1 inch slice of the mustard butter. Allow the steaks to rest at room temp for 3-5 minutes while the butter melts over the top of the steak.

Cutting and Serving Tri Tip

  • A tri tip has two different directions of grain, and it is crucial to cut the beef against the grain for tenderness!!!
    This is a great You Tube Video on properly cutting a tri tip for maximum tenderness.
  • Showing cutting "against the grain" #1
    showing the second "against the grain" on a tri tip
  • Showing "cutting against the grain" #2
    showing "against the grain" on a tri tip
  • Cut the tri tip into thin slice, and serve with more mustard butter slices on the side.

Recipe Tips and Notes:

ย 
TRI TIP: another great tri tip recipe to try is this Braised Tri Tip with Red Wine Glaze.
Did you make this recipe?Connect with me and let me know by commenting below!
Jump to Comments

Episode 105 Pesto Lasagna Skillet

August 17, 2023 by Susie Weinrich Leave a Comment

Let's Make Dinner text with a photo of pesto skillet lasagna

In episode 105 we are making a Sausage & Pesto Lasagna Skillet that is perfect for back to school time. We all need an easy recipe to get dinner back on track when the routine of school starts. This Pesto Lasagna Skillet is made in one pan, has all the flavors of lasagna, without all the work.

Pair it with a side salad and garlic bread for a great homemade dinner.

Transcript

Click for the full transcript.

Intro: Welcome, welcome everybody to another episode of Let’s Make Dinner, your audio library of amazing dinner recipes you can always get on the table. I’m your host, Susie Weinrich. 

Susie Weinrich: What’s good everybody? So if you’re listening to this episode in real time, then it’s either back to school day or it’s back to school time for you. For us, our kids went back to school on Wednesday and the house has been very, very quiet ever since. So now that we’re getting back into the rhythm of schedules and running to soccer practice and swim practice and basketball practice and all of the things, dinner time gets the shaft basically. So what we need now, and I think you’re the same if you’ve got kids, you need easy, quick recipes that are still delicious and nutritious for your family.

So that’s what we’re focusing on today. We’re making something called a Pesto Lasagna Skillet. The nice thing about this is that you get flavors of a full lasagna, but it is made in a skillet. It’s made super quick, like 30 minutes, and it is delicious with very few dirty dishes. So I hope that you like this recipe and that you’ll make it for dinner. If you do and you love it, give it five stars on the actual recipe card and leave me a little comment that you listen to it here on this podcast. 

Tips and Tricks: As for tips and tricks today, the only thing I want to talk about really quickly is the pesto. Obviously this recipe has a pesto, Pesto Lasagna Skillet. When you’re looking for pesto, if you aren’t going to make fresh pesto, which actually I will link a fresh pesto recipe right in the show notes for you. It’s actually pretty easy. It’s just done right in a blender. If you’re not gonna make your own pesto, then buy one at the store and your best bet is going to be buying a refrigerated pesto. It’s gonna have the best flavor. It’s gonna be the freshest. Now if you want to go shelf stable, what I recommend is that you look at the ingredients of the pesto bottles and make sure that basil is one of the first at least three ingredients.

The other thing you’re going to need is a large skillet. So whenever I make a skillet lasagna, I use my all clad pan and it is not nonstick. You could use a nonstick pan, but it’s not necessary. It’s about a 12 inch pan. It’s got about two to three inch high sides and then it has a nice tight fitting lid. You definitely need a pan with a lid to trap that heat and steam to cook the lasagna noodles. 

Pesto Lasagna Skillet Recipe: With all of that said, let’s go ahead and get into the full recipe for Pesto Lasagna Skillet. The first thing you’re going to do is actually toast a quarter cup of pine nuts. We’re going to actually add those at the end, but before you put anything in your skillet, you want to toast those nuts.

So, take that large skillet, put it over low heat, pop a quarter cup of pine nuts, and just roll them around in the pan until they start to brown, not burn, just brown, and they’ll start to smell really nutty. They actually, to me, when pine nuts start to toast, they smell like bacon. Take them out of the pan and just set them aside in a little bowl. We’ll use those later. 

Now set that empty skillet back over medium heat and you’re going to cook and crumble one pound of Italian sausage. You can use hot, mild, sweet, whatever bulk Italian sausage you want, go ahead and use that. Now after that’s browned and nice and crumbled up, you’re going to drain any excess grease from the pan.

Now to that, you’re going to add a half a cup of chopped onions, two chopped garlic cloves, one teaspoon of dried oregano, and a quarter teaspoon of kosher salt to the pan. Saute that around for about four to five minutes. 

Now it’s time to get things going. You’re going to need to add one and three quarters cup of water, a 15 ounce can of diced tomatoes that has been drained and then about 6 to 7 ounces of the pesto to the pan. You’re going to give that a really good stir and then bring it to a boil over medium high heat. 

As soon as that starts boiling, you’re going to take 8 to 10 lasagna noodles and break them up into 1 or 2 inch pieces and start nestling them down into that hot liquid. Now for the lasagna noodles, you can use either oven-ready noodles or you can use traditional noodles. Both work. But what I’ll say is that I usually prefer the traditional noodles because they’re just a little bit thicker and heartier than the oven-ready ones. 

After you have all of the lasagna noodle pieces nestled down into that liquid, you’re going to lower the heat to low and you’re going to pop that lid on the pan and cook for 12 minutes. After that 12 minutes, you’re going to open that pan back up and you’re going to take a half a cup of ricotta and you’re going to just dot spoonfuls all over the top of the lasagna and then you can shimmy them down into the sauce. Then top that with about 4 ounces of shredded mozzarella all over the top. You’ll pop that lid back on and cook for an additional 10 minutes. After that 10 minutes, you remove the lid, remove that pan from the heat, and just let it sit for about five minutes. Then right before serving, you will garnish it with those toasted pine nuts, and it’s ready to eat. 

So you can serve this up with a really nice side salad and some garlic bread, and you are good to go. You have a really easy and quick dinner that’s perfect for a weeknight, but also delicious enough for a weekend family dinner. 

As always, I will link this full recipe for you in the show notes so that you can take a look at it, you can print it, you can pin it to save the recipe, and hopefully make it for dinner.

Outro: So, until next time, I hope this episode of Let’s Make Dinner makes your dinnertime a little easier. See ya!

Double Dip: All right, now it’s time for your weekly double dip. In the double dip we just go over the recipe that we are going to make next week on the podcast so that you can have the ingredients you need to cook along with me every Thursday. So next week we have more of a side dish that we’re making but such a good side dish. We’re making Instant Pot Refried Beans.

If you’ve never made your own refried beans, this is your opportunity. It’s amazing. Highly, highly recommend. You don’t need much to make them, so let me tell you what you’re going to need to grab. 

You’re going to need about one pound of dry pinto beans, three tablespoons of olive oil, a white onion, some garlic cloves, one jalapeno, one tablespoon of chicken base. Chicken base is kind of like chicken bouillon, but way more flavorful. You can find it in the soup aisle by the bouillon. But it usually comes in a tub or a jar, and we like the Better Than Bouillon brand. 

From your spice cabinet, you’re going to need cumin, onion powder, kosher salt, and a bay leaf. You need four cups of chicken broth, some water, and then a fresh lime. Then of course, you’ll need an instant pot. 

So if you plan to make this, it goes great with any kind of Mexican dinner, enchiladas, burritos, tacos, quesadillas, you know, any kind of Mexican dinner where you would serve rice and beans on the side. I hope you’ll join me next week to make these Instant Pot Refried Beans.

Recipes Mentioned

  • Sausage and Pesto Lasagna Skillet
  • Fresh Homemade Pesto

Next Week

I hope you will join me every Thursday for a new dinner recipe. Next week we are making Instant Pot Refried Beans. Pair this with any Mexican Entrรฉe and you will never go back to canned refried beans again.

You will need an Instant Pot for next weeks episode. We love this 7-in-1 Instant Pot.

Follow Along

Subscribe To Stay Connected!

Sign up for the Mom's Dinner Newsletter and get dinner help delivered straight to your inbox. From new recipes and videos to weekly dinner ideas and kitchen tips, it's your go-to resource for feeling confident at dinnertime.

Sign Up Now โ†’

Perfect Side Dish Salad

August 16, 2023 by Susie Weinrich Leave a Comment

drizzling warm balsamic dressing over greens

When you are planning a delicious meal and you want a side dish salad, this is the recipe you NEED!! A mix of delicate greens is lightly dressed with fresh lemon juice and parmesan shavings, then is drizzled with a warm rosemary and shallot balsamic glaze. It is bold enough to serve with steak, but simple enough to serve with spaghetti.

a large oval platter with a side salad, with dressing being drizzled on

A couple other salads we really love to serve as a heartier side are a Classic Caesar Salad, Apple Pecan Chicken Salad (minus the chicken) and this Big ‘Ol Italian Salad.

RELATED: Fresh Basil Vinaigrette

Side Dish Salad Ingredients

There are two different sections of ingredients for this side dish salad recipe; the dressing ingredients and the salad ingredients.

salad ingredients
salad ingredients shown clockwise: delicate greens, good parmesan, and lemon

Salad Greens – In these photos I used a mix of arugula and baby spinach. But use any delicate greens you like: all arugula, spring mix, etc…

Parmesan Cheese – To find really good parmesan cheese look for something that looks dry and craggy, like it was cut from a larger wheel. A good indication is if the rind has writing or markings.

Lemon – This adds a nice bright note to the greens before adding the warm balsamic vinegar dressing.

dressing ingredients
dressing ingredients shown clockwise: balsamic vinegar, shallot, orange, rosemary, and butter

Balsamic Vinegar – The main ingredient of the dressing/glaze. You do not need to get a really expensive balsamic to make this glaze super delish!

Shallots – Are in the onion family but have a much more delicate flavor. You will find them near the onions and garlic in the produce section. Make sure you very finely dice them for your dressing/glaze.

Rosemary – This herb can be swapped with thyme if you like that better. It imparts the most wonderful flavor to the dressing. You will be removing it from the dressing, so don’t chop the rosemary (or thyme).

Butter – Adds a nice viscosity and helps thicken the balsamic.

Orange Juice – Instead of adding sugar we are adding fresh orange juice to balance the flavors and add a touch of sweetness to the dressing.

Simple Step by Step

  1. Make Vinaigrette
  2. In a saucepan add 6 tablespoon of butter, sautรฉ the shallots in the butter for about 2 minutes. Add the rosemary sprigs and balsamic vinegar. Let it simmer for about 5 minutes until reduced. Remove from the heat and let the rosemary steep for another 5 minutes.

    shallots sautรฉing in butter
    balsamic vinegar and rosemary in a pan
    whisking butter and OJ into balsamic glaze

    Remove the rosemary sprigs and return the vinegar mixture to the heat. Pour in the orange juice and add the 2 tablespoon butter, simmer for 2-3 minutes. Remove from the heat and let cool while you make the salad.

  3. Toss Salad with Lemon
  4. Add the delicate greens to a large bowl or platter. Squeeze fresh lemon juice over the leaves and toss to coat.

    squeezing lemon over greens
  5. Drizzle on Vinaigrette
  6. Lightly drizzle the warm balsamic over the greens. Serve additional on the side.

  7. Add Parmesan Shavings
  8. With a vegetable peeler, shave some parmesan over the salad.

    Serve!

    drizzling warm balsamic dressing over greens

Make Ahead

The dressing for the side salad can be made up to a week ahead and stored in a covered container in the fridge. Because of it’s butter content it will harden in the fridge.

homemade balsamic glaze dressing in a liquid measuring cup

Before serving place the dressing in a saucepan over low heat and warm through for a couple minutes until it is liquefied.

Variations

When I have made this side dish salad the past I will make variations depending on what is for dinner:

  • Add some black olives, peppers, or tomatoes
  • Sprinkle on some pistachios
  • Crispy croutons have made an appearance, especially if there is leftover bread that is too crusty to eat.
  • Add crumbled goat cheese or feta cheese
  • Grill up veggies that need to be used up and add to the salad.

Pair This Side Dish Salad With…

This salad is super versatile, it goes with a dinner like Lasagna, Garlic Steak Bites and Roasted Chicken, but is also perfect to pair with a super casual dinner like Grilled Pork Burgers, BBQ Pork Tenderloin or Chicken Salad.

Check out all the Mom’s Dinner Recipes to plan the dinner that is right for you!

More Side Salad Recipes

  • close photo of romaine caesar salad with dressing being spooned on
    Caesar Dressing Recipe No Anchovies
  • Italian Salad recipe on a platter with serving spoons
    Big ‘ol Italian Salad
  • Frito Taco Salad in a while bowl
    Frito Taco Salad with Catalina Dressing
  • Close up of the fuji apple chicken salad
    Apple Pecan Chicken Salad

Susie leaning on the kitchen counter

WATCH SUSIE ON FOOD NETWORK!

โญโญโญโญโญ

The new gameshow, 100 Cooks, premieres on Food Network June 7th, 2026 at 9est/8cst. I hope you will tune in!

drizzling warm balsamic dressing over greens

Perfect Side Dish Salad Recipe

This side dish salad is a mix of delicate greens lightly dressed with fresh lemon juice and parmesan shavings, drizzled with a warm rosemary and shallot balsamic glaze.
5 from 1 vote
Print Pin Rate Save Saved!
Prep Time: 10 minutes minutes
Cook Time: 20 minutes minutes
Total Time: 30 minutes minutes
Servings: 8 people
Author: Susie Weinrich

Ingredients

  • 6-8 cups delicate greens - any combo that you like: spring mix, arugula, baby spinach, etc…
  • 1 lemon
  • good parmesan cheese shaved
  • 8 Tbsp. butter - divided
  • 1 large shallot - finely minced
  • ยฝ cup balsamic vinegar
  • 2 large fresh rosemary sprigs - (do not chop)
  • 2 Tbsp. orange juice - preferably fresh squeezed

Instructions
 

Dressing – the dressing can be made ahead, see notes.

  • Melt 6 Tbsp. butter in a small saucepan over medium low heat. Add the minced shallot and cook until translucent (about 2 minutes).
    1 large shallot
  • Add the vinegar and rosemary and simmer until syrupy and reduced to about ยฝ cup (about 5-6 minutes)
    ยฝ cup balsamic vinegar, 2 large fresh rosemary sprigs
  • Remove from the heat and allow the rosemary to steep for a bit – about 5 minutes.
    don't be concerned if the glaze separates a little, it will come back together with a little whisk.
  • Remove the rosemary sprigs from the sauce and discard.
  • Now place the saucepan back onto medium low heat and add in the orange juice and bring to a simmer.
    2 Tbsp. orange juice
  • Add the remining 2 tablespoon butter and whisk until the butter is melted and the sauce is smooth. Season to tase with salt and pepper if desired.
  • Let cool for a minute or two while you make the salad, but it is great served warm on the salad!

Salad

  • Place the greens in a bowl or on a platter. Squeeze the lemon across the greens and lightly toss.
    6-8 cups delicate greens, 1 lemon
  • Drizzle a little of the dressing over the greens. Serve additional dressing on the side.
  • With a vegetable peeler shave the parmesan over the salad.
    good parmesan cheese shaved
  • Serve!!

Recipe Tips and Notes:

ย 
MAKE AHEAD: The dressing can be made a week ahead and stored in the fridge in a covered container. Because of the butter content it will harden in the fridge. To use, place in a saucepan over low heat and warm until liquefied.
Did you make this recipe?Connect with me and let me know by commenting below!
Jump to Comments
  • « Previous Page
  • 1
  • …
  • 14
  • 15
  • 16
  • 17
  • 18
  • …
  • 65
  • Next Page »
Susie in the kitchen with an apron on getting ready to cook

Meet The Author:

Susie Weinrich is a professional recipe developer specializing in classic Midwest cooking, recently seen on Food Network's 100 Cooks. Her thoroughly tested recipes and step-by-step guides give home cooks real confidence in the kitchen.

YOU will feel like a huge success at dinner time with any of the simple recipes on Mom's Dinner! Read More

Helpful Meal Planning Resources

  • a table with white place settings and green garland
    Easy Meals for House Guests
  • a round table with a large family eating dinner
    30 Easy Meals for Large Family Vacations & Gatherings
woman owned small business certificate by Sertify

Amazing New Recipes

  • Scoop of broccoli cheese casserole coming out of a baking dish.
    Down Home Broccoli and Cheese Casserole
  • Close up of a fresh made fried pork tenderloin sandwich topped with onion rings, pickles, horseradish mayo and lettuce.
    Iowa Fried Pork Tenderloin Sandwiches
  • two kids jumping in a lake off the dock at sunset
    Dinners for a Week at the Lake House
  • Tuna Noodle Casserole in a white dish being spooned out of the baking pan
    Mom’s Tuna Noodle Casserole

Footer

^ back to top

About

  • Susie Weinrich
  • Privacy Policy
  • Accessibility Policy

Contact

  • Sign Up! for emails
  • Contact Me!
  • Join Me On YouTube

Recipes

  • Recipe By Category
  • Instant Pot Recipes
  • Dinner Recipes

Copyright ยฉ 2026 Mom's Dinner

Rate & Review This Recipe

Your vote:


A rating is required
A name is required
An email is required