Instant Pot Beef and Noodles is a traditional, comforting and hearty family dinner recipe that has been updated to use in your electric pressure cooker (Instant Pot). This recipe is a perfect balance of tender beef pieces and hearty egg noodles coated in a rich gravy. If you are craving comfort food, this Beef and Noodles recipe will be your new go-to!

If you would rather make this with chicken, pop over to this recipe for Creamy Chicken and Noodles.
Some other favorite Instant Pot Beef Recipes are Beef and Barley Stew, Red Beans & Rice, or Instant Pot Beef Pot Roast.
When I first made this I said “we will never not be eating beef and noodles!”, it’s that good, it’s one of my favorite Instant Pot recipes!
-Susie
Why It’s SO Good
- It is made with really simple ingredients that can be found at ANY grocery store.
- The recipe calls for those THICK frozen egg noodles, just like this recipe for Homemade Chicken Noodle Soup. I use Reames brand Egg Noodles
- Campbell’s condensed French Onion Soup also adds incredible flavor!!
- No “cream-of” soups used here!
- With beef prices on the rise it is nice to have a delicious recipe that uses a cheaper cut, like stew meat.
It’s Not Stroganoff
If you are looking for a beef stroganoff recipe , this is not it.
This is definitely a traditional Beef and Noodles recipe. Stroganoff generally has a dairy component and can include mushrooms and sometimes peas. A classic Beef and Noodles recipe is made with a broth gravy.
Ingredients
Like I said before, only simple ingredients goes into this Instant Pot Beef and Noodles recipe. Pictured are the ingredients that you need, plus some tips on a few ingredients:
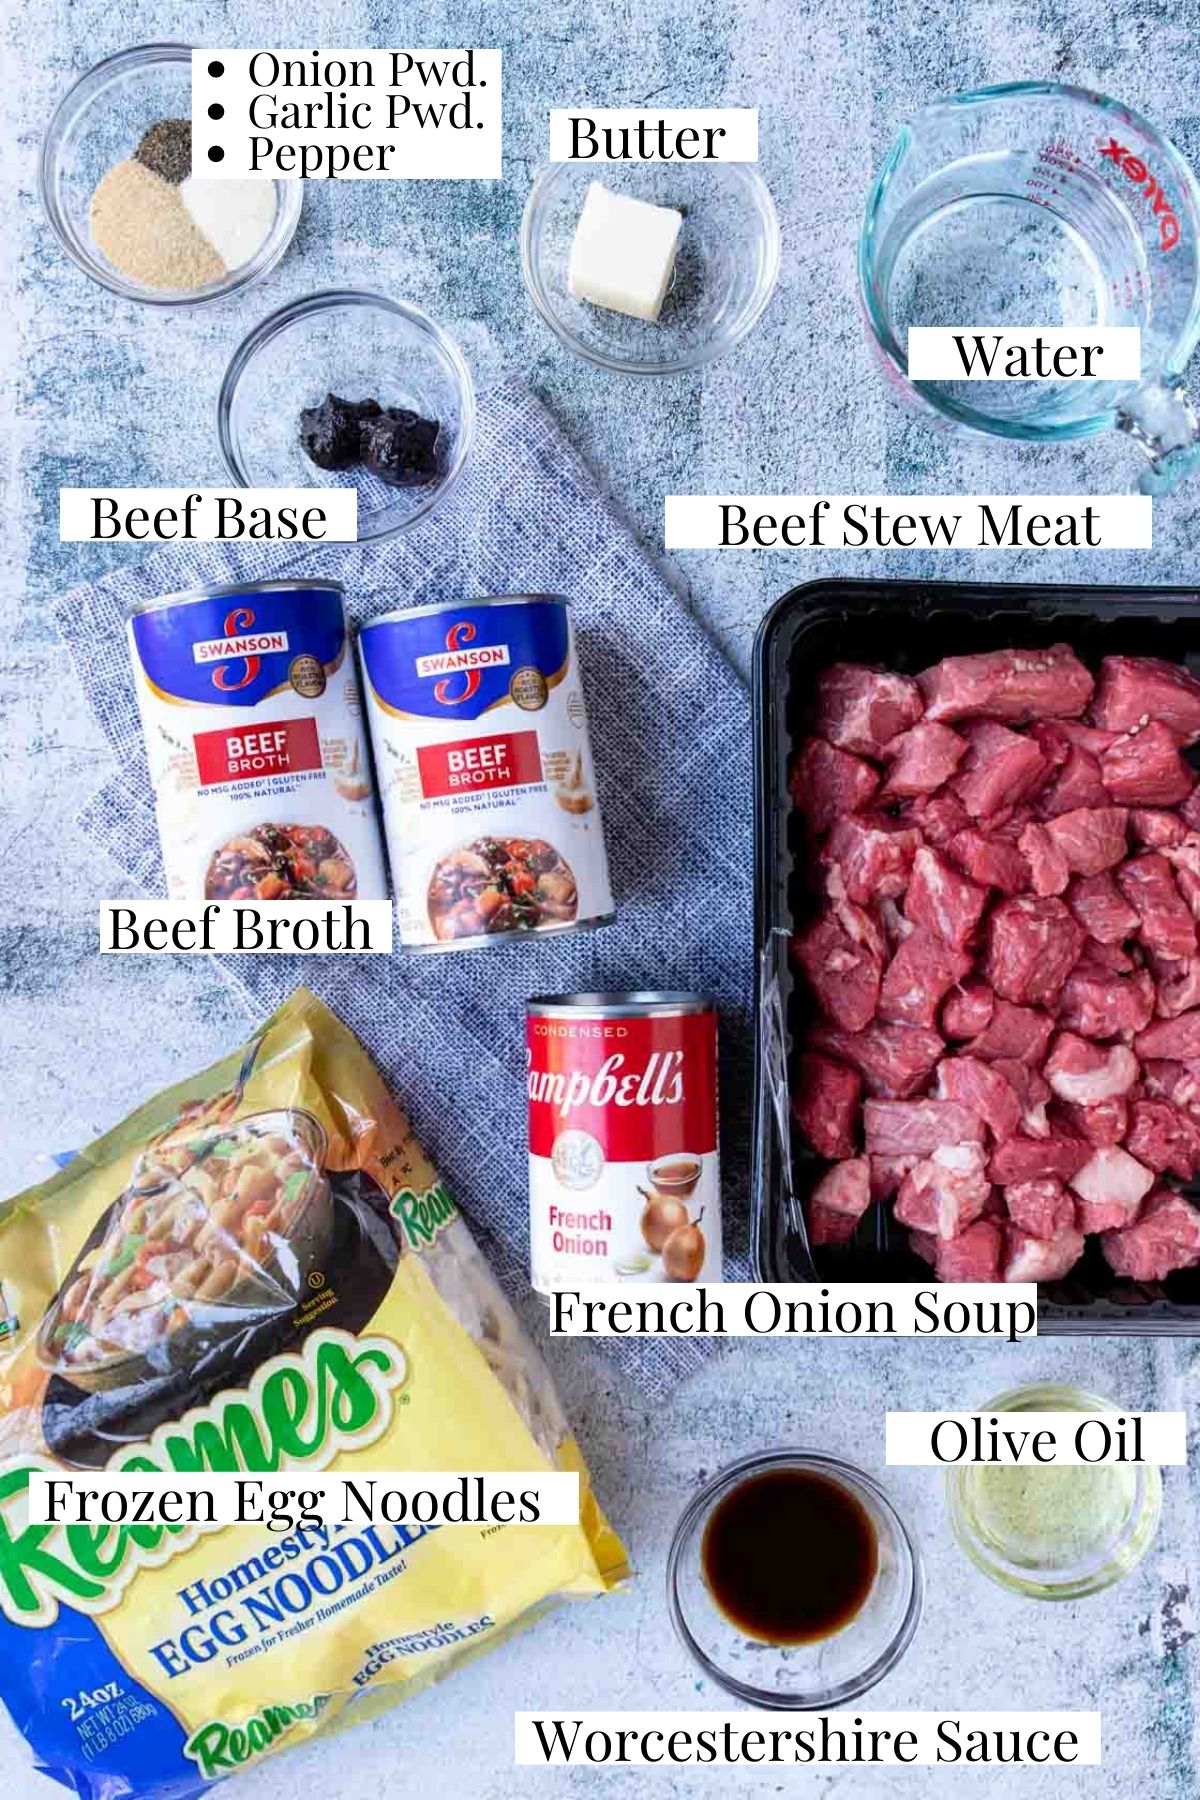
Stew Meat – beef stew meat is a cheaper cut of beef that does well with a long cooking time. In this case we are using high heat and pressure to help tenderize it quickly.
Beef Base – I love using beef base (or chicken base) in any brothy recipe. It adds a deeper layer of flavor. “Base” comes in a paste form, usually in a tub or jar. It will be near the bouillon in the soup aisle. I like to use Better Than Bouillon Brand.
Condensed French Onion Soup – this is the heavy lifter in this beef and noodles recipe. A LOT of the flavor comes from this can of condensed soup. We like Campbell’s brand. Don’t try to sub just beef broth, it will not be the same!
Egg Noodles – We are not talking about dry egg noodles here… we are talking thick and hearty frozen egg noodles. They are not the same, not even comparable! If you have never used frozen egg noodles, it’s time to start. You will NOT be disappointed. We like to use Reames brand.
Step by Step Picture Instructions
- Brown The Beef Pieces
- Deglaze The Instant Pot
- Pressure Cook
- Simmer The Egg Noodles With The Beef
- Time To Eat
Start with your Instant Pot on high sauté function, add the butter and olive oil.
To get to “high” mode, tap the sauté button and you will see it scroll through the different settings on the display screen. tap the button until it reads “high”.
Make sure your stew meat is cut roughly into 1 inch pieces, season with garlic powder, onion powder and pepper.
Brown the beef in two batches to not over crowd the pot, removing each batch of seared beef to a separate plate.
In the now empty, hot pot pour ½ cup of the beef broth and use a wooden spoon to deglaze the bottom of the pot, scraping up all the browned bits.
Complete the deglazing thoroughly. It will help reduce the chance of getting the burn warning.
Turn the sauté mode off. Add the beef and all juices back to the bot. Stir in the Worcestershire sauce, beef base and remaining beef broth, French onion soup and water to the pot.
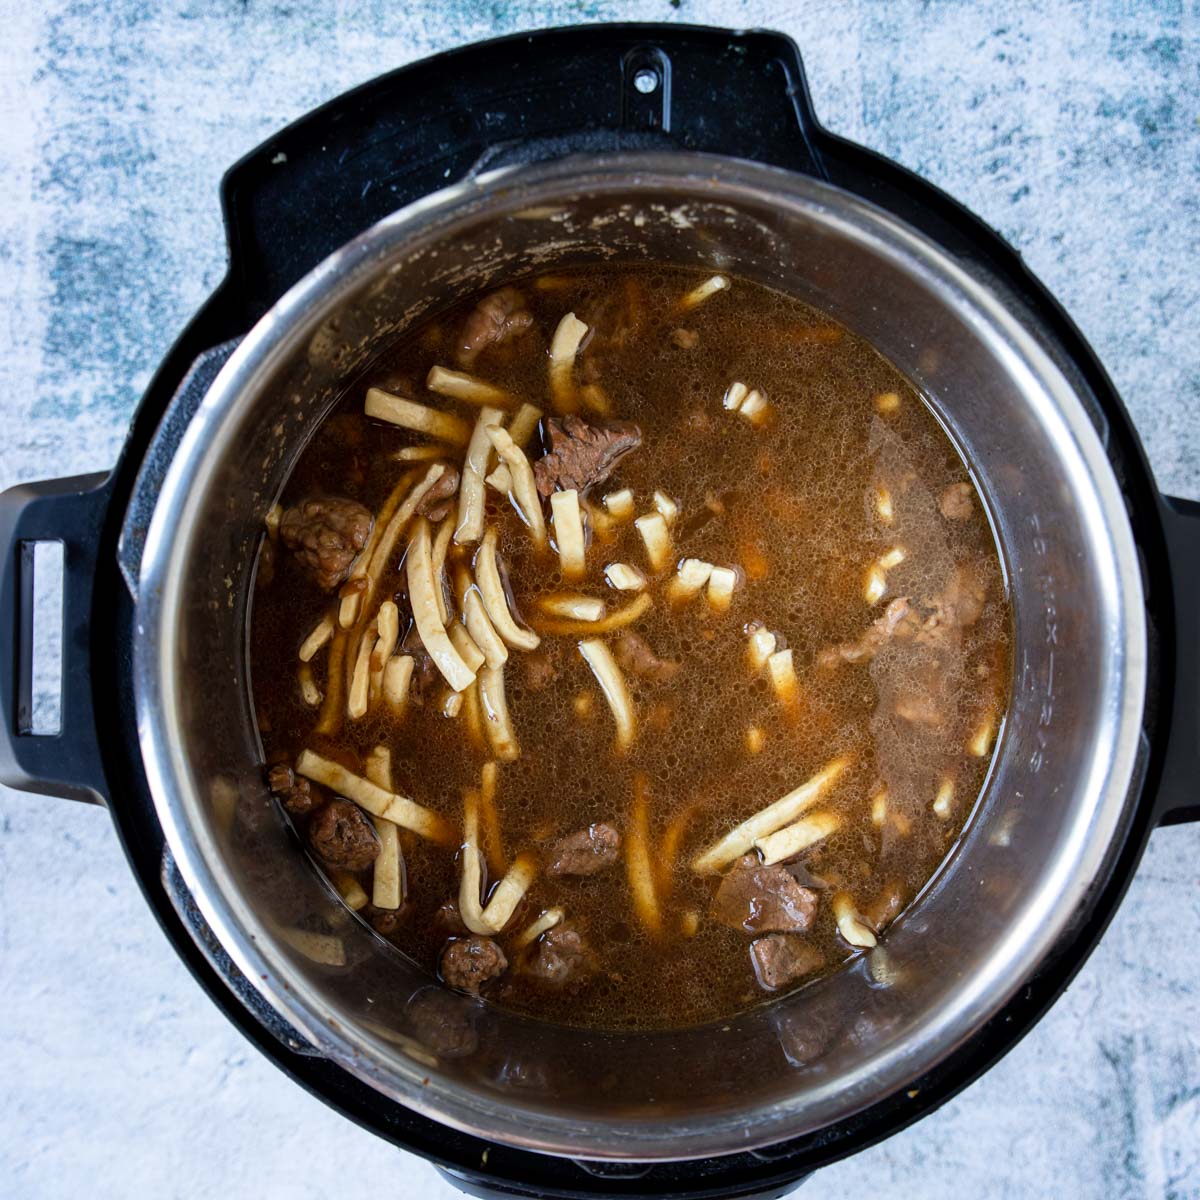
Set the Instant Pot to cook on high pressure for 22 minutes. Do a 10 minute natural pressure release, then quick release the remaining pressure. While the beef is cooking, set the noodles out at room temp.
Open the lid and turn the instant pot back onto low/less sauté mode.
Press the sauté button until it reads less or low in the display screen.
Add the egg noodles to the pot and simmer for 15-20 minutes, stirring often, until the noodles are soft.
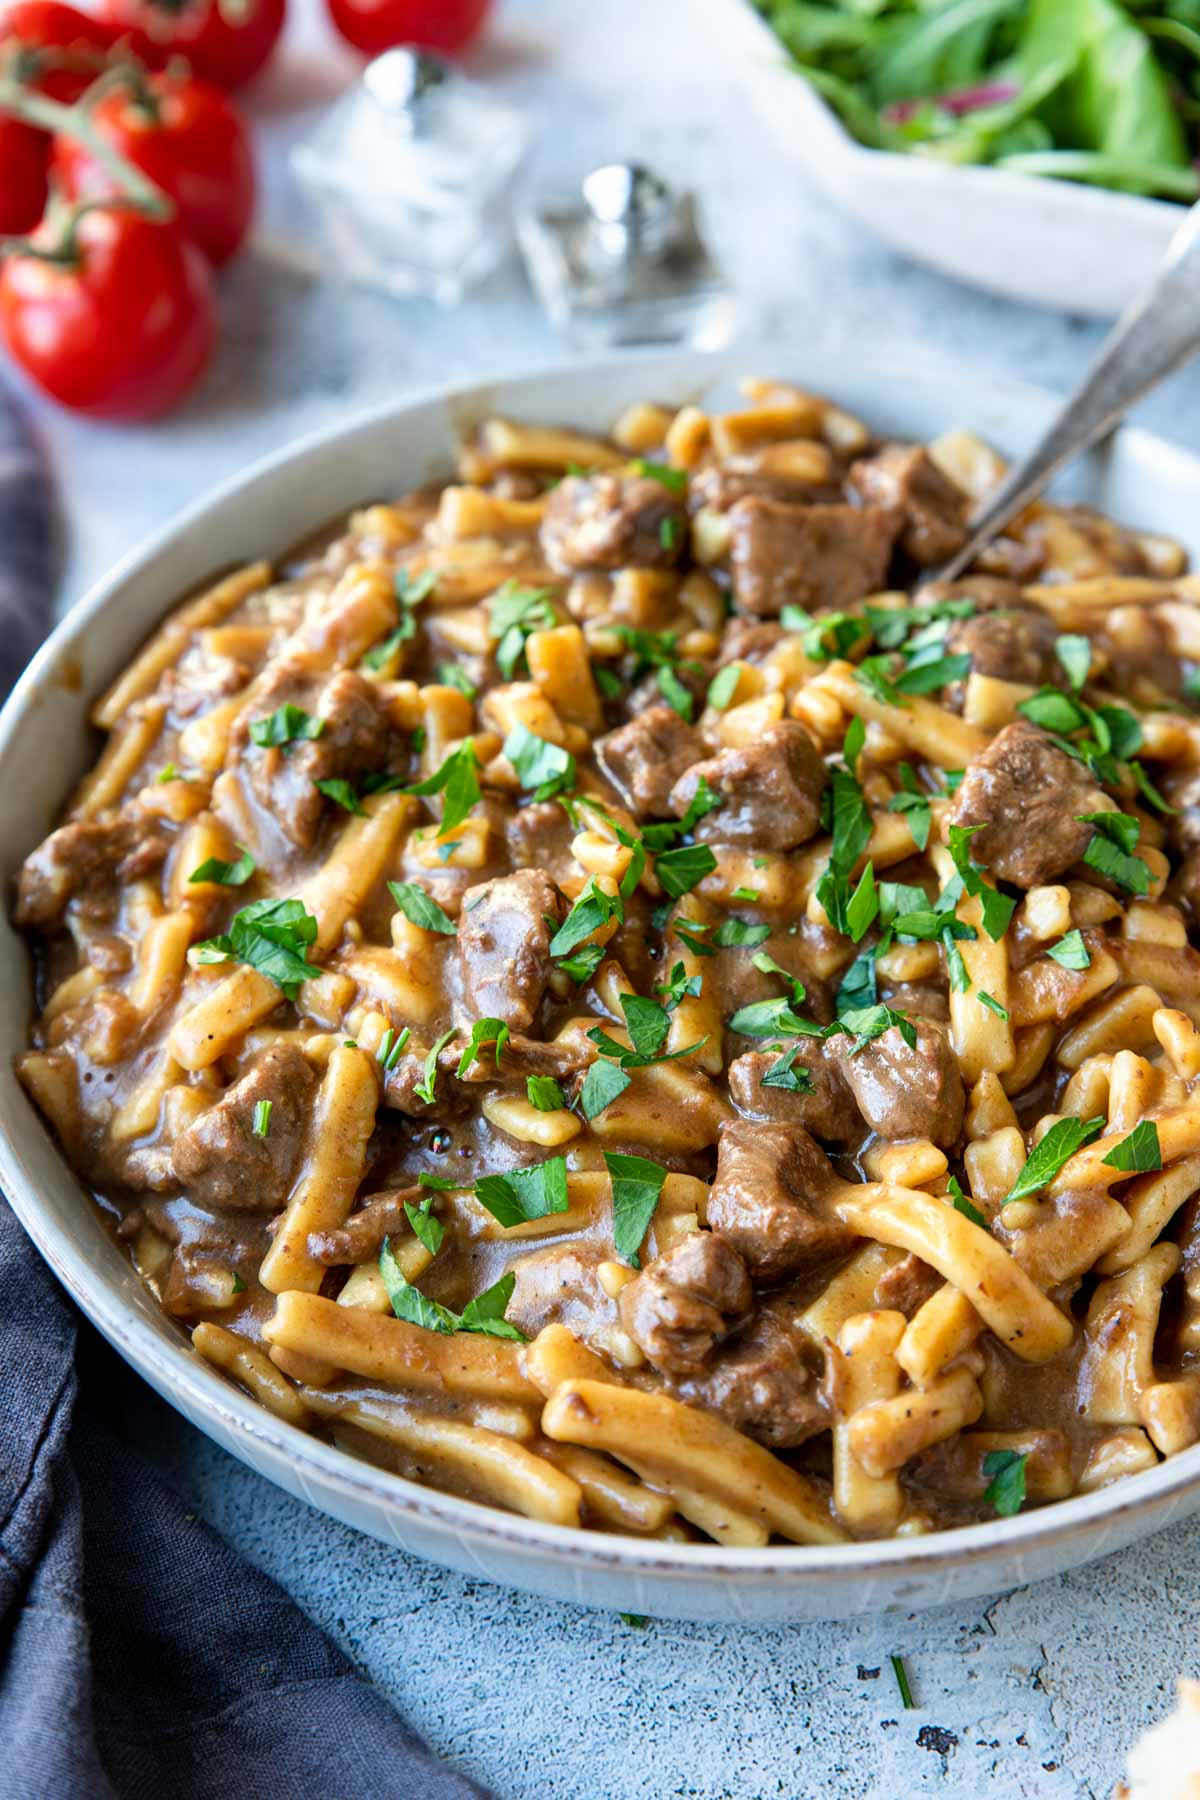
The starch from the noodles will thicken the sauce perfectly!
Serving Beef and Noodles
I like to serve Instant Pot Beef and Noodles just as is, with a side of crusty bread and maybe a side salad.

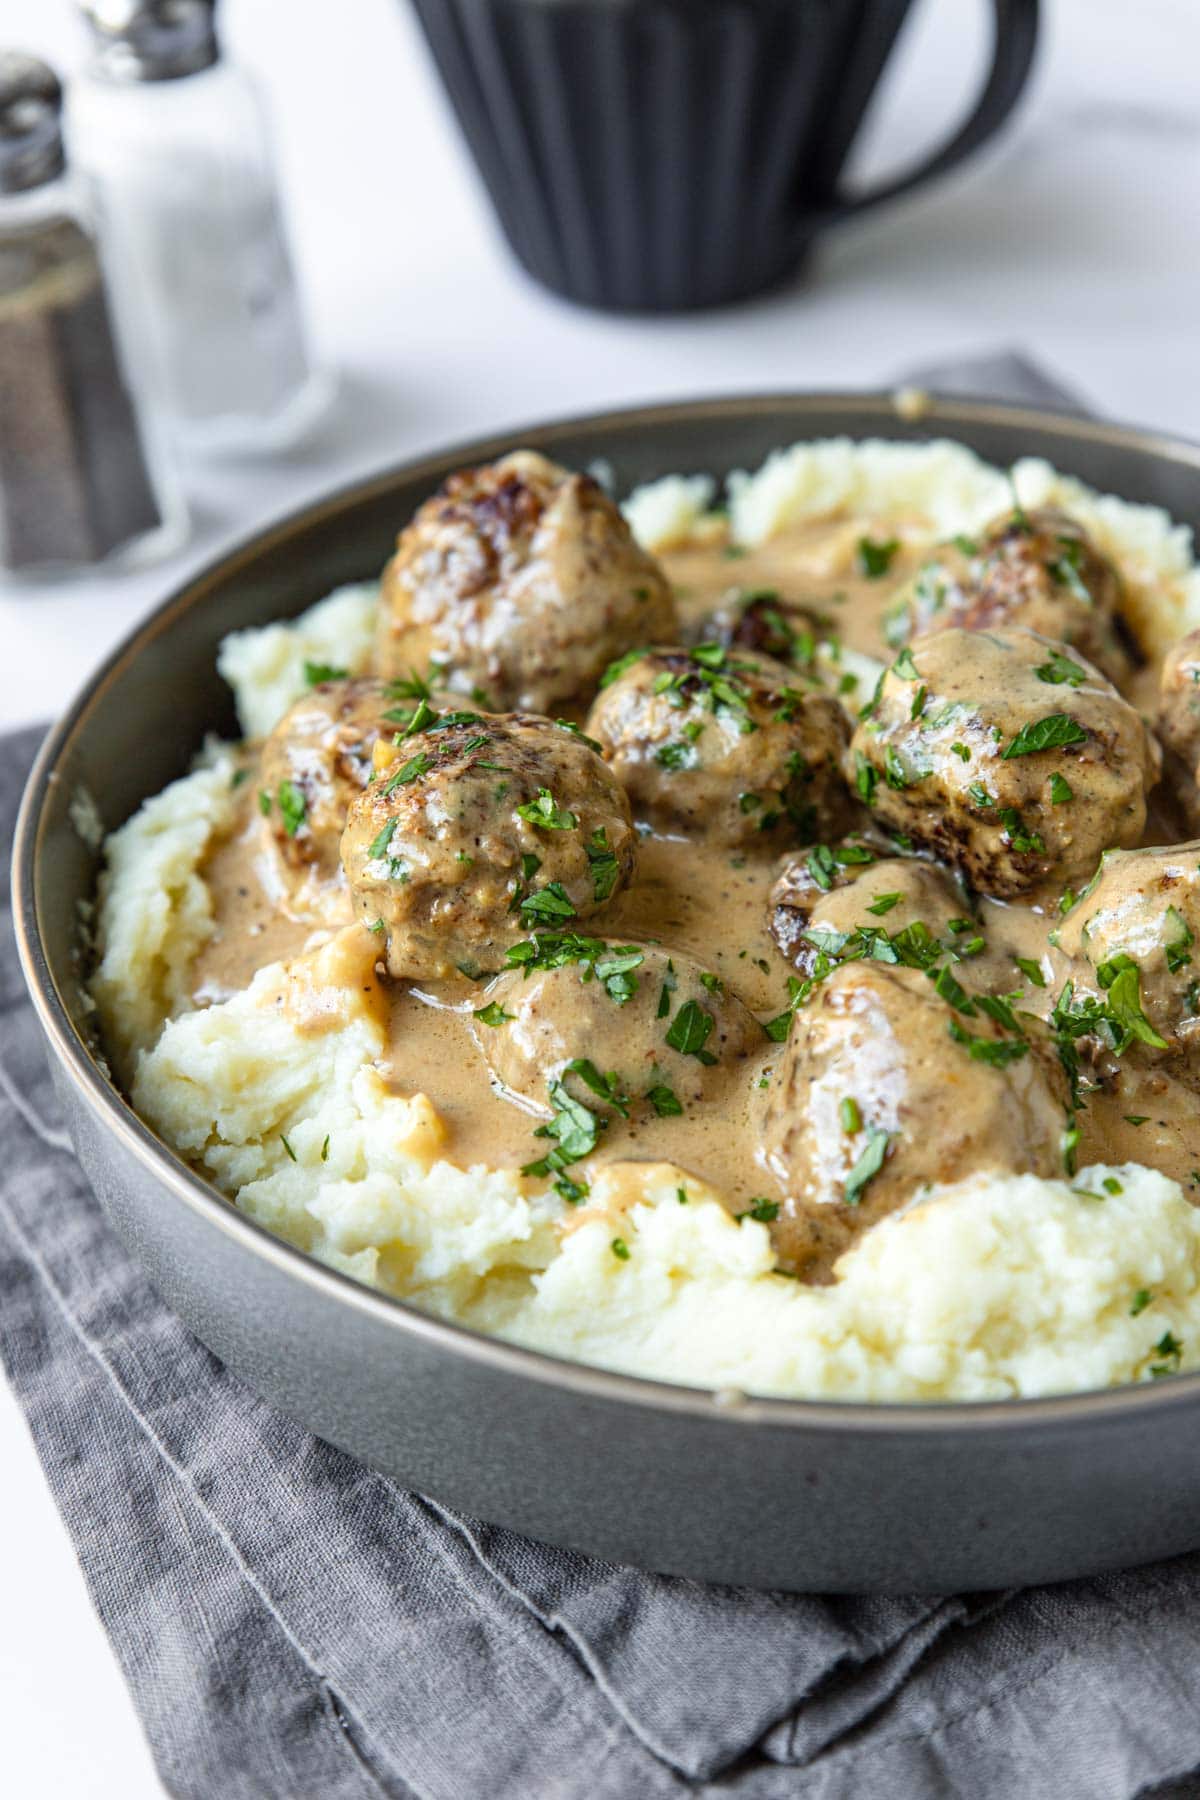
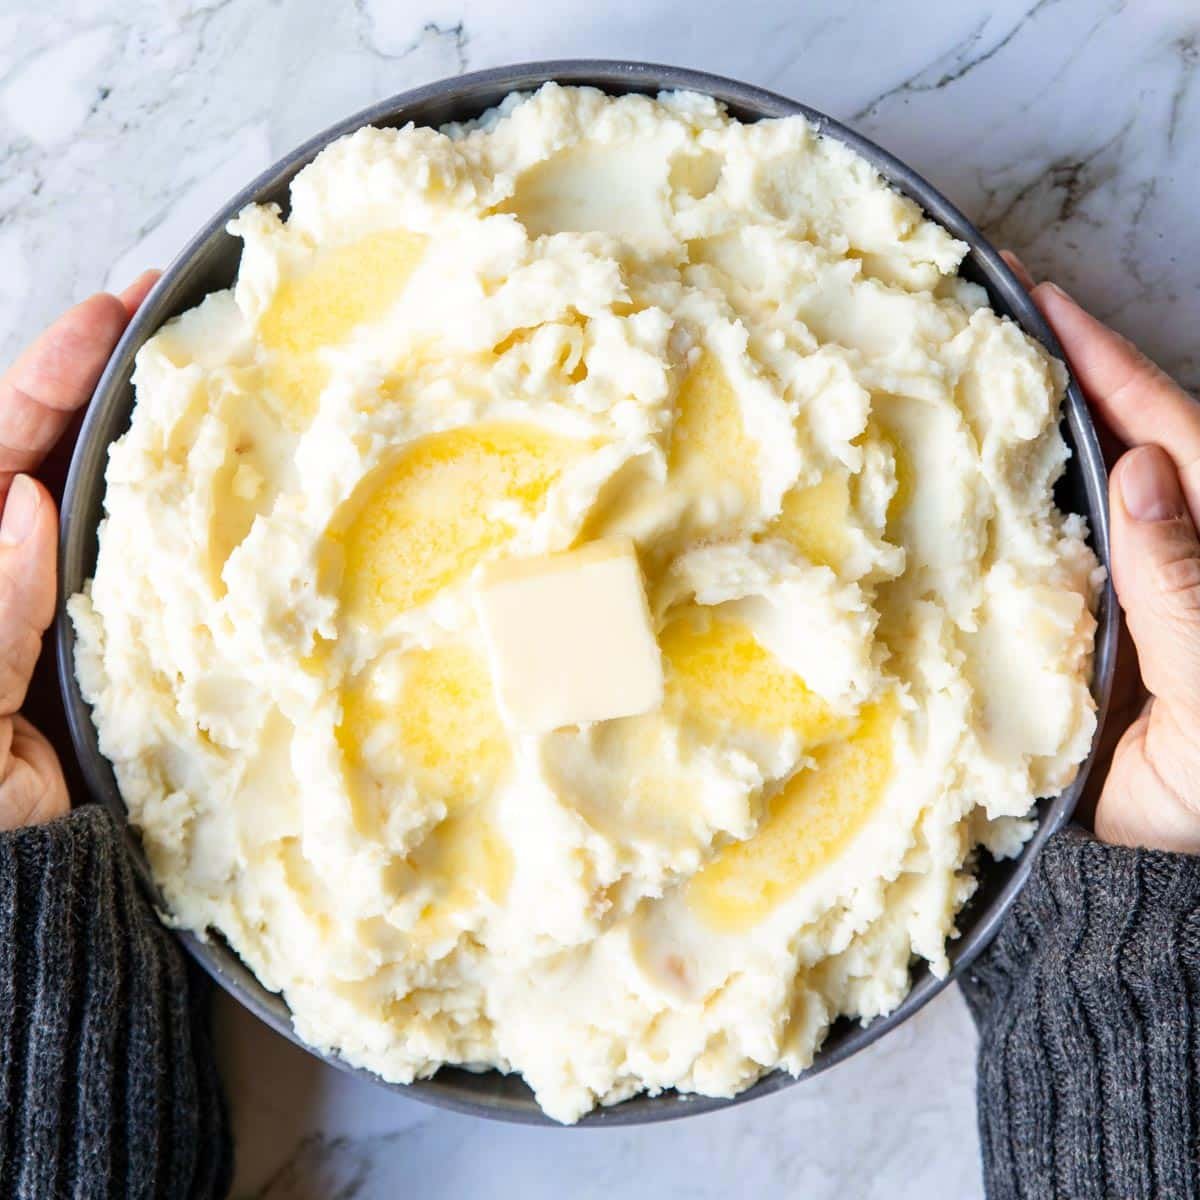
You can also serve it on spooned over top of mashed potatoes! If you choose this route, any of these mashed potato recipes would be GREAT:


Storing
Store any leftovers in the fridge in a sealed container for up to 4 days. It will thicken quite a bit in the fridge. You may need to add some broth or water to reconstitute when reheating.
Instant Pot Beef and Noodles Sauce Troubleshooting
- Sauce too thick? Add some water or broth until it is the consistency you want.
- Sauce too thin? Make a cornstarch slurry; mix together 1 tablespoon cornstarch with 1 tablespoon cool water, drizzle into the simmering sauce, it should thicken within 30 seconds.
More Delicious Comfort Food Dinner Recipes!


Instant Pot Beef and Noodles Recipe
Ingredients
- 2 tablespoon olive oil
- 2 tablespoon butter
- 2 lbs beef stew meat - cubed
- 2 teaspoon garlic powder
- 1 tsp onion powder
- ½ teaspoon black pepper
- 2 teaspoon beef base - (I use Better Than Bouillon)
- 1 tablespoon Worcestershire Sauce
- (2) 14.5 oz cans beef broth
- (1) 10.5 oz can condensed French Onion Soup - (I use Campbell's)
- 1 cup water
- (1) 24 oz bag frozen egg noodles - (I use Reames)
Instructions
- Start by turning your Instant Pot on to high sauté mode and let it heat up.Pro Tip: To get to "high" mode, tap the sauté button and watch it scroll through the settings on the display screen, tap until it gets to high.
- Meanwhile season the beef pieces with the garlic powder, onion powder and pepper.2 lbs beef stew meat, 2 teaspoon garlic powder, 1 teaspoon onion powder, ½ teaspoon black pepper
- Add the butter and olive oil to the Instant Pot. Once the butter melts, add half the seasoned beef to the pot and sear/brown the meat. Remove to a separate plate and then brown the other half and then remove to the plate.2 tablespoon butter, 2 tablespoon olive oil
- In the now empty pot pour ½ cup beef broth and completely deglaze the bottom of the pot with a wooden spoon, scraping up all the browned bits. Pro Tip: Deglazing the pot thoroughly will reduce the chance of getting the burn notice.(2) 14.5 oz cans beef broth
- Turn the sauté mode off.
- Now add the browned beef and all juices back to the pot, along with the Worcestershire sauce, beef base, remaining beef broth, French onion soup and water. Give everything a good stir.2 teaspoon beef base, 1 tablespoon Worcestershire Sauce, (1) 10.5 oz can condensed French Onion Soup, 1 cup water
- Pop the lid on the pot and lock in place, turn the pressure vent to seal. Set the pot to cook on manual pressure, high, for 22 minutes.
- Do a 10 minute natural pressure release, and then release the remaining pressure with a quick release. **don't be alarmed that the broth is not thick… adding the egg noodles in the next steps will thicken it up perfectly!
- Turn the Instant Pot on to low sauté mode.Pro Tip: To get to "low" mode, tap the sauté button and watch it scroll through the settings on the display screen, tap until it gets to low.
- Add the egg noodles to the pot and simmer for 15-20 minutes, stirring often, until they are al dente.(1) 24 oz bag frozen egg noodles
- Turn off the sauté mode and let the pot cool for 5-10 minutes, the sauce will thicken even more as it cools.
- After the pot has cooled, if you still want your gravy thicker turn the sauté function back on, mix together 1 tablespoon cornstarch with 1 tablespoon cool water and pour it into the beef and noodles while it simmers. It will thicken within 1 minute. Repeat if necessary.
Serving
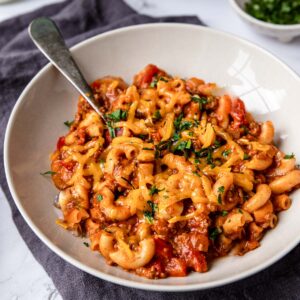
- Serve right away, optionally garnish with parsley.
- This beef and noodle dish is great served as is with crusty bread and a side salad. Some will also serve this spooned over mashed potatoes.
Storing
- Store leftovers in the fridge in a sealed container for up to 4 days.
- It will thicken in the fridge, you may need to add some broth or water when reheating.