Mom's Dinner

  • Home
  • All Recipes
  • Instant Pot
    • All Instant Pot Recipes
    • Instant Pot Soup
    • Instant Pot Beef
    • Instant Pot Chicken
    • Instant Pot Pork
    • Instant Pot Turkey
    • Instant Pot Pasta
    • Instant Pot Vegetarian
  • Dinner
    • Beef
    • Chicken
    • Pork
    • Turkey
    • Fish & Seafood
    • Mexican
    • Pasta
    • Vegetarian
  • Subscribe
menu icon
go to homepage
  • RECIPES
  • DINNER
  • ABOUT
  • SUBSCRIBE

subscribe
search icon
Homepage link
  • RECIPES
  • DINNER
  • ABOUT
  • SUBSCRIBE

×
You are here: Home

Classic Iowa Ham Balls

December 16, 2020 by Susie Weinrich 116 Comments

ham balls in a pan with glaze baked over top

Ham Balls are a classic Midwestern meatball recipe. It is even more specific to Iowa and Nebraska. It is an unusual recipe that turns out so incredibly delicious. Ground beef and ground ham are mixed with graham crackers crumbs and formed into meatballs, they are then baked with a tomato brown sugar glaze.

Ham Balls baked in a brown sugar and tomato sauce in a glass baking dish

I grew up in Iowa and this is a recipe that we had often! It is a typical Sunday night family dinner recipe.

My husband has become very picky in his old age, I was fascinated with the ingredients and had left over Easter ham saved for bean soup so decided I was going to make these even if I'd end up eating them all myself. Ha! I got 2. He loved them and ate them up as leftovers too. Definitely a keeper recipe. Thanks! Can't wait to try them on grand children. – Lisa

[feast_advanced_jump_to]

Ground Ham for Ham Balls

Ground ham can be hard to find in the grocery store. Actually I don’t think I have ever seen it in the store, unless you are in Iowa!

We are talking ground ham here, not ground pork! Ground pork is made from the shoulder (aka. pork butt). The ham is cut from the leg and is dry or wet cured and sometimes smoked. Ham has the distinct flavor that you are looking for in ham balls.

ham ground in the food processor

You will want to purchase a 1-1.25 lb. ham steak or bone-in ham steak. Once it is ground you will want it to be the consistency of ground beef. You have a couple options to make ground ham.

  • Grab a ham steak at the grocery store and ask the meat counter to grind it for you.
  • If you have a meat grinder attachment to your stand mixer you can grind the ham steak that way.
  • I prefer to “grind” it in my food processor. Cut the ham steak into 2 inch chunks then pulse the processor about 40-50 times. You will have perfectly ground ham! (see the photo above)

Graham Cracker Crumbs

Unless you have had these Ham Balls you are probably thinking that graham cracker crumbs are a really odd choice! Just trust, they add a sweetness to the ham balls that perfectly compliments the salty ham and the tangy vinegar in the sauce.

If you need to make graham cracker crumbs you can crush a couple plain graham crackers into a fine crumb. Or you can pulse them a few times in your food processor.

How To Make Ham Balls

This ham ball recipe is pretty simple, it is just a matter of mixing the ingredients and baking.

In a large bowl lightly mix together 1 lb ground beef, 1 lb ground ham, 1 cup graham cracker crumbs, ¾ cup milk, and 1 egg.

Form large meatballs, about ⅓ cup in size, and place in a 9×13 baking dish. You should have about 12-15 meatballs.

showing the correct size for a ham ball

In another bowl mix together 1 can tomato soup, ½ cup white vinegar, 1 cup brown sugar, and 1 teaspoon dry mustard. Whisk it all together and then pour the sauce over the meatballs.

pouring the tomato brown sugar sauce over the ham balls

Place in the oven at 350 degrees for 1 hour, basting the top of the meatballs with the sauce once or twice during cooking.

Let the meatballs cool for about 5 minutes and then serve with mashed or baked potatoes and veggies.

a 9x13 baking dish full of Iowa Ham Balls

Other Meatball Recipes

If you love meatballs here are a few other recipes to try:

  • Instant Pot BBQ Meatballs
  • Baked Chicken Meatballs
  • Instant Pot Turkey Meatballs
  • Easy Meatball Sub Sandwiches
ham balls in a pan with glaze baked over top

Ham Balls Recipe

Ham Balls are a classic midwestern meatball recipe. Ground ham and ground beef are mixed together with graham crackers and topped with a tomato brown sugar sauce.
4.88 from 71 votes
Print Pin Rate Save Saved!
Prep Time: 15 minutes minutes
Cook Time: 1 hour hour
Servings: 5 people
Author: Susie Weinrich

Equipment

  • 9×13 baking dish

Ingredients

Ham Balls

  • 1 lb ground ham - see note about finding and/or making ground ham**
  • 1 lb ground beef - 85/15
  • 1 cup graham cracker crumbs - finely ground
  • 1 egg
  • ¾ cup milk

Sauce

  • 10.75 oz can condensed tomato soup
  • 1 cup brown sugar
  • ½ cup white vinegar
  • 1 teaspoon dry mustard

Instructions
 

  • Preheat the oven to 350°
  • Combine the meatball ingredients. In a large bowl lightly combine the 1 lb ground ham, 1 lb ground beef, 1 cup graham cracker crumbs, ¾ cup milk, and 1 egg.
  • Make large meatballs. Form the mixture into large meatballs, about ⅓ cup in size each. Place into a 9×13 baking dish. You will have about 12-15 meatballs.
    showing the correct size for a ham ball
  • Whisk together the sauce ingredients & pour over meatballs. In another bowl whisk together the can of condensed tomato soup, 1 cup brown sugar, ½ cup white vinegar, and 1 teaspoon dry mustard. Pour the sauce over the meatballs.
    pouring the tomato brown sugar sauce over the ham balls
  • Bake 1 hour. Bake in the oven, uncovered, for 1 hour, basting the tops of the ham balls with the sauce once or twice during cooking.
  • Cool & eat! Let the meatballs cool for about 5-10 minutes and then serve with mashed or baked potatoes and veggies.
    ham balls in a pan with glaze baked over top

Recipe Tips and Notes:

Ground Ham
Do not buy ground pork, you want ground ham. This can be hard to find in the store. You can buy a ham steak or bone in ham steak and grind it to the consistency of ground beef. 
  • Have the butcher grind it for you.
  • Use a meat grinder attachment to a stand mixer.
  • Grind in a food processor by cutting the ham steak in 2 inch chunks and pulse the processor 40-50 times. (this is the method that I use)
Did you make this recipe?Connect with me and let me know by commenting below!
Jump to Comments

Originally Published December 2019, Copy Updated and Republished December 2020

More Recipes you will love

  • Instant Pot Risotto
  • Roasted Half Chicken
  • Breakfast Casserole With Bread
  • Loaded Potato
  • Red Enchilada Sauce Recipe
  • Berry Cobbler
  • Country Style Ribs In The Oven
  • Shrimp And Pasta Recipe
  • Marshmallow Fruit Dip
  • Asian Meatballs
  • Pulled Pork in Oven
  • Roasted Red Pepper Sauce
  • Cajun Shrimp
  • Simple Egg Salad Recipe
  • Herb Roasted Potatoes
  • Beef Barbacoa Recipe
  • Homemade Lasagna Recipe
  • Pizza Burger

Easy White Chocolate Toffee with Cashews

December 15, 2020 by Susie Weinrich 1 Comment

white chocolate toffee in a stack

This is such an easy recipe for White Chocolate Toffee with Cashews. Instead of making a traditional toffee you are making it with saltine crackers and a stove top toffee. Then the cracker toffee is coated in a white chocolate and topped with cashews and dried fruit.

a pile of white chocolate toffee with cashews and dried fruit on top

This makes a great Holiday treat or edible gift. Also check out this similar recipe for Saltine Toffee (also known as Christmas Crack).

Ingredients & Supplies

Here are the things you need to grab to make this white chocolate recipe:

  • 10×15 rimmed baking sheet
  • foil
  • baking/cooking spray
  • butter
  • dark brown sugar
  • white chocolate chips
  • kosher salt
  • salted cashews
  • dried fruit: apricots, cherries, cranberries
supplies to make white chocolate toffee

10×15 Rimmed Baking Sheet

You will want to make sure you have a 10×15 rimmed baking sheet for this recipe and that you fill it completely with saltine crackers. This will ensure the crackers do not “float” apart during the baking process.

Dried Fruit

In this recipe I use dried apricots, dried cherries, and dried cranberries because they are the flavors I love. However, if there is another dried fruit you love, go ahead and include it or make your own combo all together! Just plan on 1 cup of dried fruit.

Making White Chocolate Toffee Step By Step

Start by covering a 10×15 baking sheet with foil and coating in a nonstick baking spray. Fill the sheet pan up with saltine crackers, from edge to edge!

Make the stove top toffee and then pour it over the crackers. Smooth it out with a wooden spoon or spatula.

Bake for 7 minutes.

first three steps for making white chocolate toffee

Top the hot saltine toffee crackers with a sprinkle of kosher salt and the white chocolate chips. Let them sit for about 2 minutes and then spread with a spatula .

steps 4-6 for making white chocolate toffee

Top with cashews and dried fruit, pressing in slightly. Pop in the fridge to help the white chocolate set up. Break apart in serving sized pieces and enjoy!
white chocolate toffee in a baking sheet topped with cashews and dried fruit

Easy White Chocolate Toffee with Cashews Recipe

white chocolate toffee in a stack

White Chocolate Toffee with Cashews

Delicious White Chocolate Toffee made easy with saltine crackers and stove top toffee, topped with white chocolate, cashews and dried fruit.
5 from 1 vote
Print Pin Rate Save Saved!
Prep Time: 20 minutes minutes
Cook Time: 7 minutes minutes
Cooling Time: 30 minutes minutes
Total Time: 57 minutes minutes
Servings: 35 pieces
Calories: 170kcal
Author: Susie Weinrich

Equipment

  • 10" x 15" rimmed baking sheet
  • foil

Ingredients

  • 40 saltine crackers - 2" x 2" size
  • cooking/baking spray
  • 1 cup butter
  • 1 cup dark brown sugar
  • 12 oz bag white chocolate chips
  • ¼ teaspoon kosher salt
  • 1 cup salted cashews - lightly chopped
  • ⅓ cup dried apricots
  • ⅓ cup dried cherries
  • ⅓ cup dried sweetened cranberries

Instructions
 

  • Preheat the oven to 375°.
    Prep your 10×15 rimmed baking sheet by covering it completely with foil and then spraying the foil generously with baking spray.
  • Fill the pan with saltine crackers in a single layer, edge to edge. If you need to break some in half to make sure you completely fill the pan, that is ok.
  • In a saucepan over medium heat, melt the butter and brown sugar together while stirring.
    Then once it is all melted together stop stirring and let it boil for 3 minutes. (do not stir at this point or the caramel sauce can turn out grainy.)
  • Immediately pour the toffee sauce over the saltine crackers. With a spatula or wooden spoon lightly spread the toffee from edge to edge so it completely covers the crackers.
  • Pop the toffee crackers in the oven for 7 minutes, it will be bubbly and hot.
    TIP: While it is in the get the white chocolate chips, fruit, and nuts ready. Once it comes out the of oven you will want to work quickly to take advantage of how hot the toffee is!
  • Remove from the oven and sprinkle on the kosher salt and then the white chocolate chips. Let them sit for about 1-2 minutes so they get soft and melty. Spread with a wooden spoon or spatula from edge to edge of the pan, covering all the toffee crackers.
    Sprinkle on the cashews and then all the dried fruit. Press them in slightly so they adhere while drying.
  • Pop the tray in the fridge and let cool/harden for about 30 mins to 1 hour.
  • Break apart in serving sized pieces.

Storing

  • Store leftover white chocolate toffee in the fridge in an airtight container for up to 2 weeks.

Recipe Tips and Notes:

Dried Fruit: You can also use whatever dried fruits you like or have on hand! Just measure out 1 cup total!
Did you make this recipe?Connect with me and let me know by commenting below!
Jump to Comments
Calories: 170kcal | Carbohydrates: 18g | Protein: 2g | Fat: 11g | Saturated Fat: 6g | Cholesterol: 16mg | Sodium: 134mg | Potassium: 80mg | Fiber: 1g | Sugar: 14g | Vitamin A: 251IU | Vitamin C: 1mg | Calcium: 30mg | Iron: 1mg

Coffee Cake Muffins

December 14, 2020 by Susie Weinrich Leave a Comment

These Coffee Cake Muffins are a handheld version of your favorite coffee cake breakfast bread! They are a sweet and tender sour cream muffin base that is piled with a cinnamon sugar streusel topping and then drizzled with the best vanilla glaze. If you make this coffee cake muffin recipe they will absolutely be a breakfast or brunch show-stopper!

coffee cake muffin on a white cake plate, white glaze drizzled and dripping over the sides

If you are looking for more yummy breakfast treats, check out this cranberry almond cake (one of my faves), Blueberry Breakfast Cake, or cranberry orange muffins.

If you have house guests and need a full breakfast you can check out this post on feeding house guests, it has full menus with recipes for breakfast, lunch and dinner!

Ingredients & Supplies

Here are the ingredients and supplies you need to make these Coffee Cake Muffins:

  • Stand mixer or hand held mixer with a whisk attachment
  • 12 cup muffin tin (2 if you have them, this recipe makes about 16-18 muffins)
  • paper muffin liners
  • flour
  • baking soda and baking powder
  • salt
  • butter
  • sugar
  • light brown sugar
  • vanilla
  • eggs
  • sour cream (full fat)
  • cinnamon
  • powdered sugar
  • milk

Sour Cream

You will want to make sure you have full fat sour cream for your muffins. The fat in the sour cream adds moisture and richness to your muffins.

Also, the acid in the sour cream contributes to the light and fluffy texture by tenderizing some of the gluten in the flour.

How to Make Coffee Cake Muffins

There are 3 parts to these muffins: the muffin, the streusel topping, and the vanilla glaze. They all add up to the BEST coffee cake muffin recipe.

Preheat the oven to 350 degrees and line the muffin tin(s) with paper liners.

The Streusel

In a bowl add ¾ cup brown sugar, ½ cup flour, 2 teaspoon cinnamon, ¼ teaspoon kosher salt. Stir in the 3 tablespoon melted butter until it is all combined and a little crumbly. Set aside.

Cinnamon streusel in a bowl

The Muffin Batter

In a medium bowl, whisk together the 2 cups all purpose flour (measured by spooning into measuring cup and leveled off), ½ teaspoon baking soda, 1 teaspoon baking powder and ½ teaspoon salt. Set aside.

In the bowl of a stand mixer fitted with the whisk attachment or a handheld mixer with a whisk attachment, whisk together the ½ cup melted butter, ½ cup sugar, ½ cup brown sugar, and 1 ½ teaspoon vanilla.

Then whisk in 1 egg at a time. Finally add the sour cream and mix until it is all combined.

sour cream muffin batter in a mixing bowl with a whisk attachment

Add the dry ingredients to the batter and whisk, just until combined.

Baking

Spoon the batter into the prepared muffin cups, each cup about ¾ full.

Top the batter with about 1 – 1.5 tablespoon of the streusel, piling it high! Gently press the streusel into the batter, this will help it adhere during baking.

a muffin tin full of unbaked coffee cake muffins

Bake for 20 minutes or until a toothpick inserted in the middle comes out clean (no raw batter).

Remove from the oven and cool for 5-10 minutes. Then remove from the muffin tin and cool for another 5-10 minutes (while you make the vanilla glaze).

Vanilla Glaze

In a small bowl stir together 1 cup powdered sugar, 2 tablespoon melted butter, 2 tablespoon milk, and 1 teaspoon vanilla.

Drizzle over the warm coffee cake muffins.

baked muffins on a cooling rack with a bowl of vanilla glaze

Pro Tip: Place the muffins on a cooling rack over a baking sheet or on a parchment paper lined baking sheet to do the drizzling, it will make clean up much faster!

Storing

Store any leftover coffee cake muffins in an airtight container at room temp for up to 4 days.

a spoon drizzling vanilla glaze over a muffin

Make it a Breakfast or Brunch

If you are planning a breakfast or brunch and want to add these muffins, here is a great menu to plan, with recipes!

  • Sausage Egg Cups
  • Fresh Fruit Bowl
  • Cheesy Potatoes
  • Mimosas or OJ
  • Coffee (always coffee)

Recipe FAQ’s

Why do they call it coffee cake?

It is because it is meant to be eaten, usually in the morning, with a cup of coffee. It is not a dessert cake, although it is sweet!

Does coffee cake taste like coffee?

Nope! Not at all! In fact there is no coffee in the recipe at all. Coffee Cake, in America, is a vanilla or cinnamon flavored cake topped or filled with a cinnamon streusel. It is named coffee cake because it is meant to be eaten with a cup of coffee, usually in the morning.

Recipe Tips

Keep these things in mind when making your Coffee Cake Muffins:

  • Use full fat sour cream to make sure you have tender and moist muffins.
  • Once you add the flour to your muffin batter, don’t over mix. Only mix until the flour is combined into the batter.
  • Don’t be shy with the streusel topping, use it all!
  • Lightly press the streusel into the batter. That will help it adhere to the muffins during baking.
  • Place the muffins on a cooling rack over a parchment lined baking sheet or counter top before drizzling with the glaze. It will make clean up much faster!

Related Recipes

  • crescent cinnamon rolls on a white plate with frosting in the background
    Crescent Cinnamon Rolls
  • Chocolate chips scones in a basket
    Easy Chocolate Chip Scones
  • Thick slices of banana bread cut away from the loaf.
    Easiest Banana Bread Recipe

Susie leaning on the kitchen counter

WATCH SUSIE ON FOOD NETWORK!

⭐⭐⭐⭐⭐

The new gameshow, 100 Cooks, premieres on Food Network June 7th, 2026 at 9est/8cst. I hope you will tune in!

Coffee Cake Muffins

A handheld version of your favorite coffee cake! A sweet sour cream muffin is piled high with cinnamon streusel topping and finished with a vanilla glaze.
Perfect muffin recipe for a breakfast or brunch!
5 from 1 vote
Print Pin Rate Save Saved!
Prep Time: 20 minutes minutes
Cook Time: 20 minutes minutes
Cooling: 15 minutes minutes
Total Time: 55 minutes minutes
Servings: 16 muffins
Calories: 312kcal
Author: Susie Weinrich

Equipment

  • Stand mixer or hand held mixer with whisk attachment
  • 12 cup muffin tin
  • paper muffin/cupcake liners

Ingredients

Muffin Batter

  • 2 cups all purpose flour - measured by spooning into a cup and leveled off
  • 1 teaspoon baking powder
  • ½ teaspoon baking soda
  • ½ teaspoon salt
  • ½ cup melted butter - (1 stick)
  • ½ cup granulated sugar
  • ½ cup light brown sugar
  • 1 ½ teaspoon vanilla
  • 2 large eggs
  • 1 cup full-fat sour cream

Cinnamon Streusel

  • ¾ cup brown sugar
  • ½ cup all purpose flour
  • 2 teaspoon cinnamon
  • ¼ teaspoon kosher salt
  • 3 tablespoon butter - melted

Vanilla Glaze

  • 1 cup powdered sugar
  • 2 tablespoon butter - melted
  • 2 tablespoon milk
  • 1 teaspoon vanilla

Instructions
 

  • Preheat the oven to 350° and line the muffin tin(s) with paper liners.

Cinnamon Streusel

  • In a bowl add the sugar, flour, cinnamon and salt. Pour in the melted butter and stir it together until it is all combined and crumbly. Set aside.

Muffin Batter

  • In a bowl whisk together the flour, baking soda, baking powder and salt. Set aside.
  • In the bowl of a stand mixer fitted with a whisk attachment (or a bowl and a hand held mixer with a whisk attachment) add the melted butter, granulated sugar, brown sugar, and vanilla and whisk until it is combined.
  • Whisk in one egg at a time, then whisk in the sour cream until it is all combined.
  • Finally whisk in the dry ingredients (the flour mixture), just until it is combined.
  • Spoon the batter into the lined muffin tin, so that each cup is about ¾ full.
  • Top each muffin with 1 -1.5 tablespoon of the cinnamon streusel mixture, lightly pressing it into the batter so that it adheres during baking.
  • Bake for 20 minutes until a toothpick inserted into the center of a muffin comes out clean (no raw batter). Remove from the oven and cool for 5-10 minutes.
    Remove the muffins from the muffin tin and cool for another 5-10 minutes, while you make the vanilla glaze.

Vanilla Glaze

  • In a small bowl stir together the vanilla glaze ingredients. Drizzle generously over the warm coffee cake muffins.
    Tip: place the muffins on a cooling rack over a baking sheet or on a piece of parchment paper. It will make clean up from the drizzle a lot easier!

Recipe Tips and Notes:

STORING: Store leftover coffee cake muffins in an airtight container at room temp for up to 4 days. 
 
RECIPE TIPS: 
  • Use full fat sour cream to make sure you have tender and moist muffins.
  • Once you add the flour to your muffin batter, don’t over mix. Only mix until the flour is combined into the batter.
  • Don’t be shy with the streusel topping, use it all!
  • Lightly press the streusel into the batter. That will help it adhere to the muffins during baking.
  • Place the muffins on a cooling rack over a parchment lined baking sheet or counter top before drizzling with the glaze. It will make clean up much faster!
Did you make this recipe?Connect with me and let me know by commenting below!
Jump to Comments
Serving: 1muffin | Calories: 312kcal | Carbohydrates: 46g | Protein: 3g | Fat: 13g | Saturated Fat: 8g | Cholesterol: 53mg | Sodium: 283mg | Potassium: 74mg | Fiber: 1g | Sugar: 31g | Vitamin A: 407IU | Vitamin C: 1mg | Calcium: 57mg | Iron: 1mg

Peanut Butter Buckeye Balls

December 13, 2020 by Susie Weinrich 1 Comment

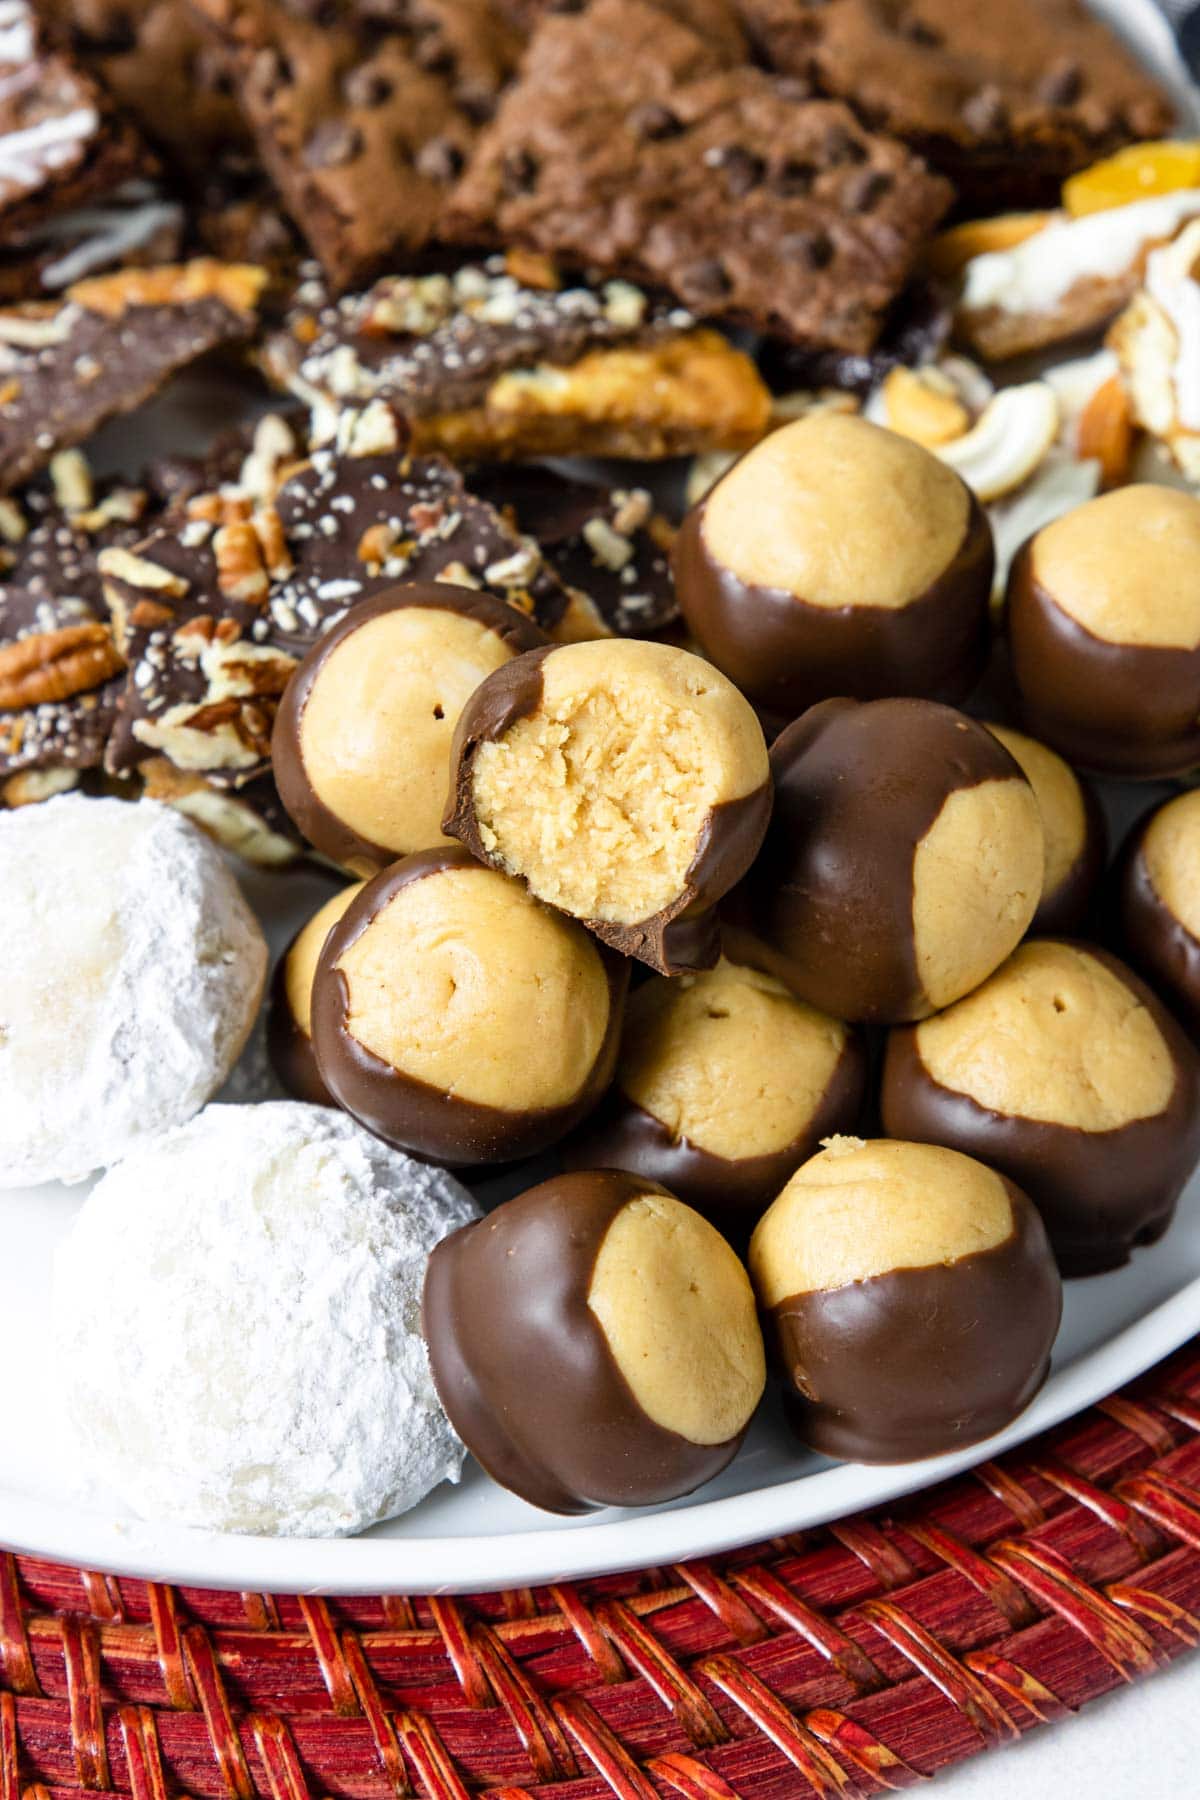
a Buckeye Ball with a bite taken out, showing the center

A Buckeye Ball (Cookie) is a very sweet, no-bake dessert, that is popular in the Midwest. Especially at the Holidays or on game day. They are a soft peanut butter flavored dough ball that is dipped in chocolate. They are best described somewhere between a Reese’s Peanut Butter Cup and peanut butter cookie dough.

buckeye ball on a cookie platter

Some other traditional Midwest treats that are similar to the Buckeye flavors are a Scotcheroo, Peanut Clusters, Peanut Butter Cup Cookies, and Peanut Butter Chocolate Star Cookies.

Why is it Called A Buckeye

The reason these cookies are called a “buckeye” is because they literally look like a buckeye! Which is the seed that comes from the Buckeye Tree. They were named because the seed of a buckeye tree literally looks like the eye of a buck (male deer).

So I guess these cookies look like the eye of a male deer. HA!

Ingredients and Supplies

If you have a well stocked pantry and baking cabinet you can most likely make these right now! Here is what you will need to make this yummy treat:

  • Stand mixer or hand held mixer
  • toothpicks or small fork
  • wax paper
  • butter (no subs here!)
  • powdered sugar
  • creamy peanut butter
  • milk
  • vanilla
  • semisweet chocolate chips
  • shortening (Crisco)

How to Make Buckeye Balls Step-By-Step

Make A Peanut Butter Dough : In a bowl of a stand mixer with a paddle attachment mix together the melted butter and 3 cups of powdered sugar.

Now add the peanut butter and mix until smooth. Finally mix in the milk and vanilla until combined.

Now add some of the additional powdered sugar (about ¼ cup at a time) until the dough is crumbly and firm, like playdough. See the photo below:

dough consistency for Buckeye Balls - crumbly and firm

Form the Peanut Butter Balls: Roll the dough into ½-1 inch balls and place on a wax paper lined baking sheet. Pop in the fridge for 1 hour to chill.

PRO TIP: These are pretty sweet cookies/treats so I like to make them a little closer to the ½ inch size.

Dipping The Peanut Butter Balls

Melt the chocolate chips and shortening together until it is smooth.

Take the peanut butter balls out of the fridge. Grab a couple toothpicks or a small fork.

Pick the ball up by poking it with the toothpick and dip ¾ of the ball in the chocolate, so that just ¼ of the peanut butter is still showing at the top. See Photo:

picking up a peanut butter ball with a toothpick
Put the peanut butter ball on a toothpick.
dipping a buckeye into melted chocolate
Dip ¾ of the peanut butter ball in the chocolate.
a tray of Peanut Butter Buckeye Balls
Put back on the lined baking sheet to set up.

Place back on the baking sheet and pop in the fridge for the chocolate to set up, about 30 minutes.

Optionally you can run (a clean) finger across the little hole from the toothpick to smooth over, but this step is not totally necessary.

Storing

Store the Buckeye Balls in the fridge in an airtight container for up to 2 weeks.

Freezing

You can also freeze the Buckeye Balls! Just freeze them on the baking sheet (so they are not touching) and then once they are solid pop them in a freezer safe baggie for up to 3 months.

Place them on a baking sheet and thaw in the fridge overnight before serving.

Edible Gift

These make an amazing edible gift, especially at the Holidays. Place them on a tray and cover with cellophane or plastic wrap. Tie with a festive bow and attach this FREE PRINTABLE GIFT TAG!

More Peanut Butter & Chocolate Recipes

  • Chocolate star cookie cooling on parchment paper
    Peanut Butter Chocolate Star Cookies
  • chocolate no bake cookie on a white tray
    Fudgy Chocolate No Bake Cookies
  • scotcheroos cut into squares
    Best Scotcheroos Recipe
  • a photo of a Reece's peanut butter cup in a muffin tin
    Reese’s Peanut Butter Cup Cookies
a Buckeye Ball with a bite taken out, showing the center

Peanut Butter Buckeye Balls Recipe

Sweet peanut butter ball no-bake cookies that are dipped in chocolate. They look just like a buckeye! It is a traditional Holiday cookie.
5 from 3 votes
Print Pin Rate Save Saved!
Prep Time: 30 minutes minutes
Cook Time: 0 minutes minutes
chill time: 1 hour hour 30 minutes minutes
Total Time: 2 hours hours
Servings: 50 Buckeye Balls
Calories: 132kcal
Author: Susie Weinrich

Equipment

  • Stand mixer with a paddle attachment or hand held mixer
  • Toothpicks
  • wax paper

Ingredients

  • ¾ cup butter - (no subs, use butter)
  • 3 ¾ cup powdered sugar - divided
  • 1 cup creamy peanut butter
  • 1 tablespoon milk
  • 1 tablespoon vanilla extract
  • 12 oz package semi-sweet chocolate chips - (could also use milk or dark chocolate or a mix)
  • 1 tablespoon Crisco shortening

Instructions
 

  • Melt the butter in the microwave or on the stove top.
    ¾ cup butter
  • In a stand mixer with a paddle attachment mix together the melted butter and 3 cups of the powdered sugar. Add the peanut butter and continue mixing until it is smooth. Add in the milk and vanilla.
    3 ¾ cup powdered sugar , 1 cup creamy peanut butter , 1 tbsp milk, 1 tbsp vanilla extract
  • Mix in enough of the remaining powdered sugar (add ¼ cup a time) so the dough becomes firm and a little crumbly (almost like playdough). see photo:
  • Roll the mixture into ½-1 inch balls (this dough is very sweet so I like them on the smaller side). Put them on a baking sheet lined with wax paper.
    Pop them in the fridge and chill for 1 hour.
  • Melt the chocolate chips and shortening together in a small saucepan over low heat OR in the microwave (60 seconds, stir, 30 seconds, stir, 30 seconds, stir).
    12 oz package semi-sweet chocolate chips, 1 tbsp Crisco shortening
  • Using a fork or toothpick pick up the peanut butter balls and dip ¾ of each ball in the melted chocolate. Place them back on the wax paper.
    Pop back in the fridge for about 30 minutes for the chocolate to set up.

Storing & Freezing

  • Store the Buckeyes in the fridge for up to a week.
    You can also freeze the buckeyes for up to 3 months. Thaw on a baking sheet in the fridge overnight.

Recipe Tips and Notes:

EDIBLE GIFT: These make an amazing edible gift at the Holidays. Use this FREE PRINTABLE GIFT TAG for the plate of cookies.
Did you make this recipe?Connect with me and let me know by commenting below!
Jump to Comments
Serving: 1serving | Calories: 132kcal | Carbohydrates: 14g | Protein: 2g | Fat: 8g | Saturated Fat: 4g | Cholesterol: 8mg | Sodium: 49mg | Potassium: 73mg | Fiber: 1g | Sugar: 12g | Vitamin A: 88IU | Calcium: 8mg | Iron: 1mg

Pecan Snowball Cookies

December 12, 2020 by Susie Weinrich 1 Comment

a pecan snowball cookie that is broken in half to see the middle

Pecan Snowball Cookies are delicious two or three bite buttery shortbread style cookies filled with chopped pecans and then rolled in powdered sugar (twice!). They are a traditional Christmas cookie in the United States, but they are also known as a Mexican Wedding Cookie or Russian Tea Cakes. I’ve even heard some call them Pecan Sandies.

A pile of pecan snowball cookies with one broken in half

I grew up in a small town in Iowa and these Snowball Cookies were always served at Christmas time, along with Saltine Toffee, Chocolate Star Cookies, Buckeye Cookies, Peanut Clusters, and Peanut Butter Cup Cookies! All traditional cookie recipes!

Ingredients & Supplies

Here are the ingredients and supplies you need to make this Pecan Snowball Cookie recipe:

  • Stand mixer or hand held mixer
  • plastic wrap
  • parchment paper or reusable silicone baking mat
  • butter
  • powdered sugar
  • vanilla
  • kosher salt
  • finely chopped pecans
  • all purpose flour
all the ingredients for snowball cookies laid out

In the Springtime you can change up some of the ingredients to make Lemon Snowball Cookies!

How to Make Pecan Snowball Cookies – Step By Step

Make the dough completely then form into a disk, wrap in plastic wrap and cool in the fridge for about 45 minutes.

disk of pecan cookie dough
disk of cookie dough wrapped in plastic wrap

Preheat the oven to 350 degrees.

Roll about 1 tablespoon of dough each into balls and place on a parchment lined baking sheet.

pecan snowball cookie dough and a tablespoon scoop
pecan snowball cookies on a baking sheet

Bake for 14-16 minutes. Cool for about 2 minutes then roll in powdered sugar. Cool for another 30 minutes and roll in powdered sugar again (it will really stick the second time!!).

rolling pecan snowball cookies in powdered sugar
dipping pecan snowball cookies in powdered sugar for a second time

You can also watch the Web Story for Making Pecan Snowball Cookies!

Freezing Cookies

These delicious little cookies can be frozen easily so that you can enjoy them at a later time! Which is especially great for the Holidays when we are all SO busy!

Make the cookies completely and cool… pop them in the freezer right on the baking sheet so they are not touching.

Once they are frozen individually you can pop them in a freezer baggie and keep for 3 months.

Frozen baked cookies- let them thaw in the fridge overnight and then store at room temp. Roll in powdered sugar one more time before serving!

Freezing Dough

You can also freeze the dough! Roll into individual cookies, lay out on a baking sheet and freeze. Once they are frozen solid pop them in a freezer baggie and keep for 3 months.

Frozen raw dough cookies – let them thaw in the fridge overnight then continue with baking and rolling in powdered sugar. 

Make the cookies completely and cool… pop them in the freezer right on the baking sheet so they are not touching.

Once they are frozen individually you can pop them in a freezer baggie and keep for 3 months.

You can also freeze the dough! Roll into individual cookies, lay out on a baking sheet and freeze. Once they are frozen solid pop them in a freezer baggie and keep for 3 months.

Frozen raw dough cookies – let them thaw in the fridge overnight then continue with baking and rolling in powdered sugar. 

Tips

Here are a few tips to make sure your Pecan Snowball Cookies turn out delicious!

  • Make sure your butter is at room temp, softened!
  • Use parchment paper or a silpat to make sure your cookies release from the pan perfectly!
  • Give the cookies a good 2-3 minutes to cool out of the oven before rolling in powdered sugar. This allows the cookie to solidify, ensuring they don’t crumble.
  • Don’t skip the “double dip”. This makes sure you get maximum powder sugar coating! The first coating is like a wet and sticky coating to help the second coat really stick!!
  • If you use a dark baking sheet only bake 14 minutes… if you have a light colored baking sheet then bake 15-16 minutes.


a pecan snowball cookie that is broken in half to see the middle

Pecan Snowball Cookies

A classic buttery cookie made with just 5 simple ingredients. Similar to a shortbread cookie that is filled with pecans and rolled in powdered sugar (twice!).
Recipe can be doubled for a larger batch!
5 from 1 vote
Print Pin Rate Save Saved!
Prep Time: 15 minutes minutes
Cook Time: 15 minutes minutes
Refrigerating the dough and sugaring: 1 hour hour
Total Time: 1 hour hour 30 minutes minutes
Servings: 16 cookies
Calories: 138kcal
Author: Susie Weinrich

Equipment

  • Stand mixer with a paddle attachment or hand held mixer

Ingredients

  • ½ cup butter - softened at room temp
  • 1 ¼ cup powdered sugar - divided
  • ¼ teaspoon kosher salt
  • 1 teaspoon vanilla
  • 1 cup all purpose flour
  • ½ cup pecans - very finely chopped

Instructions
 

  • In the bowl of a stand mixer with a paddle attachment (or a hand held mixer) cream together the butter and ½ cup powdered sugar and the salt.
    Mix in the vanilla extract.
  • Scrape the sides of the bowl down. Then gradually mix in the flour, just until the dough comes together.
    Finally mix in the chopped pecans until just combined.
  • On a lightly floured surface flatten the dough into a 1 inch thick disk. Wrap it plastic wrap and pop in the fridge for 45 minutes to 1 hour.
  • Preheat the oven to 350° and line a baking sheet with parchment paper.
  • Scoop out 1 tablespoon of dough at a time and with clean hands roll into balls.
  • Bake for 14-16 minutes, until they are barely beginning to brown.
    dark baking sheet = 14 minutes
    light baking sheet = 15-16 minutes
  • Remove from the oven and let the cookies cool for 2 minutes.
  • While they are still warm roll in the remaining ¾ cup powdered sugar. Place on a cooling rack and let them cool completely (about 30 minutes).
  • Roll again in the powdered sugar (it will really stick this time!!).
  • Store in an airtight container at room temp for up to 5 days.

Recipe Tips and Notes:

Recipe can be doubled!! = 32 cookies
FREEZING:
Make the cookies completely and cool... pop them in the freezer right on the baking sheet so they are not touching. Once they are frozen individually you can pop them in a freezer baggie and keep for 3 months.
You can also freeze the dough! Roll into individual cookies, lay out on a baking sheet and freeze. Once they are frozen solid pop them in a freezer baggie and keep for 3 months.
Frozen raw dough cookies - let them thaw in the fridge overnight then continue with baking and rolling in powdered sugar. Frozen baked cookies- let them thaw in the fridge overnight and then store at room temp. Roll in powdered sugar one more time before serving!
Did you make this recipe?Connect with me and let me know by commenting below!
Jump to Comments
Serving: 1cookies | Calories: 138kcal | Carbohydrates: 16g | Protein: 1g | Fat: 8g | Saturated Fat: 4g | Cholesterol: 15mg | Sodium: 87mg | Potassium: 21mg | Fiber: 1g | Sugar: 9g | Vitamin A: 177IU | Calcium: 5mg | Iron: 1mg

Creamy Baked Feta with Tomatoes

December 11, 2020 by Susie Weinrich 2 Comments

feta cheese that has been baked in a red baking dish, topped with tomatoes and garlic

This Baked Feta and Tomato appetizer will soon be one of your go-to appetizer recipes. Tangy feta cheese is smothered in a mixture of cherry tomatoes, garlic, shallots, capers, olive oil and herbs, then broiled to creamy deliciousness with a browned top. Serve it up with some crostini or pita chips and delicious cocktails.

baked feta topped with tomatoes in a red baking dish

This Baked Feta is a killer party appetizer, here are some others to check out and round out your menu: Baked Spinach Artichoke Dip, Deviled Eggs, Skillet Cajun Shrimp, or Garlic Butter Steak Bites.

If you are a visual learner you can watch this Feta Appetizer being made on a 30 minute episode of Pin TV.

Ingredients & Supplies

Pictured below are the ingredients you will need to make this Baked Feta recipe, plus some tips on a few ingredients and supplies:

Quality Feta Cheese – You will want to look for a block of feta cheese, not the crumbles. See more about feta cheese below.

Extra Virgin Olive Oil – In this recipe you will use “extra virgin” olive oil. It has a much more pronounced flavor than just regular olive oil. Look for a Greek, Spanish or Italian extra virgin olive oil, they have a little more flavor.

Capers – If you haven’t used capers, you are going to LOVE them. They are a traditional Mediterranean ingredient. It is the edible flower buds from the perennial plant called Capparis spinosa (or caper bush or Flinders rose). They are brined and have a salty pickled flavor.

You can find them near the olives in your grocery store. If you buy a jar you can also use them in this Mediterranean Shrimp Skillet Recipe, Parmesan Baked Tilapia or Baked Caesar Chicken!

ingredients for baked feta

Shallots – are in the onion and garlic family. They have a milder onion flavor that pairs perfectly with the feta and capers!

Small Oven Safe Pan– To make this dish in one pan you want to have a small oven safe dish. Any of these will work:

  • Lodge Oval Cast Iron Dish
  • Le Creuset Oval Au Gratin Dish
  • Staub 9 inch Oval Dish

Feta Cheese

Feta cheese is a semi-soft Greek white cheese that is made from sheep and/or goat milk. It is brined in blocks and has a slightly grainy texture with a very tart and tangy flavor. It is commonly used in a lot of Mediterranean and Greek recipes.

You will want to buy a block of feta- either in brine or in a package. The feta will not melt completely when it is baked. Instead, it becomes warm, soft and creamy. Perfect texture to scoop and dip with bread or chips.

Variations

If you don’t have the exact ingredients or want to make some changes here are some great substitutions to consider:

Love Olives? Add a few chopped black olives, kalamata or Greek olives to the tomato mixture.

Can’t find shallots? Try adding in finely chopped red onion instead. If you have a strong onion, cut a large slice and then rinse it with cool water before chopping. That will wash away some of the enzyme that will have the onion flavor overpower the dish.

Fresh Herbs – Add some fresh oregano, thyme or rosemary for a new flavor profile.

Fresh Tomatoes in Short Supply? Try using sun dried tomatoes instead. Buy the ones packed in oil and drain them before using. BUT you can use some of that oil in place of the extra virgin olive oil… try a 50/50 split.

How To: Recipe Step by Step

This is a pretty easy recipe. Here is how to put it together, step-by-step:

  • Start by setting your block of feta in your baking dish, at room temp, for about 30 minutes. **info on cheese at room temp.
  • Put a rack in the oven in one of the top positions, about 6-10 inches from the heat source. Then preheat the broiler.
  • In a sauté pan over medium heat add the olive oil. Sauté the garlic and shallots for about 2 minutes.
  • Add the tomatoes, kosher salt, pepper and sugar and sauté for another 2-3 minutes.
sauteed tomatoes, garlic, shallots and capers in a pan
  • Remove the pan from the heat and stir in the capers, basil and oregano.
  • Pour the tomato mixture over the feta cheese.
  • Pop under the broiler for 8-10 minutes. Watch it carefully around the 8 minute mark. Broilers vary widely!
  • Serve warm with pita chips or crostini for dipping.
baked feta appetizer in a dish being scooped with crostini

More Amazing Appetizer Recipes

  • garlic butter steak bites on a platter with a sprig on rosemary
    Garlic Steak Bites
  • deviled eggs on a tray
    How to Make Deviled Eggs
  • Cajun shrimp in a skillet with lemons
    Skillet Cajun Shrimp Recipe

Susie leaning on the kitchen counter

WATCH SUSIE ON FOOD NETWORK!

⭐⭐⭐⭐⭐

The new gameshow, 100 Cooks, premieres on Food Network June 7th, 2026 at 9est/8cst. I hope you will tune in!

feta cheese that has been baked in a red baking dish, topped with tomatoes and garlic

Creamy Baked Feta with Tomatoes Recipe

A delicious feta cheese appetizer that is baked and topped with a mixture of tomatoes, garlic, shallots, capers, herbs and spices. Add some pita chips or crostini and you have a great party appetizer!
You can watch this Feta Appetizer being made on a 30 minute Pin TV episode.
4.50 from 4 votes
Print Pin Rate Save Saved!
Prep Time: 15 minutes minutes
Cook Time: 10 minutes minutes
Feta to room temp: 30 minutes minutes
Total Time: 55 minutes minutes
Servings: 6 people
Calories: 156kcal
Author: Susie Weinrich

Equipment

  • Small baking dish

Ingredients

  • 8 oz block feta cheese - bring to room temp, about 30 minutes
  • 2 tablespoon extra virgin olive oil
  • 2 cloves garlic - chopped
  • 2 tablespoon shallot - finely chopped (can sub red onion)
  • 10 oz cherry tomatoes - halved if they are larger. multicolored if you can find it!
  • ½ teaspoon kosher salt
  • ¼ teaspoon black pepper
  • ½ teaspoon sugar
  • 2 tablespoon capers - drained
  • 1 tablespoon fresh basil - chopped
  • ¼ teaspoon dried oregano

Instructions
 

  • Preheat the broiler and set the oven rack to the top position. Set the feta at room temp while the oven preheats.
  • Place the feta block in a small oven proof baking dish. Set aside.
    8 oz block feta cheese
  • In a skillet over medium heat add the extra virgin olive oil.
    Add the garlic and shallots and soften for about 2 minutes. Add the tomatoes, salt, pepper, and sugar and sauté an additional 2 minutes.
    2 Tbsp extra virgin olive oil, 2 cloves garlic, 2 Tbsp shallot , 10 oz cherry tomatoes , ½ tsp kosher salt, ¼ tsp black pepper , ½ tsp sugar
  • Remove from the heat and stir in the capers, basil and oregano.
    2 Tbsp capers , 1 Tbsp fresh basil, ¼ tsp dried oregano
  • Pour the tomato mixture over the feta.
  • Broil for approx 8-10 minutes until the feta is beginning to brown on top.
    Keep a close eye on the feta at this point… broilers can vary widely and your appetizer may be ready closer to 8 minutes.
  • Serve the feta and tomatoes warm with pita chips, crostini, or warm crusty bread.

Recipe Tips and Notes:

FETA CHEESE: make sure you purchase a block of feta either in a package or in brine. You do not want feta crumbles for this recipe.
Did you make this recipe?Connect with me and let me know by commenting below!
Jump to Comments
Serving: 1serving | Calories: 156kcal | Carbohydrates: 5g | Protein: 6g | Fat: 13g | Saturated Fat: 6g | Polyunsaturated Fat: 1g | Monounsaturated Fat: 5g | Cholesterol: 34mg | Sodium: 704mg | Potassium: 146mg | Fiber: 1g | Sugar: 2g | Vitamin A: 414IU | Vitamin C: 12mg | Calcium: 198mg | Iron: 1mg

Perfect Pomegranate Martini

December 10, 2020 by Susie Weinrich Leave a Comment

pomegranate martini in a stemmed glass with and orange twist

This Pomegranate Martini is an excellent party cocktail. Pomegranate juice is shaken with vodka, orange liqueur, a little fresh squeezed orange juice and then poured in a stemmed martini glass with a sugar rim. Add an orange peel twist and you have a perfectly elegant cocktail!

pomegranate martini with a sugar rim and pomegranate arils on the table

A Pomegranate Martini is especially appropriate at the holidays when fresh pomegranates are in season and you can pop a few pomegranate arils in the drink!

If Pomegranate is your jam then you will love this Pomegranate Margarita and this Winter Wine Sangria too!

Ingredients & Supplies

Here are the things you need to grab to make yourself a delicious Pomegranate Martini:

  • Stemmed Martini Glass
  • Cocktail shaker
  • Ice
  • Vodka (plain vodka or a citrus flavored vodka)
  • Pomegranate Juice
  • Orange liqueur (like Triple Sec, Grand Marnier, or Cointreau)
  • fresh orange
  • sugar
  • optional – pomegranate arils

Pomegranate Juice

I like to purchase POM Wonderful pomegranate juice, which is usually in the produce section of the grocery store.

However if you are feeling super ambitious and want to make your own juice, follow this guide for homemade pomegranate juice.

Garnish

There are three things I like to use to garnish this martini – sugar for the rim, orange peel and a few pomegranate arils for the cocktail. If you can’t find pomegranate arils or they are out of season, you can skip that garnish.

a top view of a pomegranate martini with a sugar rim and an orange twist

mAKING A Pitcher

If you are making martinis for a crowd, here are the measurements to make it ahead:

  • 1 cup vodka
  • ¼ cup orange liqueur (like Triple Sec, or Cointreau)
  • ¾ cup pomegranate juice
  • ¼ cup fresh squeezed orange juice

Stir everything together in a large pitcher and chill for at least 30 minutes.

Make a bowl or orange twists and a bowl of pomegranate arils, then rim a few glasses with sugar so they are ready to go!

More Chic Cocktails

  • tequila sour in a coupe glass with a shaker and fruit in the background
    Frothy Tequila Sour Cocktail
  • Etched glass filled with an orange smash cocktail garnished with fresh thyme
    Tequila, Thyme & Orange Smash
  • Tequila Lemon Drop made with cinnamon Simple syrup in a stemmed glass with a cinnamon stick on the side
    Tequila Cinnamon Lemon Drop

Susie leaning on the kitchen counter

WATCH SUSIE ON FOOD NETWORK!

⭐⭐⭐⭐⭐

The new gameshow, 100 Cooks, premieres on Food Network June 7th, 2026 at 9est/8cst. I hope you will tune in!

pomegranate martini in a stemmed glass with and orange twist

Pomegranate Martini Recipe

A delicious martini made with pomegranate juice, vodka, and orange. Garnish the rim with a little sugar and an orange twist! Make a single drink or a pitcher!
5 from 3 votes
Print Pin Rate Save Saved!
Prep Time: 5 minutes minutes
Cook Time: 0 minutes minutes
Total Time: 5 minutes minutes
Servings: 1 drink
Calories: 204kcal
Author: Susie Weinrich

Equipment

  • Cocktail Shaker
  • Stemmed Martini Glass

Ingredients

One Martini (see notes for a pitcher)

  • 2 oz vodka - plain or citrus flavored
  • 1 ½ oz pomegranate juice
  • ½ oz orange liqueur - like Triple Sec or Cointreau
  • ½ oz fresh squeezed orange juice

Garnish

  • sugar, orange twists, pomegranate arils

Instructions
 

  • Lightly rub an orange wedge around the rim of a martini glass. Dip into sugar. Set aside.
  • Fill a cocktail shaker with ice. Pour in the vodka, pomegranate juice, orange liqueur, and fresh squeezed orange juice. Give it a vigorous shake for about 30 seconds.
    2 oz vodka, 1 ½ oz pomegranate juice, ½ oz orange liqueur, ½ oz fresh squeezed orange juice
  • Strain into the sugar rimmed glass. Garnish with an orange twist and/or pomegranate arils.

Recipe Tips and Notes:

FOR A PITCHER:
  • 1 cup vodka (plain or citrus flavored)
  • ¾ cup pomegranate juice
  • ¼ cup orange liqueur (like Triple Sec or Cointreau)
  • ¼ cup fresh squeezed orange juice
Stir everything together in a small pitcher and chill for at least 30 minutes.
 
Did you make this recipe?Connect with me and let me know by commenting below!
Jump to Comments
Serving: 1martini | Calories: 204kcal | Carbohydrates: 12g | Protein: 1g | Fat: 1g | Saturated Fat: 1g | Sodium: 6mg | Potassium: 91mg | Sugar: 11g | Vitamin C: 7mg

How to Make Christmas Crack (Saltine Toffee)

December 9, 2020 by Susie Weinrich 13 Comments

saltine cracker toffee in a bowl

Saltine Toffee is a sweet treat made with just five ingredients! Saltine crackers are covered in a 2 ingredient caramel sauce and baked, then chocolate chips are melted over top and spread like frosting. Sprinkle on some chopped pecans and it is ready! You may also know this Saltine Toffee Recipe as “Christmas Crack” or “Fool’s Toffee”.

Saltine Toffee (Christmas Crack) in a bowl with a black and white napkin

If it's Christmas time you better bet that I have a pan of Saltine Toffee (Christmas Crack) somewhere in my house. It’s an absolute tradition. This is THE classic recipe with saltines, homemade toffee, chocolate chips and pecans. Over the years I have made all the mistakes making Fool's Toffee, so you don't have to! Promise yours is going to turn out perfect.

My daughter and I had so much fun making this for her teacher gifts. Her English teacher sent her a text saying she had eaten the entire bag in 10 minutes and she was now terribly addicted. All of her teachers loved it! -Robin

[feast_advanced_jump_to]

Saltine Toffee Ingredients

You only need 5 simple ingredients to make this Saltine Toffee Recipe, you may already have most of them in your kitchen:

Ingredients to make saltine toffee
  • Saltine Crackers – make sure you get the classic 2×2 size, not oyster crackers. You can use other types of crackers, the most important part is that you lay them end to end filling up the pan from edge to edge. If you don’t do that the crackers will float around the pan and the toffee won’t set on the crackers.
  • Butter – Salted butter is the only butter we recognize here at Mom’s Dinner. This mixed with the brown sugar creates the toffee.
  • Brown Sugar – There is a difference between light and dark brown sugar. The darker version has double the molasses, which creates a much deeper and richer flavor. The light will work in this Fools Toffee Recipe but if you can grab a bag of dark brown sugar go ahead and do that!
  • Semi Sweet Chocolate Chips – This flavor will give you the most traditional flavor. However you could also use dark chocolate chips or milk chocolate chips.
  • Pecans – Either chopped pecans or pecan halves that you chop will work. You could also use just about any other nut you love: walnuts, pistachios, peanuts, or almonds.

Rimmed Baking Sheet Size

It is crucial that you use a 10×15 rimmed baking sheet for this recipe, also known as a jelly roll pan. If you try to do it in a larger pan and not fill it with crackers when you pour on the caramel the crackers will float apart.

rimmed baking sheet with foil

Kids Can Help Too

This is a pretty simple recipe to make so you can absolutely have your kids help in the kitchen. Here are some tasks they can help with:

  • Spraying the foil
  • Laying out the crackers
  • Stirring the butter & brown sugar mixture
  • Smoothing the chocolate chips
  • Sprinkling on the nuts

How To Make Christmas Crack

This is a quick overview of how to make Fool’s Toffee… for more detailed instructions and ingredient amounts pop down to the recipe card.

foil covered baking sheet being sprayed with baking spray

Step 1

Cover your pan with foil and then spray it generously with cooking or baking spray. Do not skip this step or the toffee will bake TO your pan!

saltine crackers in a 10x15 pan

Step 2

Lay the saltine crackers in one layer so they reach edge to edge of the pan (very important!!). It’s totally ok if they overlap a little.

pouring homemade caramel over crackers

Step 3

Make the caramel toffee on the stove top, then pour it over the saltine crackers, spreading it from edge to edge.

chocolate chips being spread on top of saltine toffee

Step 4

Bake the crackers for 7 minutes in a 375 degree oven. Once it comes out sprinkle on the chocolate chips. Let them sit for about 2 minutes to soften and then spread them until they are all melted.

sprinkling pecans on top of saltine toffee

Step 5

Sprinkle on the finely chopped pecans. Let the Saltine Toffee cool in the fridge until the chocolate is set up, at least 1-2 hour. Then break into serving pieces.

Fools toffee broken in half being held in a hand

Step 6

When you break the Saltine Toffee press down on the chocolate instead of up on the toffee. It will help keep the toffee and chocolate in tact.

Saltine Toffee Variations

CRACKER BASE: You can swap out the cracker base. Just make sure you fill the pan edge to edge so that crackers can't float around the pan when baking.

  • Graham Crackers
  • Matzo Crackers
  • Club Crackers

CHOCOLATE: Skip the standard semi-sweet chips and try milk, or dark chocolate chips. Or use a mix or white and dark chocolate to create a gorgeous marbled look.

Swap chocolate chips for butterscotch, peanut butter, or even peppermint chips for a flavor twist.

TOPPINGS: You can't go wrong with chopped pecans, walnuts, almonds, pistachios, or hazelnuts.

You can also try some candies or cookies in place of the nuts:

  • M&M's: Add pops of color for a festive touch.
  • Crushed Cookies: Oreos give a cookies-and-cream twist.
  • Sprinkles: Go wild with holiday or party-themed colors.
  • Dried Fruit: Dried cranberries or cherries add a tart chewiness that balances the sweetness.
  • Toffee Bits: Layer on even more toffee flavor with store-bought bits.
  • Coconut: Unsweetened flakes add a tropical crunch.
  • Sea Salt: A pinch of flaky Maldon salt elevates everything and balances the sweetness perfectly.

How to Store Christmas Crack (Saltine Toffee)

Keep your Fools Toffee in an air tight container in the fridge for up to 2 weeks.

Can You freeze Christmas Crack?

Yes! For longer storage wrap it up in plastic wrap and then foil and pop in the freezer for up to 3 months.

Thaw at room temp to serve.

WATCH: How to Make Christmas Crack Candy

You can watch Kyle (my son) and me make this Saltine Toffee recipe on a 30 minute episode of Pinterest TV.

Easy Christmas Crack Recipe Tips

Here are a few tips to make sure your Saltine Toffee recipe turns out perfect:

  1. When the caramel sauce is boiling, don’t stir too much, it helps avoid getting grainy toffee.
  2. Make sure you use the right size pan!!! 10″x 15″
  3. Line your pan with foil and spray it generously with baking/cooking spray.
  4. The crackers should fill the entire tray, even if you have to break some in half to fill the end. If they don’t fill the pan they will float apart in the oven and the recipe won’t work.
  5. When you break the Saltine Toffee press down on the chocolate instead of up on the toffee. It will help keep the toffee and chocolate in tact.
  6. When it is time to wash up, you can simmer a little water in your caramel pot to remove the sticky toffee.

Saltine Toffee FAQs

What are common saltine toffee mistakes?

Make sure you fill the pan with the crackers, from edge to edge. Even if you need to break some crackers in half to fill the pan. This helps prevent the crackers from floating around in the pan.
Boil the brown sugar and butter together for about 3 minutes. If you stop too soon, the toffee won't set properly and will stay soft or grainy.
On the flip side don't over boil the toffee, it can burn which will give it a bitter flavor.
You MUST line the pan with foil or the toffee crackers will bake TO THE PAN.
Breaking the toffee up too early. Let the toffee set completely (the fridge helps this along)or when you break it, it won't snap, it will be sticky.


Susie leaning on the kitchen counter

WATCH SUSIE ON FOOD NETWORK!

⭐⭐⭐⭐⭐

The new gameshow, 100 Cooks, premieres on Food Network June 7th, 2026 at 9est/8cst. I hope you will tune in!

saltine cracker toffee in a bowl

Easy Christmas Crack Recipe (Saltine Cracker Toffee)

A delicious sweet treat made with saltine crackers coated with a caramel toffee and then coated in chocolate and sprinkled with pecans. It is a great dessert at the Holidays and is sometimes called "Christmas Crack" or "Fools Toffee"
5 from 6 votes
Print Pin Rate Save Saved!
Prep Time: 20 minutes minutes
Cook Time: 7 minutes minutes
Cooling & Setting: 1 hour hour
Total Time: 1 hour hour 27 minutes minutes
Servings: 35 pieces
Calories: 95kcal
Author: Susie Weinrich

Equipment

  • 10×15 rimmed baking sheet (jelly roll) – make sure you have this size!
  • foil
  • Non Stick Spray

Ingredients

  • 35 saltine crackers - (2"x2") approx count.
  • 1 cup salted butter - (this is 2 sticks)
  • 1 cup dark brown sugar - packed
  • 2 cups chocolate chips - your choice- milk chocolate, semi-sweet, or dark chocolate
  • ¾ cup pecans - chopped

Instructions
 

  • Preheat the oven to 375°.
  • Prep your 10×15 rimmed baking sheet (make sure you have this size in order for the recipe to work!!) by covering it completely with foil and then spraying the foil very generously with non stick baking spray.
  • Fill the pan with saltine crackers in a single layer, edge to edge. If you need to break some in half to make sure you completely fill the pan, that is ok. A little overlapping is fine too. Set aside.
    See photo:
    35 saltine crackers
    saltine crackers in a 10x15 pan
  • In a saucepan over medium heat, melt the butter and brown sugar together while stirring.
    Then once it is all melted together stop stirring constantly and only stir occasionally, let it simmer/boil for 3 minutes.
    1 cup salted butter , 1 cup dark brown sugar
  • Immediately pour the toffee sauce over the saltine crackers. With a spatula or wooden spoon lightly spread the toffee from edge to edge so it completely covers the crackers.
    toffee or caramel sauce covering saltine crackers
  • Pop the toffee crakcers in the oven for 7 minutes, it will be bubbly and hot.
    TIP: While it is in the get the chocolate chips and nuts ready. Once it comes out the of oven you will want to work quickly to take advantage of how hot the toffee is!
  • Remove from the oven and sprinkle on the chocolate chips. Let them sit for about 1-2 minutes so they get soft and melty.
    2 cups chocolate chips
  • Spread the chocolate chips with a wooden spoon or spatula from edge to edge of the pan, covering all the toffee crackers.
  • Sprinkle on the chopped nuts. Lightly press the nuts into the chocolate so they adhere.
    ¾ cup pecans
  • Pop the tray in the fridge and let cool/harden for about 1-2 hour.
  • Remove from the fridge and break the toffee into serving sized pieces (2-3 bites each).
    Mom's Tip: When you are breaking the saltine toffee into chunks grab one corner and peel it from the foil. Break a large chunk off and then break it into serving sized pieces.
    Press DOWN on the chocolate (instead of pressing up from the bottom).. you will get a better break that way.

Storing

  • Store the toffee in the fridge in an airtight container for up to 2 weeks!
  • You can also freeze the toffee for up to 3 months. Wrap in plastic wrap and foil and then place a a freezer safe baggie.

Recipe Tips and Notes:

FREE PRINTABLE GIFT TAG FOR THE HOLIDAYS
BUTTER: can use salted or unsalted
NUTS: optional! Can also use walnuts, pistachios, peanuts or almonds.
DARK BROWN SUGAR: can also use light brown sugar, however the dark brown sugar has a deeper and richer flavor.
Watch a 30 minute episode of Pinterest TV where Kyle (my son) and I make this treat for the Holidays.
Did you make this recipe?Connect with me and let me know by commenting below!
Jump to Comments
Serving: 3pieces | Calories: 95kcal | Carbohydrates: 9g | Protein: 1g | Fat: 7g | Saturated Fat: 3g | Cholesterol: 14mg | Sodium: 83mg | Potassium: 21mg | Fiber: 1g | Sugar: 6g | Vitamin A: 162IU | Calcium: 8mg | Iron: 1mg

Crispy Peppermint Brownie Brittle

December 8, 2020 by Susie Weinrich Leave a Comment

a pile of peppermint brownie brittle and some candy canes

Peppermint Brownie Brittle is crispy baked brownies with peppermint flavor, they are topped with a white chocolate drizzle and crushed candy canes. It makes an impressive holiday dessert or edible gift! It would also be the star of a cookie exchange!

This will be similar to the Sheila G’s Peppermint Brownie Brittle!

peppermint brownie brittle, candy canes and a wreath

If you like the crispy edge pieces of a pan of brownies then you are going to love this dessert recipe! Every bite IS the crispy edge piece.

If you are looking for a non-peppermint brownie brittle then pop over to this recipe for Chocolate Brownie Brittle. But if you LOVE a peppermint dessert, check out these Copycat Thin Mint Cookies (only 3 ingredients!) or these Peppermint Bark Oreos (only 4 ingredients!).

Ingredients

We highly recommend grabbing all the ingredients before you start making the peppermint brownie brittle recipe. You will find it goes much smoother when all the ingredients are in front of you!

Pictured are all the ingredient you need:

ingredients to make peppermint brownie brittle

Parchment Paper

You absolutely must use parchment paper for this recipe! If you try to make this recipe without the parchment the brownie brittle will bake right to your pan.

Free Printable Gift Tag

This peppermint brownie brittle makes a great edible gift, especially at the holidays. Print this FREE PRINTABLE GIFT TAG and attach it to your sweet treat!

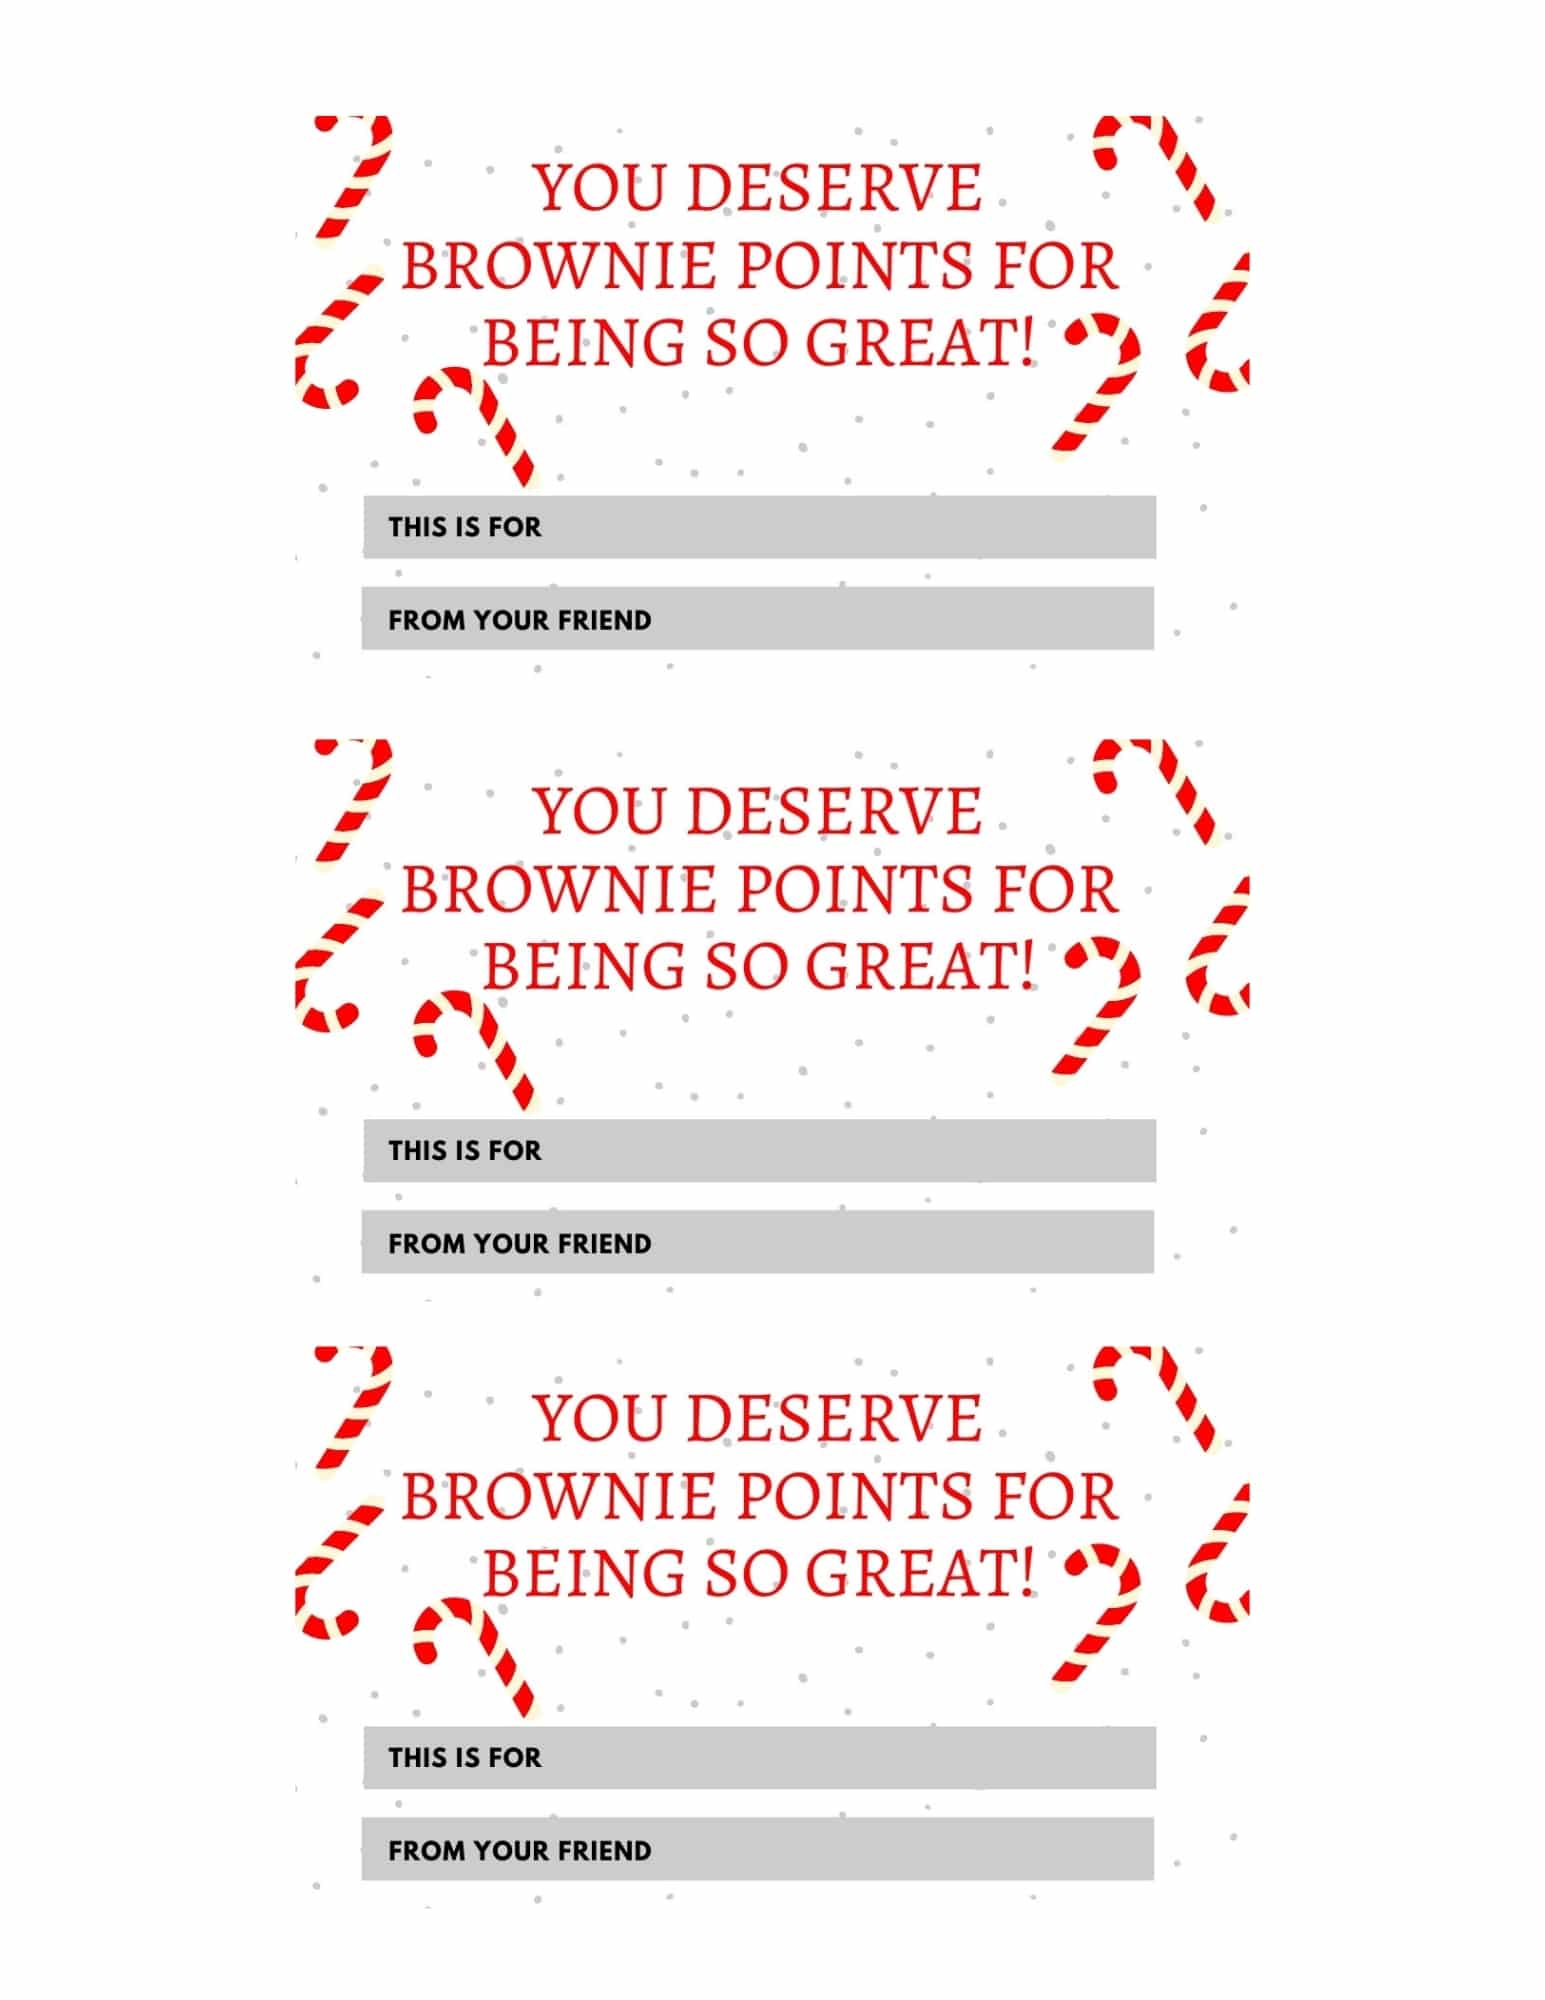
you deserve brownie points free printable gift tag

More Delicious Chocolate Recipes

  • No-Bake Chocolate Pot de Crème
  • a pile of brownie brittle pieces and a glass of milk
    Chocolate Brownie Brittle
  • pile of three pieces of cake with a bite taken out of the top piece
    Homemade Chocolate Sheet Cake & Chocolate Frosting
  • chocolate pudding cake in an 8x8 pan
    Hot Fudge Pudding Cake

Susie leaning on the kitchen counter

WATCH SUSIE ON FOOD NETWORK!

⭐⭐⭐⭐⭐

The new gameshow, 100 Cooks, premieres on Food Network June 7th, 2026 at 9est/8cst. I hope you will tune in!

a pile of peppermint brownie brittle and some candy canes

Crispy Peppermint Brownie Brittle Recipe

Deliciously crispy brownie bites that are flavored with peppermint extract and then drizzled with white chocolate and crushed candy canes. A great holiday treat or edible gift!
You can also check out this Classic Chocolate Brownie Brittle Recipe!
5 from 3 votes
Print Pin Rate Save Saved!
Prep Time: 15 minutes minutes
Cook Time: 15 minutes minutes
Cooling Time: 15 minutes minutes
Servings: 36 pieces
Calories: 89kcal
Author: Susie Weinrich

Equipment

  • Sand mixer with whisk attachment (or hand held mixer with whisk attachment)
  • Parchment paper
  • Large rimmed baking sheet (13×18)

Ingredients

  • 2 tablespoon butter
  • 2 tablespoon vegetable oil
  • 4 squares bittersweet chocolate squares - equal to 1 oz., melted (such as Baker's)
  • ¼ cup plus 1 tablespoon unsweetened cocoa powder
  • 2 large egg whites
  • ¾ cup sugar
  • 1 teaspoon peppermint extract
  • ½ cup all purpose flour
  • ¼ teaspoon baking soda
  • ¼ teaspoon kosher salt
  • ¼ cup mini semi-sweet chocolate chips
  • 1 cup white chocolate melting wafers
  • 3 tablespoon candy canes - crushed

Instructions
 

  • Preheat the oven to 325°.
    Line a large rimmed baking sheet (13×18) with parchment paper. This step cannot be skipped!!! Without the parchment your brittle will bake ONTO the pan!
  • In a microwave safe bowl melt the butter, vegetable oil and 4 bittersweet chocolate squares together, about 30-45 seconds. Give it a good stir to make sure the chocolate in melted completely.
    Stir in the cocoa powder. Set aside.
    2 tbsp butter , 2 tbsp vegetable oil, 4 squares bittersweet chocolate squares , ¼ cup plus 1 tablespoon unsweetened cocoa powder
  • In the bowl of the stand mixer with a whisk attachment (or handheld mixer with whisk attachment), whisk the egg whites until they are very frothy, about 4 minutes.
    Add in the peppermint extract and sugar. Mix for 15 seconds.
    Pour in the melted chocolate mixture. Mix for 15-20 seconds.
    Set aside.
    2 large egg whites, ¾ cup sugar, 1 tsp peppermint extract
  • In a separate bowl stir together the flour, baking soda and salt.
    ½ cup all purpose flour , ¼ tsp baking soda, ¼ tsp kosher salt
  • Fold the flour mixture into the batter, just until combined.
  • Pour the batter out onto the parchment lined baking sheet. Spread the batter with a spatula into a REALLY THIN LAYER. It will be like painting the parchment paper!
    IMPORTANT: You want to make sure you spread the batter just about from end to end of the baking sheet. You want it to be really thin so that it will be crispy. If it is not spread thin enough it will be a little chewy and not crispy.
  • Sprinkle with the ¼ cup mini chocolate chips.
    ¼ cup mini semi-sweet chocolate chips
  • Bake for 14-15 minutes.
  • Once the brittle comes out of the oven score it with a knife or pizza cutter. This will help you break the brittle apart once it cools.
  • Melt the white chocolate in the microwave. (60 seconds, stir, 30 seconds, stir, 30 seconds, stir).
    Drizzle over the brownie brittle. Then sprinkle on the crushed candy canes.
    1 cup white chocolate melting wafers , 3 tbsp candy canes
  • Once the pan is cool enough to handle pop it in the fridge for 15 minutes so the white chocolate can set up.
  • Break apart and enjoy this peppermint brownie brittle!

Storing

  • Keep this brownie brittle in an airtight container at room temp for up to a week.

Gifting

  • This peppermint brownie brittle makes a great edible gift. Find the printable gift tag below. Package it up in holiday cellophane bags and tie the gift tag to the bag with festive ribbon!

Recipe Tips and Notes:

FREE PRINTABLE GIFT TAG
If peppermint isn’t your jam, you can check out this brownie brittle recipe too!
Did you make this recipe?Connect with me and let me know by commenting below!
Jump to Comments
Serving: 3pieces | Calories: 89kcal | Carbohydrates: 12g | Protein: 1g | Fat: 5g | Saturated Fat: 3g | Cholesterol: 3mg | Sodium: 36mg | Potassium: 51mg | Fiber: 1g | Sugar: 9g | Vitamin A: 21IU | Calcium: 11mg | Iron: 1mg

Mexican Shredded Beef – Barbacoa

December 7, 2020 by Susie Weinrich 7 Comments

Mexican Shredded Beef Barbacoa on a baking sheet with two forks

Mexican Shredded Beef (Barbacoa) is a true Sunday dinner kind of recipe. This is what I make when I've got time to let something cook low and slow and fill the house with that "something good is cooking" smell. It takes about 2½ hours in the oven, which turns a tough cut of beef into tender, juicy, flavor-packed barbacoa.

a baking sheet filled with shredded Mexican beef

This is the kind of dinner that people look forward to all day. It slow cooks in the oven and will feed a crowd. I love this one for Sunday dinner when we have a full house and everyone is hungry. Not to mention the leftovers make GREAT meal prep for the week (tacos, quesadillas, barbacoa mac and cheese…)

[feast_advanced_jump_to]

What is Mexican Barbacoa?

Barbacoa is the Spanish word for “barbecue”. However, here is the United States, we associate this word with Mexican Shredded Beef, made more widely popular by the restaurant Chipotle.

The pronunciation for barbacoa is baar-bah-kow-uh.

Barbacoa Beef Recipe Ingredients

To make Mexican Shredded Beef you need a nice large 3 lb. chuck roast, some lime, beef broth, chipotle in adobo and a well stocked spice cabinet. Pictured below are the ingredients you need to grab:

ingredients to make barbacoa on a baking sheet

For serving you will want to grab some tortillas for tacos or burritos, or some rice for a rice bowl. And all your favorite toppings.

How to Pick Beef For Mexican Barbacoa

When you are selecting a chuck roast try to pick one that is well marbled with fat, and not too many large chunks of fat around the edges. A “choice” graded chuck roast is perfect for this barbacoa recipe.

Some other great ways to use a chuck roast is for Pot Roast, Shredded BBQ Beef, or Italian Beef Sandwiches!

Chipotle In Adobo Sauce

Chipotle Peppers in Adobo Sauce are jalapeño chiles that have been dried, smoked and then packed in a flavorful sauce made of tangy tomatoes and spices. (sited from goya.com)

You can find chipotle in Adobo sauce in the Mexican aisle of your grocery store. They generally come canned in 10-11 oz portions.

Don’t be fooled by these little red peppers, they are SPICY!!! For this recipe you will not use the entire can so you can freeze the remaining portion in a freezer safe container for up to 6 months. Or you can make these Grilled Steak Tacos or Chipotle Chicken Burgers that use Chipotle in Adobo!

Getting To Your Desired Spice Level

The spicy ingredient in this recipe are the chipotle peppers in adobos that I talked about above. I definitely would not call this barbacoa recipe “spicy” as it is written.

Using 3 peppers is great to just add flavor. If you like more spice than definitely add 5 chipotle peppers and all the sauce.

To really take it to the next level add some cayenne pepper to the chile paste!

Equipment

To make Barbacoa in the oven you will want to have a large Dutch Oven or Braising Pot. You of course could get a Le Creuset Dutch Oven $$$$ but I find that Lodge makes a Dutch Oven that is just as good for a lot less $$.

How to Make Mexican Barbacoa

There are just a couple steps to make this Mexican Shredded Beef recipe and the oven does the rest!

  1. Preheat the oven to 325.
  2. Cut the beef in 2-3 inch chunks (this helps the beef cook faster and allows more surface area for added flavor)
  3. Pat the beef dry and season with kosher salt and pepper. Brown all the chunks in the vegetable oil.
  4. Make the chile paste in a blender or food processor by mixing the garlic, cumin, oregano, paprika, onion powder, chipotles in adobo, lime juice, and vinegar. (if you need to add some of the beef broth for it to process smooth that is totally fine!)
beef with chile paste and onions and bay leaves nestled around

5. Coat the browned beef cubes in the chile paste.
Add the onions, bay leaves and beef broth to the oven safe braising pot.
6. Cook, covered, for 2 ½ hours. (your pot will look crazy when it comes out of the oven… don’t worry it comes clean!)

Mexican Beef Cooked in a Dutch Oven with Onions and Bay leaves

7. Shred the beef using two forks. It should shred VERY easily!!
8. Optionally you can add the shredded beef back to the pot and stir it into the onions and sauce. If you do this make sure to remove the 2 bay leaves.

How to Serve This Beef Barbacoa Recipe

Barbacoa is most traditionally served piled into a corn tortilla as a taco. Top if off with some fresh pico de gallo and a healthy squeeze of fresh lime. That is really all you need to have it be over-the-top delicious.

However it can also be delicious baked into an enchilada; replace the chicken with this barbacoa in this Enchilada Recipe or replace the ground beef with shredded beef in this Enchilada Casserole.

You can make a stuffed smothered burrito using shredded beef instead of ground beef.

Barbacoa tacos topped with white onions and cilantro

It can also be as simple as adding the shredded beef and some cheese in between two flour tortillas and pan frying into a delicious quesadilla. Or serving it bowl style like they do at Chipotle with some Mexican Rice, black or pinto beans, salsa, and guacamole.

The possibilities go on and on….

Mexican Beef Tacos

If you choose the traditional route and make Barbacoa Tacos, use flour or corn tortillas, whatever you prefer. Then top it with all your favorite taco toppings like:

  • Pico de Gallo or Tomatillo Salsa
  • pickled jalapeños
  • queso fresco
  • sour cream or plain Greek yogurt
  • guacamole or diced avocados
  • diced white onions or sliced green onions
  • sliced radishes
  • cilantro
  • fresh lime juice

Storing Leftover Mexican Shredded Beef

Barbacoa is just like pulled pork in that it freezes really well!!! Which for all of you busy people out there means EASY MEAL PREP!!

Simply make the barbacoa completely and then freeze it on a baking sheet. Once it is frozen divide it out into freezer safe baggies in serving portions. It will keep in the freezer for 3 months.

Reheat the frozen barbacoa on the stove top or in the microwave. Can also be thawed in the fridge overnight.

Perfect Side Dishes for Barbacoa

If you are making tacos, burritos, or enchiladas with your Barbacoa then you can make it a meal by adding some 15 minute refried beans, and Mexican Rice even this Cilantro Lime Pineapple would be a delicious side dish.

Don’t forget to add a tequila cocktail… like this Margarita on the Rocks, tequila soda, or super easy Paloma.

More Mexican Dinner Recipes

If you love Mexican for dinner then here are some recipes for you to try next…

  • Beef Enchilada Casserole
  • Cream Cheese Enchiladas
  • Instant Pot Shredded Chicken Tacos
  • Stuffed Bell Peppers
  • Grilled Steak Tacos assembled with pico de gallo and chipotle crema
    Grilled Steak Tacos Recipe with Chipotle Crema
  • a pan of baked Chicken Enchilada Suiza garnished with cilantro
    Easy Enchilada Suizas
  • beef enchilada Casserole with a slice cut out so you can see the layers of corn tortillas, beef, cheese and sauce
    Ground Beef Enchilada Casserole
  • four ground beef tacos in a row with pico de gallo and sour cream
    Easy Ground Beef Tacos

Susie leaning on the kitchen counter

WATCH SUSIE ON FOOD NETWORK!

⭐⭐⭐⭐⭐

The new gameshow, 100 Cooks, premieres on Food Network June 7th, 2026 at 9est/8cst. I hope you will tune in!

Mexican Shredded Beef Barbacoa on a baking sheet with two forks

Mexican Shredded Beef - Barbacoa Recipe

Beef Chuck Roast is seasoned with Mexican chiles and spices and slow cooked. It is shredded and served in tacos, but also burritos, enchiladas, and quesadillas.
Find Oven and Slow Cooker Methods below!
4.41 from 5 votes
Print Pin Rate Save Saved!
Prep Time: 20 minutes minutes
Cook Time: 2 hours hours 30 minutes minutes
Total Time: 2 hours hours 50 minutes minutes
Servings: 6 people
Calories: 490kcal
Author: Susie Weinrich

Equipment

  • Oven safe pot with a lid (Dutch Oven)

Ingredients

  • 2 tablespoon vegetable oil
  • 3 lb chuck roast - (approx size) cut into 2-3 inch chunks
  • 2 teaspoon kosher salt
  • 1 teaspoon pepper
  • 5 garlic cloves
  • 1 tablespoon ground cumin
  • 1 tablespoon dried oregano
  • 1 tablespoon onion powder
  • 1 teaspoon smoked paprika
  • 3 chipotle chilies in adobo sauce - **see notes
  • ¼ cup fresh squeezed lime juice - approx. 2 limes
  • 2 tablespoon white vinegar
  • 1 large onion - sliced into ¼ inch slices
  • 2 bay leaves
  • 14.5 oz can beef broth

Instructions
 

Oven Method

  • Preheat the oven to 325°.
  • In a large oven safe pot (with a lid), like a Dutch oven, over medium heat on the stove top heat the vegetable oil.
    2 Tbsp vegetable oil
  • While that heats cut your beef into 2-3 inch chunks. Pat the pieces dry with paper towels and season with the kosher salt and pepper.
    3 lb chuck roast , 2 tsp kosher salt , 1 tsp pepper
  • Working in batches, brown all the beef pieces in the oil (on two sides each).
    Now add all the beef back to the pot and remove from the heat. Set aside for now.
  • In a blender or food processor add the garlic cloves, cumin, oregano, smoked paprika, onion powder, chipotles in adobo, lime juice, and vinegar. Process until it is a smooth paste.
    Pro Tip: if you need to add a little of the beef broth so it will process smooth, go ahead and do that!
    5 garlic cloves , 1 Tbsp ground cumin, 1 Tbsp dried oregano, 1 Tbsp onion powder , 1 tsp smoked paprika, 3 chipotle chilies in adobo sauce , ¼ cup fresh squeezed lime juice , 2 Tbsp white vinegar
  • Pour the blended chile mixture over the browned beef that is in the Dutch Oven and coat it on all sides.
  • Nestle the cut onions and bay leaves around the beef. Pour the beef broth around the beef, careful not to pour it over the beef, removing the chile paste.
    1 large onion, 2 bay leaves , 14.5 oz can beef broth
    beef with chile paste and onions and bay leaves nestled around
  • Pop the lid on the pot and place in the oven, cook for 2 ½ hours.

Shredding

  • Remove the meat to a cutting board or rimmed baking sheet. Shred and chop the beef into bite sized pieces/shreds.
  • Optionally add the beef back to the broth and onions in the pot (but be sure to remove the bay leaves and discard).
    Or you can strain some of the onions out and add to the beef.

Serving

  • The shredded beef is excellent serve in a warmed corn tortilla with Pico de Gallo, queso fresco, and a squeeze of fresh lime.
  • Also delicious served in burritos or enchiladas, topped on a salad or rice bowl, or spread on nachos. The possibilities are endless.

Slow Cooker Method

  • Cut the chuck roast into 3 inch pieces and place in your slow cooker.
    3 lb chuck roast
  • In a blender or food processor combine the kosher salt, black pepper, garlic cloves, cumin, oregano, smoked paprika, onion powder, chipotles in adobo, lime juice, vinegar, and beef broth. Process until it is a smooth paste.
    2 tsp kosher salt , 1 tsp pepper, 5 garlic cloves , 1 Tbsp ground cumin, 1 Tbsp dried oregano, 1 Tbsp onion powder , 1 tsp smoked paprika, 3 chipotle chilies in adobo sauce , ¼ cup fresh squeezed lime juice , 2 Tbsp white vinegar , 14.5 oz can beef broth
  • Pour that mixture over the beef. Nestle the onions and bay leaves around the beef.
  • Set to cook on low for 7 hours.
  • Move to the shredding and serving instructions above.

Recipe Tips and Notes:

Chipotle Peppers in Adobo: 
You will buy a small can of chipotle peppers in adobo and then use 3 of the individual peppers and a little sauce. If you like things spicier you can use 5 peppers. The remaining peppers and sauce can be frozen for up to 6 months.
Freezing:
You can make and freeze your Mexican Shredded Beef. Simply place on a baking sheet in one layer. Pop in the freezer for about 2 hours, then portion into freezer safe baggies. It will be good for 3 months. 
To reheat warm the frozen beef in the microwave or on the stove top. You can also let it thaw in the fridge overnight. 
Did you make this recipe?Connect with me and let me know by commenting below!
Jump to Comments
Serving: 1serving | Calories: 490kcal | Carbohydrates: 8g | Protein: 45g | Fat: 32g | Saturated Fat: 15g | Cholesterol: 156mg | Sodium: 1316mg | Potassium: 912mg | Fiber: 2g | Sugar: 2g | Vitamin A: 614IU | Vitamin C: 6mg | Calcium: 92mg | Iron: 7mg

Chocolate Brownie Brittle

December 6, 2020 by Susie Weinrich 34 Comments

a pile of brownie brittle pieces and a glass of milk

The first time I had Sheila G's brownie brittle from the store I was hooked! I knew I needed to create a recipe that mimicked that deep chocolate flavor and the crispy brownie bite. I went to work and testing and testing again until I perfected this recipe for Crispy Brownie Brittle. Now you don't have to buy those expensive bags of brownie bites, you just need to open your baking cabinet and turn on the oven.

brownie brittle on a cutting board with a bottle of milk

Don't worry-you don't need to be a master baker to nail this Brownie Brittle. I've put in the time testing and tweaking so you don't have to. The steps are simple, clear, and totally doable, whether you've baked a hundred things or just a handful. If you follow along, you'll end up with perfectly crisp, chocolatey brittle.

Brownie Brittle Recipe Ingredients

I have made this quite a few times and I find that the whole process goes a lot smoother if you collect all the ingredients before you get started! Here is what you need:

  • butter
  • vegetable oil
  • bittersweet chocolate baking squares
  • cocoa powder
  • eggs
  • sugar
  • vanilla extract
  • all purpose flour
  • baking soda
  • kosher salt
  • mini semi-sweet chocolate chips
a picture list of ingredients for brownie brittle

Parchment Paper

Another supply that you absolutely must use is parchment paper! The paper allows the brittle to bake without sticking to the baking pan. If you do not use parchment paper the brittle will literally bake ONTO the pan. LOL!

How to Make Brownie Brittle

  1. Start by preheating your oven to 325 degrees. Prep a large rimmed baking sheet (13×18) by completely covering in parchment paper (Do not skip this step!!).
  2. Now place the butter, vegetable oil, and chocolate squares in a microwave safe bowl. Microwave for about 30 seconds and give it a good stir, microwave for another few seconds if the chocolate doesn’t melt all the way.
  3. Stir the cocoa into the melted chocolate mixture. Set that aside.
  4. In the bowl of a stand mixer fitted with a whisk attachment (or a handheld mixer with a whisk attachment), whisk the 2 egg whites until they are frothy, about 4 minutes. Then pour in the sugar and vanilla extract. Mix another 15 seconds.
  5. Add the melted chocolate mixture to the egg white mixture. Whisk for another 20-30 seconds.
  6. In a small bowl stir together the flour, baking soda and salt. Pour that mixture into the batter and fold it in, until it is combined.
  7. Pour the batter out onto the parchment paper. With a spatula spread the batter out REALLY THIN. It will be like painting the parchment paper. The batter should only be about a ¼ inch thick on the paper, from edge to edge. If you don’t get it spread thin enough the brittle will not be crispy.
  8. Sprinkle the batter with the mini chocolate chips.
four steps for making crispy brownie brittle

9. Bake for 15 minutes (up to 18 minutes if the edges aren’t getting burnt). Watch the brittle closely towards the end of the cooking time to make sure the edges don’t burn.
10. As soon as the brittle comes out of the oven, score it with a knife or pizza cutter. This will help you break it apart when it is ready.
11. Let it cool for about 15 minutes and then break it apart at the scored lines.

Tips for Perfectly Crispy Brownie Brittle

To make sure you get the CRISPIEST brownie brittle, remember these tips:

  • Do not make this recipe without parchment paper! The brownie brittle will cook directly TO the pan, so lay down that parchment first.
  • Spread the batter super thin, it should be like painting the parchment paper.
  • Don't try to shorten the baking time… if it isn't crisp after cooling, pop it back in the oven for a few minutes.
  • Let the brownie brittle cool. It won't be totally crispy when it comes right out of the oven. Let it cool for 15 minutes, and then you will get that crispity-crunch.
  • Don't use the whole egg, just the egg whites, that is what helps give the batter more air to create a crunchy bite.

How to Store Chocolate Brittle

Store your Brownie Brittle in an airtight container at room temp for up to a week.

Give this Brownie Brittle as a Gift!

This makes an amazing edible gift! Package them up in a cellophane gift bag with a fancy ribbon, then attach this FREE PRINTABLE GIFT TAG:

Brownie Points printable gift tag
a pile of brownie brittle pieces and a glass of milk

Homemade Brownie Brittle

Chocolate Brownie Brittle is delicious little crispy bites of brownie. It's like the crispy edge of a brownie in every bite!
4.97 from 28 votes
Print Pin Rate Save Saved!
Prep Time: 20 minutes minutes
Cook Time: 15 minutes minutes
Cooling: 15 minutes minutes
Servings: 35 pieces
Calories: 75kcal
Author: Susie Weinrich

Equipment

  • Large rimmed baking sheet (13×18)
  • Stand mixer with whisk attachment (or hand held mixer with whisk attachment)
  • Parchment paper

Ingredients

  • 2 tablespoon butter
  • 2 tablespoon vegetable oil
  • 4 squares bittersweet baking chocolate - (equals 1 ounce)
  • ¼ cup plus 1 tablespoon unsweetened cocoa powder
  • 2 large egg whites
  • ¾ cup sugar
  • 1 teaspoon vanilla extract
  • ½ cup all purpose flour
  • ¼ teaspoon kosher salt
  • ¼ teaspoon baking soda
  • ½ cup mini semi sweet chocolate chips

Instructions
 

  • Preheat the oven to 325°. Completely line a large rimmed baking sheet (18×13 works well) with a piece of parchment paper.
    Do not skip this step! The recipe will not work without the parchment paper. The brittle will be ONTO the pan without it!
  • In a microwave safe bowl melt together the butter, vegetable oil, and 4 bittersweet chocolate squares, for about 30 seconds. Give it a good stir to make sure the chocolate is completely melted.
    Stir the cocoa powder into the melted chocolate mixture. Set aside.
    2 tbsp butter , 2 tbsp vegetable oil, 4 squares bittersweet baking chocolate , ¼ cup plus 1 tablespoon unsweetened cocoa powder
  • In a stand mixer fitted with the whisk attachment (or handheld mixer), whisk the egg whites until they are really frothy, about 4 minutes. Add the vanilla extract and sugar to the egg whites and whisk another 15 seconds.
    Pour the melted chocolate mixture into the egg white mixture and mix for another 20-30 seconds.
    2 large egg whites , 1 tsp vanilla extract , ¾ cup sugar
  • In a separate bowl stir together the flour, baking soda and salt.
    ½ cup all purpose flour , ¼ tsp kosher salt, ¼ tsp baking soda
  • Pour the flour mixture into the batter and fold it in with a spatula or wooden spoon until it is combined.
  • Pour the batter onto the parchment paper. Using a spatula spread the batter across the parchment paper until it is really thin, about ¼ inch thick at most. It will be like you are painting the parchment paper!
    Make sure you get the batter spread thin enough so it bakes crispy!
  • Sprinkle the mini chocolate chips across the batter.
    ½ cup mini semi sweet chocolate chips
  • Bake for 15 minutes (if the edges aren't burning or browning, bake up to 18 minutes).
    Watch the pan towards the end of the cooking time so the edges don't burn.
  • As soon as the brittle comes out the oven it will still be soft, score it with a knife or pizza cutter (into shapes that you want the individual pieces to be).
    Then let it cool for about 15-20 minutes to dry and get crispy.
    Break it apart into bite sized pieces.
  • Enjoy your Chocolate Brownie Brittle!!

Storing

  • Keep your brownie brittle in an airtight container at room temp for up to a week.

Recipe Tips and Notes:

GIFTING:
If you are giving this as an edible gift, print and attach this FREE PRINTABLE GIFT TAG
Did you make this recipe?Connect with me and let me know by commenting below!
Jump to Comments
Serving: 3pieces | Calories: 75kcal | Carbohydrates: 9g | Protein: 1g | Fat: 4g | Saturated Fat: 3g | Cholesterol: 2mg | Sodium: 34mg | Potassium: 42mg | Fiber: 1g | Sugar: 7g | Vitamin A: 24IU | Calcium: 4mg | Iron: 1mg

Easy Cranberry Ginger Margarita

December 5, 2020 by Susie Weinrich 6 Comments

cranberry ginger margarita in a glass with salt on the rim

This Cranberry Margarita recipe is a delicious tequila cocktail with a winter vibe. It has that delicious salty flavor of the tequila, mixed with the slightly sweet tartness of cranberry juice, and the bite of ginger beer. It is a truly refreshing and not too sweet margarita.

three cranberry ginger margaritas garnished with fresh cranberries and limes

If you love the ginger flavor in this margarita you will also love this Fresh Ginger Margarita or this Mexican Mule Cocktail!

If you are looking for other Holiday cocktails, check out this Apple Cider Margarita, Pomegranate Margarita or this Cranberry Wine Spritzer. If you need a non-alcoholic party drink this Cranberry Punch recipe is a delicious option!

How to Make a Cranberry Margarita with a Ginger Zing

I know there are recipes out there that have you making ginger simple syrup, or peeling fresh ginger. That is great and all, but I don’t think I will be going to those lengths for my margarita.

I want my cocktails to be easy and delicious.

three cranberry ginger margaritas with limes and cranberries scattered on the counter

To make my Cranberry Ginger Margarita, well, gingery, I use Ginger Beer. Easy peasy. I love using it in Moscow Mules and knew I wanted to use it in other cocktails. This was a perfect fit.

What Ginger Beer to Use in a Cranberry Ginger Margarita

Any Ginger Beer will work. However, I have found there is a significant difference in the quality and flavor between Ginger Beer brands. Some are overly sweet, some are spicy, and some don’t have enough flavor depth.

My favorite brands are, in order:

  1. Q Mixers Ginger Beer (pictured below)
  2. Fever Tree Ginger Beer
Cranberry ginger margarita on a saftey grater with cranberries and limes, ginger beer in the background

Q Mixers Ginger Beer is my absolute favorite, hands down! I am able to buy it online on Amazon or at my local Target. It is made with the most perfect combination of ginger, agave, chili peppers, coriander, and cardamom. This ginger beer has a little kick to it and will leave a little spice tingle on your lips. I absolutely love it!

What is a “Part” in My Cocktail Recipe

When you see a cocktail recipe and it calls for a “part”, that is a generic unit of measurement for a cocktail. YOU get to decide what the “part” is. The important of a “part” is the ratio. For example:

Recipe- 1 part tequila, 2 parts juice, 1 part soda

If you choose a part to be 2 ounces, then the recipe would be 2 ounces tequila, 4 ounces juice, and 2 ounce soda

Or if you wanted to make enough for a party, the recipe might look like this- 3 cups tequila, 6 cups juice, 3 cups soda

How to Make A Cranberry Margarita

First, get ready for a super delicious cocktail.

Now, on a flat plate make a mixture of salt and sugar. Here are your ratio options depending on how you like your margaritas garnished:

  • Sweet- all sugar
  • Sweet and Salty- half sugar, half salt
  • Little More Salty- ¾ salt and ¼ sugar
  • Super Salty- all salt

I prefer the “little more salty” option for my Margarita.

Take a cut lime wedge and run it around the rim of your glass. Now dip the glass into the sugar/salt mixture.

Cranberry Ginger Margarita in a glass with a lime and fresh cranberries, tequila and ginger beer in the background

Fill the glass with ice and add 1 part silver tequila, 1 part cranberry juice, and 1 part ginger beer. Garnish with a squeeze fresh lime and fresh cranberries. (To start you can measure 1 part as 2 ounces)

If you want a drink that isn’t quite as strong, make the Cranberry Margarita with 1 part silver tequila, 2 parts cranberry juice, and 2 parts ginger beer.

To Make A Pitcher

For a party, make a pitcher for people to pour their own drinks! Mix:

  • 1.5 cups silver tequila
  • 1.5 cups cranberry cocktail
  • 1.5 cups ginger beer

Delicious Tequila Cocktails

If you love this tequila cocktail definitely give these other two a try as well:

  • Cantarito
  • Ginger Margarita
  • Rosemary Paloma or Traditional Paloma
  • Grapefruit Margaritas (makes a pitcher)
  • Tequila Mule
  • Jalapeno Tequila

I hope you give this Cranberry Margarita a try at your next party, or Saturday night on the couch♥


Susie leaning on the kitchen counter

WATCH SUSIE ON FOOD NETWORK!

⭐⭐⭐⭐⭐

The new gameshow, 100 Cooks, premieres on Food Network June 7th, 2026 at 9est/8cst. I hope you will tune in!

Cranberry Margarita Recipe

cranberry ginger margarita in a glass with salt on the rim

Easy Cranberry Ginger Margarita

This Cranberry Ginger Margarita is a delicious blend of silver tequila, cranberry juice, and ginger beer. It is easy to make and makes an amazing party cocktail.
5 from 4 votes
Print Pin Rate Save Saved!
Prep Time: 5 minutes minutes
Cook Time: 0 minutes minutes
Servings: 1 drink
Calories: 176kcal
Author: Susie Weinrich

Ingredients

  • 1 part Silver Tequila
  • 1 part cranberry juice cocktail
  • 1 part Ginger Beer - I recommend Q Mixers
  • Garnishes- a squeeze of fresh lime juice, sugar & kosher salt (fresh cranberries are optional)

Instructions
 

  • On a flat plate make a mixture of kosher salt and sugar. Make this to your taste:
    All salt, all sugar, half & half, or ¾ salt and ¼ sugar.
  • Use a cut lime wedge and run it around the rim of your glass, now dip the glass rim in the sugar/salt mixture.
    Fill the glass with ice, pour in the tequila, cranberry juice, ginger beer, and a squeeze of fresh lime juice. Give it a stir.
    Garnish with fresh lime and fresh cranberries.
  • ** For a drink that isn’t quite as strong change the ratio to 1 part tequila, 2 parts cranberry juice, and 2 parts ginger beer.

Recipe Tips and Notes:

A “part” is a unit of measurement for drinks. You get to decide how much a “part” is. A good starting point:
2 ounces = 1 part
FOR A PITCHER: 
1.5 cups = 1 part
Ginger Margarita – for a more summery ginger drink try this Fresh Ginger Margarita
 
Did you make this recipe?Connect with me and let me know by commenting below!
Jump to Comments
Serving: 1margarita | Calories: 176kcal | Carbohydrates: 12g | Protein: 1g | Fat: 1g | Saturated Fat: 1g | Sodium: 6mg | Potassium: 44mg | Sugar: 12g | Vitamin C: 5mg

Originally Posted December 2018 – Copy Updated December 2020

  • « Previous Page
  • 1
  • …
  • 41
  • 42
  • 43
  • 44
  • 45
  • …
  • 65
  • Next Page »
Susie in the kitchen with an apron on getting ready to cook

Meet The Author:

Susie Weinrich is a professional recipe developer specializing in classic Midwest cooking, recently seen on Food Network's 100 Cooks. Her thoroughly tested recipes and step-by-step guides give home cooks real confidence in the kitchen.

YOU will feel like a huge success at dinner time with any of the simple recipes on Mom's Dinner! Read More

Helpful Meal Planning Resources

  • a table with white place settings and green garland
    Easy Meals for House Guests
  • a round table with a large family eating dinner
    30 Easy Meals for Large Family Vacations & Gatherings
woman owned small business certificate by Sertify

Amazing New Recipes

  • Scoop of broccoli cheese casserole coming out of a baking dish.
    Down Home Broccoli and Cheese Casserole
  • Close up of a fresh made fried pork tenderloin sandwich topped with onion rings, pickles, horseradish mayo and lettuce.
    Iowa Fried Pork Tenderloin Sandwiches
  • two kids jumping in a lake off the dock at sunset
    Dinners for a Week at the Lake House
  • Tuna Noodle Casserole in a white dish being spooned out of the baking pan
    Mom’s Tuna Noodle Casserole

Footer

^ back to top

About

  • Susie Weinrich
  • Privacy Policy
  • Accessibility Policy

Contact

  • Sign Up! for emails
  • Contact Me!
  • Join Me On YouTube

Recipes

  • Recipe By Category
  • Instant Pot Recipes
  • Dinner Recipes

Copyright © 2026 Mom's Dinner

Rate & Review This Recipe

Your vote:


A rating is required
A name is required
An email is required