Mom's Dinner

  • Home
  • All Recipes
  • Instant Pot
    • All Instant Pot Recipes
    • Instant Pot Soup
    • Instant Pot Beef
    • Instant Pot Chicken
    • Instant Pot Pork
    • Instant Pot Turkey
    • Instant Pot Pasta
    • Instant Pot Vegetarian
  • Dinner
    • Beef
    • Chicken
    • Pork
    • Turkey
    • Fish & Seafood
    • Mexican
    • Pasta
    • Vegetarian
  • Subscribe
menu icon
go to homepage
  • RECIPES
  • DINNER
  • ABOUT
  • SUBSCRIBE

subscribe
search icon
Homepage link
  • RECIPES
  • DINNER
  • ABOUT
  • SUBSCRIBE

ร—
You are here: Home

Cranberry Wine Spritzer

November 21, 2018 by Susie Weinrich 4 Comments

cranberry wine spritzer in a glass garnished with cranberries and a bucket of ice

Cranberry Wine Spritzer is a light effervescent cocktail with hints of cranberry. It is refreshing, sparkling, and a little sweet.  This drink makes a perfect cocktail for a brunch, lunch, or just a Friday afternoon get together.

two glasses of cranberry white wine spritzers garnished with fresh cranberries, a bowl of cranberries and an ice bucket in the background

It would also be a great light cocktail to serve during the Holidays. The light cranberry flavor is the perfect match for the season. Float a few frozen cranberries in the glass to make it extra festive.

[Read more…]

Oatmeal with Fruit

November 19, 2018 by Susie Weinrich 6 Comments

a black bowl filled with oatmeal with fruit, milk and nuts

This recipe for Oatmeal is absolutely loaded with fruits, nuts and spices. It is a great alternative to the standard egg breakfast. It is also a great option if you are entertaining guests at breakfast time.

two bowls of oatmeal loaded with fruit and nuts

The oats are cooked on the stove top with fresh apples, sweet cinnamon, crunchy pecans, and dried fruit. The oatmeal is simmered with half milk and half water to give it an extra creamy texture. The whole recipe is ready in about 15 minutes.

Best Oatmeal Recipe for House Guests

When you are entertaining weekend house guests, sometimes planning all the meals can feel a little overwhelming.

We all turn to eggs dishes as an easy breakfast option, but if guests are staying for multiple days you do not want to serve the same thing morning after morning. That is when you need recipes like Oatmeal with Fruit and Nuts.

What to Serve with Oatmeal Breakfast

Serve this Oatmeal with a little extra sugar, honey, brown sugar, and milk on the side for everyone to doctor it up just how they like.

a pot full of cooked oatmeal with cranberries, apples and nuts

I don’t think that an additional side, besides coffee, is totally necessary. However, if you want a little protein on the side, bacon, sausage patties or links and some coffee cake muffins would be great!

Variations on Oatmeal with Fruit

This recipe can be customized to suit you and your family or guests. Here are a few ideas to get you started:

  • Switch up the dried fruit that you add: dried apricots, dried cherries, and/or dried blueberries would all be delicious.
  • To make the oatmeal a little creamier use half and half instead of 2% milk.
  • Stir fresh cut bananas in right before serving for an extra flavor.
  • Try different nuts like pepitas, walnuts, pistachios, or almonds.
apples and raisins in a bowl

More Delicious Breakfast Recipes to Check Out

  • Scoop of broccoli cheese casserole coming out of a baking dish.
    Down Home Broccoli and Cheese Casserole
  • Close up of a fresh made fried pork tenderloin sandwich topped with onion rings, pickles, horseradish mayo and lettuce.
    Iowa Fried Pork Tenderloin Sandwiches
  • two kids jumping in a lake off the dock at sunset
    Dinners for a Week at the Lake House
  • Tuna Noodle Casserole in a white dish being spooned out of the baking pan
    Mom’s Tuna Noodle Casserole

Susie leaning on the kitchen counter

WATCH SUSIE ON FOOD NETWORK!

โญโญโญโญโญ

The new gameshow, 100 Cooks, premieres on Food Network June 7th, 2026 at 9est/8cst. I hope you will tune in!

a black bowl filled with oatmeal with fruit, milk and nuts

Breakfast Oatmeal | Oatmeal with Fruit!

A great oatmeal recipe made with milk, a lot of fruit, nuts, and spices. Delicious enough for breakfast with company.  
5 from 4 votes
Print Pin Rate Save Saved!
Prep Time: 10 minutes minutes
Cook Time: 5 minutes minutes
Total Time: 15 minutes minutes
Servings: 6 people
Calories: 304kcal
Author: Susie Weinrich

Equipment

  • large pot

Ingredients

  • 2 cups water
  • 2 cups milk - 2% or whole
  • 2 tablespoon brown sugar
  • ยผ teaspoon salt
  • 1 teaspoon cinnamon
  • pinch of clove & allspice (optional)
  • ยฝ cup dried cranberries
  • ยฝ cup raisins
  • 2 cups quick cooking oatmeal
  • 1 cup diced fresh apples, skin on - about ยฝ inch dice
  • ยฝ cup chopped pecans
  • ยฝ teaspoon vanilla

Instructions
 

  • In a large sauce pot, over medium heat, bring the water, milk, salt, brown sugar, cinnamon, cranberries, raisins, and option clove/allspice to a light boil.ย 
  • Once the mixture boils stir in the oatmeal and apples. Turn the heat down to low. Let the oatmeal cook for 2-3 minutes, stirring occasionally.ย 
  • Remove from the heat and stir in the chopped pecans and vanilla.ย 
  • Serve immediately with extra milk, brown sugar, and honey on the side.

Storing & reheating

  • Store leftovers in the fridge for up to 3 days. It will congeal in the fridge!
  • To reheat place on the stove top over medium low heat. Add some milk to reconstitute.
  • Keep on the heat stirring occasionally until heated through, about 4-5 minutes.

Recipe Tips and Notes:

VARIATION IDEAS:ย 
  • Switch up the dried fruit that you add: dried apricots, dried cherries, and/or dried blueberries would all be delicious.
  • To make the oatmeal a little creamier use half and half instead of 2% milk.
  • Stir fresh cut bananas in right before serving for an extra flavor.
  • Try different nuts like pepitas, walnuts, pistachios, or almonds.
Did you make this recipe?Connect with me and let me know by commenting below!
Jump to Comments
Serving: 1serving | Calories: 304kcal | Carbohydrates: 48g | Protein: 8g | Fat: 11g | Saturated Fat: 2g | Polyunsaturated Fat: 3g | Monounsaturated Fat: 5g | Cholesterol: 10mg | Sodium: 138mg | Potassium: 387mg | Fiber: 6g | Sugar: 18g | Vitamin A: 149IU | Vitamin C: 2mg | Calcium: 135mg | Iron: 2mg

Simple Savory Mashed Sweet Potatoes

November 15, 2018 by Susie Weinrich 6 Comments

A bowl of sweet potato mash

Savory Mashed Sweet Potatoes are the such a delicious side dish, especially perfect for a Holiday Meal. The problem with most mashed sweet potato recipes is that they are WAY TOO sweet! So with this recipe you are going to ROAST the sweet potatoes to develop their natural sweetness and then add amazing savory ingredients like roasted garlic and balsamic vinegar to balance the flavor!

Savory Mashed Sweet Potatoes in a large bowl with a pat of butter on top

This is going to be your new go-to sweet potato mash recipe!

If you are an Instant Pot lover, then you must check out this similar recipe for Instant Pot Mashed Sweet Potatoes.

If you are a visual learner you can pop over and watch these Savory Sweet Potatoes being made on Pinterest TV.

Why This Recipe Works

Number ONE is that the flavors are balanced. You have the sweetness of sweet potatoes, and to round out that sweetness we add just a touch of brown sugar, then you add the deep & warm flavor of roasted garlic, the creaminess of milk and butter, and finish with the tanginess of balsamic vinegar.

It is truly a completely balanced flavored savory mashed sweet potatoes recipe!!

Number TWO is that you are roasting the potato instead of boiling. The roasting develops a much deeper and more robust flavor in the potato. You are going to love how it changes this side dish.

Number THREE it is not a sickly sweet potato recipe that can overpower your dinner and feel like you are eating dessert at the wrong time! It compliments a savory and rich dinner menu perfectly.

Ingredients

Besides the 3 pounds of sweet potatoes you just need a few simple ingredients that you probably already have in your kitchen:

savory sweet potato mash ingredients: butter, brown sugar, balsamic vinegar, garlic, and kosher salt
  • olive oil
  • small head of garlic
  • brown sugar
  • salted butter
  • milk or half & half
  • balsamic vinegar
  • kosher salt

Step By Step Instructions

We are ROASTING the sweet potatoes instead of boiling them. So start by preheating your oven to 400 degrees and grab a large rimmed baking sheet.

Cut the sweet potatoes in half, lengthwise. Lay them cut side up on the baking pan and drizzle with 3 tablespoons of olive oil.

a sheet pan with sweet potatoes cut in half lengthwise
Sweet Potatoes Cut Lengthwise
a piece of foil with a head of garlic that has the very top cut off
Garlic Packet for Roasting

Then cut the very top off of the small head of garlic. Place in a little piece of foil, drizzle with a little olive oil and close the packet up. Tuck the garlic packet in the side of the pan with the sweet potatoes.

Pop that all in the oven a roast for 20 minutes, then flip the potatoes over. Put back in the oven and continue to roast another 20 minutes.

At the end of the roasting time make sure the potatoes are completely cooked by piercing them with a fork, if they are soft all the way thru pull them out of the oven. If they are not, keep cooking for 5 more minutes (but pull the garlic packet out).

sweet Potatoes that have been roasted perfectly

Let the potatoes cool for a few minutes before handling them. If you need to get them done right away, fold a paper towel or a clean kitchen towel into your hand to hold the hot potatoes.

Scoop or squeeze the cooked sweet potatoes from the skins, discard the skins. Also squeeze the garlic head so the soft cloves slip out of the peel into the sweet potatoes, discard the peel.

Add in the butter, milk, brown sugar, kosher salt and balsamic vinegar in with the potatoes.

Using a potato masher or a hand held mixer, mash/mix the sweet potatoes until they are to your desired consistency (smooth to a little chunky). OR try using your food processor for really smooth and creamy sweet potato puree!

Give them a taste for your preference…

  • To make them sweeter add a little more brown sugar or maple syrup.
  • If you want them a little saltier, add a couple pinches of kosher salt, or top with Maldon Flake Sea Salt.
  • To add more warmth or depth of flavor drizzle in a little more balsamic vinegar.

Now they are ready to serve! Scoop into a serving dish and make swoops and swooshes with the back of a spoon.

A bowl of sweet potato mash

To garnish (optional) add a big pat of butter to the top, sprinkle on some Maldon Flake Sea Salt, and chopped fresh parsley.

Variations

I think that these savory roasted sweet potatoes are excellent just how they are. But, if you want to change it up just a bit, here are some ideas to get you started:

  • Use half and half or heavy whipping cream for a creamier flavor
  • Cut the fat by using extra virgin olive oil instead of butter
  • Add chopped herbs: fresh thyme, rosemary, or chives.
  • Add fresh grated Parmesan cheese to add a great layer of flavor

More Sweet Potato Recipes

If you always have a few sweet potatoes on hand in your kitchen, you will love these other sweet potato dishes too.

  1. Quinoa Sweet Potato Chili
  2. BBQ Chicken with Sweet Potatoes and Peppers
  3. Southwest Sweet Potato & Turkey Bowl
  4. Instant Pot Mashed Sweet Potatoes

More Mashed Potato Recipes To Love!

  • A large serving bowl of Yukon Gold Mashed Potatoes topped with melting butter
    The BEST Yukon Gold Mashed Potatoes
  • mashed sweet potatoes topped with butter and cinnamon sprinkled on top
    Instant Pot Mashed Sweet Potatoes
  • mashed potatoes in a bowl
    Best Instant Pot Mashed Potatoes

Susie leaning on the kitchen counter

WATCH SUSIE ON FOOD NETWORK!

โญโญโญโญโญ

The new gameshow, 100 Cooks, premieres on Food Network June 7th, 2026 at 9est/8cst. I hope you will tune in!

A bowl of sweet potato mash

Savory Mashed Sweet Potatoes Recipe + Video

A delicious mashed sweet potato side dish that is made of roasted sweet potatoes mixed with savory ingredients like roasted garlic and balsamic vinegar. It is a perfectly balanced sweet potato dish that isn't overly sweet!
5 from 6 votes
Print Pin Rate Save Saved!
Prep Time: 10 minutes minutes
Cook Time: 35 minutes minutes
Total Time: 45 minutes minutes
Servings: 6 people
Calories: 337kcal
Author: Susie Weinrich

Equipment

  • Large rimmed baking sheet

Ingredients

  • 3 lbs. sweet potatoes - washed and cut in half lengthwise
  • 3 tablespoon olive oil - plus 1 teaspoon for the garlic
  • 1 small head of garlic
  • 1 tablespoon brown sugar
  • 4 tablespoon salted butter
  • 1 tablespoon milk
  • 2 teaspoon balsamic vinegar
  • 1 teaspoon kosher salt

Optional Garnish

  • large pat of butter
  • Maldon Flake Sea Salt - Can be found at Amazon Here.
  • fresh chopped parsley

Instructions
 

Roasting the Sweet Potatoes

  • Preheat the oven to 400 degrees. Grab a 9×13 or larger rimmed baking sheet
  • Cut the sweet potatoes in half lengthwise, and place cut side up on the baking sheet.
    Drizzle with the olive oil.
    3 lbs. sweet potatoes, 3 Tbsp olive oil
  • Cut the very top off the head of garlic, just so you can see the inside of all the cloves.
    Place in a small piece of foil and drizzle with 1 teaspoon olive oil. Close the foil around the garlic, then place on the baking sheet with the potatoes.
    1 small head of garlic
  • Roast the potatoes and garlic for 20 minutes, then flip the potatoes over. Pop back in the oven and roast an additional 20 minutes.
    Pro Tip: make sure the potatoes are cooked all the way through by piercing with a fork, you shouldn't meet any resistance past the skin of the potato.
    If they need to cook longer, put them back in the oven for 5 minute increments, BUT REMOVE THE GARLIC from the pan to avoid burning.

Mashing – potato masher, hand held mixer or food processor

  • Let the potatoes cool for a few minutes before handling. With a spoon scoop the potato from the peel into a mixing bowl, discard the peel.
    You may also be able to just squeeze the potato and the flesh will fall out of the skins!
    Pro Tip: If the potatoes are still hot fold a towel in your hand to hold them.
  • Give the head of garlic a squeeze and all the roasted, soft garlic should squeeze out into the mixing bowl with the potatoes. Discard the garlic peels.
  • Add the butter, brown sugar, kosher salt, balsamic vinegar, and milk.
    Pro Tip: if your potatoes are no longer warm/hot, you may want to melt the butter at this point.
    1 Tbsp brown sugar, 4 Tbsp salted butter, 1 Tbsp milk, 1 tsp kosher salt, 2 tsp balsamic vinegar
  • With a potato masher or hand held mixer blend the potatoes until they are your desired consistency.
    OR you can puree in a food processor, pulse a few times and then run until they are smooth and creamy.

Troubleshooting Flavor

  • You want these to be a stand out savory side dish, with just the right amount of sweetness. I highly recommend you give them a taste before serving:
    + To make them sweeter add a little more brown sugar or maple syrup.
    + If you want them a little saltier, add a couple pinches of kosher salt, or top with Maldon Flake Sea Salt.
    + To add more warmth or depth of flavor drizzle in a little more balsamic vinegar.

Serving

  • Spoon into a large serving bowl.
    Optionally garnish with a large pat of butter, Maldon flake sea salt, and fresh chopped parsley.

Storing

  • Store any leftovers in an airtight container for up to 4 days.

Recipe Tips and Notes:

VIDEO: You can also watch these Savory Mashed Sweet Potatoes being made on this episode on PIN TV.
INSTANT POT: You can make a similar recipe in your electric pressure cooker- pop over to this recipe for Instant Pot Mashed Sweet Potatoes.
Did you make this recipe?Connect with me and let me know by commenting below!
Jump to Comments
Serving: 1serving | Calories: 337kcal | Carbohydrates: 48g | Protein: 4g | Fat: 15g | Saturated Fat: 6g | Polyunsaturated Fat: 1g | Monounsaturated Fat: 7g | Trans Fat: 0.3g | Cholesterol: 21mg | Sodium: 575mg | Potassium: 781mg | Fiber: 7g | Sugar: 12g | Vitamin A: 32417IU | Vitamin C: 6mg | Calcium: 80mg | Iron: 1mg

No-Bake Almond Joy Cookies

November 14, 2018 by Susie Weinrich 11 Comments

no bake almond joy cookies on parchment paper

Sometimes you feel like a nut, sometimes you don’t. Almond Joy’s got nuts, Mounds don’t.

Anyone remember that jingle?!

all clad pot of melted chocolate with an almond joy cookie in the middle

For this recipe I felt like a nut, because I love that salty almond flavor in my No Bake Almond Joy Cookies!

[Read more…]

Hearty Instant Pot Chicken & Rice Soup

November 13, 2018 by Susie Weinrich 12 Comments

Chicken and Wild Rice Soup in a bowl with a spoon

This is a delicious and easy recipe for Instant Pot Chicken & Rice Soup. So simple that it makes a perfect weeknight dinner. This Instant Pot soup recipe has a flavorful broth with tender pieces of chicken and wild rice blend. Cream of mushroom soup and milk are added at the end to make it nice and creamy.

two bowls of chicken and rice soup with spoons and crackers

If you love a soup with wild rice blend also check out this Instant Pot Creamy Wild Rice Soup.

Ingredients

Just a few simple ingredients come together to make this delicious soup recipe. Here are some tips on a few ingredients:

Wild Rice Blend – You will want to use a wild rice blend, not true wild rice. The recipe is written to cook this type of rice. A true wild rice takes much longer to cook. We really like the Royal Blend Rice Blend – see the photo below.

wild rice blend from Royal Blend Rice Select

Chicken – You will want to use boneless skinless chicken breasts for this Instant Pot Chicken and Wild Rice Soup recipe. As always I recommend using an air chilled chicken as it is really good quality and consistent texture.

The nice thing is you can use fresh or frozen chicken for this recipe!

Chicken Base – This ingredient makes all the difference. It adds amazing chicken flavor to the broth. You can find it in the soup aisle at the grocery store. It is a paste form and comes in a jar or tub. We prefer the “Better Than Bouillon” Brand.

Turmeric – This is an ingredient that is also added to this AMAZING Homestyle Chicken Noodle Soup (highly recommend you check it out!!!). The turmeric adds a nice earthy depth of flavor. It also is considered an anti-inflammatory, especially when eaten with black pepper.

Step by Step Instructions

This recipe is pretty simple to make thanks to the Instant Pot!

  1. Sautรฉ the onions, carrots and celery in a little oil.
  2. Add the seasonings and chicken base, stir around the pot.
  3. Deglaze the bottom of the pot with the chicken broth.
  4. Add in the mushrooms, rice and chicken.
  5. Pressure cook for 12 minutes (14 minutes for frozen chicken).
  6. Quick Release
  7. Shred or chop chicken.
  8. Stir together the milk and cream of mushroom soup, whisk into the soup.
  9. Serve.

Serving

This is not an entertaining recipe, just a great weeknight family dinner recipe. But, it does make an excellent soup for a meal train!

Since this soup recipe already has your starch, protein, and veggies I would keep any side dishes simple.

Instant Pot full of chicken and rice soup

A raw veggie tray with dip or green side salad and saltine crackers or warm ciabatta or sour dough complete this meal perfectly.

More Instant Pot Soup Recipes

If you love making soup in your Instant Pot, save some of these recipes for dinner tomorrow night:

  • a bowl of zuppa toscana with a spoon
    Instant Pot Zuppa Toscana
  • a bowl of chicken chili topped with sour cream and two limes
    30 Minute Instant Pot Chicken Chili
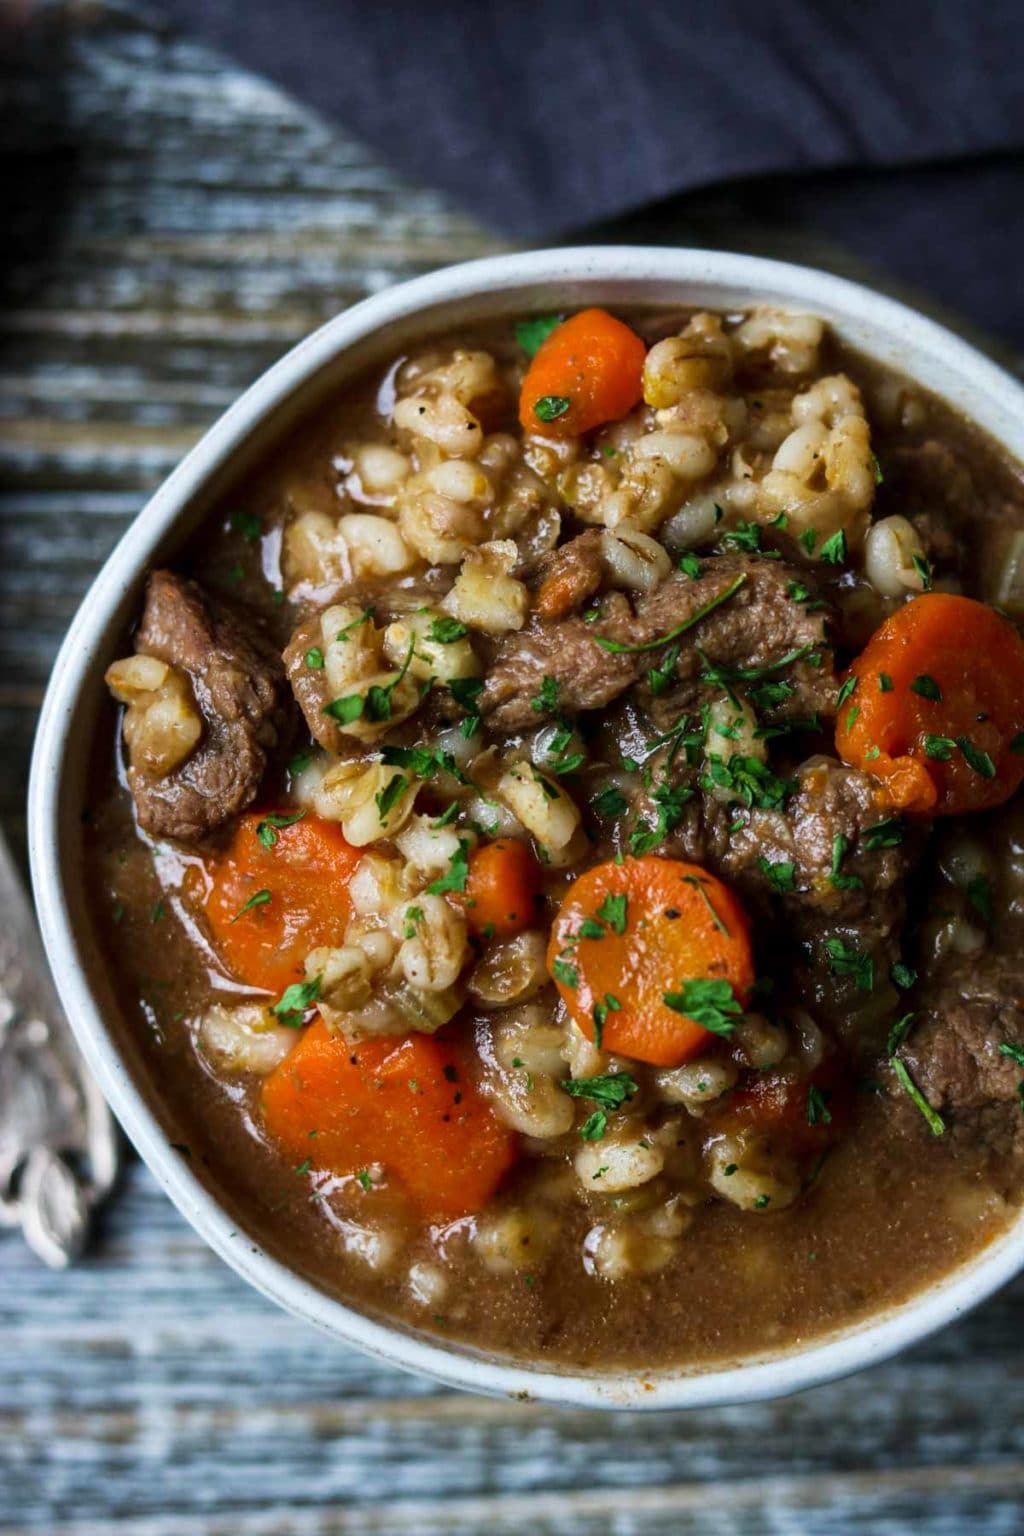
  • a bowl of Instant Pot Beef and Barley Soup
    Instant Pot Beef and Barley Soup
  • a ladle full of hamburger soup over the instant pot
    Easy Instant Pot Hamburger Soup

Susie leaning on the kitchen counter

WATCH SUSIE ON FOOD NETWORK!

โญโญโญโญโญ

The new gameshow, 100 Cooks, premieres on Food Network June 7th, 2026 at 9est/8cst. I hope you will tune in!

Chicken and Wild Rice Soup in a bowl with a spoon

Instant Pot Chicken and Rice Soup Recipe

A hearty and slightly creamy Chicken & Rice Soup made in the Instant Pot. This is an easy weeknight family dinner recipe because it can be made with frozen chicken breast and is ready in under 30 minutes. No thawing or planning required!
4.94 from 16 votes
Print Pin Rate Save Saved!
Prep Time: 10 minutes minutes
Cook Time: 14 minutes minutes
Total Time: 24 minutes minutes
Servings: 5 people
Calories: 286kcal
Author: Susie Weinrich

Equipment

  • Instant Pot or Electric Pressure Cooker

Ingredients

  • 1 tablespoon oil
  • 1 cup yellow or white onion - diced
  • 1 cup carrots - sliced or diced
  • 1 cup mushrooms - sliced (baby bella, button or cremini mushrooms)
  • 2 celery stalks - chopped
  • 3 plump garlic cloves - minced
  • 1 teaspoon fresh rosemary or thyme - minced
  • ยพ teaspoon kosher salt
  • ยฝ teaspoon each: garlic powder and onion powder
  • ยผ teaspoon turmeric powder
  • ยผ teaspoon black pepper
  • 2 teaspoon chicken base - Better Than Bouillon is a great brand
  • 32 oz chicken stock or broth
  • 2 fresh or frozen boneless skinless chicken breasts
  • 1 cup wild rice blend -
  • 10.5 oz can cream of mushroom soup
  • ยฝ cup milk - can use half & half for a creamier soup

Instructions
 

  • With the Instant Pot on sautรฉ mode add the oil and soften the onions, garlic, celery, and carrots for 5 minutes.ย 
    1 tbsp oil, 1 cup yellow or white onion, 1 cup carrots, 2 celery stalks, 3 plump garlic cloves
  • Add the mushrooms, seasonings and chicken base. Stir to combine.
    1 cup mushrooms, ยพ tsp kosher salt, ยฝ tsp each: garlic powder and onion powder, ยผ tsp turmeric powder, ยผ tsp black pepper , 2 tsp chicken base , 1 tsp fresh rosemary or thyme
  • Turn off the sautรฉ mode. Pour in the chicken broth, add the chicken breasts, and wild rice.ย 
    32 oz chicken stock or broth, 2 fresh or frozen boneless skinless chicken breasts , 1 cup wild rice blend
  • Set the Instant Pot to cook for 12 minutes (fresh chicken) OR 14 minutes (frozen chicken).
    Pro Tip: if using frozen chicken make sure your breasts are not frozen together, they will not cook through if they are in one clump.
  • While that cooks, whisk together the cream of mushroom soup and milk. Set aside.
    10.5 oz can cream of mushroom soup, ยฝ cup milk
  • Once the soup is done cooking do a quick release.
  • Remove the chicken with a pair of tongs and chop or shred into bite size pieces. Then add back to the soup.
  • Stir the mushroom soup/milk mixture into the soup.
  • Serve warm with saltine crackers or warm crusty bread on the side.

Storing

  • Store leftovers in an air tight container in the fridge for up to 4 days.
  • Reheat on the stove top or in the microwave.

Recipe Tips and Notes:

Side Dish Ideas:
  • Veggie Tray with Ranch or Blue Cheese Dip
  • Green Salad with Vinaigrette
  • Warm Ciabatta or Sour Dough
  • Saltine Crackers
ย 
Did you make this recipe?Connect with me and let me know by commenting below!
Jump to Comments
Serving: 1serving | Calories: 286kcal | Carbohydrates: 36g | Protein: 20g | Fat: 7g | Saturated Fat: 2g | Polyunsaturated Fat: 1g | Monounsaturated Fat: 3g | Trans Fat: 0.02g | Cholesterol: 39mg | Sodium: 1721mg | Potassium: 656mg | Fiber: 4g | Sugar: 6g | Vitamin A: 4348IU | Vitamin C: 5mg | Calcium: 71mg | Iron: 2mg

Best Scotcheroos Recipe

November 7, 2018 by Susie Weinrich 9 Comments

scotcheroos cut into squares

Scotcheroos actually come from where I grew up in Iowa, so you know this recipe is the OG. Around the Midwest they're practically a cult classic!! If you grew up around the Midwest, you know exactly what happens when a pan of Scotcheroos shows up… Someone lifts the foil and immediately says, "Who made Scotcheroos!?!" Then they disappear faster than you made them.

scotcheroo bars cut into squares

If you’ve never had a Scotcheroos, you are in for a treat! They are a classic midwestern dessert made with a base of chewy peanut butter Rice Krispy treats that are topped with a creamy chocolate and butterscotch spread. If you need a no-bake dessert that EVERYONE will absolutely love, this Scotcheroo recipe is it!

Made these recently for our family Thanksgiving and everyone raved! They're just like my grandma's! Thank you! – Lauren

[feast_advanced_jump_to]

Why You’ll Love This Recipe

This is the ORIGINAL MIDWEST Scotcheroo Recipe from Iowa – no changes, no substitutions, no additions!

Just like your Grandma or your Mom made.

They are very easy to make and everyone LOVES them!

Chocolate, peanut butter, and a touch of butterscotch is such a great combo.

What Are Scotcheroos

Scotcheroos are a peanut butter Rice Krispy treat topped with a chocolate and butterscotch. It is a dessert or treat that you will commonly find in the Midwest.

The name Scotcheroo comes from one of the ingredients- butterscotch chips that are melted with chocolate chips and spread across the top. They were originally printed on the back of a box of Rice Krispies in the 1960’s.

a piece of parchment paper with Scotcheroos and a glass of milk

They are made by mixing puffed rice cereal with a melted mixture of sugar, corn syrup, and peanut butter. It is then topped with a mix of melted chocolate chips and butterscotch chips. The bars are cut in squares and served as dessert.

6 Simple Ingredients for Scotcheroo Bars

You only need 6 ingredients to make these bars; 4 for the actual bars and 2 for the topping. If you have a well stocked baking cabinet and pantry you may have everything you need to make Scotcheroos!

Puffed Rice Cereal – this is basically Rice Krispies cereal, but any store brand will work. It is very important that you measure the puffed rice cereal exactly. If you over measure they will be too dry… if anything undermeasure.

Sugar – White sugar is what you need here, you will melt this into the corn syrup and peanut butter.

Corn Syrup – Make sure you get light corn syrup. I have had people use honey in it’s place and have reported no issues, but I have not tested that.

Creamy Peanut Butter – Any brand will do.

Semi-Sweet Chocolate Chips – The chocolate chips melt perfectly with the butterscotch chips for a great topping!

Butterscotch Chips – Don’t worry, your Scotcheroos don’t really taste like butterscotch. It just gives the topping a little depth of sweetness.

Thicker or Thinner Bars

There are two options when making this recipe (the Scotcheroos pictured in this post were made in a 9×13 pan.);

  • 9×9 pan = thicker bars: This is a great option when you don’t need a lot of bars and you want a more indulgent treat.
  • 9×13 pan = thinner or smaller bars: This is a good option when Scotcheroos are part of a larger dessert display (Christmas cookie platter). You can cut them into smaller bite sized pieces.

At my house during the holidays, we always make Scotcheroos in a big 9ร—13 pan and just leave them on the counter (with a knife in the pan). That way everyone can walk by, slice off a little square treat, throughout the day. Somehow those "little pieces" add up fast, and before you know it the whole pan has disappeared.

How To Make Scotcheroos

If you are not a master baker then this is a super easy dessert bar to make. They make a great dessert for pot lucks, holidays, or gift giving (everyone loves a Scotcheroo). It would also be a great dessert to take for a Meal Train.

karo syrup, sugar and peanut butter in a pot

Step 1

Combine the corn syrup and sugar in a sauce pan over low- medium/low heat.

Let the sugar mixture warm on the stove top for a few minutes until the sugar dissolves. Off the heat stir in the peanut butter.

MOM’S TIP: Do not let the sugar mixture come to a rolling boil or your bars will be hard as a rock!

karo syrup, sugar and peanut butter in a pot

Step 2

Slowly stir in the puffed rice cereal by stirring in a cup at a time.

MOM’S TIP: Measure the puffed rice cereal well… don’t add extra or the bars will be dry. If anything add scant cups.

peanut butter rice krispies in a 9x13 pan

Step 3

Prepare your pan with non-stick spray. Pour the puffed rice cereal mixture into the pan and press into even layer.

MOM’S TIP: Wet your hands to press the mixture into the pan. By using wet hands the sticky cereal mixture will not stick to your hands.

chocolate and butterscotch melted in a pot

Step 4

Melt the chocolate chips and butterscotch chips together in a sauce pan over medium low heat, stirring constantly.

MOM’S TIP: Don’t overheat the chocolate chips or the chocolate will “break” and become gritty.

scotcheroo bars with frosting over top

Step 4

Spread over the bars and let cool and set before slicing.

MOM’S TIP: These are pretty rich, so I recommend cutting them in smaller squares than shown here. Cutting them into 20 squares makes a good size.

Storing

Store your Scotcheroos at room temp, covered for up to a week. But they will not last that long, promise!

Freezing

You can freeze your Scotcheroos as a block or cut into squares. Wrap in plastic wrap and foil or place in a freezer safe container. Keep for up to 3 months. Thaw at room temp before eating.

two rows of Scotcheroos

Scotcharoo Recipe Tips

  • Do not boil the sugar and corn syrup together or the Rice Krispy Bars will be tough as nails.
  • For thicker bars make this dessert in a 9×9 pan.
  • This is a rich dessert so cut it into smaller squares than you would with traditional Rice Krispy Treats.

More CLassic Dessert Bar Recipes

  • pile of three pieces of cake with a bite taken out of the top piece
    Homemade Chocolate Sheet Cake & Chocolate Frosting
  • pumpkin bar on a plate
    Pumpkin Bars with Cream Cheese Frosting
  • a piece of apple pie bar recipe on parchment paper, drizzled with vanilla glaze
    Apple Pie Bar Recipe
  • a few slices cut out of a pan of frosted banana bars
    Old Fashioned Frosted Banana Bars

Susie leaning on the kitchen counter

WATCH SUSIE ON FOOD NETWORK!

โญโญโญโญโญ

The new gameshow, 100 Cooks, premieres on Food Network June 7th, 2026 at 9est/8cst. I hope you will tune in!

scotcheroos cut into squares

Original Scotcheroos Recipe

This is the ORIGINAL recipe for Scotcheroo Bars, straight from Iowa. Peanut butter Rice Krispie treats are topped with a delicious chocolate and butterscotch frosting. They are irresistible!
5 from 7 votes
Print Pin Rate Save Saved!
Prep Time: 20 minutes minutes
Total Time: 20 minutes minutes
Servings: 20 squares
Calories: 313kcal
Author: Susie Weinrich

Equipment

  • 9×13 baking dish or can use an 8×8 or 9×9 for thicker bars
  • non-stick spray or oil

Ingredients

  • 1 cup light corn syrup - (Karo Syrup)
  • 1 cup sugar
  • 1 cup smooth peanut butter
  • 6 cups puffed rice cereal - (Rice Krispies)

Frosting

  • 1 ยฝ cups semi-sweet chocolate chips
  • 1 ยฝ cups butterscotch chips

Instructions
 

  • Prepare a 9×13 pan by spraying it with non stick spray or rubbing it with oil.
    (or use an 8×8 or 9×9 pan for thicker bars)
  • In a large sauce pot, over low to medium-low heat, warm the corn syrup and sugar together, about 3-4 minutes, until the sugar granules are dissolved.ย 
    MOM'S TIP: Do not let the sugar mixture boil or your bars will be hard as a rock!
    1 cup light corn syrup, 1 cup sugar
  • Off the heat stir in the smooth peanut butter until it is completely incorporated.
    1 cup smooth peanut butter
    karo syrup, sugar and peanut butter in a pot
  • Stir in the rice cereal, one cup at a time.
    MOM'S TIP: Measure the puffed rice cereal well… don't add extra or the bars will be dry. If anything add scant cups.
    6 cups puffed rice cereal
  • Pour the mixture into the prepared 9×13 pan. With clean hands press the cereal mixture evenly into the pan.
    MOM'S TIP: wet your hands and the sticky cereal mixture will not stick to your hands.
    peanut butter rice krispies in a 9x13 pan
  • On the stove top in a small pot, over medium-low heat melt the chocolate chips and butterscotch chips together, stirring constantly.
    MOM'S TIP: Do not over heat the chocolate or it will "break" and become gritty.
    1 ยฝ cups semi-sweet chocolate chips, 1 ยฝ cups butterscotch chips
    chocolate and butterscotch melted in a pot
  • Spread the melted chocolate/butterscotch over the cereal bars.
    Let the topping set up at least an hour before cutting.
    scotcheroo bars with frosting over top
  • Cut the bars into squares for serving.
    This is a very rich dessert bar so cut them into smaller squares, approx. 20 bars.

Storing

  • Keep the Scotcheroo Bars covered at room temp for up to 5 days… but I can promise you they won't last that long.

Freezing

  • Wrap in plastic wrap and foil or place in a freezer safe container. Keep for up to 3 months. Thaw at room temp before eating.

Recipe Tips and Notes:

Storing : Store leftover bars (if you have any!!) at room temp in a covered container for up to a week.
Freezing:ย You can freeze your Scotcheroos as a block or in squares, wrap in plastic wrap and foil or place in freezer safe container for up to 3 months. Thaw at room temp before serving.
Did you make this recipe?Connect with me and let me know by commenting below!
Jump to Comments
Serving: 1bar | Calories: 313kcal | Carbohydrates: 49g | Protein: 4g | Fat: 12g | Saturated Fat: 5g | Polyunsaturated Fat: 2g | Monounsaturated Fat: 5g | Trans Fat: 0.01g | Cholesterol: 2mg | Sodium: 117mg | Potassium: 157mg | Fiber: 2g | Sugar: 40g | Vitamin A: 20IU | Calcium: 18mg | Iron: 1mg

Instant Pot Chicken & Stuffing with Gravy

November 6, 2018 by Susie Weinrich 7 Comments

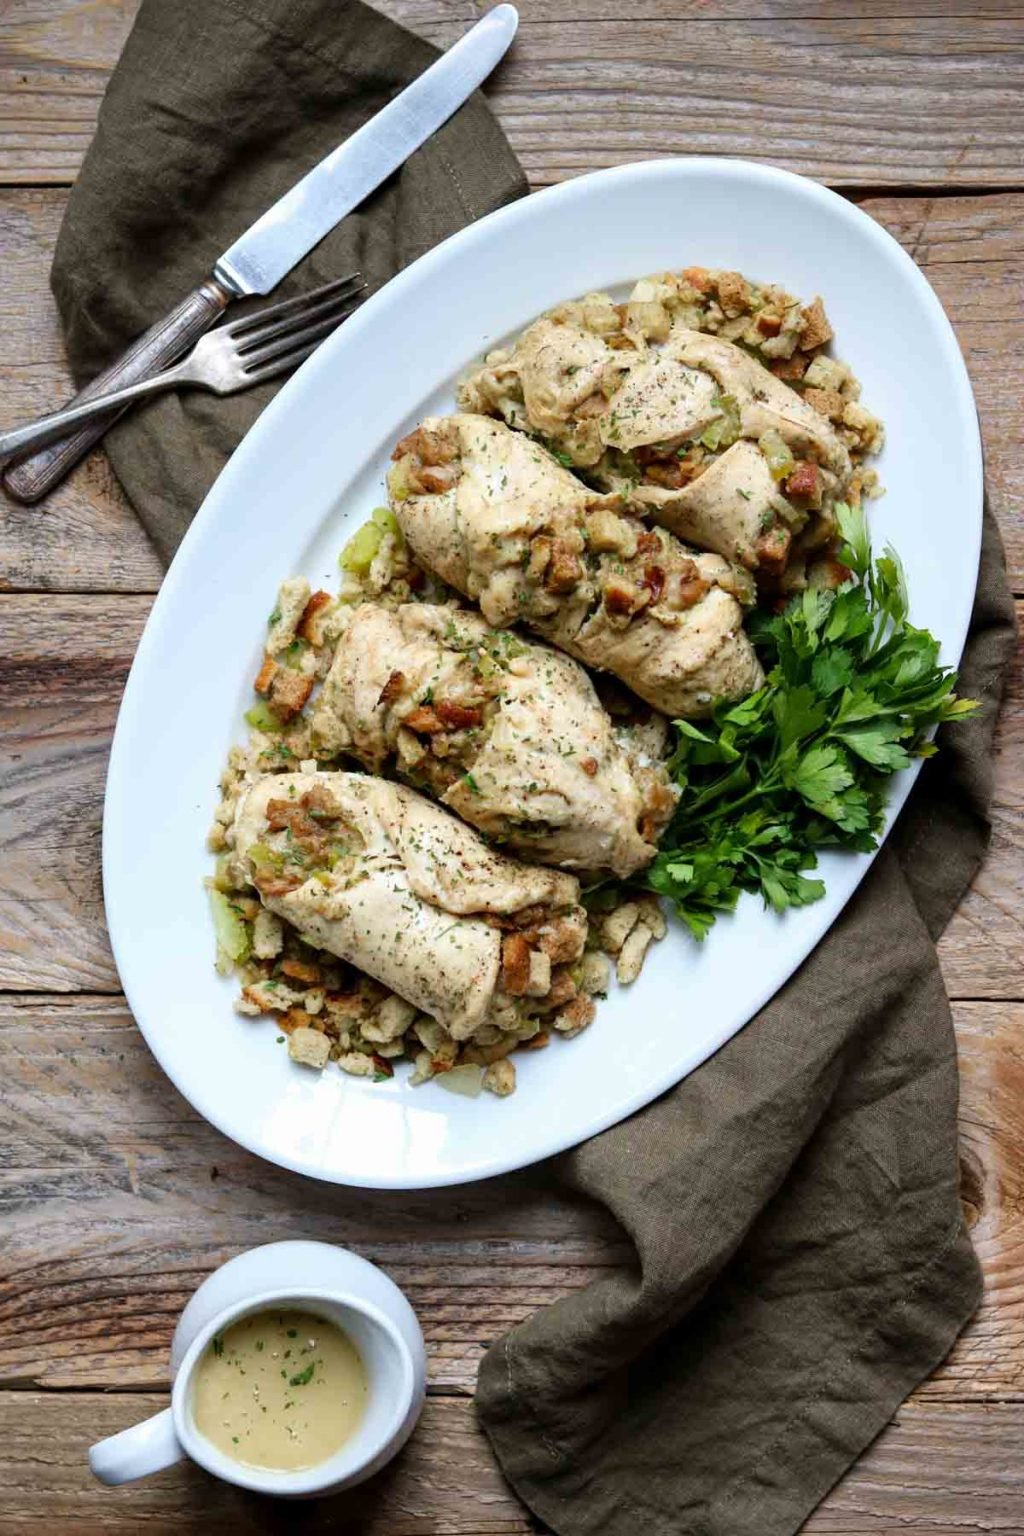
A white serving plate full of chicken rolls stuffed with dressing and topped with gravy

This post contains affiliate links. Thank you for supporting Mom's Dinner at no cost to you!

Nope, you didn’t read that wrong…this is a recipe for Chicken & Stuffing with Gravy ALL made in the Instant Pot! Every bit of it!

And just because it is made in the Instant Pot does not mean that you are missing ANY flavor. In fact, this Instant Pot chicken gravy is some of the best gravy that I have ever had.

I wouldn’t joke about gravy, people!

Chicken with Stuffing on a white oval serving platter garnished with parsley, a knife and fork and gravy to the side

You should also pop over and check out the rest of my Thanksgiving recipes!

[Read more…]

Resurrection Rolls Recipe

November 1, 2018 by Susie Weinrich 6 Comments

Resurrection Rolls (sometimes called Empty Tomb Rolls) are a sweet Easter treat that look a little like cinnamon rolls, but bake up with a fun surprise inside (or NOT inside). I loved making these with my kids every Easter when they were a bit younger. It's a great Easter tradition to add to dying eggs.

a cinnamon bun that has a melted marshmallow in the center

They're made by wrapping a cinnamon-sugar coated marshmallow in dough, and as they bake, the marshmallow melts away-leaving the roll hollow in the center with a sticky, cinnamon-sugar bottom.

[feast_advanced_jump_to]

Ingredients Needed for Empty Tomb Rolls

If you have a well stocked spice and baking cabinet then you are half way to making this recipe!

  • Cinnamon
  • Sugar
  • Butter
  • Marshmallows
  • Powdered Sugar
  • Milk
  • Crescent Rolls

What are Resurrection Rolls

Resurrection rolls are a simple, symbolic baked treat that's most often made around Easter, especially with kids. They're sometimes called empty tomb rolls.

At their core, they're made by wrapping a marshmallow in dough, coating it in butter and cinnamon-sugar, and baking it. In the oven, the marshmallow melts and disappears, leaving a hollow center. When you break one open after baking, it's "empty," which is why people connect it to the Easter story and the idea of the empty tomb.

Why You’ll Love These Kid Friendly Easter Rolls

This is a pretty easy recipe especially because you use store-bought crescent dough, which makes the recipe easy enough for the kids to help. My daughter helped make this batch. Here are some tasks the kids can help with:

  • Roll the marshmallow in the melted butter and the cinnamon sugar.
  • Drizzle the outside with butter and then sprinkle on the cinnamon sugar.
  • Make the powder sugar glaze, and spoon it on once the buns come out of the oven.

This recipe is also a great way to talk about the meaning of Easter with younger kids.

Don’t forget they are also a tasty treat for everyone!

How to Make Empty Tomb Rolls

  1. Preheat the oven to 375ยฐF and grab a 12 count muffin tin.
  2. In a small bowl melt the butter in the microwave. In a separate bowl combine the cinnamon and sugar.
  3. Gently roll each marshmallow in the melted butter and then in the cinnamon sugar mixture.
a marshmallow in cinnamon sugar
  1. Wrap a crescent roll dough triangle around the marshmallow making sure to pinch all the seams closed. This does not have to look pretty… just make sure the seams are sealed or the marshmallow will seep out of the seams.
  2. After the marshmallows are wrapped in the dough, place in the muffin tin seam side up, drizzle the crescent with a little butter and then sprinkle with cinnamon sugar.
a crescent roll wrapped around a cinnamon sugar marshmallow
  1. Bake for 10-13 minutes until they are golden brown.
  2. While they cook make the Powder Sugar Glaze: Simply mix together a ยฝ cup of powder sugar and 1 tablespoon of milk or water.
drizzled powder sugar glaze on marshmallow cinnamon buns
  1. Once the Cinnamon Buns come out the oven let them cool for about 5 minutes. Then remove them from the muffin tin. You may have to run a knife around the edge to get them out, especially if the marshmallows seeped out of the sides.
  2. Place on a cooling rack or on parchment paper and drizzle with the Powder Sugar Glaze.

Variations

Orange Sugar Resurrection Rolls : Add fresh orange zest to the cinnamon-sugar before coating the dough. It gives the rolls a light, citrusy flavor.

โ€ข Strawberry Cheesecake-Style Resurrection Rolls : Mix finely crushed freeze-dried strawberries into the cinnamon sugar. After baking, dust with powdered sugar or use the glaze recipe below.

โ€ข S'mores Resurrection Rolls : Add a pinch or two of cocoa powder to the cinnamon sugar and tuck a few mini chocolate chips into the dough before sealing.

How To Store

After baking let them cool completely, then store in an airtight container at room temperature. They don't need to be refrigerated and actually stay softer when kept on the counter.
They're best the day they're made, especially while still a little warm. After that, they'll keep well for about 2 days at room temperature. After day one, a quick warm-up brings back some softness.

Resurrection Rolls Recipe FAQs

Can I make these easter rolls ahead of time?

Bake these rolls the morning you plan to serve them. You can make them a few hours ahead, let them cool, loosely cover, and then warm them briefly before serving.
You can assemble them earlier in the day, cover tightly, and keep them in the fridge until you're ready to bake.

Can I use homemade marshmallows?

I have not tested the rolls with homemade marshmallows, but it should work perfectly!

What To Serve with Easter Rolls

These rolls are a great addition to an Easter Brunch, the kids can say they made them and tell the story of the empty tomb.

a table scape that has tulips, plates, and wine glasses with text overlay that says Easter Brunch

Easter Brunch Menu

An easy Easter brunch menu with cozy classics and simple dishes that make hosting feel doable.

Get the Menu

More Yummy Pastry Recipes

  • a morning glory muffin cut open to show all the fruits, veggies and nuts
    Morning Glory Muffins
  • Coffee Cake Muffins
  • cranberry orange muffins topped with a cinnamon crumble, on a black and white napkin, fresh cranberries to the side
    Cranberry Orange Muffins

Susie leaning on the kitchen counter

WATCH SUSIE ON FOOD NETWORK!

โญโญโญโญโญ

The new gameshow, 100 Cooks, premieres on Food Network June 7th, 2026 at 9est/8cst. I hope you will tune in!

Empty Tomb Rolls Recipe

Indulgent Cinnamon Buns (aka. Empty Tomb Rolls) are like cinnamon rolls on the next level. A marshmallow is dipped in butter and cinnamon sugar, placed inside a store bought crescent roll and then baked. Drizzle with Powder Sugar Glaze and you have a show stopping breakfast or brunch pasty, or a side dish for chili!ย 
5 from 5 votes
Print Pin Rate Save Saved!
Prep Time: 10 minutes minutes
Cook Time: 12 minutes minutes
Total Time: 22 minutes minutes
Servings: 8 buns
Calories: 139kcal
Author: Susie Weinrich

Equipment

  • 12 cup muffin tin

Ingredients

Cinnamon Buns

  • 1 tube crescent roll dough - 8 count
  • 4 tablespoon salted butter - melted
  • ยผ cup granulated sugar
  • 1 teaspoon cinnamon
  • 8 marshmallows

Powder Sugar Glaze

  • ยฝ cup powdered sugar
  • 1 tablespoon milk or water

Instructions
 

  • Preheat the oven to 350 degrees and prepare a muffin tin by lightly greasing each cup with oil or nonstick spray.
  • Melt the butter in the microwave.
    Mix the cinnamon and sugar together in a small bowl.
  • Dip the marshmallow into the melted butter and then lightly roll the marshmallow in the cinnamon sugar mixture.
    Wrap a crescent dough triangle around the marshmallow and crimp all the seams closed. This does not have to look pretty (see photo).
    Place in the muffin pan, seam side up.
    dough ball in a muffin tin
  • Drizzle a little butter over top of the crescent and then sprinkle with cinnamon sugar.
  • Bake for 10-13 minutes, until they are golden brown.ย 
    Don't worry if some of the buns pop open and marshmallow spills out, they are still delicious!
  • You may need to run a sharp knife around the edge of the buns to get them out of the pan.
    Let the cinnamon buns cool on parchment paper or a cooling rack for about 5 minutes, then drizzle with powder sugar glaze.

Powder Sugar Glaze

  • While the buns bake make the powder sugar glaze.
    In a small bowl mix together the powder sugar and milk or water. Stir until it is all incorporated. You may need to add a drop of two of additional milk or water, but don't add too much, you want a pretty thick consistency because the frosting will melt over the warm cinnamon buns.
Did you make this recipe?Connect with me and let me know by commenting below!
Jump to Comments
Calories: 139kcal | Carbohydrates: 21g | Protein: 0.3g | Fat: 6g | Saturated Fat: 4g | Polyunsaturated Fat: 0.5g | Monounsaturated Fat: 2g | Trans Fat: 0.2g | Cholesterol: 15mg | Sodium: 78mg | Potassium: 3mg | Fiber: 0.1g | Sugar: 18g | Vitamin A: 176IU | Vitamin C: 0.01mg | Calcium: 5mg | Iron: 0.1mg

Easy Sheet Pan Chicken Fajitas

October 30, 2018 by Susie Weinrich 2 Comments

chicken fajita sheet pan dinner with cilantro lime vinaigrette being poured over the top

Another sheet pan dinner to keep your meal time easy! This delicious dinner comes together in 30 minutes and cooks up on one sheet pan.

Healthy boneless skinless chicken breasts, peppers, onion, tomatoes, and pinto beans are baked in the oven and then drizzled with a delicious cilantro lime vinaigrette.

Chicken and veggies being drizzled with a cilantro lime vinaigrette

This is a super versatile dinner. You can serve it as is with some chips and guacamole on the side, or scoop the chicken and veggies into flour tortillas and top with all your favorite burrito toppings: sour cream, avocado, salsa, hot sauce, or cheese.

[Read more…]

Best 15-Minute Canned Refried Beans

October 29, 2018 by Susie Weinrich 15 Comments

Mexican Side dish of refried beans topped with cheese, tomatoes and cilantro

You can turn canned refried beans into a great side dish perfect for any Mexican Dinner! This recipe is the perfect mixture of a can of refried beans combined with the texture of canned whole pinto beans, seasoned with garlic, onions, sour cream and Mexican spices. Top all that off with some gooey cheese and you have a perfect Mexican side dish.

refried bean side dish in a glass dish topped with cheese and tomatoes

The truly great thing is that once all the ingredients are mixed together it bakes up in just 15 minutes! Gives you more time to mix up Margaritas and relax!

This recipe for Mexican Refried Beans makes a great side dish for burritos, tacos, or enchiladas… all your favorite Mexican Dinners. You can also add some Mexican Rice to complete the dinner.

RELATED: Instant Pot Refried Beans

Ingredients

Just a few simple ingredients from your pantry and spice cabinet, plus some cheese and sour cream and you have an amazing refried bean side dish.

Onion- In most Mexican recipes we prefer to use white onion. Any onion will work, but the flavor of white onion is most traditional.

If you like a crunchier onion in your beans you can skip the sauteing.

Cheese – use any cheese you have on hand in this recipe. Fresh shredded cheese from a block will melt up creamier, but pre-shredded will still work. If you like a little spice you can choose to use pepper jack!

Pinto Beans – You will be using two kinds of pinot beans; refried beans and whole pinto beans. More on buying canned refried beans in the section below.

Canned Refried Beans

Refried beans are traditionally whole pinto beans that are cooked soft and then pureed or smashed into a creamy texture. They are a staple in Mexican and Tex-Mex Cooking. However, recipes vary quite a bit from home to home and by region.

In this recipe we are taking advantage of the canned refried beans at the grocery store.

PRO TIP: I do recommend that you DO buy the traditional refried beans, not the fat free refried beans. The traditional ones have a much creamier consistency! The fat free beans can tend to be dry.

How to Make The Best Canned Refried Beans

This is a super simple recipe to put together. Buying canned refried beans and whole pinto beans cuts down on cooking time considerably!

a baking dish of refried beans with a spoon

Preheat your oven to 350 degrees, and grab a small baking dish, like an 8×8 or 9×9.

In a small frying pan sautรฉ the chopped onion and garlic in ยฝ tablespoon of oil, just until they are softened, about 4 minutes.

(If you like a crunchy onions in your beans you can skip the sautรฉing step)

Meanwhile, stir together the canned refried beans, the drained and rinsed whole pinto beans, sour cream, and all the seasonings.

When the onions and garlic are ready stir them in as well.

If you like a kick or heat or vinegar add a couple dashes of Tabasco or your favorite hot sauce. It gives it a little vinegar tang and great flavor! But, it’s totally optional. But also you should do it.

Pour the bean mixture into your baking dish.

Mexican Side dish of refried beans topped with cheese, tomatoes and cilantro

Sprinkle the top with your preferred cheese (I like pepper jack or colby jack). Cover the pan with foil and pop it into the oven with the timer set for 10 minutes.

Pro Tip: Spray the underside of your foil with non-stick spray so the cheese doesn’t cook to the foil.

Then remove the foil and bake another 5 minutes.

Garnish with cilantro and diced tomatoes if you are feeling fancy.

They are ready to eat as soon as they come out of the oven!

Variations

Here are a few ideas on how you can change up this Canned Refried Bean recipe to suit your taste buds:

  • Add a tablespoon or two of your favorite hot sauce.
  • Sautรฉ some chopped jalapeno with the onion and garlic for a kick of heat.
  • Sprinkle in some red pepper flakes or cayenne pepper for extra heat.
  • Substitute Refried Black Beans and a can of whole black beans.
  • If you like your beans super cheesy stir a ยฝ cup of cheese into the bean mixture and then top the beans with an additional ยฝ cup of cheese.
  • Top the beans with whatever cheese you like: cheddar, monterey jack, pepper jack, colby jack, queso fresco (however, note that the queso fresco will not melt).

Make It a Meal

Refried Beans are a traditional side dish served to accompany a dinner. They are also traditionally served with a Mexican Rice on the side (or try this Instant Pot Mexican Rice). Here are some favorite Mexican Main Dishes to check out:

  1. Barbacoa Tacos
  2. Instant Pot Chicken Tacos
  3. Chicken Enchiladas
  4. Beef Enchilada Casserole
  5. Grilled Steak Tacos
  6. Chicken Enchilada Suiza

Appetizer

You can also serve this refried bean recipe as a dip with some tortilla chips along side some salsa and guacamole. I would recommend smashing some of the whole pinto beans with a potato masher to serve it as a dip.

More Mexican Side Dishes to Check Out

Of course Refried Beans and Mexican Rice are traditional Mexican side dishes, here are some more to add to your dinner:

  • two hands serving a bowl of Pico de Gallo
    Simple Pico de Gallo
  • a bowl of fresh avocado guacamole with a chip dipping in
    Holy Guacamole, That’s Good Guac
  • a wooden bowl of cilantro lime slaw
    Cilantro Lime Coleslaw
  • fresh pineapple in a bowl with a citrus cilantro glaze over top
    Fresh Pineapple with Citrus Cilantro Glaze

Susie leaning on the kitchen counter

WATCH SUSIE ON FOOD NETWORK!

โญโญโญโญโญ

The new gameshow, 100 Cooks, premieres on Food Network June 7th, 2026 at 9est/8cst. I hope you will tune in!

a pan of refried beans topped with cheese, cilantro and tomatoes

The Best 15-Minute Canned Refried Beans Recipe

A perfect mix of smooth canned refried beans and canned whole pinto beans seasoned with sour cream, Mexican spices, garlic, and onions. Top it all with your favorite cheese and bake for 15 minutes.ย 
This dish makes a perfect and easy Mexican side dish!
5 from 12 votes
Print Pin Rate Save Saved!
Prep Time: 5 minutes minutes
Cook Time: 15 minutes minutes
Total Time: 20 minutes minutes
Servings: 6 people
Calories: 191kcal
Author: Susie Weinrich

Equipment

  • 8×8 baking dish

Ingredients

  • ยฝ cup onions - finely diced
  • 1 large garlic clove - minced
  • 1 tablespoon olive oil or vegetable oil
  • 16 oz canned refried beans - buy the "Traditional" not the fat-free
  • 15.5 oz canned whole pinto beans - drained and rinsed
  • โ…“ cup sour cream
  • ยผ teaspoon each: cumin, chili powder, garlic powder, onion powder, salt
  • couple dashes of tabasco or hot sauce - (optional)
  • 1 cup shredded cheese , divided – - cheddar, pepper jack, colby jack, queso fresco, monterey jack
  • **optional garnish- cilantro and diced tomatoes

Instructions
 

  • Preheat the oven to 350. Grab a small baking dish, 8×8 or 9×9
  • In a frying pan, over medium low heat, sautรฉ the diced onions and minced garlic in the oil until they are translucent, about 4-5 minutes.
    ยฝ cup onions, 1 Tbsp olive oil or vegetable oil, 1 large garlic clove
  • While the onions and garlic cook, in a mixing bowl stir together the refried beans and drained whole pinto beans, sour cream, all the seasonings, and optional hot sauce.ย 
    16 oz canned refried beans , 15.5 oz canned whole pinto beans , โ…“ cup sour cream, ยผ tsp each: cumin, chili powder, garlic powder, onion powder, salt, couple dashes of tabasco or hot sauce
  • Once the onions and garlic are ready, stir them into the bean mixture. Add ยฝ cup of cheese and stir it in.
  • Pour the beans into the baking dish. Top with the additional ยฝ cup shredded cheese. Cover the pan with foil and bake for 10 minutes.
    Pro Tip: spray the under side of the foil with non-stick spray to prevent the cheese from sticking.
  • Remove the foil and bake for an additional 5 minutes.
  • Garnish with cilantro and diced tomatoes if you are feeling fancy.ย 
    Enjoy this awesome Mexican side dish!
    **optional garnish- cilantro and diced tomatoes

Recipe Tips and Notes:

REFRIED BLACK BEANS: For refried black beans simply substitute 1 can of whole black beans and 1 can of refried black beans.
INSTANT POT REFRIED BEANS
OPTIONAL VARIATIONS:ย ย 
  • Add a TABLESPOON of your favorite hot sauce for more heat and vinegar tang.
  • Sautรฉ some chopped jalapeno with the onion and garlic for a kick of heat.
  • Sprinkle in some red pepper flakes or cayenne pepper for extra heat.
  • If you like your beans super cheesy stir a ยฝ cup of cheese into the bean mixture and then top the beans with an additional ยฝ cup of cheese.
  • Top the beans with whatever cheese you like: cheddar, monterey jack, pepper jack, colby jack, queso fresco (however, note that the queso fresco will not melt).
Did you make this recipe?Connect with me and let me know by commenting below!
Jump to Comments
Serving: 1serving | Calories: 191kcal | Carbohydrates: 22g | Protein: 9g | Fat: 7g | Saturated Fat: 3g | Polyunsaturated Fat: 1g | Monounsaturated Fat: 3g | Cholesterol: 15mg | Sodium: 694mg | Potassium: 247mg | Fiber: 7g | Sugar: 4g | Vitamin A: 206IU | Vitamin C: 2mg | Calcium: 123mg | Iron: 2mg

Rosemary Paloma

October 25, 2018 by Susie Weinrich 3 Comments

Rosemary Paloma Cocktail garnished with rosemary sprigs

Tequila is one of my go-to mixers when I want to have a cocktail. I like the salty flavor of tequila, I love a shot of tequila followed by salt and a lime, and I love a tequila mixed drink. However I don’t always love a super sweet drink, like a margarita.

That is one reason I really love this recipe for Rosemary Palomas. It has the salty tequila flavor that I love, mixed with a tart grapefruit juice and just a hint of sweetness from the rosemary infused Triple Sec.

Two glasses of Rosemary Paloma with a rosemary sprig garnish

The rosemary flavor in this cocktail is just a hint of piney earthiness. It has just the right amount of rosemary flavor to compliment the salty tequila and tart grapefruit.

[Read more…]

Savory Dutch Oven Chicken Pot Roast

October 23, 2018 by Susie Weinrich 20 Comments

chicken pot roast topped with french fried onion

Chicken Pot Roast?! What!? Yes! You are going to love it. This is a savory dish, just like Beef Pot Roast, but here you are using chicken thighs and slow braising them in a pot with carrots, potatoes, mushrooms and turnips, all in a savory creamy gravy that is seasoned perfectly with garlic, rosemary, and bay leaves. Then it is served in bowls topped with crispy French fried onions!

a bowl with chicken pot roast topped with crispy french fried onions

Chicken Pot Roast is the comfort food you want on a cold fall or winter night, at a Sunday family dinner, or when you are entertaining family and friends.

If you love a chicken dinner, definitely check out all the chicken recipes on Mom’s Dinner, there are over 50 amazing recipes.

What is Pot Roast?

The term “pot roast” actually means a piece of meat that is cooked slowly in a covered pot. So, yep, Chicken Pot Roast is a thing and it is delicious.

I have seen some recipes online that consider Roasted Whole Chicken the same thing as Chicken Pot Roast. Here at Mom’s Dinner these are two totally different things! See below:

roasted chicken in a Dutch Oven
THIS IS ROASTED CHICKEN
chicken pot roast topped with french fried onion
THIS IS CHICKEN POT ROAST

Ingredients

Even though the ingredient list is a little long for this Chicken Pot Roast recipe, it is full of simple ingredients that are easy to find. You may even have quite a few of them in your kitchen already:

  • Fresh Vegetables: onion, garlic, carrot, celery, turnip, red potatoes, cremini mushrooms.
  • Pantry: canola or olive oil, flour, chicken stock or broth, boneless skinless chicken thighs
  • Spice Cabinet: kosher salt, black pepper, dried basil, bay leaves
  • Fridge: butter, chicken base, fresh rosemary, chicken thighs, heavy cream

When you cut and process all your veggies, try to cut them all about the same size, around 1 ยฝ inches thick.

How to Make Chicken Pot Roast

Start by preheating the oven to 300 degrees.

Pro Tip: you are processing a lot of veggies in this recipe, you can save scraps, peelings and stems in the freezer and use them for this Instant Pot Chicken Stock!

In a large Dutch Oven slightly brown the chicken thigh pieces in oil over medium heat, about 3-4 minutes. They do not need to be cooked thru just browned on the outside.

chicken thighs and veggies in a dutch oven

Remove the chicken from the pot and set aside.

Melt the butter in the pot and then sprinkle the flour into the butter, whisk or stir them together, creating a roux.

Roux (pronounced Roo): a mixture of fat, especially butter, and flour used in making thick sauces an thickening liquids.

Pour the chicken stock into the roux and whisk it together, making sure it is smooth. Let the broth simmer for about 5-10 minutes, until it starts to thicken a little. Turn the heat off and stir in the salt, pepper, dried basil, heavy cream, rosemary sprigs, and bay leaves.

Add all the cut veggies and the chicken back to the pot. Give it a good stir, pop the lid on, and put it in the oven for 90 minutes.

It will thicken as it cooks and the chicken and veggies become perfectly tender.

Cooked chicken pot roast in a Dutch Oven

French Fried Onions for Serving

While the Chicken Pot Roast cools you can crisp up some French fried onions for garnish. You can find them in the grocery store, usually in the soup aisle. They are commonly used to top green beans casserole.

On a sheet pan scatter the store bought French fried onions and pop them in the 300 degree oven for 4-5 minutes until they are golden and crisp. Serve these in a bowl on the table so everyone can garnish their own Chicken Pot Roast.

Serving

If you are serving this on a weeknight I would honestly consider this a one pot meal and just serve it with warm bread or rolls, no side dishes. It has your protein, vegetable, and starch, and it is super filling!

If you are entertaining or having Chicken Pot Roast for Sunday dinner then this would be a great menu:

  • Oven Roasted Broccoli or Garlic Green Beans
  • Garlic Butter Smashed Sweet Potatoes
  • Dinner Rolls & Butter
  • (if you are serving a big feast this Raspberry Jello Fluff would be great too)

More Roast Recipes

If you love a classic roast dinner you are in the right place! You will love any of these recipes:

  • a slice of Instant Pot Pork Roast on a plate with gravy and veggies
    Pork Shoulder Roast Instant Pot
  • Beef Chuck Roast (Instant Pot)
  • sliced tri tip with red wine glaze and herbs
    Braised Tri Tip with Red Wine Glaze
  • a close up of pot roast,cooked carrots and mashed potatoes
    Beef Pot Roast with Gravy

Susie leaning on the kitchen counter

WATCH SUSIE ON FOOD NETWORK!

โญโญโญโญโญ

The new gameshow, 100 Cooks, premieres on Food Network June 7th, 2026 at 9est/8cst. I hope you will tune in!

chicken pot roast topped with french fried onion

Dutch Oven Chicken Pot Roast Recipe

Tender chicken thighs are slow braised with vegetables in a savory and creamy gravy flavored with garlic, rosemary, and bay leaves. The final dish is garnished with crispy french fried onions.ย 
5 from 11 votes
Print Pin Rate Save Saved!
Prep Time: 20 minutes minutes
Cook Time: 2 hours hours
Total Time: 2 hours hours 20 minutes minutes
Servings: 6 people
Calories: 407kcal
Author: Susie Weinrich

Equipment

  • Oven safe pot with a lid (Dutch Oven)

Ingredients

  • 1.5 lbs. boneless skinless chicken thighs - cut into 1 inch chunks
  • 1 tablespoon oil - canola or olive oil
  • 4 tablespoon butter
  • ยผ cup flour
  • 1 ยฝ teaspoon chicken base
  • 3 cups chicken stock or broth
  • ยฝ cup heavy whipping cream
  • 1 cup yellow onion - cubed
  • 4 garlic cloves - chopped into large rough pieces
  • 3 large carrots - peeled, cut into large coins
  • 2 celery ribs - chopped into 1 inch chunks
  • 4 red potatoes - , cut into 1 inch cubes
  • 1 turnip - peeled, cut into 1 inch cubes
  • 4-5 cremini mushrooms - quartered
  • ยฝ teaspoon kosher salt
  • ยฝ teaspoon dried basil
  • ยผ teaspoon black pepper
  • 2 sprigs fresh rosemary - leaves removed and chopped
  • 2 bay leaves

Garnish

  • 6 oz French Fried Onions

Instructions
 

  • Preheat the oven to 300 degrees.
  • In a large Dutch oven over medium heat sautรฉ the chicken thigh pieces in the oil until they are just browned on the outside (they do not need to be cooked thru).ย 
    Remove them from the pot and set aside.
    1.5 lbs. boneless skinless chicken thighs, 1 tbsp oil
  • In the now empty Dutch oven, over medium-low heat, melt the butter. ย 
    Add the chicken base and stir into the butter. Then add the flour and stir or whisk until it is combined, about 1 minute.ย 
    4 tbsp butter, ยผ cup flour, 1 ยฝ tsp chicken base
  • Pour the chicken broth into the pot and scrape up any brown bits on the bottom of the pot. Whisk the liquid to ensure it is smooth.
    Simmer the broth over medium-high heat until it begins to thicken, about 3 minutes.ย 
    3 cups chicken stock or broth
  • Turn the heat off and stir in the heavy whipping cream.ย 
    ยฝ cup heavy whipping cream
  • Next add all the veggies and browned chicken pieces to the pot.
    Finally stir in the kosher salt, pepper, dried basil, rosemary sprigs, and bay leaves.
    1 cup yellow onion, 4 garlic cloves, 3 large carrots, 2 celery ribs, 4 red potatoes, 1 turnip, 4-5 cremini mushrooms, ยฝ tsp kosher salt, ยฝ tsp dried basil , ยผ tsp black pepper, 2 sprigs fresh rosemary , 2 bay leaves
  • Place the lid on the Dutch oven and place in the preheated oven for 90 minutes.ย 
  • Let the pot sit for 10 minutes to cool. Then remove the bay leaves before serving.
    (while it cools jump down and make the French Fried Onions!)
  • Serve in bowls garnished with Crispy French Fried Onions.

French Fried Onion Garnish

  • Make the garnish while the Chicken Pot Roast cools.
  • Spread the French fried onions on a rimmed baking sheet and bake in the 300ยฐ oven for 4-5 minutes, until they are golden and crispy.
    6 oz French Fried Onions
  • Serve them in a bowl on the table so everyone can garnish their own Chicken Pot Roast.

Recipe Tips and Notes:

MORE POT ROAST:
If you are looking for a Beef Pot Roast then pop over to this recipe for Beef Pot Roast with Gravy.
Or for and Instant Pot Version check out this Instant Pot Beef Pot Roast.
For a Whole Roasted Chicken you can check out this Ultimate Guide to Roasted Chicken or this Roasted Half Chicken.
Did you make this recipe?Connect with me and let me know by commenting below!
Jump to Comments
Serving: 1serving | Calories: 407kcal | Carbohydrates: 36g | Protein: 20g | Fat: 21g | Saturated Fat: 10g | Trans Fat: 1g | Cholesterol: 119mg | Sodium: 909mg | Potassium: 1199mg | Fiber: 4g | Sugar: 6g | Vitamin A: 5661IU | Vitamin C: 29mg | Calcium: 77mg | Iron: 3mg
  • « Previous Page
  • 1
  • …
  • 57
  • 58
  • 59
  • 60
  • 61
  • …
  • 65
  • Next Page »
Susie in the kitchen with an apron on getting ready to cook

Meet The Author:

Susie Weinrich is a professional recipe developer specializing in classic Midwest cooking, recently seen on Food Network's 100 Cooks. Her thoroughly tested recipes and step-by-step guides give home cooks real confidence in the kitchen.

YOU will feel like a huge success at dinner time with any of the simple recipes on Mom's Dinner! Read More

Helpful Meal Planning Resources

  • a table with white place settings and green garland
    Easy Meals for House Guests
  • a round table with a large family eating dinner
    30 Easy Meals for Large Family Vacations & Gatherings
woman owned small business certificate by Sertify

Amazing New Recipes

  • Scoop of broccoli cheese casserole coming out of a baking dish.
    Down Home Broccoli and Cheese Casserole
  • Close up of a fresh made fried pork tenderloin sandwich topped with onion rings, pickles, horseradish mayo and lettuce.
    Iowa Fried Pork Tenderloin Sandwiches
  • two kids jumping in a lake off the dock at sunset
    Dinners for a Week at the Lake House
  • Tuna Noodle Casserole in a white dish being spooned out of the baking pan
    Mom’s Tuna Noodle Casserole

Footer

^ back to top

About

  • Susie Weinrich
  • Privacy Policy
  • Accessibility Policy

Contact

  • Sign Up! for emails
  • Contact Me!
  • Join Me On YouTube

Recipes

  • Recipe By Category
  • Instant Pot Recipes
  • Dinner Recipes

Copyright ยฉ 2026 Mom's Dinner

Rate & Review This Recipe

Your vote:


A rating is required
A name is required
An email is required