In episode 076 we are making Instant Pot Alfredo for dinner. It is a simple recipe that is ready in under 30 minutes with the help of your Instant Pot. Butter and garlic is mixed with chicken broth, heavy cream and lemon. Fettuccine noodles are added in a criss-cross pattern and then topped with chicken. It all gets pressure cooked for 6 minutes and then at the end you add some fresh grated parmesan cheese.
It makes an excellent dinner when paired with a green veggie or side salad. Listen to this episode or watch Susie make this on a 30 minute episode of Pinterest TV.
Also…fromaggio is Italian for cheese… not fredo. LOL!
Transcript
Click for the full transcript.
Intro: Hey, hey everybody. Welcome to another episode of Let’s Make Dinner, your audio library of amazing dinner recipes you can always get on the table. I’m your host, Susie Weinrich.
Susie Weinrich: Hello, hello everybody. What’s good today? So I’ve been doing something kind of new recently that I have absolutely fallen in love with. There’s a new platform on Pinterest called PinTV. It’s where you can go live and cook. Some people paint, some people do makeup. I’m obviously cooking and I have fallen in love with this platform. It’s super easy. I can literally make dinner live and share all of my, you know, kitchen tips and tricks and recipe knowledge. It goes live out to Pinterest and people join and watch me, and I absolutely love it. Who knew that that’s something that I would like to do? So it’s kind of opening a whole new world for me this year. Like maybe I wanna do TV or a news segment or something. So anyway, I made this recipe for Instant Hot Chicken Alfredo last night on PinTV. So you can listen to the recipe here like we always do, or you could pop over to the episode on PinTV which I’ll link in the show notes for you and you can actually watch me live making this recipe. But if you are just looking for a really good easy pasta, maybe Instant Pot pasta recipe, this is so good. I ate it after the pin TV episode last night, and I think I could have eaten my weight in this chicken alfredo. It’s that good.
Tips and Tricks: There’s a few key ingredients that make it better than any other alfredo recipe you’re gonna find on the internet. So let’s go ahead and get started. We always start with tips here on let’s make dinner. So we’re gonna start with tips and specific ingredients that you want to have for this recipe. So we’re gonna actually start by talking about the Parmesan cheese. Parm is definitely a key ingredient to making Alfredo, and it’s no different here with this Instant Pot Chicken Alfredo. My tip is to purchase the very best Parmesan cheese you can, and generally that’s going to be something that looks kind of craggy and dry and has a rind on the outside that maybe is stamped or has lettering or words on it.
That generally means that it came from a larger wheel and it’s going to have a really true Parmesan flavor. Buy the best Parmesan you can. And whatever you do, don’t buy pre shredded and don’t buy the powder stuff. You want to grate your own Parmesan. It’s going to make it creamier and more flavorful.
Another thing that’s gonna make your Alfredo the best Alfredo on the internet is by adding the lemon. We’re going to add lemon zest and lemon juice to the liquid that’s gonna cook the pasta and the chicken. That is just gonna add the perfect bright note that an Alfredo needs to balance all of the flavors. You’ve got the carbs, you’ve got the chicken, you’ve got the cream, the Parmesan. It’s a heavy dish. When you add that lemon, it just brightens everything up and almost separates the flavors so that you can taste everything individually. It’s definitely a key ingredient.
Another key ingredient that cannot be swapped is the heavy cream. You have to use heavy cream in the Instant Pot to keep it stable. So that fat content of heavy cream ensures that it doesn’t separate or curdle when it’s being cooked in the pressure cooker. You cannot sub half and half, whole milk. Milk will not work the same. You need that heavy cream.
Now, of course an Alfredo is generally made with a fettuccini, which is great, use a fettuccini. I have also tested this recipe with linguini, and that works as well too.
All right, just a couple more things before we get to the full recipe. We’re gonna talk about just cooking pasta in general in your Instant Pot. So the key here with the longer pasta, we’re gonna break it in half, which I know is sacrilege to all of you full blood Italians out there. But to actually fit it in the pot, you do have to break your pasta in half. So you’re going to break them in half. Then the key here is you’re gonna crisscross all of the noodles so that they don’t cook together in one big clump. You’re going to just use eight ounces of pasta for this recipe, break them in half, and then separate that eight ounces into four or five piles. Crisscross them as you layer them in the Instant Pot, and they will cook up perfect for you. All right, and like I just said, this recipe only calls for eight ounces of fettuccini noodles. On the recipe I say this will serve anywhere from two to four people. At your house, eight ounces of pasta may only serve one person. It may serve four people. It depends on are you serving all adults that are really hungry? Are you serving kids? You’ll have to decide if you want to double or triple the recipe. But there have been plenty of people on the Mom’s Dinner comments and then also on Pinterest who have doubled and tripled the recipe with no problem whatsoever. So you should be able to do that and be just fine. Those are all of my tips and tricks. So let’s get on to making the full Instant Pot Chicken Alfredo recipe.
Instant Pot Chicken Alfredo Recipe: You’re gonna start with your Instant Pot on saute mode, just on normal heat. You’re going to add two tablespoons of butter. Get that melted down in the pot, and then you’re going to mince two garlic cloves. If you want to mince four garlic cloves, go for it. But the recipe calls for two garlic cloves. Add those into the pot and just stir them around in the butter until it becomes fragrant. So just about one minute. You don’t wanna brown it, you don’t want your garlic to burn. You just want to start to soften it and get it really fragrant in the butter.
Then you can turn off that saute mode and you’re going to add in one in three quarters cups of chicken broth or stock. That’s going to add really nice flavor to your sauce for this Alfredo.
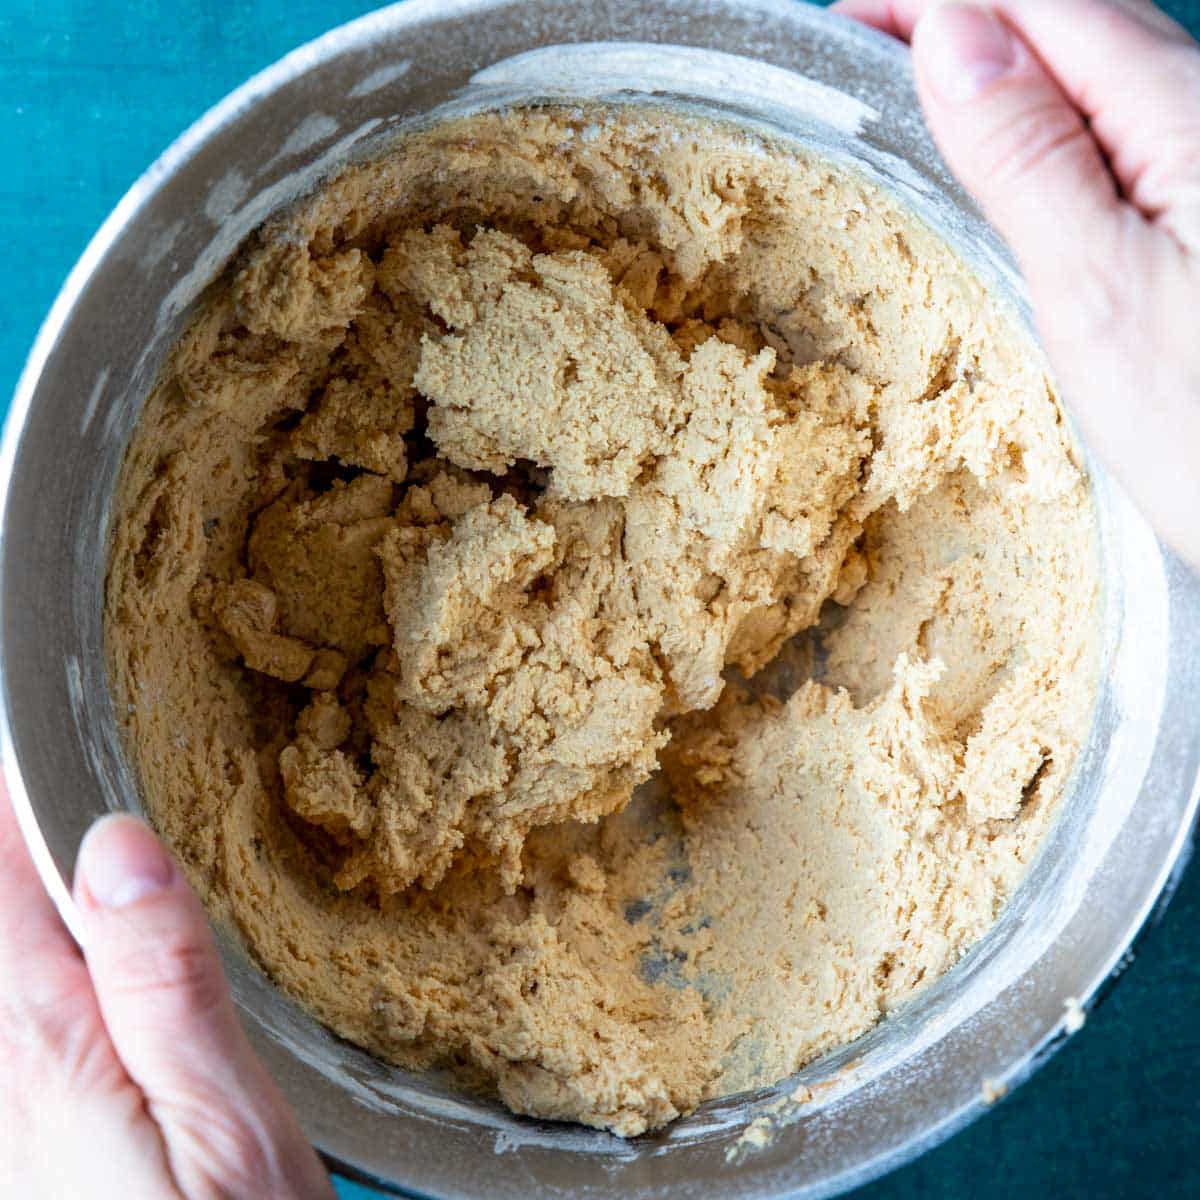
Then you’re going to add in one cup of heavy cream, one tablespoon of lemon juice and about two teaspoons of lemon zest. For me, that’s usually about the zest of one entire lemon. Give that a good stir so that the zest gets distributed all throughout that liquid. Now it’s time to add that pasta. We’re going to add eight ounces of fettuccini, separate them into piles, maybe like four piles. Grab each pile. Break them in half, scatter them into that liquid in the Instant Pot. Grab the next one, break it in half, but turn it the opposite way so you’re crisscrossing that pasta in the liquid. Repeat that until you’ve used all of your pasta, and then you can take a wooden spoon and lightly shimmy that pasta so that it is all at least touching the liquid. You don’t have to jam it down in the pot so that it’s all in the liquid. It just needs to be at least touching that liquid.
Now you’re gonna take one large chicken breast and cut it up so that it’s in about half inch pieces, and then scatter that all over the top of the pasta that’s in the Instant Pot. Now we’re going to season that chicken. You’re going to take about a half a teaspoon, a scant half teaspoon of onion powder and kosher salt. Sprinkle that all over the top. Then you can add fresh cracked black pepper if you like. I love fresh cracked black pepper with anything creamy. So I like a lot added into my Alfredo.
Now it’s time to cook. You’re going to pop that Instant Pot lid on, lock it in place. Turn the vent on top to seal, and then set your pot to cook on normal heat, high pressure for six minutes. It’s gonna go ahead and come up to pressure. It’ll beep. It will count down, 6, 5, 4, 3, 2, 1. It will beep at you again, and then it’s time to release all of the pressure. You’ll turn that vent on top. All of the pressure will escape in full dramatic fashion. It’s so loud. Once it’s ready to open, open up the pot. You’ll notice that it is still very soupy. Don’t worry, you haven’t messed up the recipe. It will come together, I promise.
So what you wanna do is give it a little stir and then just let it set for about five minutes. As it starts to cool, it’s going to start to thicken. During that five minute period, you can grate up your fresh Parmesan cheese. You’ll need one cup. So then it’s time to add that cheese to the pasta. What I recommend here is that you do it in two batches. Add a half a cup, stir it into the pasta, and then add another half cup, stir it into the pasta. This is just preventing you from dumping one cup of Parmesan cheese into your pasta and having it steamed together in one big clump. That’s the worst. So you’re going to have a really creamy, yummy pasta at this point. If it’s still a little too liquidy for you, you can absolutely let it sit for about five more minutes and it will thicken up even more. Of course, you wanna give it a little taste before you serve it, you know? Do you want a little more lemon zest? Do you want a little more lemon juice? Do you need more salt? Do you want to add a little garlic powder? Just flavor it up exactly how you like it.
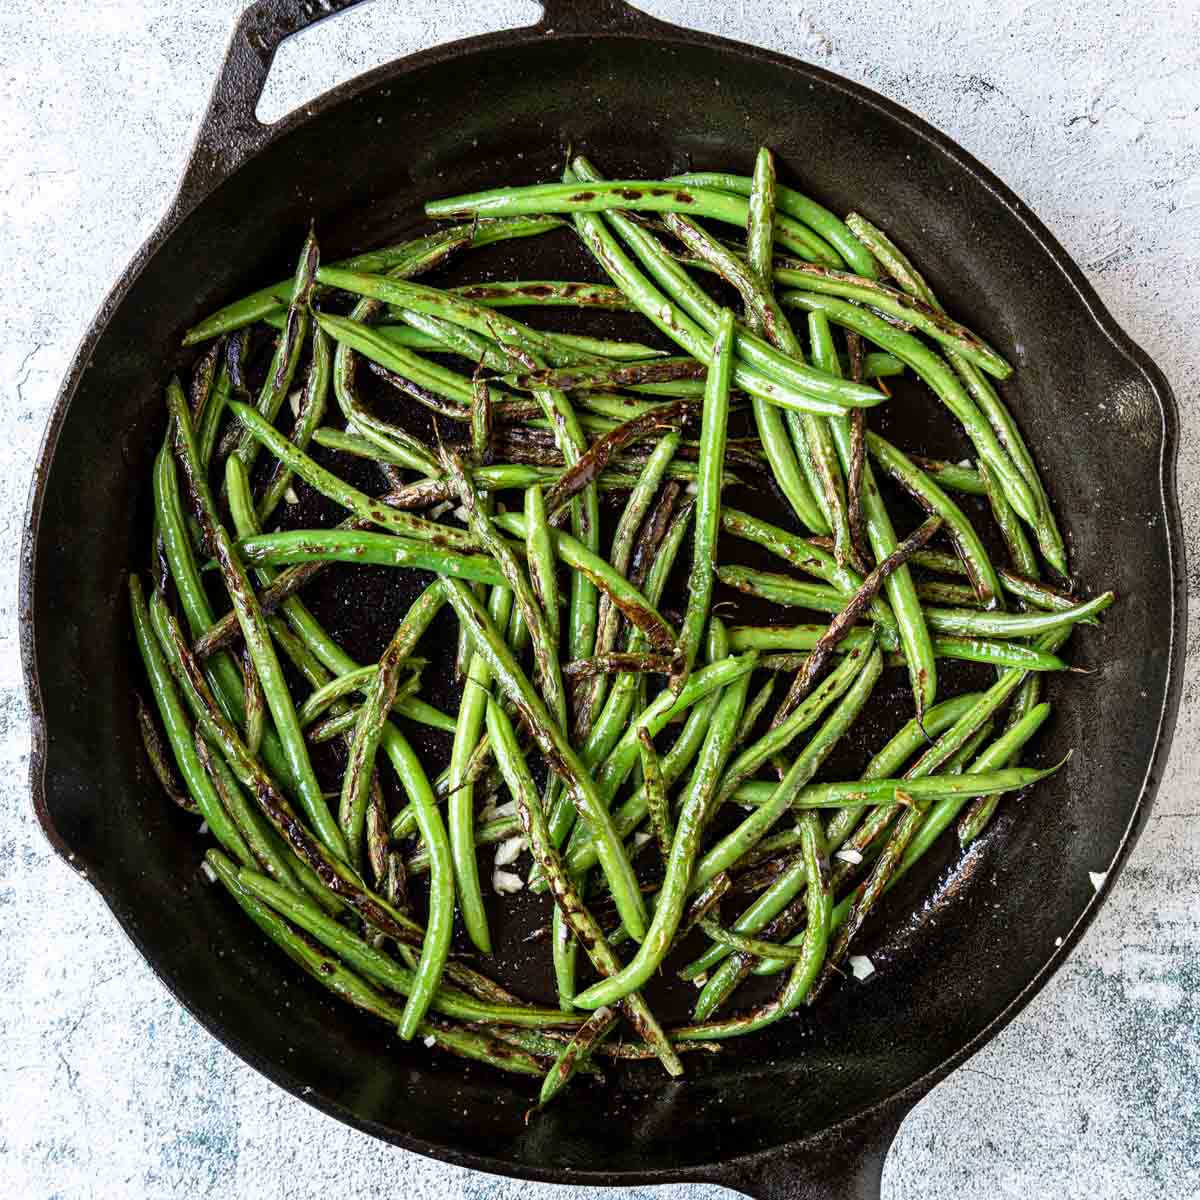
Now when you serve this, you can serve it just as is. I think that this heavy, creamy pasta does really well with a green vegetable, like green beans or zucchini, or doing a side salad with a really bright vinegarette dressed on the green. So I have a great recipe for a basil vinaigrette that would be perfect paired with this Alfredo. Of course if you like garlic bread or breadsticks, add those too.
So that does it for this full recipe for Instant Pot Chicken Alfredo. Of course, I will link all of the recipes that I talked about in this episode right in the show notes, as well as that PinTV episode that I told you about where I’m making this for dinner live. It’s a 30 minute episode, really fast. You can watch it and learn how to make this.
Outro: As a newer show, we would love to have you either rate and review the show or follow along on your preferred podcast player. Until next time, I hope this episode of Let’s Make Dinner makes your dinner time a little easier. See ya.
I think Alfredo means “with cheese”. I need to look that up. I’m going to look that up right now while I’m recording. Let’s see. What does Alfredo mean in English? Let’s look. Alfredo. Well, it’s just saying a sauce for pasta. Oh, I know. Let’s look up, what does Fredo mean? In English, I’m sure somebody out there screaming right now, means cheese!!!!!! Gosh, nope. Cold and passionless. I don’t think that that describes Alfredo at all.
Tips Shared
Make sure you use the very best parmesan cheese you can. Really good parmesan will look kind of dry and craggy and have a rind that is stamped or has words or letters. This usually means it was cut from a larger aged wheel of parm.
Criss-cross your fettuccine into layers so that it doesn’t cook together in one clump.
Don’t skip the lemon. It adds a bright zest that this heavy and rich dish needs.
Recipes Mentioned
Equipment Recommended
Follow Along

Subscribe To Stay Connected!
Sign up for the Mom's Dinner Newsletter and get dinner help delivered straight to your inbox. From new recipes and videos to weekly dinner ideas and kitchen tips, it's your go-to resource for feeling confident at dinnertime.