• Home
  • All Recipes
  • Instant Pot
    • All Instant Pot Recipes
    • Instant Pot Soup
    • Instant Pot Beef
    • Instant Pot Chicken
    • Instant Pot Pork
    • Instant Pot Turkey
    • Instant Pot Pasta
    • Instant Pot Vegetarian
  • Dinner
    • Beef
    • Chicken
    • Pork
    • Turkey
    • Fish & Seafood
    • Mexican
    • Pasta
    • Vegetarian
  • Subscribe
menu icon
go to homepage
  • All Recipes
  • Dinner
  • About
  • Subscribe
subscribe
search icon
Homepage link
  • All Recipes
  • Dinner
  • About
  • Subscribe
ร—
You are here: Home

Horseradish Cream Sauce

June 17, 2022 by Susie Weinrich Leave a Comment

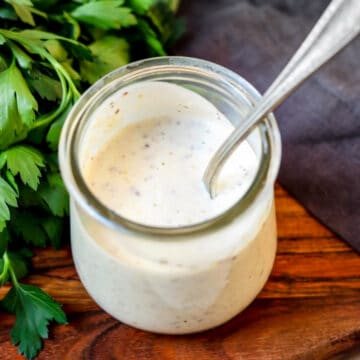
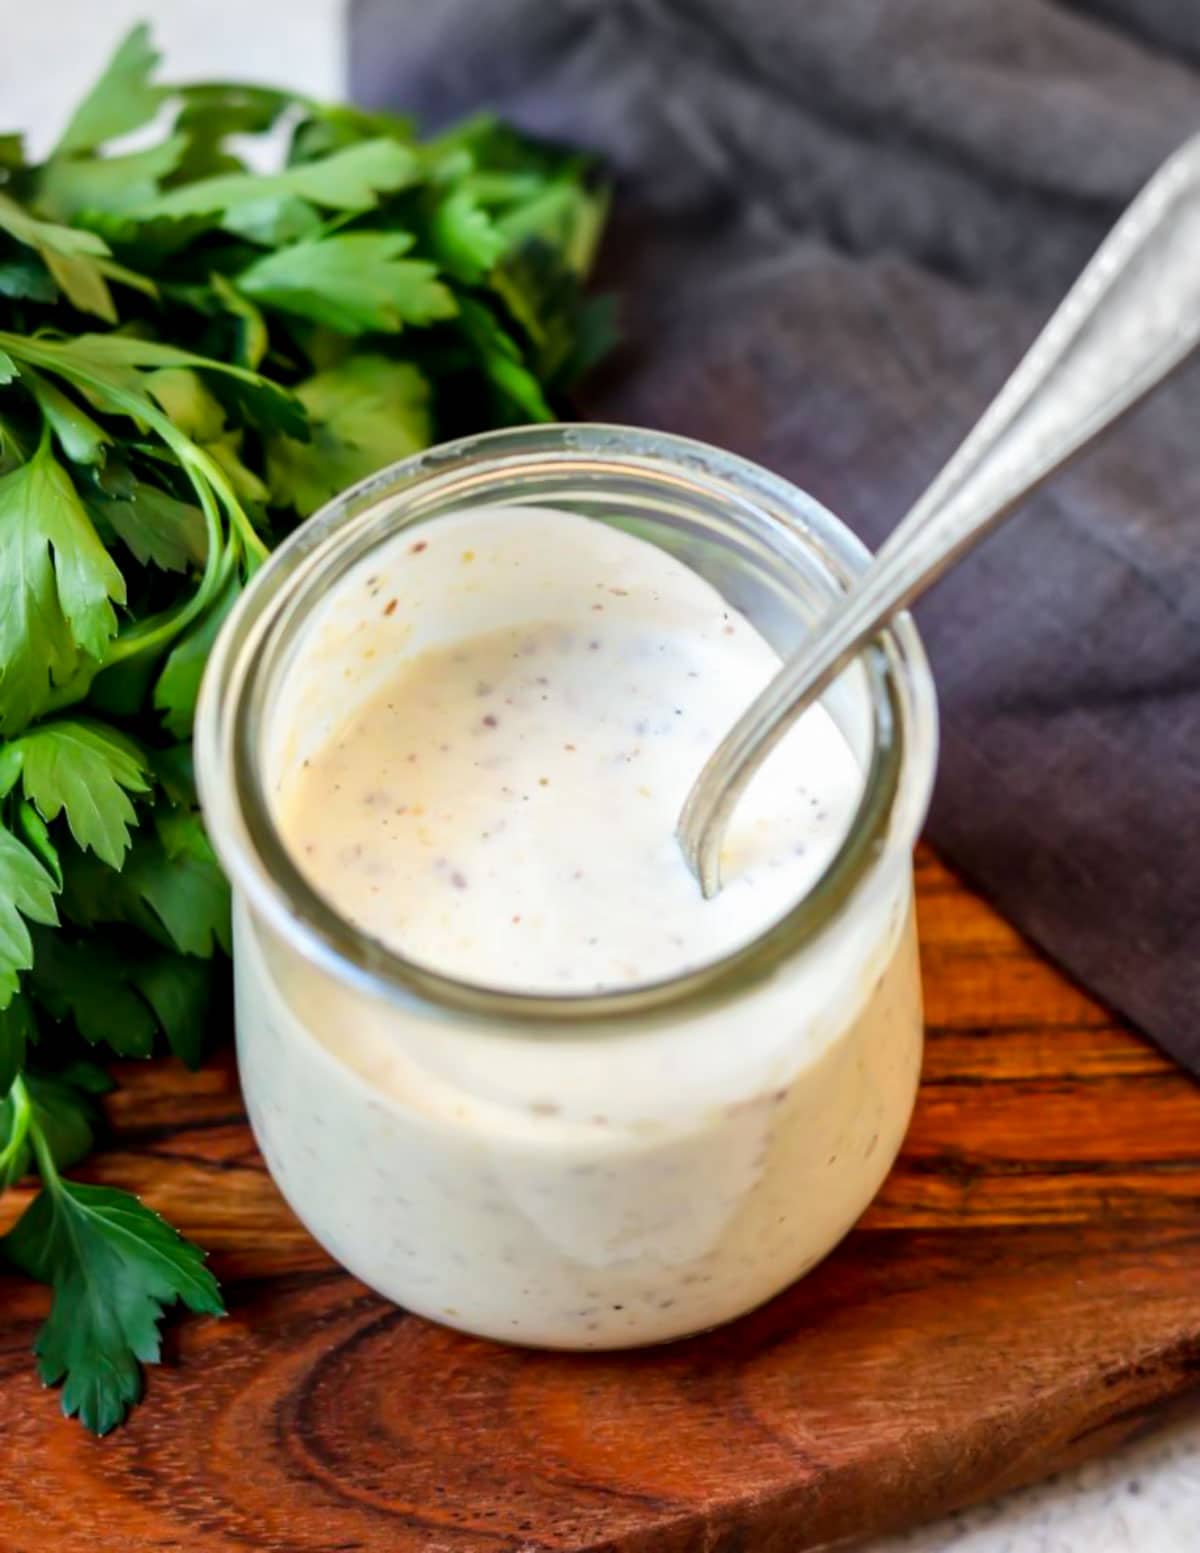
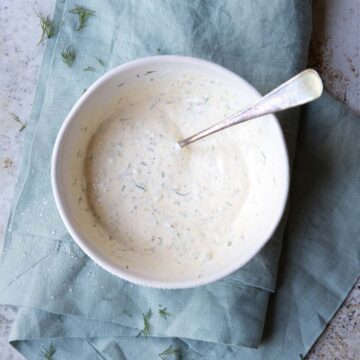
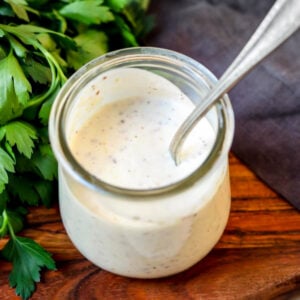
horseradish cream sauce in a jar with a spoon

Horseradish Cream Sauce is a wonderful thick sauce that is made by mixing sour cream, mayo, mustards, and horseradish. This is a killer sauce originally published by Ina Garten (Barefoot Contessa). She uses it as a dipping sauce for Roasted Beef Tenderloin, which is amazing! But we have found over time that this sauce is good for SO MUCH MORE!!

horseradish cream sauce in a little jar

Uses for Horseradish Cream Sauce

We find this to be like the ultimate “universal sauce”. It is good on just about everything from burgers to potato chips. Here are some great ideas to use this homemade horseradish cream sauce:

Grilled Chicken Sandwiches

This sauce is excellent on top of grilled buttermilk chicken. Here is how to build a killer chicken sandwich: Brioche buns, lots of horseradish cream sauce, lettuce, tomato, grilled chicken, avocado, and thick cut crispy bacon.

Pork Tenderloin

Horseradish and pork are a match made in heaven. If you love a pork tenderloin this sauce is perfect to be served on the side!

Burger Topper

Whether you make a Grilled Beef Burger, Juicy Turkey Burger or Pork Burger this sauce would be amazing smeared all over the bun and drizzled on the burger! Add some lettuce, tomato and onion for the ultimate summer burger.

Dip or Sauce for….

You can dip just about anything in this sauce, but we love it with:

  • chicken fingers
  • prime rib
  • beef tenderloin
  • steak bites
  • grilled chicken
  • grilled veggies
  • chips

More Sauce Recipes To Check Out

  • a chicken nugget dipping into homemade honey mustard dip
    2 Min. Honey Mustard Dipping Sauce
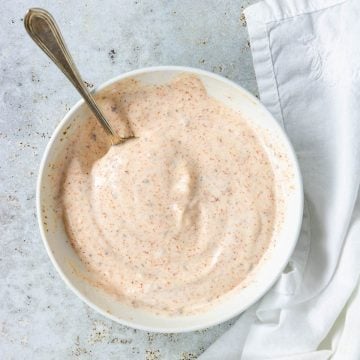
  • homemade cajun aioli in a white bowl with a spoon
    Simple Cajun Aioli
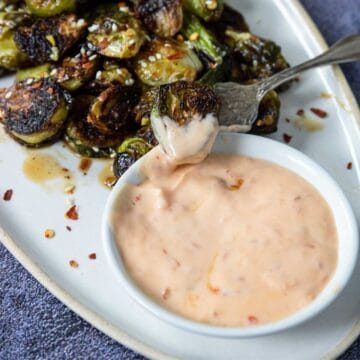
  • a bowl of sambal aioli with a brussel sprout dipping in
    Sambal Aioli
  • tartar sauce mixed in a small bowl
    Perfect Homemade Tartar Sauce

Susie leaning on the kitchen counter

๐Ÿ’›๐Ÿ’›๐Ÿ’›๐Ÿ’›๐Ÿ’›

Did you make this recipe?

I would love to hear your review, especially if you have tips and tricks to add! Pop down to the comment section and connect with me

Rate This Recipeโ†’
horseradish cream sauce in a jar with a spoon

Horseradish Cream Sauce

A delicious creamy sauce perfect for dipping or smearing. Made with simple ingredients like mayo, sour cream, mustards and horseradish.
Perfect dip or sauce for most proteins (beef, pork, chicken and turkey)!!
5 from 2 votes
Print Pin Rate Save Saved!
Prep Time: 10 minutes minutes
Cook Time: 0 minutes minutes
Total Time: 10 minutes minutes
Servings: 1 cup (approx)
Author: Susie Weinrich

Ingredients

  • 1 ยฝ cups mayonnaise
  • โ…“ cup sour cream
  • 3 tablespoon Dijon mustard
  • 1 ยฝ tablespoon whole grain mustard
  • 1 tablespoon prepared horseradish - (more to taste)
  • pinch kosher salt

Instructions
 

  • In a bowl whisk together the mayonnaise, sour cream, both mustards, horseradish, and kosher salt.
  • Can be used right away or place in fridge, covered, for up to 2 weeks.

Using your Horseradish Cream Sauce

  • This is like a universal sauce! It is good on just about anything!
  • Makes a great grilled chicken sandwich, especially with buttermilk marinated grilled chicken, lettuce, tomato, avocado and thick cut crispy bacon.
  • Wonderful on all types of burgers: Beef Burger, Turkey Burger or Pork Burger.
  • Excellent dip for pork tenderloin, grilled steak or steak bites, chicken fingers, or grilled veggies.

Recipe Tips and Notes:

Original Recipe: This recipe is originally published by Ina Garten for her Beef Tenderloin Recipe.
Did you make this recipe?Connect with me and let me know by commenting below!
Jump to Comments

Episode 006 Homemade Tacos

June 16, 2022 by Susie Weinrich Leave a Comment

ground beef tacos and podcast text "Let's Make Dinner"

In Episode 006 we are making Homemade Ground Beef Tacos for dinner. Susie shares a great way to make homemade tacos without a taco seasoning packet! All you need are some spices from your spice cabinet, a little tomato paste and some water.  Dinner will be ready in under 30 minutes! 

Transcript

Click for the full transcript.

Intro: Welcome to Let’s Make Dinner, your audio library of amazing dinner recipes you can get on the table any night of the week. I’m your host, Susie Weinrich.

Susie Weinrich: It’s Taco Tuesday. Do you know what that means? We are going to be making some tacos for dinner. These are going to be ground beef tacos, and I have a little PSA before we get started. Did you know that you can make tacos without buying that spice packet from the grocery store? If you have a well-stocked spice cabinet, you can totally make tacos. 

This is a great budget-friendly dinner, one pound of ground beef, some taco shells, maybe some toppings, salsa, and your spice cabinet, and you have dinner made in under 30 minutes.

Tips and Tricks: Before we get to making this recipe, let me go over a couple of tips that I have for you when you’re making homemade ground beef tacos. First of all, is your ground beef. I recommend that you use 85/15 ground beef. If you have 80/20, it will totally work. I just find sometimes 80/20 in tacos can get a little bit greasy. The 85/15, or even 90/10 still has enough fat to be flavorful, but not so much fat that you’re going to have greasy taco meat. I recommend 80/20 for hamburgers, but that’s because some of the grease is going to drain out of your hamburger into the grill. Whereas with taco meat and stuff, you’re actually sauteing it in a pan and it’s cooking in its own fat. Which is actually flavor and delicious, but too much is not good. So 85/15 is my recommendation here. 

Number two, this is a piece of equipment that I love and I use way more than I thought I would. I am not one who likes equipment in the kitchen just to have equipment. I like things that I use often. I’m not even sure of the technical name of this piece of equipment. I call it a meat masher, and it basically looks like a four-pronged spatula. It has a cross, and you literally can mash the meat up and crumble the meat really well. It works great for sausage which can sometimes be hard to crumble. 

Ground Beef Tacos Recipe: Let’s get onto this recipe. So you’re going to want to take a large skillet over medium heat and add some oil to that pan about a tablespoon of olive oil or vegetable oil will work as well. Now once that’s hot, you’re going to add one pound of ground beef and get to crumbling that while it browns and cooks through. While that cooks, I recommend mixing up your seasoning in a little bowl. What you’re going to need for that is one teaspoon each of chili powder and cumin, half a teaspoon each of onion powder, garlic powder, and dried oregano. A quarter teaspoon of smoked paprika, and then three-quarters teaspoon of kosher salt, and a quarter teaspoon of black pepper. If you like a little spice, you could certainly add some red pepper flakes in there or some cayenne pepper. 

Now mix that together with a fork and set that aside for just a minute. Go back to the ground beef and drain off any excess grease that has been collected in the pan. Then you’re going to stir in one and a half tablespoons of tomato paste. Get that coated on all of the ground beef, and then you’re going to sprinkle in your seasoning. Again, stir around the pan, and get everything nice and coated. Pour in a third a cup of water, and then just let that simmer for about two minutes and it will get nice, syrupy isn’t the right word, it gets nice and kind of thick and coats the ground beef and makes it look like taco meat. Now you’re going to remove that from the heat and it’s time to make your tacos.

So however you like your tacos, hard shell, soft shell, lettuce, cheese, sour cream. Salsa, guacamole. I’ve got a great salsa and guacamole recipe that I will link in the show notes for you. But however you like it, set it all out and let everybody make their own tacos. 
Now, as far as side dishes, if it’s a busy night, put out some chips, salsa, and guacamole and call it good. If you want it more of a full Mexican-style dinner, I’ve got a great recipe for 15-minute refried beans, which let me tell you, the secret to really good refried beans is using a can of whole pinto beans and a can of refried beans. Mix it together. So good. Then I also have a great recipe for Mexican rice that I will also link in the show notes for you.

That does it for Ground Beef Tacos pretty easily, right? Of course, I will link the full principle recipe for the Ground Beef Tacos in the show notes for you so you can easily find it when you’re ready to make them. 
That does it for today. If you are enjoying these episodes of Let’s Make Dinner, I would love it if you would subscribe or follow in your preferred podcast player. That way, all of our new episodes will show up right in your podcast feed. 
Outro: Until next time, I hope this episode of Let’s Make Dinner makes your dinner time a little easier.

Recipes Mentioned

  • Homemade Ground Beef Tacos
  • The Best Margarita
  • Guacamole
  • Salsa
  • Easy Mexican Rice
  • 15 Minute Refried Beans

Equipment Mentioned

I don’t like having a lot of equipment and tools that I never use cluttering up my drawers. But this Meat Masher is something I use OFTEN! It is especially great when you crumble sausage, which can tend to be “sticky”.

Grilled Steak Tacos Recipe with Chipotle Crema

June 15, 2022 by Susie Weinrich Leave a Comment

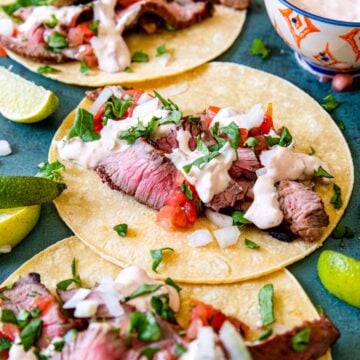
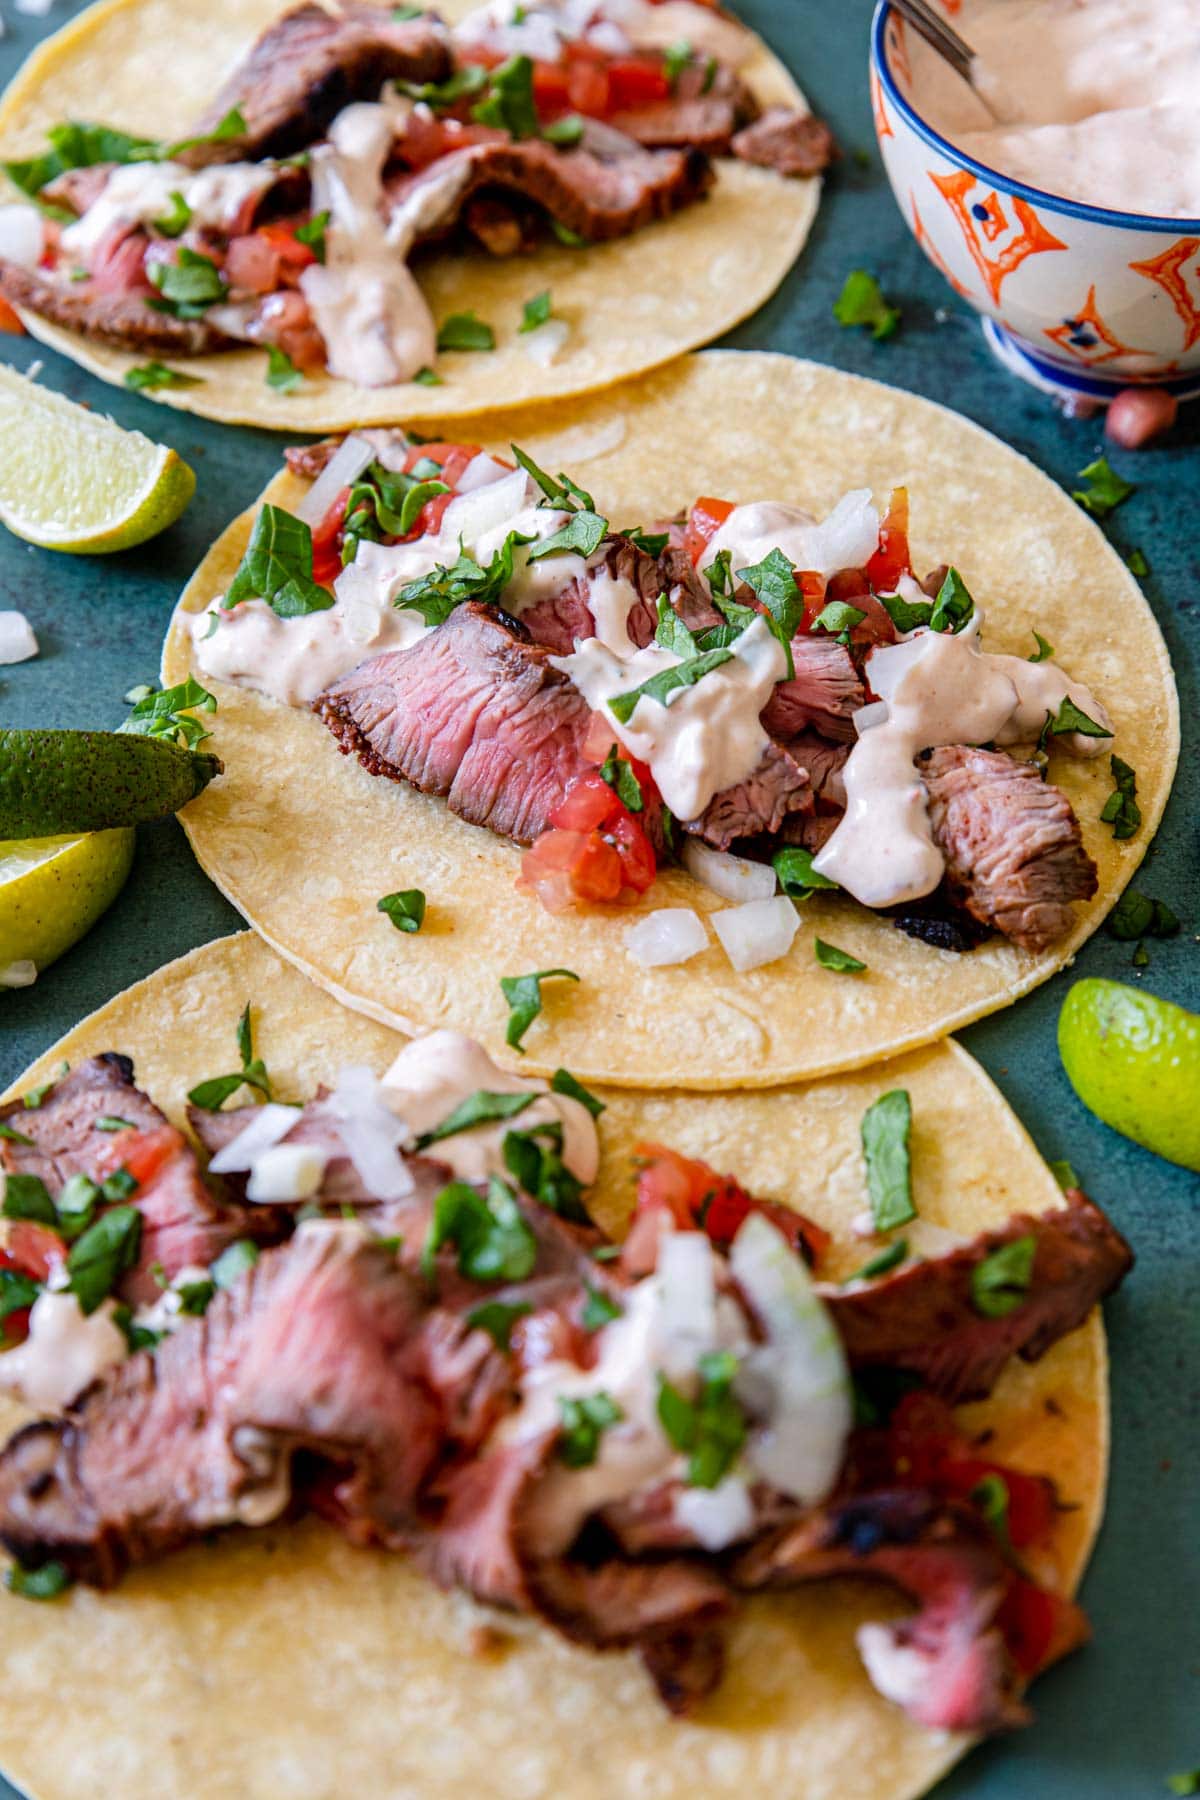
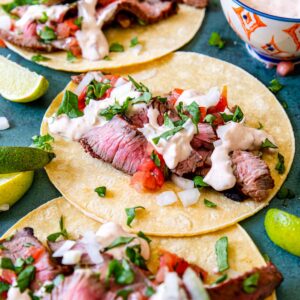
Grilled Steak Tacos assembled with pico de gallo and chipotle crema

Sure, you could just grill up a steak and slice it up for taco -but we're aiming for AMAZING here. These Grilled Steak Tacos go beyond the basics with a well-tested marinade that packs the steak with smoky, savory flavor before it ever hits the grill. Then just when you think your steak taco can't get better, a chipotle crema gets drizzled over top. These Grilled Steak Tacos aren't just amazing-they're family-dinner-approved.

grilled steak tacos with pico de gallo and chipotle crema

Add some chips with guacamole, Mexican Rice and Refried Beans. And don’t forget to whip up a Margarita on the Rocks (or your favorite tequila cocktail).

[feast_advanced_jump_to]

Why You’ll Love This Grilled Steak Tacos Recipe

  • A perfect summer dinner.
  • Great alternative to a traditional ground beef taco or shredded chicken taco.
  • An elevated Mexican recipe that your whole family will love on taco night.
  • Made with a more economical cut of beef, Top Sirloin.
  • Restaurant style tacos at home!

Ingredients for Grilled Steak Tacos

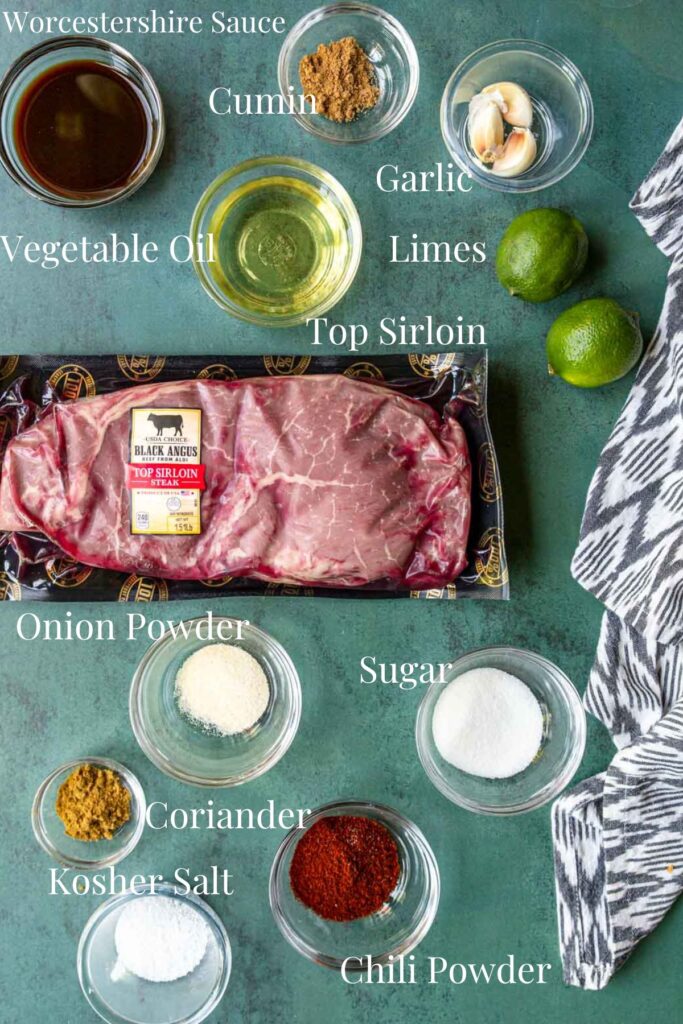
The Grilled Steak Tacos are made with pretty simple ingredients, pictured is everything you need:

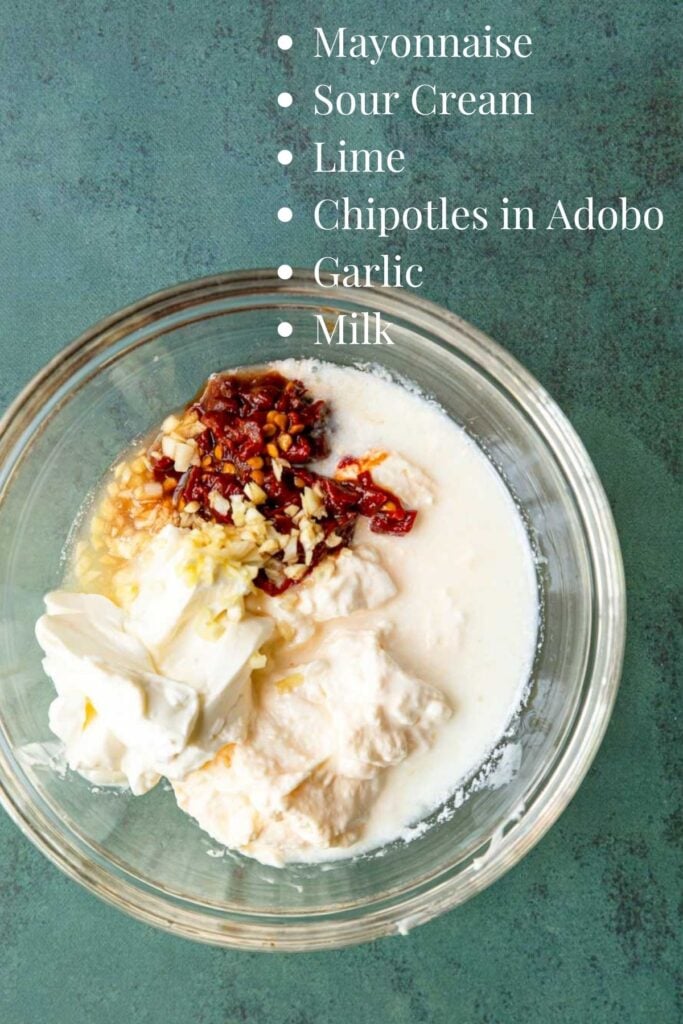
ingredients listed with text for chipotle lime crema
all the ingredients you need to make grilled steak tacos

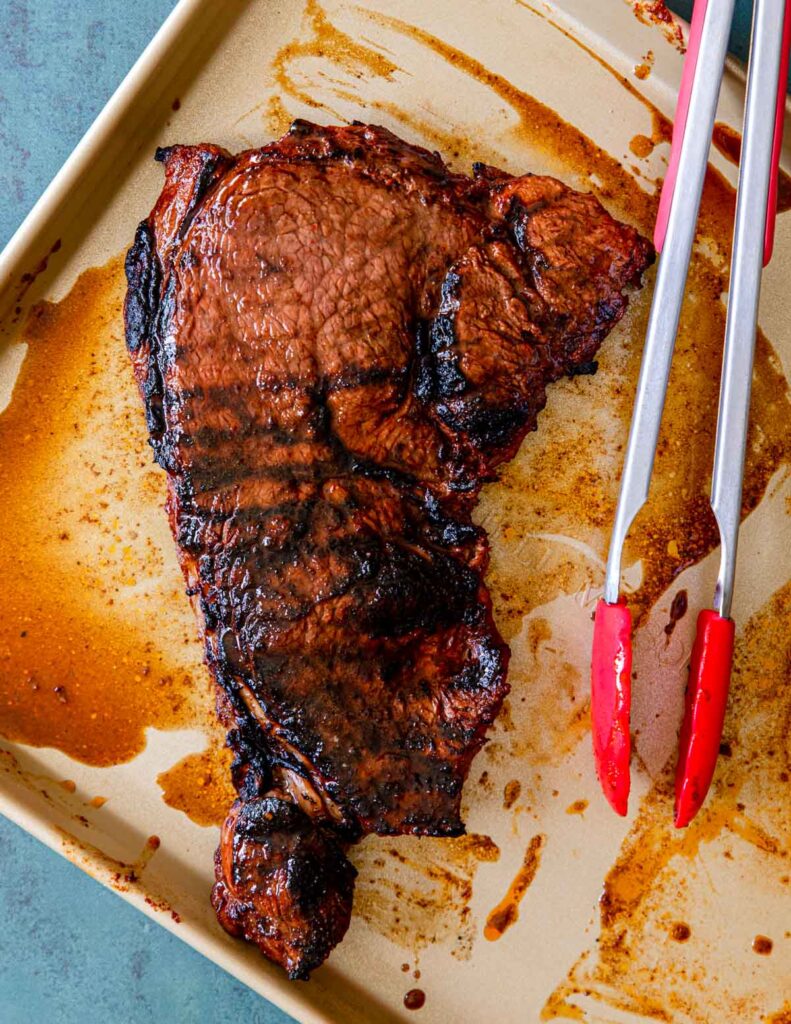
Top Sirloin Steak: Find a Top Sirloin that is around 1 .5-2 lbs. This is a lean cut of beef so you will want to make sure you don’t cook it past medium. (this is the cut of beef also used in these Garlic Butter Steak Bites.)

top sirloin grilled for tacos
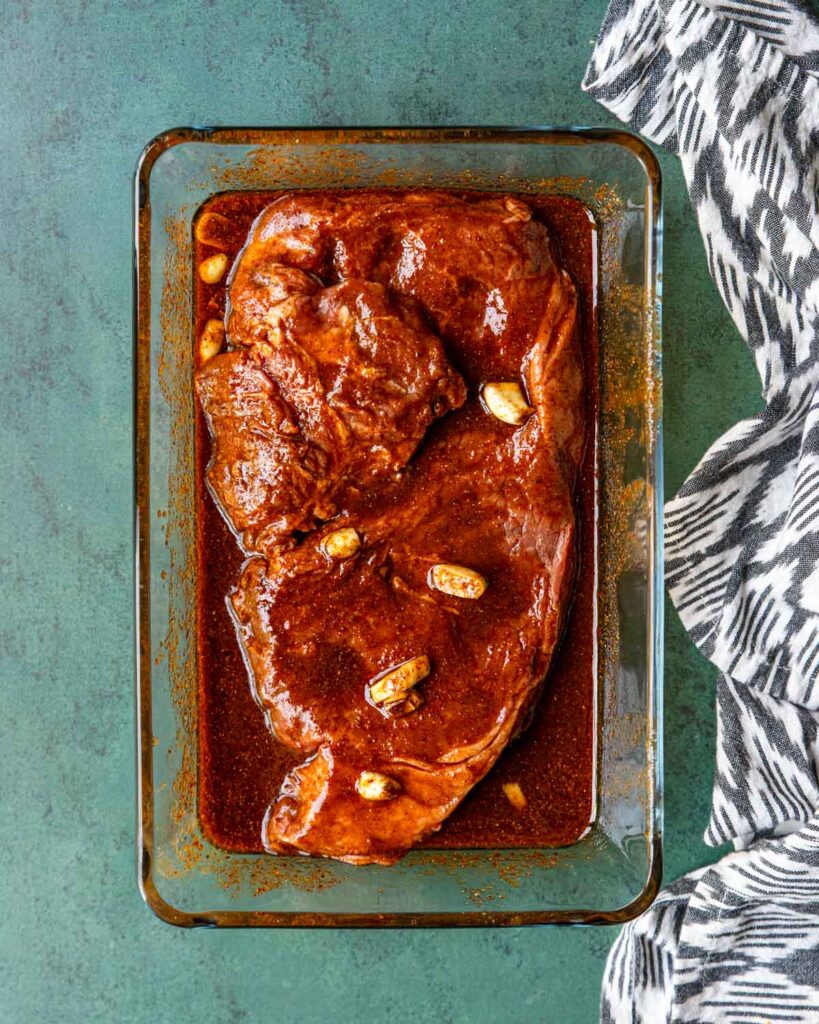
top sirloin marinating to be grilled

Chipotle in Adobo: these are smoky little peppers that come in a can. You can find them near the Mexican foods at the grocery store. Don’t be fooled, they are spicy! So you will not want to use a whole can for the crema, just pull 3 out of the can. You can freeze the rest for up to a year.

How to Make Steak Tacos

Follow these tips to make sure your Mexican Steak Tacos turn out perfect!

  • Grill your steak over direct heat to a medium-rare/medium, 135-145 internal temperature.
  • Getting a few charred pieces on the steak are super delicious.
  • Use an instant read thermometer to make sure you cook the steak just right.
  • Let the steak cool for at least 5-10 minutes before slicing, this allows the juices to redistribute & reabsorb in the steak.
  • Slice the steak into thin strips across the grain.
  • Heat your corn tortillas in the microwave, oven or skillet before eating, this will make them more pliable and they won’t crack and tear.
  • Add any of your favorite toppings for tacos!

Serving

The 1.5-2lb. Sirloin Steak, sliced thin, will make about 10-12 tacos, making the tacos with about 3 strips each. If you are serving 2-3 tacos per person this will serve 4-5 people.

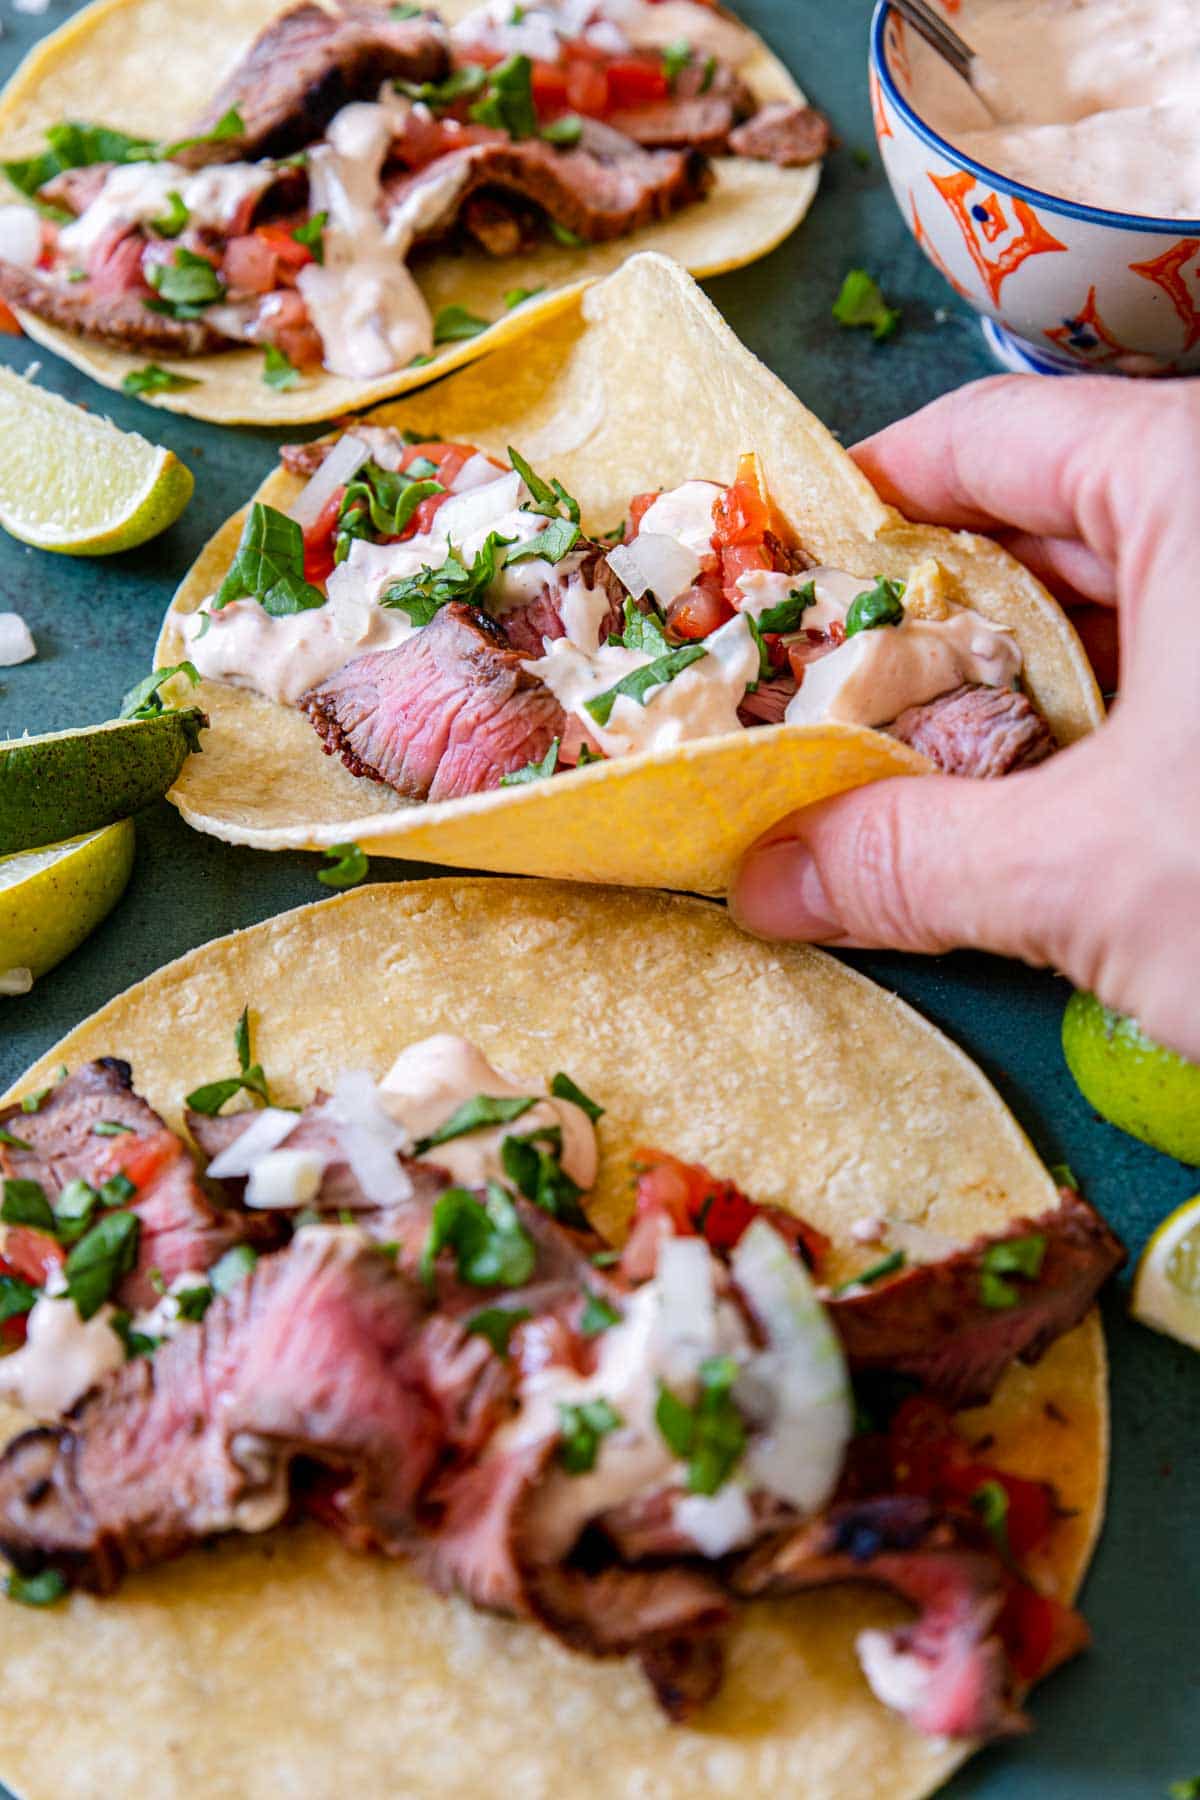
a hand picking up a grilled steak taco

We recommend serving these tacos “buffet style” so that everyone can assemble their own tacos.

Then add some Mexican Rice, Refried Beans and Cilantro Lime Pineapple on the side.

Storing

Leftover Grilled Steak and the sauce can be stored in the fridge, in a covered container, for up to 4 days. To reheat either pop in the microwave for 45 seconds, or saute in a pan with a little oil until warmed through.

More Taco Recipes

We love a good taco around here! Here are some more to try next Taco Tuesday:

  • Fish Stick Tacos
  • four ground beef tacos in a row with pico de gallo and sour cream
    Easy Ground Beef Tacos
  • shredded chicken in a bowl with taco fixing around
    Instant Pot Shredded Chicken Tacos
  • two chicken tacos in flour tortillas
    Creamy Chicken Tacos

Susie leaning on the kitchen counter

๐Ÿ’›๐Ÿ’›๐Ÿ’›๐Ÿ’›๐Ÿ’›

Did you make this recipe?

I would love to hear your review, especially if you have tips and tricks to add! Pop down to the comment section and connect with me

Rate This Recipeโ†’
Grilled Steak Tacos assembled with pico de gallo and chipotle crema

Grilled Steak Tacos with Chipotle Crema

Marinated Top Sirloin steak is grilled to a medium rare and then sliced thin to serve on tacos, a recipe for a chipotle crema is included to drizzle all over the steak! Delicious!
5 from 1 vote
Print Pin Rate Save Saved!
Prep Time: 15 minutes minutes
Cook Time: 8 minutes minutes
Marinating Time: 4 hours hours
Total Time: 4 hours hours 23 minutes minutes
Servings: 4 people
Author: Susie Weinrich

Equipment

  • Grill (gas or charcoal)
  • Instant Read Thermometer

Ingredients

Grilled Steak Taco Marinade

  • 1 ยฝ – 2 lbs. Top Sirloin Steak
  • 3 Tbsp. Worcestershire sauce
  • 3 Tbsp. fresh squeezed lime juice
  • 3 Tbsp. vegetable oil
  • 1 Tbsp. sugar
  • 1 tsp. ground cumin
  • 1 Tbsp. chili powder
  • 1 tsp. ground coriander
  • 1 tsp. onion powder
  • 3 large cloves garlic - chopped
  • ยพ tsp. kosher salt

Chipotle Lime Crema

  • ยฝ cup mayonnaise
  • ยผ cup sour cream
  • 3 teaspoon fresh lime juice
  • 3 chipotle chilies in adobo sauce - finely diced
  • 1 large garlic clove - minced
  • 2 tablespoon milk

Tacos

  • corn or flour tortillas
  • Simple Pico De Gallo - store bought or use this recipe https://momsdinner.net/pico-de-gallo/

Instructions
 

Marinating the Steak

  • In a glass baking dish whisk together the Worcestershire sauce, lime juice, vegetable oil, sugar, cumin, chili powder, ground coriander, onion powder, garlic and kosher salt.
  • Using a fork, poke holes all over 1 side of the steak. Place the steak in the dish with the marinade and turn to coat both sides evenly with the marinade.
  • Cover the dish with plastic wrap and refrigerate for 4-8 hours (remove the steak from the refrigerator 30 minutes prior to grilling and let set at room temp.)

Grill

  • Prepare the grill - you will want to set your grill up for high/direct heat.
    While the grill heats up take the steak out of the fridge and let it sit at room temp for about 30 minutes. This is called tempering and will help your steak cook up more evenly.)
  • Grill the steak, covered, for 4-5 minutes per side for medium/rare (135 degrees with an instant read thermometer).
    The charred bits are extra tasty!
  • Remove the steak from the grill and let it rest on a cutting board for 5-10 minutes.
  • Thinly slice the meat against the grain.

Serving

  • Make the Chipotle Lime Crema by mixing all the ingredients in a bowl.
    (you can also make this when you make the marinade for the steak and just store it in the fridge)
  • Lightly char or warm the flour or corn tortillas over an open flame, either directly on the gill or over a gas cooktop. Alternately warm in the microwave or oven.
  • Top the tortillas with the thinly sliced grilled steak, pico de gallo and a generous drizzle of the chipotle lime crema.

Recipe Tips and Notes:

Sides: Goes great with chips & guacamole, Mexican Rice, Refried Beans and Cilantro Lime Pineapple.ย 
Don’t forget the margarita or your favorite Tequila Cocktial.
Did you make this recipe?Connect with me and let me know by commenting below!
Jump to Comments

Episode 005 Baked Parmesan Tilapia

June 14, 2022 by Susie Weinrich Leave a Comment

baked parmesan tilapia with Let's Make Dinner Podcast text

In Episode 005 we are making Baked Parmesan Tilapia. Susie shares this 15 minute dinner, yep I said 15 minutes! The tilapia cooks quickly under your oven broiler, add a delicious mixture of parmesan, butter, sour cream, capers and lemon and finish for another 3 minutes in the oven. Your dinner is ready!  Add some roasted asparagus and cous cous for a great dinner idea.

Transcript

Click for the full transcript.

Intro: Welcome to Let’s Make Dinner, your audio library of amazing dinner recipes you can get on the table any night of the week. I’m your host, Susie Weinrich. 

Hello. Hello. Let’s make some dinner. It’s about dinnertime and I am getting ready to put together dinner. I thought I would come on here and talk about what we are making tonight.

We are having Parmesan Tilapia. If you need a quick and easy dinner idea that doesn’t taste or feel quick and easy, this is it. It’s ready in 15 minutes from start to finish. I have some great side dish ideas that I’ll give you at the end that will also be ready in 15 minutes. 

Some of the ingredients that you’re going to want to make sure that you have on hand for this recipe are tilapia filets, fresh Parmesan cheese, mayonnaise, sour cream, softened butter, a lemon, capers, just some normal spices from your spice cabinet. There is one spice that you may not have, and that is dried dill weed. You’ll definitely want to grab that because the dill is perfect in that Parmesan sauce. If you like a little hot sauce, you can also make sure that you have some Tabasco or Chululo or whatever your favorite hot sauce is.

Tips and Tricks: Some equipment that you need to make sure you have to make this recipe is a rimmed baking sheet, foil, and then some kind of non-stick cooking spray. All right, let’s go over some tips for this recipe. Now, if you’re buying tilapia filets, you’ll want to buy something that is about six to eight ounces in size for each filet. When I buy my tilapia filets frozen, if I can remember, I will put them in the fridge the day before and let them thaw in there. But if you’re like me, you always forget about it. We need quick thaw methods over here at this house. For a quick thaw, what you want to do is fill up either a bowl or your sink with just room temperature water, keep that tilapia in its original packaging, and place it right down in that water. Leave it for about 10 to 15 minutes, then switch the water out again and let it sit in there for another 10 to 15 minutes, and it should be nice and thawed for you to use in this recipe. 

Another tip I have for you is the lemon. When you have a recipe that calls for the zest and the juice of a lemon, you always want to make sure that you zest first. Then cut it in half and squeeze the juice. 

Parmesan Tilapia Recipe: All right, let’s get started with this recipe. It actually comes together very quickly. So you want to do a few prep things before you actually start cooking your tilapia. The first thing is to preheat your oven broiler to 500 or 550 degrees and move that oven rack to one of the top two positions, so it’s anywhere from like six to 10 inches from that broiler heating element.

Next, you want to go ahead and mix up that Parmesan sauce that’s going to go on top of the tilapia. In a small bowl, you’re going to stir together half a cup of grated Parmesan cheese, three tablespoons of each one of these – mayonnaise, sour cream, and butter. Then you want zest of about half of the lemon, one and a half tablespoons of freshly squeezed lemon juice, and one and a half tablespoons of capers. A three-quarter teaspoon of onion powder, half a teaspoon of kosher salt, and half a teaspoon of dried dill weed. Half a teaspoon of hot sauce if you like it spicy. Okay, it’s not going to be super spicy. It just adds a nice little tang or kick to the sauce and then finishes with a quarter teaspoon of black pepper. Give that all a mix and then set that aside. You don’t need that quite yet. 

Now you’re going to want to prepare your rimmed baking sheet by covering it with foil and then spraying it generously with some type of non-stick cooking spray. Then go ahead and lay the tilapia filets on the baking sheet so they are not overlapping or touching. Pop that under the broiler for about three minutes. Then you’re going to pull it out of the oven and flip those filets over. Now you need the Parmesan sauce. You’re going to grab that Parmesan sauce and divide it evenly across all four filets and then spread it to the edges of each piece of fish. Then return it to the broiler for about another four or five minutes and it’s done.

That is it. That is the whole entire recipe. Isn’t it crazy? Your fish will be nice and flaky. The Parmesan sauce gets kind of golden in spots. Now if some of it starts to seep off of the fish when it comes out of the oven, you can just kind of spoon that back over the fish. 

For side dishes, when I am serving Parmesan tilapia, I like to add usually some type of vegetable and some type of starch. For the vegetable, I just love to do an oven-roasted asparagus. You could even pop it in the oven when the tilapia is in there. My oven-roasted asparagus is cooked at 400 degrees for 12 minutes, but since you have that broiler on, you could probably get it cooked in, I don’t know, like eight minutes. 

Then I also like to serve a couscous on the side. If you’ve never made couscous, it’s ready in about eight minutes because you just boil some broth or water. Pop that couscous in there, remove it from the heat and let it sit covered for five minutes. That’s it. It’s done. 

So as you can see, all of these dishes are really done and ready in 15 minutes. You’re going to have an amazing dinner. I will place the links for the full printable recipes for the Parmesan tilapia and the oven roasted asparagus, so they will be easy for you to find right in the show notes. 

If these episodes of Let’s Make Dinner helping you get dinner on the table, I would love it if you would subscribe or follow in your preferred podcast player. It will just make it easier for you to find our future episodes right in your podcast feed. 

Outro: Until next time, I hope this episode of Let’s Make Dinner, make your dinner time a little easier.

Recipes Mentioned

  • 15 min Parmesan Tilapia
  • Roasted Asparagus

Quick Chili for Chili Dogs

June 13, 2022 by Susie Weinrich 4 Comments

quick stove top chili in a pot and on a wooden spoon

This an easy no-bean Chili for Hot Dogs – perfect to top your summer cookout hot dogs, or to add to a tailgating or game day hot dog buffet, it’s truly an American Classic! It is a super quick 15 minute chili sauce recipe that is full of ground beef, onions, tomato sauce, cumin and chili powder. Finish off your chili dogs with cheddar cheese, diced white onions, pickled jalapenos or pickle relish, whatever you like on top of your hot dogs.

quick stove top chili in a pot and on a wooden spoon

Listen To The Recipe

You can listen to this full recipe for Hot Dog Chili on my podcast, Let’s Make Dinner! I go over the full recipe and all my favorite tips for making it delicious.

What is a Chili Dog

A “Chili Dog” is an American hot dog in a bun that is topped with a savory meat sauce. It can also be called chili cheese dogs or Coney Dogs, depending on what parts of America you are in.

chili cheese dogs in a foil packet

The hot dog chili sauce is somewhat similar to Traditional Chili, but the chili sauce you use for hot dogs usually does not include beans.

Ingredients

You only need a handful of simple ingredients to make this delicious hot dog topper:

ingredients for quick stove top chili for chili dogs

Ground Beef: I recommend using an 85/15 lean ground beef. It has enough fat to be flavorful but not so much that your sauce becomes greasy.

Plenty of Spices: grab a handful of spices from your spice cabinet; chili powder, cumin, onion powder, garlic powder, sugar and kosher salt. Add some cayenne pepper if you like it spicy.

White Onions: Add a nice layer of flavor and texture to the chili.

Tomato Sauce: just enough tomato sauce is added to make this a chili sauce, but not soup. You want this chili to sit on top of your hot dog, not soak the bun.

Green Chilies: adds a nice flavor to the chili.

Best Way To Warm Hot Dogs

To make a chili cheese dog you obviously need hot dogs. We think the very best way to heat a hot dog is in simmering water.

Fill a pot with water and place over medium heat. Add the hot dogs and let them simmer while you make the chili. Dinner will be ready in 15 minutes!

Step by Step Instructions for Chili Sauce

  1. Start by placing a pot over medium heat. Add the oil then the diced white onion. Sautรฉ for about 5 minutes to soften the onions.
  2. Add the ground beef and crumble with a wooden spoon while cooking through. Pro Tip: A meat masher is a great tool to have in the kitchen if you use a lot of ground meat.
  3. Now pour in the tomato sauce and diced green chilies.
  4. Finish by adding the chili powder, cumin, sugar, garlic powder, onion powder, and kosher salt.
  5. Stir it all together and let it simmer for 2-3 minutes to warm through.
  6. It’s ready for your hot dogs (or it would be amazing on top of a baked potato)!

More Topping Ideas for Chili Cheese Dogs

Of course you want to have cheese to top your chili cheese dogs! Here are a few other ideas to put on your hot dog bar:

  • diced white onions
  • sauerkraut
  • ketchup, yellow mustard, mayo
  • jalapenos (fresh or pickled)
  • relish or dill relish
  • diced tomatoes
  • crispy bacon crumbles
chili cheese dogs in a foil packet on top of a cutting board

Storing

Store your leftover chili sauce in the fridge in an airtight container for up to 4 days. Reheat on the stove top or in the microwave. It may thicken in the fridge, add a little water to reconstitute.

Freezing

You can freeze any leftovers or make it ahead and freeze to use later! Cool completely and then place in a freezer safe baggie or container for up to 3 months. If you like to have single portions you can spoon the chili sauce into an ice cube tray, freeze for 24 hours and then pop out into a freezer safe baggie!

Chili Sauce Variations

  • Use any ground meat you like: ground turkey, ground pork or ground chicken will all work in this recipe.
  • For a stronger garlic flavor: add 2 minced garlic cloves when you add the onions.
  • Spice things up: add a pinch or two of red pepper flakes or cayenne pepper when you add the other spices.
  • Beans?: beans are not traditional in a chili sauce meant to top hot dogs, but if you LOVE beans you can add a can of drained pinto or black beans.
  • Vegetarian?: sub the ground meat for a vegetable crumble like Beyond Meat, Everything Legendary or Quorn. Then use a veggie dog.

More Ground Beef Recipes

  • four ground beef tacos in a row with pico de gallo and sour cream
    Easy Ground Beef Tacos
  • beef enchilada Casserole with a slice cut out so you can see the layers of corn tortillas, beef, cheese and sauce
    Ground Beef Enchilada Casserole
  • juicy burger on a bun with mustard, ketchup, lettuce and tomato
    Perfect Grilled Burger Recipe
  • BBQ meatballs on a plate
    Best Baked BBQ Meatballs

Susie leaning on the kitchen counter

๐Ÿ’›๐Ÿ’›๐Ÿ’›๐Ÿ’›๐Ÿ’›

Did you make this recipe?

I would love to hear your review, especially if you have tips and tricks to add! Pop down to the comment section and connect with me

Rate This Recipeโ†’
quick stove top chili in a pot and on a wooden spoon

Chili Sauce Recipe for Chili Dogs

A really quick and easy recipe for chili sauce (without beans) that is perfect to top a hot dog. Great for summer cookouts, tailgating and game day!
5 from 2 votes
Print Pin Rate Save Saved!
Prep Time: 5 minutes minutes
Cook Time: 10 minutes minutes
Total Time: 15 minutes minutes
Servings: 2 cups
Calories: 1463kcal
Author: Susie Weinrich

Ingredients

  • 1 tablespoon olive oil
  • 1 medium white onion - diced, extra for serving
  • 1 lb ground beef - 85/15 reccomended
  • 4 oz canned diced green chilies
  • 8 oz tomato sauce
  • 1 tablespoon chili powder
  • 2 teaspoon cumin
  • 1 teaspoon sugar
  • 1 teaspoon garlic powder
  • 1 teaspoon onion powder
  • 1 teaspoon kosher salt

Serving

  • hot dogs, buns, cheese… any other toppings your group loves. - see notes for full list of options

Instructions
 

Hot Dogs

  • Prep your hot dogs before you start the chili sauce.
    We highly recommend adding your hot dogs to simmering water and letting them warm through while you make the chili!

Chili Sauce

  • In a sauce pot over medium heat add 1 tablespoon olive or vegetable oil. Once it is shimmery and hot add the diced onions. Let them sautรฉ for about 5 minutes to soften, but do not brown.
    1 tablespoon olive oil, 1 medium white onion
  • Now add the ground beef and crumble into small pieces while it cooks through.
    1 lb ground beef
  • Once it is cooked drain any excess grease before moving on.
  • Pour in the tomato sauce and green chilies.
    8 oz tomato sauce, 4 oz canned diced green chilies
  • Add the chili powder, cumin, sugar, garlic powder, onion powder and kosher salt and stir to mix in completely.
    1 tablespoon chili powder, 2 teaspoon cumin, 1 teaspoon sugar, 1 teaspoon garlic powder, 1 teaspoon onion powder, 1 teaspoon kosher salt
  • Let simmer for about 2-3 minutes to come together.
  • Time to serve!!

Serving

  • Place your warmed hot dog in a bun, spoon the chili sauce over top, sprinkle on some cheese, then add all your favorite toppings (see notes section for a list of ideas).

Optional Variations to the Chili Sauce

  • Use any ground meat you like: ground turkey, ground pork or ground chicken will all work in this recipe.
    For a stronger garlic flavor: add 2 minced garlic cloves when you add the onions.
    Spice things up: add a pinch or two of red pepper flakes or cayenne pepper when you add the other spices.
    Beans?: beans are not traditional in a chili sauce meant to top hot dogs, but if you LOVE beans you can add a can of drained pinto or black beans.
    Vegetarian?: sub the ground meat for a vegetable crumble like Beyond Meat, Everything Legendary or Quorn. Then use a veggie dog.

Recipe Tips and Notes:

Great Chili Dog Toppings:
  • cheese
  • diced white onions
  • sauerkraut
  • ketchup, yellow mustard, mayo
  • jalapenos (fresh or pickled)
  • relish or dill relish
  • diced tomatoes
  • crispy bacon crumbles
Did you make this recipe?Connect with me and let me know by commenting below!
Jump to Comments
Serving: 1whole recipe | Calories: 1463kcal | Carbohydrates: 40g | Protein: 85g | Fat: 108g | Saturated Fat: 37g | Polyunsaturated Fat: 5g | Monounsaturated Fat: 51g | Trans Fat: 6g | Cholesterol: 322mg | Sodium: 3862mg | Potassium: 2556mg | Fiber: 10g | Sugar: 20g | Vitamin A: 3540IU | Vitamin C: 35mg | Calcium: 249mg | Iron: 17mg

The Best Cantarito Cocktail

June 11, 2022 by Susie Weinrich 7 Comments

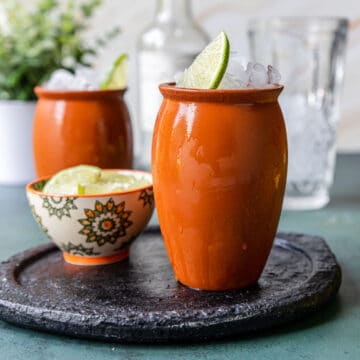
cantarito drink in a clay cup garnished with a lime wedge

You may not be familiar with this traditional Mexican Drink! A Cantarito is similar to a paloma cocktail in that it is a tequila based cocktail made with grapefruit soda and citrus juices. But this drink has a more complex citrus base of fresh squeezed lime, grapefruit and orange juice. The fun part is that it is served in a clay cup that helps keep your drink nice and cold!

Cantarito Drink in a jarrito de barro (clay cup)

This is truly a deliciously balanced cocktail. You get the tartness of lime and grapefruit, sweetness of the grapefruit soda and orange juice and a little salty earthiness from the tequila and kosher salt.

If you love tequila cocktails and are ready for something other than a margarita you should check out this Tequila Cobbler, Tequila Mojito or Tequila Lemonade!

Cantarito Clay Cups

If you notice in the picture above these cocktails are traditionally served in clay cups. They look like a terra cotta or clay pot that you would plant a small cactus in!

In Mexico these cups are traditionally used for Cantaritos. They are called Jarrito or Jarrito de Barro. Jarrito is translated as “little jug” and Barro is translated as “clay”, so it literally means little clay jug, which is perfect!

two clay cups also called jarritos de barro that have been soaked in water, these cups are used for cantarito drinks

You can find these clay cups on Amazon or more artisan options on Etsy. These are the Jarritos I purchased on Amazon.

You can buy them unglazed or glazed.

  • UNGLAZED cups will need to be soaked in ice cold water for about 10-15 minutes before you drink from them. This has two purposes; to chill the glass for a really nice cold drink, and to saturate the clay so it doesn’t absorb your cocktail. You will also want to make sure you don’t use soap on these cups, they are meant to only be rinsed with water.
  • GLAZED cups are raw clay on the outside and glazed on the inside so your drink won’t soak into the cup. These can also be soaked in ice water but it isn’t totally necessary. They are also generally dishwasher safe.

Drinking Experience

You can absolutely make this Cantarito Cocktail in a normal highball glass BUT I highly recommend purchasing the Traditional Clay Cups!! The drinking experience is equivalent to drinking a Mule out of a copper glass.

The drink stays super cold because of the clay. If you are a tactile person you are going to LOVE the hand feel of the clay cup, it is super cold and slightly wet/sweaty. It’s just unique all around… when have you ever drank out of clay cups!

Ingredients

You need a silver tequila, fresh grapefruit, orange, and lime, and grapefruit soda to make your Cantarito.

ingredients and supplies to make cantarito cocktails

Tequila: a silver or tequila blanco works best in this Mexican cocktail. I like Jose Cuervo Traditional ($), Espolon ($$), Cazadores ($$), or Casa Migos ($$$).

Grapefruit Soda: There are a few options for the soda added. You can grab any of these brands: Jarritos, Squirt, Fever Tree, Q Mixers. Use Fresca for less sugar but it will change the flavor of the drink.

Optional Garnish

Garnishing this Cantarito Cocktail with lime, grapefruit or orange cocktails is perfect. But some people like to rim the clay jug with a little Tajin Seasoning, just like you would garnish a margarita glass with kosher salt.

Tajin is classically used for fruits, veggies and meat. It has a semi salty flavor with herbs and spices: dried chilies and dehydrated lime juice.

Make It a Pitcher

If you want to make a pitcher of Cantaritos for a larger group, pop down to the recipe card and follow these instructions:

  1. Hover your cursor or finger over the “servings” section in the recipe card.
  2. Move the cursor that appears up to the amount of drinks you wish to make.
  3. That will change the ingredient amounts in the recipe card.
  4. Serve from a pitcher into glasses filled with ice.

More Tequila Cocktails

  • pineapple jalapeno spicy margarita in a glass with jalapenos to the side
    Pineapple Jalapeno Margarita
  • a glass of roasted strawberry margarita garnished with salt and berries
    Roasted Strawberry Margaritas
  • ranch Water cocktail in a mason jar with a bottle of Topo Chico
    Authentic Ranch Water

Susie leaning on the kitchen counter

๐Ÿ’›๐Ÿ’›๐Ÿ’›๐Ÿ’›๐Ÿ’›

Did you make this recipe?

I would love to hear your review, especially if you have tips and tricks to add! Pop down to the comment section and connect with me

Rate This Recipeโ†’
cantarito drink in a clay cup garnished with a lime wedge

The Best Cantarito Cocktail Recipe

A citrus forward, tequila based Mexican drink that is traditionally served in clay cups. Flavors of grapefruit, orange, and lime makes this an excellent summer cocktail.
5 from 10 votes
Print Pin Rate Save Saved!
Prep Time: 5 minutes minutes
Cook Time: 0 minutes minutes
Total Time: 5 minutes minutes
Servings: 1 drink
Author: Susie Weinrich

Equipment

  • Cocktail Shaker optional (can also use a mason jar, just be careful since it's glass)
  • Cantaritos Clay Glasses

Ingredients

  • 2 oz blanco tequila
  • 2 oz fresh orange juice
  • 1 oz fresh grapefruit juice
  • .5 oz fresh lime juice
  • 2 oz grapefruit soda - Squirt or something similar
  • pinch of kosher salt

Garnish

  • lime, orange or grapefruit wedges
  • optionally rim the Cantarito cup with Tajin Seasoning, just like you would rim a margarita glass with kosher salt.

Instructions
 

Cups/Glasses

  • You can use traditional clay cups called Jarritos de Barro or if you don't have those just use a highball glass.
  • Two types of Clay Cups (Jarritos de Barro)-
    UNGLAZED cups will need to be soaked in ice water for about 10-15 minutes before you drink from them. This has two purposes; to chill the glass for a really nice cold drink, and to saturate the clay so it doesn't absorb your cocktail. You will also want to make sure you don't use soap on these cups, they are meant to only be rinsed with water.
    GLAZED cups are raw clay on the outside and glazed on the inside so your drink won't soak into the cup. These can also be soaked in ice water but it isn't totally necessary. They are also generally dishwasher safe. (this is the type I use)
  • TIP: if you are going to soak your cups do it while you squeeze all your fresh juices!

Cantarito Cocktail

  • Fill your cup half way with ice. Set aside.
  • In your cocktail shaker add a few cubes of ice, tequila, a pinch of kosher salt, fresh squeezed grapefruit, orange and lime juices.
    2 oz blanco tequila, 2 oz fresh orange juice, 1 oz fresh grapefruit juice, .5 oz fresh lime juice, pinch of kosher salt
  • Pop the lid on the shaker and give it a vigorous shake for about 20 seconds.
  • Strain into your drinking glass/cup. Top with 2 oz of grapefruit soda.
    2 oz grapefruit soda
  • Optionally garnish with a lime, grapefruit or orange wedge.

Recipe Tips and Notes:

Tequila: a silver or tequila blanco works best in this Mexican cocktail. I like Jose Cuervo Traditional ($), Espolon ($$), Cazadores ($$), or Casa Migos ($$$).
Grapefruit Soda: There are a few options for the soda added. You can grab any of these brands: Jarritos, Squirt, Fever Tree, or Q Mixers. Use Fresca for less sugar but it will change the flavor of the drink.
Make It a Pitcher:ย 
  • Hover your cursor or finger over the “servings” section in the recipe card.
  • Move the cursor that appears up to the amount of drinks you wish to make.
  • That will change the ingredient amounts in the recipe card.
  • Serve from a pitcher into glasses filled with ice.
Did you make this recipe?Connect with me and let me know by commenting below!
Jump to Comments

Episode 004 Instant Pot BBQ Chicken

June 9, 2022 by Susie Weinrich Leave a Comment

episode art of Instant Pot BBQ Chicken on Let's Make Dinner Podcast

In Episode 004 we are making Instant Pot Pulled BBQ Chicken. Susie shares a very easy way to make tender and flavorful Pulled BBQ Chicken in your Instant Pot. The chicken is coated in a delicious dry rub and then pressure cooked, shredded and mixed with your favorite BBQ sauce.  Serve it as a delicious BBQ Chicken Sandwich or make these BBQ Chicken Sliders or BBQ Chicken Pizza.

Transcript

Click for the full transcript.

Intro: Welcome to Let’s Make Dinner, your audio library of amazing dinner recipes you can get on the table any night of the week. I’m your host, Susie Weinrich. 

Susie Weinrich: Calling all potheads. Okay, we’re not talking about marijuana today. We are talking about our lovely instant pots. Do you have an Instant Pot and do you love it? I am obsessed with mine when I first got it though, I will be honest, I felt like I was going to blow up my entire house and everybody in it. So the first couple times I actually made anything in my instant pot, I made everybody leave the kitchen and I would peek around the corner and see how much time I had left and then forget it about the very first time I had to turn that pressure valve and all the pressure flew out like a shotgun. So scared. But really, once you get everything figured out, the Instant Pot is such an amazing kitchen tool. You can cook huge pieces of meat, like pork loin or pork shoulder in such a short amount of time. Or even we love to make beef stew in it because that beef stew meat that is super inexpensive, cooks down incredibly tender in your instant pot.

Tips and Tricks: Today we are not making any of those recipes Today we are making Instant Pot Pulled Barbecue Chicken. If you are a meal prepper, you like to cook a large batch of something on the weekend and have it for your busy week ahead. If you want to cook something in the morning so that it’s ready for dinner at night, this is an excellent recipe because it keeps really well in the fridge.

Or if you want to make it and pop it in the freezer, It keeps really well in the freezer for about three months. But if you are just in time for dinner and you want to make pulled barbecue chicken sandwiches, it’s ready in about 30 minutes from start to finish.ย 

I bet you already have most of the ingredients you need to make this recipe. Oe thing you’re going to definitely want to make sure you have is one and a half to two pounds of fresh boneless skinless chicken breasts. You could also add in some thighs if you like a little dark meat. On this recipe, I have ingredients to make basically like a barbecue dry rub for your chicken. If you have one already that you like to use, just plan to use that. You don’t need to make your own. It’s not crucial part of the recipe. But if you do want to use my recipe, you’ll wanna make sure that you have brown sugar, kosher salt, black pepper, onion powder, and garlic powder, smoked paprika. Then for the liquid in the pot, we’re going to do either water or chicken broth, Worcestershire sauce, apple cider vinegar, and some crushed garlic cloves.

One tip that I want to give you on the chicken, we are picky about our chicken in this house because I’ve had too many experiences with chicken that had a weird texture, was kind of grizzly or tasted weird, and we were just done with it. What I found is the very best chicken is called air chilled chicken, and that’s not a brand. It is a method. Anytime you can find a chicken that says air chilled right on the front of the package, that’s going to be one of your very best options for flavor and texture. 

Instant Pot BBQ Chicken Recipe: All right, let’s get on with the recipe. You’ll want to take your chicken breasts and if you have extra large chicken breasts, go ahead and cut them into four pieces. If it’s more of a normal or small sized chicken breast, then just cut each piece in half. Then you’re going to want to make your barbecue dry rub. Like I said before, if you already have one that you like, go ahead and use that. But if you do not in a little bowl, you’re going to want to mix together one teaspoon of brown sugar, one and a half teaspoons of kosher salt, one teaspoon of both black pepper and garlic powder, half a teaspoon of onion powder, and a quarter teaspoon of smoked paprika. Give that a really good mix and then sprinkle that on all sides of the chicken. I like to press it onto the chicken a little bit so that it adheres really well. 

Now inside of the Instant Pot, you’ll pour one cup of water, or you can use chicken broth, one tablespoon of Worcestershire sauce, half a tablespoon of apple cider vinegar, and then three or four cloves of crushed fresh garlic. Go ahead and place that seasoned chicken right down in that liquid and then pop the lid of the instant pot on. Turn that pressure valve on the top to seal and set your instant pot to cook on high pressure, normal heat for eight minutes.

At the end of that eight minutes, you’ll do something called a five minute natural release, and that is just where the pot stops heating up. The pressure starts to dissipate and the pot will start to count back up in time. Once it reaches five, you’ll finish releasing the pressure with a quick release by turning that pressure valve on the top of the pot to vent.

Go ahead and remove the chicken pieces from the pot and you’re gonna get to either pulling or shredding. This is an excellent kitchen tip that I use every single time. To shred my warm chicken, I will put it in my stand mixer with the paddle attachment and run it for about 25 seconds. It shreds the chicken perfectly. You may have one or two pieces that you need to shred with a fork, but otherwise it works like a charm. I’m telling you, this is not a kitchen hack that doesn’t work. I promise you it works because I use it every single time. 

Now at this point, if you want to pop your chicken in the freezer, go ahead and put it in a freezer safe bag or container and put it in there for three months. If you’re saving this for dinner for later, you can put it just as is with a little bit of that liquid from the pot in a container, and pop it in the fridge for up to four days. But if you’re just in time for dinner, then you’re going to want to mix your shredded chicken with about a half to three quarters cup of your family’s favorite barbecue sauce.

Then you can pile high on buns with all of your favorite sandwich toppings. For barbecue chicken sandwiches, we love to do either pickles, pickled jalapenos, pepperoncinis, or some type of creamy coleslaw piled high on top of that pulled chicken. 

For side dishes. It really depends on what kind of night it is. So if it’s a busy weeknight, the side dishes may look like chips and raw veggies with ranch dip. If I have a little more time, then we love an instant pot potato salad and baked beans to go with our barbecue sandwiches. 

As always, I will link all of these recipes right in the show notes for you, including the full printable recipe for the instant pop pulled barbecue chicken. 

If you’re enjoying these episodes of Let’s Make Dinner, I would love it if you would subscribe or follow in your preferred podcast player. That way you can find all of the future episodes right in your podcast feed. 

Outro: Until next time, I hope this episode of Let’s Make Dinner, makes your dinner time a little easier.

Recipes Mentioned

  • Instant Pot Pulled BBQ Chicken
  • Instant Pot Potato Salad
  • Instant Pot Pork Roast
  • All Instant Pot Recipes

Equipment Mentioned

To make this recipe you will need an Instant Pot or Electric Pressure Cooker. Here is a link to the model that I use:

  • Instant Pot Duo Plus 9-in-1 6 qt electric pressure cooker

Episode 003 Steak Bites

June 7, 2022 by Susie Weinrich Leave a Comment

garlic butter steak bites episode art for let's make dinner podcast

In Episode 003 we are making Garlic Butter Steak Bites for dinner. Susie shares this budget friendly steak dinner recipe that is ready in under 30 minutes. Top sirloin is cooked in a skillet to a tender medium – medium/rare and then finished with a rosemary garlic butter glaze. You will think you are eating filet mignon! 

Transcript

Click for the full transcript.

Intro: Welcome to Let’s Make Dinner, your audio library of amazing dinner recipes you can get on the table any night of the week. I’m your host, Susie Weinrich. 

Welcome, welcome everybody to another episode of Let’s Make Dinner. We are getting near the end of the school year and we’re sliding right into summer. So I am looking for all of those easy recipes that I know that my whole family will eat, and the recipe that I’m making tonight is one that I know the whole family will eat. We’re talking about Garlic Butter Steak Bites. They’re super garlicky, and buttery and delicious, and they’re budget conscious. It’ll be like you’re having filet minion on a sirloin budget.

One of the nice things about this recipe is it’s considered a skillet recipe. So you’ve got one pan that you’re going to cook all of these steak bites in. Then if you wanna worry about some side dishes, we can talk about those at the end. It’s also a dinner that you will have ready and on the table in under 30 minutes.

Tips and Tricks: A few ingredients you want to make sure you have are olive oil, kosher salt, black pepper, butter, plenty of fresh garlic. Fresh rosemary, which actually, if rosemary is not your favorite flavor, you could certainly sub out fresh thyme in its place. Then lastly, your worcestershire sauce and a top sirloin steak.

Now, top sirloin is a very lean cut of beef that has a really nice beefy flavor. The only thing is that since it’s more of a lean cut of beef, you do not want to cook this to well done. We’re talking like medium rare to medium at the most. If that’s not your jam, if you’re like, I better not see any pink on the inside of my beef, then you need to skip this recipe and move on to something else.

This top sirloin, when you cook it to a medium rare or medium, it’s going to eat more like a filet than a sirloin. If you have followed me in the past, then you know that I love Aldi. I’m not being paid to talk about Aldi. I just love to go to Aldi. I feel like I can save quite a bit of money there. They actually have really, really nice sirloin steaks. They are nice and large. You can get them like two, two and a half pounds, and they’re not full of gristle. They just have some nice beef fat on them. They are perfect for this recipe. 

Garlic Butter Steak Bites Recipe: Let’s get into making this recipe. You’re going to start by cutting your steak into about one inch, one and a half inch sized pieces. Now if you do have any gristle or large pieces of fat left on your steak, then go ahead and cut that away and discard. Season all of the steak pieces with some kosher salt and black pepper. If you have a cast iron or non-stick skillet, that’s what you’re going to want to use. Place it over medium high heat and add one to two tablespoons of either olive oil or vegetable oil. Both of those have a high enough smoking point to get a nice sear on your steak pieces. 

Another tip for this recipe is that you’re going to want to cook your steak in batches. When you crowd a skillet or a pan or a sheet pan, you actually will start to steam whatever it is that you’re cooking instead of sauteing or browning. 

So with this recipe, you’re probably going to want to cook your steak in three, maybe four batches, but it still goes really quickly. Once that oil is nice and hot in the pan, you’ll lay your first batch of steak bites into the oil and let it cook for about one minute. Then you can flip it, cook it for an additional minute, and then finish for about 30 seconds and you can either stir it around the pan or brown, another side. But about two and a half minutes is all you need to cook these steak bites to about a medium rare. Then you’ll just go ahead and take that batch out of the pan, set it aside on just a plate or whatever you have to the side. Then if you need to add more oil to the pan, go ahead and do that and continue with that process, cooking all of the rest of the steak bites. 

After you have cooked all of the steak bites, go ahead and turn that heat down to about a medium low. You’re going to add the butter with the chopped garlic and rosemary and saute that around the pan for just a couple minutes. Then you’re going to take the steak pieces and any juices that collected on the plate and add it back into the pan, stir it around. Finish with one teaspoon of Worcestershire sauce and stir it again and it’s time to eat. That’s it. 

When I serve these steak bites, I like to keep it pretty classic with a starch and a vegetable. Now you’ve got that skillet that you just cooked all of those steak bites in. What I like to do is add a little bit more oil and some fresh green beans, saute those, add a little garlic at the end and some kosher salt. Serve those on the side. I actually have a recipe on moms dinner.net for skillet garlic green beans that I will link in the show notes for you. 

The next recipe that I recommend is a side dish is next level, people. Next level. It is from my friend Lori over at the food blog, Josie and Nina, and they are crispy oven potatoes. So you’re just taking new potatoes or red potatoes and you’re slicing them in half. You put them on a sheet pan with, it’s almost a whole stick of butter, so it obviously they’re going to be really good. If you’re on any kind of diet, that might not be the recipe for you, but I’m telling you it is worth it for these potatoes. You pop them in the oven. They come out tender and buttery on the inside, but the outside has this crispiness that is just, it’ll blow your mind. It’ll be one of your new favorite side dishes. So I’m going to go ahead and link those in the show notes as well. 

Besides those two recipes, I will also link the full printable recipe for the garlic butter steak bites. The recipe will serve four to five people.

That does it for today. If you are enjoying these episodes of Let’s Make Dinner, I would love it if you would subscribe or follow in your preferred podcast player. That way, all of our future episodes will be easy to find right in your podcast feed. 

Outro: Until next time, I hope this episode of Let’s Make Dinner makes your dinner time a little easier. However, I wish I was being paid by Aldi, so if you got the hookup, send them my way.

Tips

  • Use Top Sirloin, but don’t cook it past Medium. This cut is too lean to be cooked past medium.
  • If you feel you need to cook this to a medium well or well done you will want to use a ribeye or tenderloin.
  • A cast iron or non stick skillet work great for this recipe.
  • Cook in batches so you sear the steak bites. If you crowd the pan you will end up steaming them and they won’t get the nice browning on the outside.

Recipes Mentioned

  • Garlic Butter Steak Bites
  • Crispy Oven Potatoes (Josie & Nina)
  • Skillet Garlic Green Beans

Episode 002 Orzo Shrimp Skillet

June 2, 2022 by Susie Weinrich Leave a Comment

mediterranean orzo shrimp skillet podcast art

In Episode 002 we are making Mediterranean Shrimp Skillet for dinner. Susie shares this easy 30 minute, one pan dinner that is JAM PACKED with flavor! Orzo is cooked in a tomato base with herbs, garlic, capers and shallots. Then shrimp, feta cheese, kalamata olives and basil are added for a flavor punch. 

Transcript

Click for the full transcript.

Intro: Welcome to Let’s Make Dinner, your audio library of amazing dinner recipes you can get on the table any night of the week. I’m your host, Susie Weinrich. 

There’s one recipe we’ve made. What’s it called again? Oh yeah, we love that one. I can’t even talk about this recipe without my mouthwatering. Okay. Those are some of the things that people say to me when they talk about this recipe. It’s called Mediterranean Shrimp Skillet, and it’s what we’re making for dinner today. This is probably one of the most talked about recipes on momsdinner.net. If I’m at a dinner party or I run into somebody at the grocery store, this is usually the recipe that is brought up when we talk about Mom’s Dinner.

I think there’s a couple reasons why people love this recipe so much. Number one, it’s ready in about 30 minutes, so it’s a really quick dinner to make. Number two, it is considered a skillet meal, and not only is it just made in one pan, the whole recipe together is its own dinner, so it’s not like you have to have any kind of side dishes. You can just eat the Mediterranean Shrimp Skillet and it covers all of your bases. 

Tips and Tricks: All right, some of the ingredients that you want to make sure you have on hand to make this dinner. Now, these are ingredients that you might not already have. A shallot, fresh garlic, a 28 ounce can of diced tomatoes, chicken broth. Capers, Orzo pasta. Then you’ll need one pound of a medium to large sized shrimp. For this recipe, I like to use a raw peeled and de-veined shrimp. Whether or not the tail is on, that’s totally up to you. You’ll also need kalamata olives, fresh basil, and feta cheese. So I think from those ingredients you kind of get an idea of what this recipe is all about.

I also wanna give you a couple tips on a few of the ingredients. The feta cheese will probably be available in a couple different options in the grocery store. What I recommend is that you buy the block of feta cheese instead of the, it’s pre crumbled feta cheese that usually comes in a little container. The block feta cheese is going to be more flavorful and creamier and tangier and brinier. It’s going to be way better than that pre-crumbled cheese. 

The other tip that I wanna give you is for the shrimp. If you are buying frozen shrimp and you forgot to thaw it, because who remembers to thaw meat? I always forget. If you need to do a quick thaw on your shrimp, my best advice is to fill up either a bowl or the sink with a room temperature water, submerge the shrimp in its package. Now, if you’ve already taken it out of its package, then go ahead and put it in a Ziploc baggie, submerge it in that water, and let it sit for about 10 to 15 minutes. Then swap out the water with some more room temperature water, pop that shrimp back in there, in the package for about another 10 to 15 minutes. You keep doing this until that shrimp is thawed, and that’s considered a quick thaw method. 

Mediterranean Shrimp Skillet Recipe: Let’s get into making this recipe one piece of equipment that you’re going to want to have to make this, is a large non-stick skillet, preferably with a lid. Pop that over medium heat, and you’re going to add in three tablespoons of extra virgin olive oil. Once that’s nice and shimmery and hot, you’re going to add a half a cup of finally chopped shallots. Saute that around the pan for about two to three minutes. Then you’ll stir in three garlic cloves that have been chopped or minced, one and a half teaspoons of sugar. One teaspoon each of kosher salt and dried oregano. Half a teaspoon of black pepper and a quarter teaspoon of red pepper flakes. Stir that around the pan and you’ll begin to smell it and it smells so good. 

Then you’re going to add 28 ounce can of diced tomatoes with the juice. Do not drain those tomatoes. Add one cup of chicken broth and two tablespoons of capers. Then you’re going to stir in one cup of that dried orzo pasta. Stir it around the pan so that it’s kind of nestled down into the liquid, so it begins to cook. You’re going to let that simmer for about 10 minutes, and you’ll want to make sure that you stir it occasionally just so that orzo doesn’t cook to the bottom of the pan. 

It’s time to add the shrimp. Go ahead and nestle one pound of medium to large size shrimp down into the liquid that’s in the pan. Then cover the pan. This is where you’re gonna need that lid. If your pan does not have a lid, you could also use foil or just like a sheet pan that you place over top. 

Let that simmer for about four minutes until the shrimp are cooked through. Now you’re going to remove that pan from the heat completely and add in mega flavor. I need to add like the background sound. That’s like boo boo boo, mega flavor. All right, here we go. Here we go. All right. All right, so add in a half a cup of chopped kalamata olives. A third a cup of fresh basil that’s been chopped. Then crumble in your six ounce block of feta cheese. 

Then pop the lid back on and let that just sit together for about two minutes, and your dinner is ready. It’s time to eat. 

When I serve this dish, I like to just spoon it into bowls rustic style and serve either warmed up pita or warmed up ciabatta bread on the side. If you want to bulk up the dinner, you could definitely add a green side salad. I would highly recommend a basil vinaigrette, and I have an excellent recipe for a fresh basil vinaigrette on momsdinner.net. I will link that in the show notes for you. 

That’s it for this recipe. As always, I will link the full printable recipe and any other recipes that I talked about in this episode right in the notes for you so you can always find the Mediterranean Shrimp Skillet whenever you crave it. 

If you are enjoying these episodes of Let’s Make Dinner, I would love it if you would subscribe or follow on your preferred podcast player. 

Outro: Until next time, I hope this episode of Let’s Make Dinner makes your dinner time a little easier.

Tips

Here are the tips Susie shares to make your Shrimp Skillet super delish:

  • Buy block feta cheese instead of the pre-crumbled. It will be much creamier and tastier.
  • Trader Joe’s has great frozen medium/large sized raw, deveined shrimp (if you have one nearby)
  • Quick Thaw Method for frozen shrimp- place them in a bowl of cool water (in their original packaging or place in a Ziploc baggie), changing the water every 10 minutes, until they are thawed.

Recipes Mentioned:

  • Mediterranean Shrimp Skillet
  • Basil Vinaigrette
  • More One Pan Dinner Recipes

Equipment Mentioned:

  • Large Non-stick Skillet with a lid

Traditional Paloma

June 1, 2022 by Susie Weinrich 1 Comment

two grapefruit palomas with a bottle of grapefruit soda and silver tequila in the back

Believe it or not a Traditional Paloma doesn’t always have to include fresh grapefruit juice. In Mexico a Paloma is generally made with one part Silver Tequila to three parts grapefruit soda (Jarritos is the most common brand used in Mexico). It is meant to be a refreshing sparkling cocktail that is easy to make. ย 

two glasses of paloma cocktail with a bottle of Jarittos and tequila in the background

Did you also know that a Paloma is the national drink of Mexico!?

Now if you want a more boujee version of a Paloma you can check out this Rosemary Paloma or if you want something made with real grapefruit juice check out this Fresh Grapefruit Paloma. Or if a frozen drink is on the menu, this Frozen Paloma is SO good!

Or a fun tequila cocktail you may not heard of, that is similar to the paloma, is a Cantarito. It is served in fun clay cups called Jarrito de Barro!

Grapefruit Soda

Jarritos is the soda most commonly used in Mexico for traditional palomas. It is a mild grapefruit soda.

Here in the United States I can find it at my local Wal-Mart. Sometimes I can find it at a local grocery store in the aisle with other Mexican products.

If you cannot find Jarritos, Squirt Soda or other grapefruit flavored sodas will work as a sub.

More Tequila Cocktails

If you are new to Mom’s Dinner then you might not know that Tequila Cocktails are our JAM! Here are some other tequila based drinks you should check out asap:

  • cantarito drink in a clay cup garnished with a lime wedge
    The Best Cantarito Cocktail
  • a glass of roasted strawberry margarita garnished with salt and berries
    Roasted Strawberry Margaritas
  • a salt rimmed glass with a classic margarita garnished with a lime
    Classic Margarita on the Rocks
  • pineapple margarita in an etched glass, garnished with a pineapple wedge
    Perfect Pineapple Margarita
  • Tequila lemonade in a tall glass with a bottle of tequila to the side
    Tequila Lemonade
  • Tequila Mojito

Susie leaning on the kitchen counter

๐Ÿ’›๐Ÿ’›๐Ÿ’›๐Ÿ’›๐Ÿ’›

Did you make this recipe?

I would love to hear your review, especially if you have tips and tricks to add! Pop down to the comment section and connect with me

Rate This Recipeโ†’
two grapefruit palomas with a bottle of grapefruit soda and silver tequila in the back

Traditional Paloma

A traditional Paloma recipe made with just two ingredients: silver tequila and grapefruit soda.
5 from 2 votes
Print Pin Rate Save Saved!
Prep Time: 2 minutes minutes
Cook Time: 0 minutes minutes
Servings: 1 drink
Author: Susie Weinrich

Ingredients

  • 2 oz silver tequila - (also called Blanco tequila)
  • 5 oz grapefruit soda - Jarritos is traditional, see notes for other brands
  • ice

Garnishes

  • kosher salt and a grapefruit or lime wedge

Instructions
 

  • Run a grapefruit wedge or lime wedge around the rim of a tall cocktail glass. Dip lightly in kosher salt.
  • Add ice, filling it to the rim.
  • Pour in 2 oz silver tequila and then top with 5 oz grapefruit soda. Give it a light stir.
  • Garnish with a fresh grapefruit or lime wedge.

For larger quantities:

  • To make more than one paloma simply follow the rule of 1 part tequila to 3 parts grapefruit soda.
    Example for a pitcher: 1 cup tequila mixed with 3 cups grapefruit soda.

Recipe Tips and Notes:

Jarritos: I can usually find this Grapefruit Soda at my local Wal-Mart or in the Mexican food aisle of my grocery store.ย 
If you cannot find this brand you can sub Squirt or Fresca.
Tequila- Since you are mixing your silver tequila with sweet soda there is no reason to buy a really expensive bottle of tequila. Here are some brands that we love:
  • Jose Cuervo Traditional $
  • Cazadores $$
  • Espolon $$
  • Casamigos $$$
For a Paloma with fresh juice check out this Fresh Grapefruit Paloma Recipe.
Did you make this recipe?Connect with me and let me know by commenting below!
Jump to Comments

Episode 001 Grilled Hamburgers

May 31, 2022 by Susie Weinrich Leave a Comment

grilled burger podcast episode 001 Let's Make Dinner

I am so pumped for the first episode of Let’s Make Dinner!! If you would have told me a year ago I would be starting a podcast I would have said you were crazy… But here we are. I guess never say never, right?!

In Episode 001 we are making really good grilled hamburgers for dinner. Susie shares all the tips and tricks you need to make crave-worthy burgers. This will definitely become your go-to recipe you will have on repeat all summer long. 

Transcript

Click for the full transcript.

Intro: Welcome to Let’s Make Dinner, your audio library of amazing dinner recipes you can get on the table any night of the week. I’m your host, Susie Weinrich. 

Susie Weinrich: Welcome everybody to the very first episode of Let’s Make Dinner. Okay, we’re not going to come in like that every single time. I’m just super excited because this is the very first episode of Let’s Make Dinner, my new podcast. I just want to take a minute and say thank you for being here. Thank you for listening and supporting me. I am super pumped about this new journey that I’m on. 

The very first episode, the very first recipe. We had to make it a really killer one, and today we are talking about the perfect juicy, grilled hamburger. That is something that you want to have in your arsenal, especially for grilling season, which here in Kansas is spring, summer, fall, and maybe not winter. I am not strong enough to get out there in the winter. I just don’t do it. I know some of y’all are out there and praise you for getting out there in the cold.

Tips and Tricks: All right, so for your burgers, if you want to make burgers for dinner, this is going to take you about 10 minutes to actually make the burger patties. Depending on how well done you want your burgers, we’re talking about eight minutes to grill. So in total, this dinner is probably going to take you about 20 minutes. So under 30 minutes. Not bad to have some killer grilled hamburgers.

You probably have most of the ingredients you need to make really good grilled hamburgers. Besides maybe the beef. This recipe costs one and a half pounds of 80/20 ground beef. The rest of the ingredients, I bet you have in your spice cabinet and then in the fridge. I bet you have Worcestershire sauce and Dijon mustard. You need a little milk and you need a piece of white or wheat bread. 

Now, some tips when you are making grilled hamburgers. Number one, the main ingredient here is ground beef. You want to make sure that you are buying really high-quality ground beef. So if you have a butcher that you can go to, definitely choose that option over, I’m going to explain this to you and I hope you know you’re what I’m talking about, that kind of block of ground beef that’s already pre-packaged and it’s all smooshed together. 

The better option is going to be something that is more fresh ground that looks like ribbons of ground beef, but if you can get it at the actual meat counter, that’s going to be your best option. If you can get ground chuck, that is the best. However, a lot of times when I ask the meat counter, dude if they have ground chuck, I usually just get pointed to an 80/20. At the very least, get an 80/20 ground beef. 

The next tip I have for you is to make a panade, and that’s where the milk and the bread come in. A panade is basically, I think, is that a French word? I mean, it sounds French. It’s basically a kitchen or cooking technique where you’re mixing starch and a liquid to keep a ground meat recipe juicy, which is perfect in this case for grilled burgers. It works really well for Turkey burgers, meatballs, or meatloaf. Pretty much any recipe you’re going to find on my site for any of those things is going to have a panade mixed in. 

Two more tips I have for you. Before we get to the actual making of the recipe. You’re going to want to form your burger patties about half an inch to an inch larger than the bun you’ll be serving them on because they’re going to shrink up just a smidge on the grill. Once they shrink up, if you make them a little bit larger than the bun, they will fit your bun perfectly. 

The other tip is when you form that patty, take your thumb, your clean thumb, or a clean spoon, and press it right into the middle of the burger patty, making it kind of a little divot. And that also helps prevent the burgers from shrinking up into little hockey pucks. Have you ever had those burgers that grill up into slider-sized burgers? This will prevent that from happening.

Perfect Grilled Hamburgers Recipe: All right, so onto the recipe. How do we make these burgers? So you’re going to start by making that panade in a bowl. You want to mix one piece of white or wheat bread that you have torn or cut into tiny little pieces. Three tablespoons of milk, a teaspoon of kosher salt, a teaspoon of onion powder, half a teaspoon of black pepper, and then one garlic clove that you minced really well. A tablespoon of Worcestershire sauce and a tablespoon of Dijon mustard. You’re going to mix that all together, and that is your flavorful panade that’s going to get mixed into the burgers. I like to wash my hands really well and get my hands in there and literally squish the panade like it’s Play-Doh. That really gets it down into that nice paste that will mix into the ground beef really, really well. If you don’t want to get your hands in there, that’s fine. Then you just want to use a fork or spoon or something to really mash everything together. 

Then you’re going to add your ground beef. When you add your ground beef, make sure that you’re not overworking the beef into the panade. You don’t want to end up with tough little hockey pucks like we talked about before. So mix that ground beef in just until everything is incorporated together. Then you can form your patties. 

Now you can grill your burgers on a gas or charcoal grill. Obviously, either one will work. If you are grilling on a gas grill, you’ll want to set your grill to a medium, medium-high heat and grill them right over direct heat. I recommend about four minutes per side. Same with a charcoal grill. You’re going to want to set it up for direct grilling, and then you’re going to want to grill them for about four minutes per side.

Now if you want to add cheese to your burgers, then what I recommend doing is moving your burgers to the indirect heat side. Place the cheese on and then close the grill up for about a minute and let that cheese melt. Grab all of your burgers, take them inside, and get ready to eat. 

When you are serving your perfect juicy grilled burgers, some side dishes that I recommend are of course fries or sweet potato fries. That’s just classic, right? Some other ones are potato salad. If sweet corn is in season, get that in there. Baked beans, coleslaw, or any of those classic barbecue side dishes will work here. I will link my recipe for potato salad and instant pot sweet corn in the show notes for you. That’s it for today.

As always, I will link the full printable recipe for Perfect, Juicy Grilled Burgers in the show notes, and you can use it all summer long. Or all year long if that’s how you do. 

Thank you so much for listening today. If you are enjoying Let’s Make Dinner, then I would love it if you would subscribe or follow your preferred podcast player. That will just make it easier for you to find future episodes right in your podcast feed. 

Outro: Until next time, I hope this episode of Let’s Make Dinner makes your dinner time a little easier.

Tips

There are 7 main rules to follow when making great grilled hamburgers:

  1. Use high quality 80/20 ground beef
  2. Start with a panade to keep the burgers juicy.
  3. Add fresh garlic to the panade to add a punch of flavor.
  4. Don't overmix your ground beef into the panade.
  5. Form the patties about ยฝ-1 inch larger than the buns, then they will shrink to fit your buns.
  6. Place a divot in the center of each burger to prevent too much shrinkage on the grill.
  7. Grill the burgers over direct heat.

Recipes in the Episode

Here are the links to the recipes discussed in this episode:

  • Juicy Grilled Hamburgers
  • Bacon Jam
  • Instant Pot Corn on the Cob
  • Potato Salad
  • Instant Pot Potato Salad

Easy Salmon Marinade

May 10, 2022 by Susie Weinrich 18 Comments

Asian Marinated Salmon on a plate with rice and veggies

This Asian marinade for salmon is one I've made time and again in my own kitchen, so I know firsthand how much flavor it brings. Over the years, I've used it for everything from quick weeknight meals to special family dinners, and it has never let me down. The blend of soy sauce, garlic, ginger, and a touch of sweetness creates a perfectly balanced flavor that complements salmon without overpowering it.

Asian Marinated Salmon on a plate with sauce being spooned over

Because I've tested and refined this recipe many times, you can feel confident it will deliver consistent results every time. With just a handful of simple pantry ingredients, this marinade transforms salmon into a dish that tastes like it came from a restaurant, but with the ease and reliability of home cooking.

This is a terrific recipe. The flavor is the perfect blend of sweet and spicy. I add a bit more red pepper flakes for an extra kick. And it's a breeze to put together.

Thanks for posting. It's a keeper. – William

[feast_advanced_jump_to]

Asian Salmon Recipe Ingredients

Pictured are the ingredients you need to make this Asian Flavored Marinade, plus some tips on a few ingredients:

ingredients to make Asian salmon Marinade

Ginger: you can buy fresh ginger in the produce section, it looks like a tree root. You peel the brown outside and just use the fragrant yellow flesh.

But what I recommend is buying the Dorot Gardens Ginger in the freezer. It comes in little teaspoon sized frozen cubes that can be popped out and used any time.

Unseasoned Rice Vinegar: You can find this vinegar near the Asian section of your grocery store. Make sure you purchase Unseasoned Rice Wine Vinegar. There is also a vinegar called Seasoned Rice Vinegar which will be stronger in flavor.

Garnish: It is not necessary to garnish your Asian marinated Salmon, but if you want these are some great options:

  1. toasted sesame seeds
  2. green onions
  3. lime wedges
  4. cilantro
salmon filets marinating in Asian marinade

How to Cook Salmon With Salmon Marinade

You can make salmon in the oven, in a skillet, on a grill, poached in water…. if there is heat involved you can probably cook salmon.

You just want make sure the center reaches 145 degrees Fahrenheit with an instant read thermometer to be considered safe to eat.

This is a great article giving you 8 different ways to cook salmon!

Marinade For Salmon Tips

  • If you are using individual salmon filets then marinate them for about 30 minutes up to 1 hour.
  • If you are using a larger whole salmon filet you can marinate it for up to 2 hours.
  • Marinate your salmon flesh side down if you are using skin-on fish.
  • Choose a shallow glass container to marinate your salmon, or you can go with a plastic baggie.
  • Do not marinate your salmon for more than 4 hours. It will start to break down and the fish will turn mushy.
  • Cook the salmon however you like, just make sure the center reaches 145 degrees Fahrenheit with an instant read thermometer to be considered safe to eat.

More Fish Recipes For Dinner

  • Shrimp Carbonara on a platter with parsley garnish
    Shrimp Carbonara
  • Cajun Salmon on a plate with a bite taken out and dipped in Cajun Aioli
    Quick & Easy Baked Cajun Salmon
  • broiled parmesan tilapia on a plate with couscous and asparagus
    Easy 15 Minute Parmesan Tilapia

Susie leaning on the kitchen counter

๐Ÿ’›๐Ÿ’›๐Ÿ’›๐Ÿ’›๐Ÿ’›

Did you make this recipe?

I would love to hear your review, especially if you have tips and tricks to add! Pop down to the comment section and connect with me

Rate This Recipeโ†’
Asian Marinated Salmon on a plate with rice and veggies

Asian Salmon Marinade

A great marinade for salmon filets using delicious Asian flavors of ginger, soy, sesame and honey.
Makes enough marinade for 6-7 individual salmon filets or a large whole salmon filet.
4.95 from 17 votes
Print Pin Rate Save Saved!
Prep Time: 5 minutes minutes
Cook Time: 5 minutes minutes
marinating: 30 minutes minutes
Total Time: 40 minutes minutes
Servings: 6 people
Author: Susie Weinrich

Ingredients

  • Fresh Salmon
  • โ…“ cup (scant) Soy sauce
  • ยผ cup Honey
  • 2 tsp toasted sesame oil
  • 2 teaspoon fresh ginger - grated or minced
  • 2 tsp unseasoned rice vinegar
  • 2 large garlic cloves - minced
  • ยผ teaspoon red pepper flakes - more for spicier salmon and sauce

Serving Garnish Ideas

  • toasted sesame seeds, green onions, lime wedges, cliantro

Instructions
 

  • Mix all the marinade ingredient together.
    โ…“ cup (scant) Soy sauce, ยผ cup Honey, 2 teaspoon toasted sesame oil, 2 teaspoon fresh ginger, 2 teaspoon unseasoned rice vinegar, 2 large garlic cloves, ยผ teaspoon red pepper flakes
  • Place in a shallow glass container or plastic baggie (Ziplock).
  • Lay the salmon in the marinade, flesh side down if you are using skin on salmon. Spoon the marinade over the fish to coat.
    Fresh Salmon
  • Let marinate for at least 30 minutes at room temp.
    – individual salmon filets can marinate for 30 minutes up to an hour.
    – whole salmon filet can marinate for up to 2 hours.
    I do not reccommend exceed 4 hours as the salmon will begin to break down and become mushy.
  • Pull the salmon out of the marinade.
    RESERVE THE REMAINING MARINADE, it makes a delicious serving sauce (see directions below)!
  • Cook the salmon in your preffered method. (oven, stove top, foil, grill, air fryer…)

Sauce

  • You can use the remaining marinade as a great sauce to pour over the salmon.
  • Simply place it in a pot over medium low heat. Let it simmer for a few minutes until it slightly thickens.
  • Serve on the side or spoon over each portion.

Recipe Tips and Notes:

How To Cook Salmon: This is a great article giving you 8 different ways to cook your marinated salmon.
Did you make this recipe?Connect with me and let me know by commenting below!
Jump to Comments

More Recipes you will love

  • How To Make Meatball Subs
  • Beef Stew with Wine
  • Corn Casserole Recipe with Jiffy Mix
  • Sausage and Herb Stuffing
  • Spaghetti in the Instant Pot
  • Spaghetti Meat Sauce Recipe
  • Turkey Gravy Recipe No Drippings
  • Traditional Chili
  • Whole Berry Cranberry Sauce
  • Yam Casserole
  • Baked Potato Bar Ideas
  • Chicken Alfredo with Heavy Cream
  • Boiled Eggs Instant Pot
  • Morning Glory Muffins Healthy
  • Saltines Toffee
  • « Previous Page
  • 1
  • …
  • 26
  • 27
  • 28
  • 29
  • 30
  • …
  • 63
  • Next Page »
Susie in the kitchen with an apron on getting ready to cook

Meet The Author:

Susie Weinrich is a professional food photographer and recipe developer. Her thoroughly tested recipes and step-by-step guides give readers confidence in the kitchen.

YOU will feel like a huge success at dinner time with any of the simple recipes on Mom's Dinner! Read More

Helpful Meal Planning Resources

  • a table with white place settings and green garland
    Easy Meals for House Guests
  • a round table with a large family eating dinner
    30 Easy Meals for Large Family Vacations & Gatherings
woman owned small business certificate by Sertify

Amazing New Recipes

  • chicken in a cream sauce with stuffing over top, in a 9x13 baking dish
    Chicken and Stuffing Casserole
  • Plate of spaghetti and meatballs that was prepared in the instant pot.
    Instant Pot Spaghetti and Homemade Meatballs
  • Parsley topped garlic cheesy bread with half of the loaf sliced into individual pieces to serve.
    Simple Cheesy Garlic Bread
  • Close up of hot melty cheese over stuffed beef manicotti in a baking dish.
    Outstanding Beef Manicotti

Footer

^ back to top

About

  • Susie Weinrich
  • Privacy Policy
  • Accessibility Policy

Contact

  • Sign Up! for emails
  • Contact Me!
  • Join Me On YouTube

Recipes

  • Recipe By Category
  • Instant Pot Recipes
  • Dinner Recipes

Copyright ยฉ 2025 Mom's Dinner

Rate & Review This Recipe

Your vote:


A rating is required
A name is required
An email is required