Mom's Dinner

  • Home
  • All Recipes
  • Instant Pot
    • All Instant Pot Recipes
    • Instant Pot Soup
    • Instant Pot Beef
    • Instant Pot Chicken
    • Instant Pot Pork
    • Instant Pot Turkey
    • Instant Pot Pasta
    • Instant Pot Vegetarian
  • Dinner
    • Beef
    • Chicken
    • Pork
    • Turkey
    • Fish & Seafood
    • Mexican
    • Pasta
    • Vegetarian
  • Subscribe
menu icon
go to homepage
  • RECIPES
  • DINNER
  • ABOUT
  • SUBSCRIBE

subscribe
search icon
Homepage link
  • RECIPES
  • DINNER
  • ABOUT
  • SUBSCRIBE

ร—
You are here: Home

Instant Pot Carnitas Recipe

March 22, 2023 by Susie Weinrich 4 Comments

Instant Pot Carnitas in a bowl with lime wedges and a fork

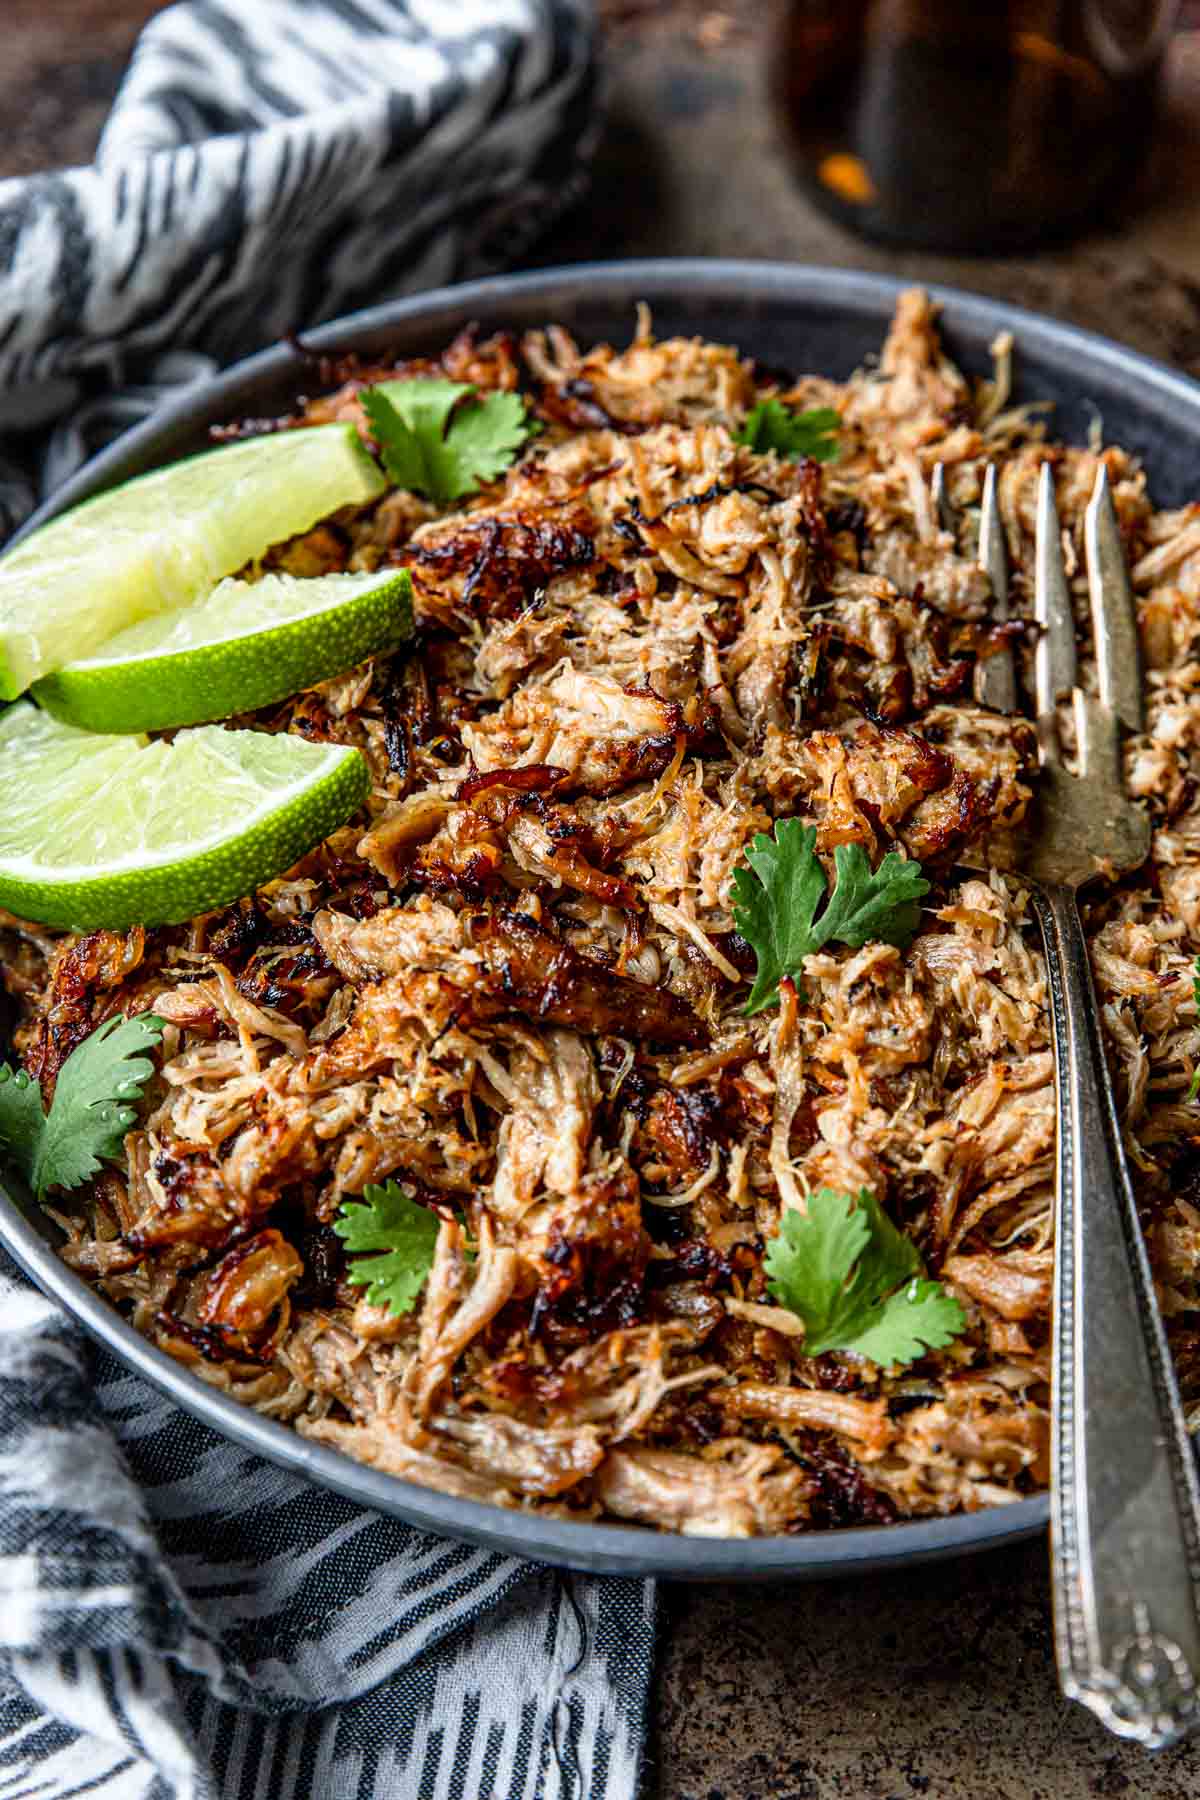
If you are looking for an easy and delicious Instant Pot Carnitas recipe, this is it! This recipe is cooked in the Instant Pot with a lemon/lime soda, fresh orange and lime juices and a tons of spices. It is the perfect combination of tender spiced pulled pork with crispy edges. Your carnitas will be ready in half the time it would take using a slow cooker, oven or grill.

Instant Pot Carnitas in a bowl garnished with cilantro and limes

Carnitas is a super versatile dish. It can be used as a sub in these chicken enchilada recipe or this beef enchilada casserole. Simply swap the chicken or beef in either one for these carnitas! Then serve it up with some Mexican Rice, Refried Beans and a Margarita!

[feast_advanced_jump_to]

Instant Pot Carnitas Ingredients

Pork: Pork shoulder is the dream cut for carnitas, plenty of marbling means it melts down into tender, pull-apart perfection under pressure.

Kosher Salt & Black Pepper: Super simple seasoning for the outside of the pork.

Canola Oil: A neutral, high-heat oil that helps you get a quick sear on the pork without adding extra flavor.

Lemon Lime Soda: The lemon lime soda used in this recipe makes a perfect cooking base for your Carnitas. It adds the sweetness the dish needs and the lemon and lime citrus pairs perfectly with the Mexican herbs and spices.

  1. Sprite
  2. 7-Up
  3. Store Brand
  4. Starry
  5. Sierra Mist

Orange and Lime: These are classic flavors in Carnitas. Use fresh orange and lime for the best flavor.

Garlic and White Onion: While the pork pressure cooks the garlic and onions infuse their flavors through all the layers of pork.

Ancho Chili Powder: You can also use chili powder if you can’t find the ancho variety. The “ancho” gives the pork a slightly smoked flavor.

Mexican Oregano: More citrusy and floral than Mediterranean oregano. It makes the Carnitas taste distinctly authentic. You'll usually find near the dried chiles or traditional Mexican spices at the grocery store, often hanging right in the produce section.

Garlic Powder, Onion Powder, Smoked Paprika, Bay Leaf and Cumin: These five spices/seasonings build excellent flavor through the pork.

What Cut of Pork To Use for Carnitas

The most common cut of pork to use for Carnitas is a bone-in pork butt, which is also called a Boston butt, a pork shoulder, and maybe even a pork roast.

All four are actually cut from the shoulder, hence "pork shoulder". The pork "butt", also known as Boston butt, comes from the same area but is a little higher on the foreleg.

a whole bone-in pork butt, also known as pork shoulder and Boston butt
5 lb. bone-in pork butt

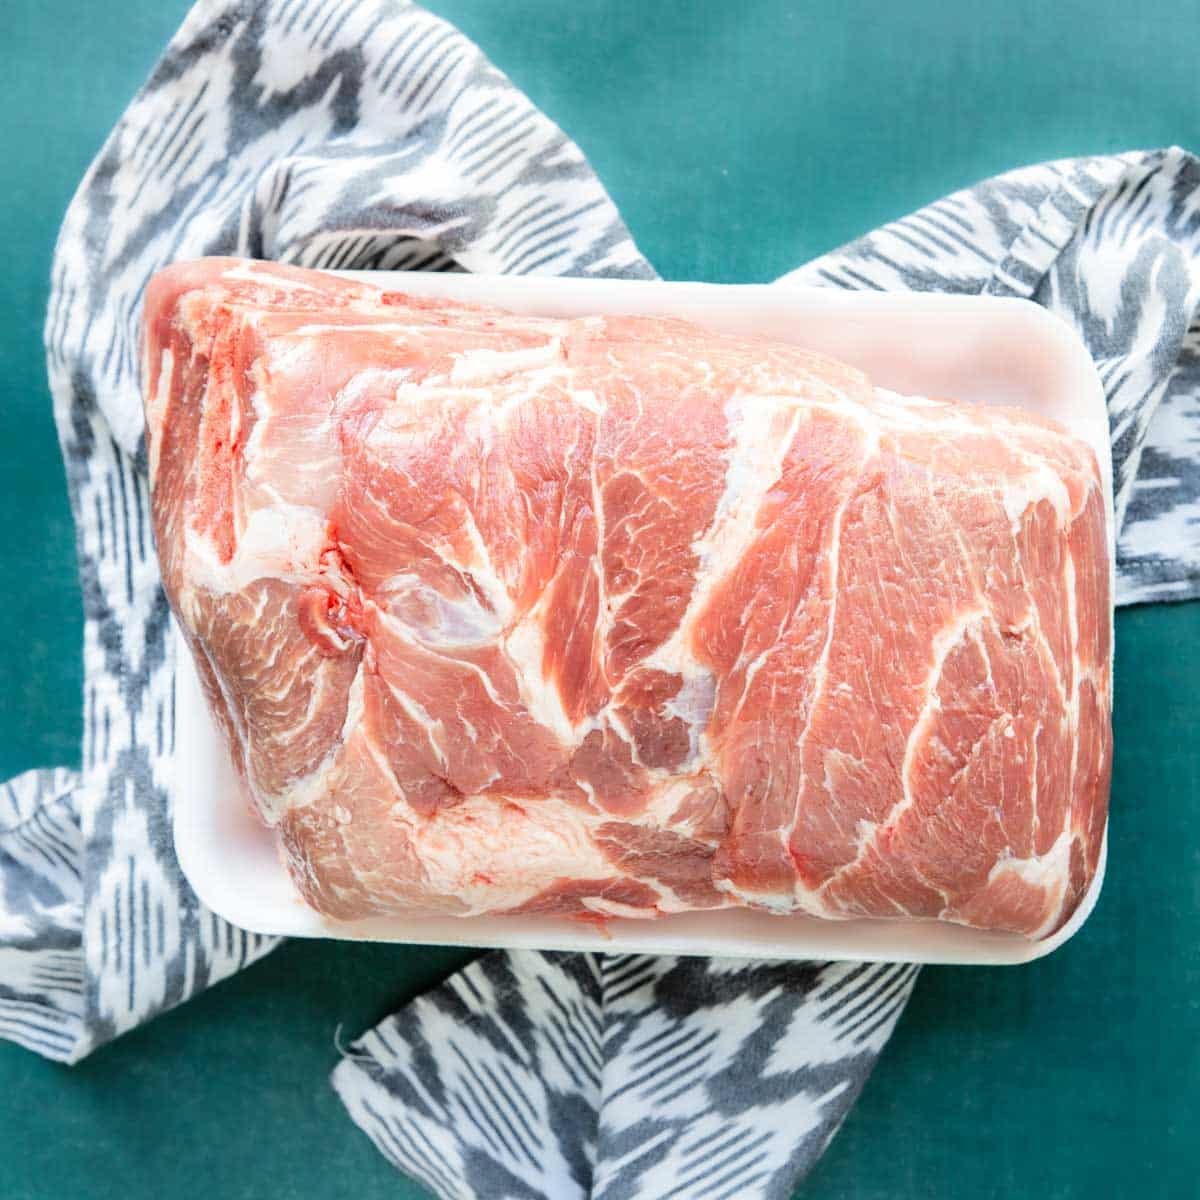
Whether you buy boneless or bone-in is a personal preference and, of course, what is available at your grocery store. The pork butt shown above is a bone-in pork shoulder.

Both bone-in and boneless will cook perfectly fine in your Instant Pot. Since you will be cutting the pork meat into cubes, you could cut the bone out if you prefer, but it is definitely not necessary. The meat will come clean off the bone after it is pressure cooked.

Trimming Pork for the Instant Pot

Trimming and prepping the pork butt for the Instant Pot is not the same as prepping it for longer “low and slow” cooking.

When you cook in the instant pot you are cooking “hot and fast” under a lot of pressure. Which does not leave time for the fat to properly render, instead it cooks up into giggly pieces of fat, not quite what you want in your Carnitas.

pork butt cut into 3 inch pieces and the fat discarded to the right

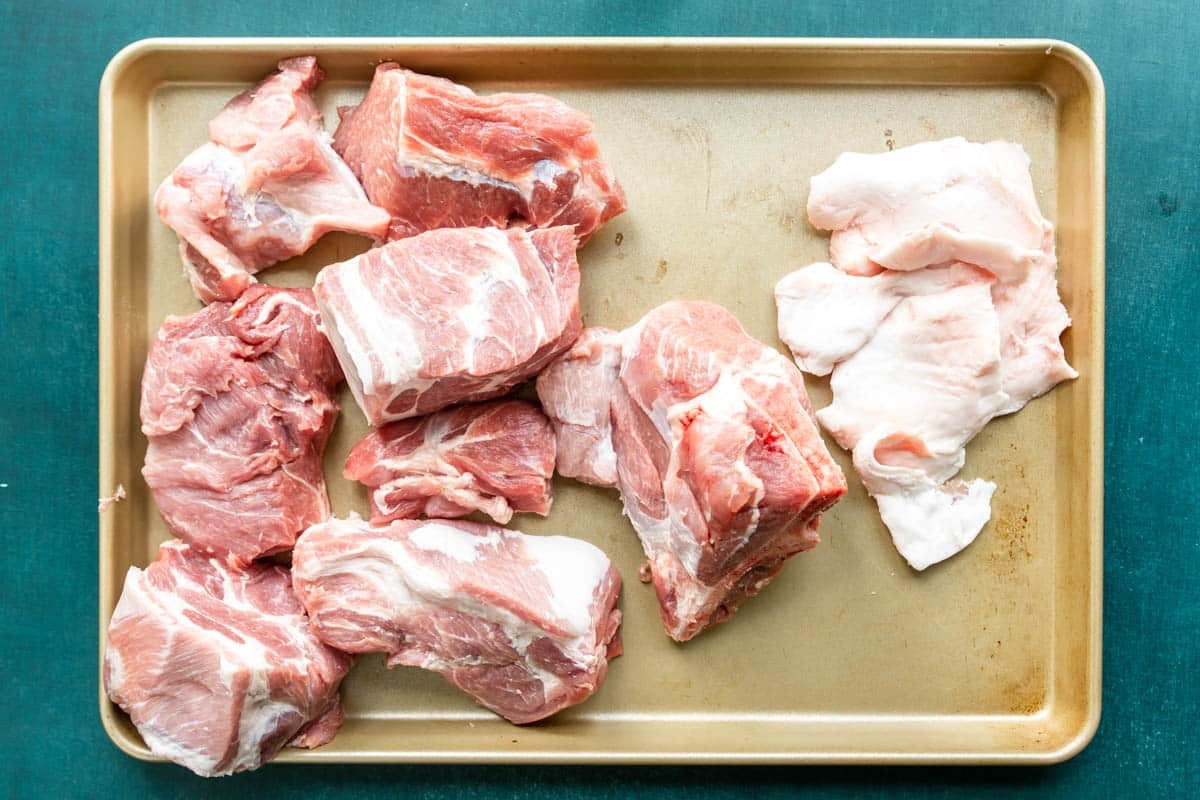
Therefore, to make the BEST Instant Pot Carnitas it is important to trim a lot of the fat cap from the pork butt. Trim it down as much as you can without removing the pork meat underneath. Discard that extra fat (see the right side of the photo above).

Then you want to cut the pork into large 2-3 inch pieces. This allows you to use a shorter cook time and ensures that all the pieces of pork are fall apart tender and will shred easily for carnitas.

How to Make Carnitas in Instant Pot

This is a quick overview of how to make Instant Pot Carnitas. For more detailed instructions and ingredient amounts, pop down to the recipe card.

pork butt cut into 3 inch pieces and the fat cap discarded to the side.

Step 1

You will start by trimming the fat and cutting your large pork butt into large 2-3 inch pieces (does not have to be exact!).

Season the pork pieces on all sides with the 1 ยฝ tablespoon of kosher salt (make sure you use kosher salt and not iodized table salt), and 1 tablespoon black pepper.
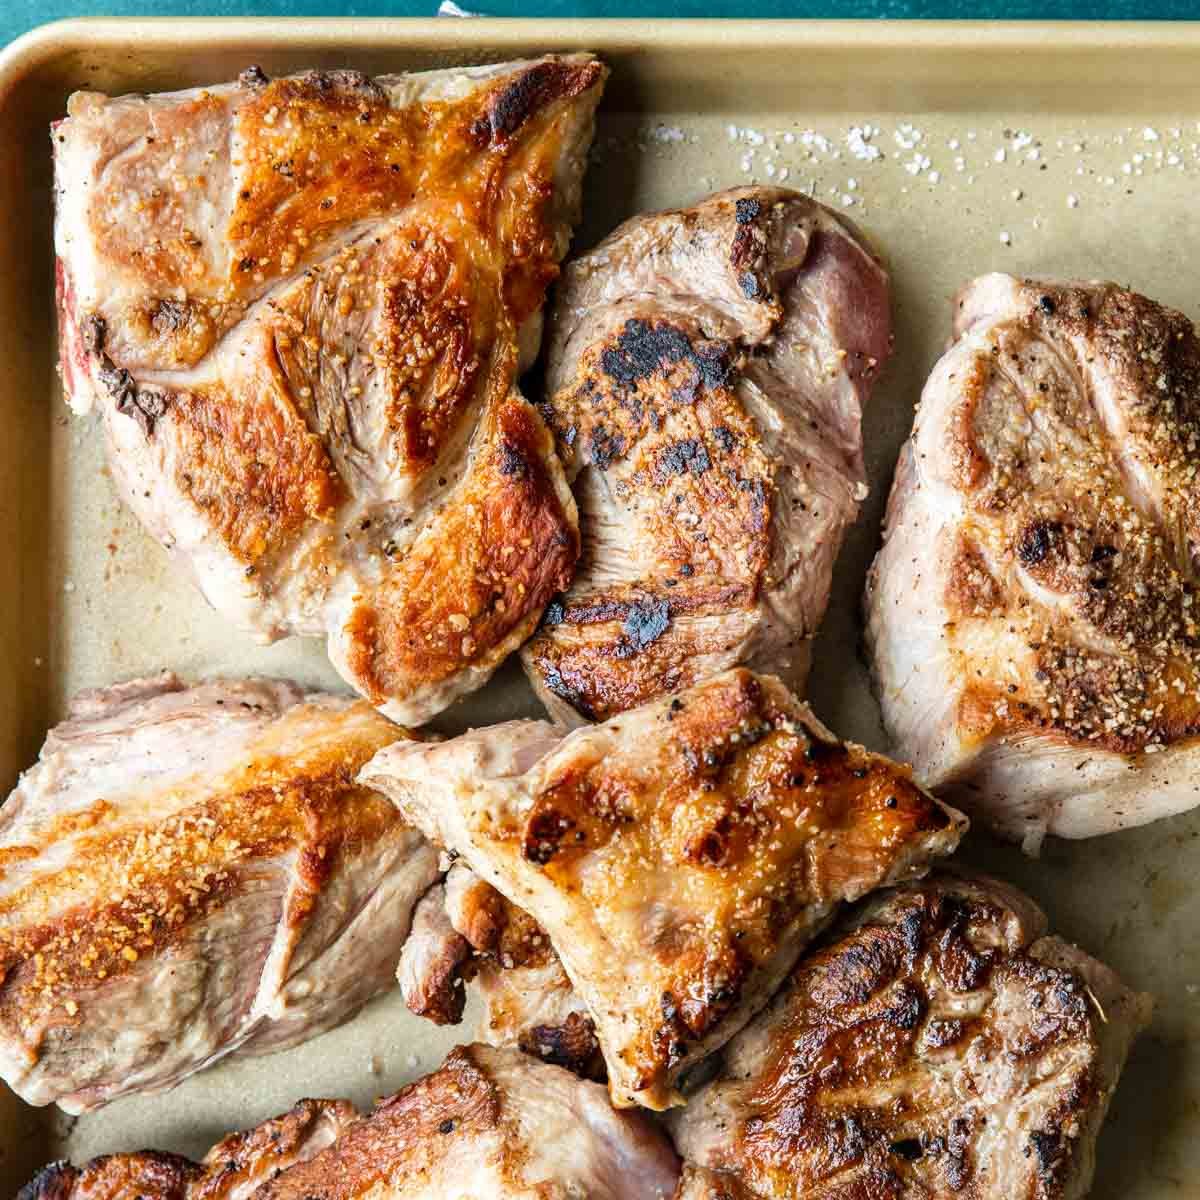
large cuts of pork butt browned.

Step 2

Searing the pork pieces: there are two options when searing the pork pieces. Either do it in the Instant Pot or in a cast iron skillet on the stove top.
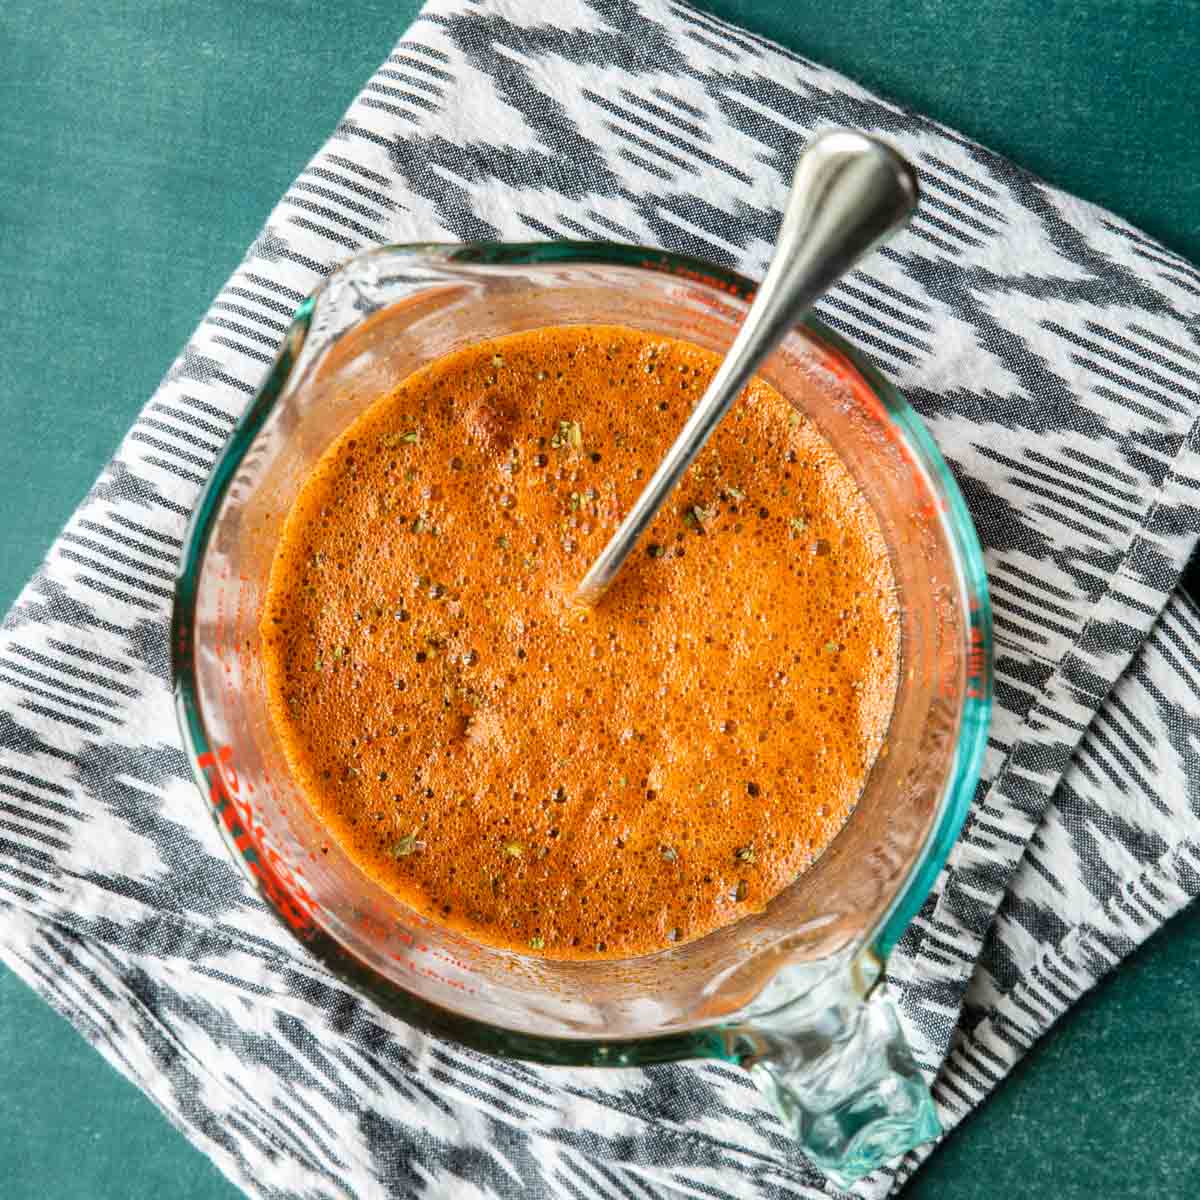
liquid mixed together for cooking Carnitas in the Instant Pot

Step 3

Mix the cooking liquid: lemon-lime soda, orange juice, lime juice, chopped garlic and all the herbs/spices.

Deglaze the Instant Pot with the liquid.
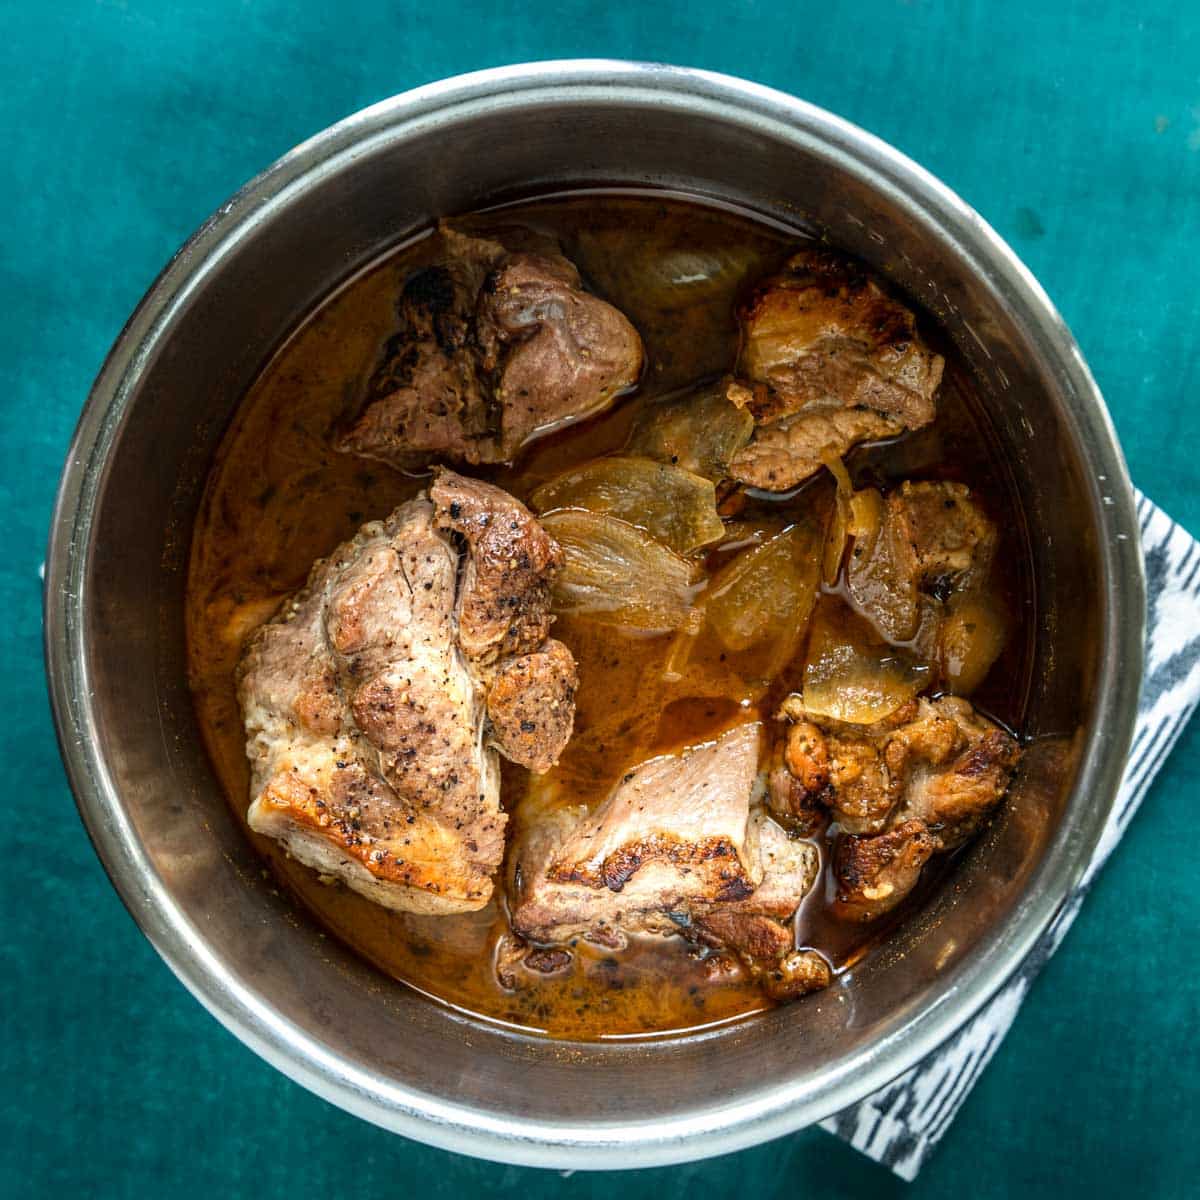
Carnitas after they have been cooked in the Instant Pot

Step 4

Add the browned pork pieces, onions and bay leaf to the Instant Pot and nestle everything down in the liquid.

Close the pot and set to cook on high pressure, normal heat, for 30 minutes. Finish with a 10 minute natural release.

Instant Pot Carnitas in a bowl with lime wedges and a fork

Step 5

Remove the pork from the liquid and shred.

Mom’s Tip: I like to put the pork pieces in my stand mixer and run it for about 30 seconds. It shreds it up perfectly.

How to Make Crispy Edges

Generally when you cooking in the Instant Pot, it is considered "moist heat", so it makes it very difficult to get a crisp on anything. In the case of carnitas you will want to remove them from the Instant Pot and pop them on a rimmed baking sheet and stick them under the broiler for a minute or so. This will crisp up the edges perfectly!

Variations

  • Smoky Chipotle Carnitas
    Stir in a spoonful of adobo sauce (or chop up one chipotle pepper) before pressure cooking. It adds depth, heat, and that irresistible smoky finish.
  • Green Chile Carnitas
    Swap the orange juice for a 4 oz can of diced green chiles and a splash of salsa verde.
  • Coke Carnitas
    Replace the lemon lime soda for Coke.
  • Garlic-Lime Carnitas
    Load up with extra garlic (like, don't be shy) and finish the shredded pork with lime juice and zest. Bright, bold, and perfect for tacos with pickled red onions.

Storing & Freezing

Store any leftover Carnitas in the fridge, in an airtight container for up to 5 days.

To extend the storage of your Instant Pot Carnitas you can freeze them for up to 3 months.

How to Freeze

Once the pork is cooked and shredded, let it cool completely. Portion it into freezer-friendly bags, pressing out as much air as possible, and spoon a little of the cooking liquid in there to keep things juicy. They'll keep in the freezer for up to three months. When you're ready to revive it, thaw in the fridge and recrisp it in a hot skillet.

To Reheat

Carnitas reheat like a dream, and you've got a few options.

  1. Skillet toss the pork into a hot pan with a splash of the cooking juices and let it sizzle until the edges get those gorgeous crispy bits again.
  2. Oven is great for bigger batches. Spread the carnitas on a sheet pan, drizzle with a little liquid, chicken broth will work here, cover with foil, and warm at 350ยฐF until hot, then uncover for a few minutes to re-crisp.
  3. And if you're in a hurry the microwave totally works. Just cover the pork with a damp paper towel so it doesn't dry out, heat in short bursts, and fluff it with a fork.

How to Serve Pork Carnitas

Carnitas are almost like a blank canvas for tons of yummy Mexican Dinner ideas! Here are a few popular ways to serve your Pork Carnitas:

Menu Ideas

  • TACOS!! This is probably the most popular way to eat Carnitas. Use either corn or flour tortillas. Pile them high with your favorite taco toppings. Or you can eat them more like a street taco with diced white onion, cilantro, and queso fresco.
  • BURRITOS- You can use carnitas in your favorite burrito recipe. It would be a great substitute for the ground beef in these Smothered Burritos.
  • BURRITO BOWLS- Just like you would find at Chipotle, create your own burrito bowl with a layer of rice, beans, carnitas, salsas, sour cream and guacamole.
  • ENCHILADAS- my 100% favorite way to eat Carnitas! Sub this shredded pork for any of these enchilada recipes!
  • CHILAQUILES – if you have never had chilaquiles, I highly recommend you put this dish at the top of your list.
  • NACHOS
  • SALAD

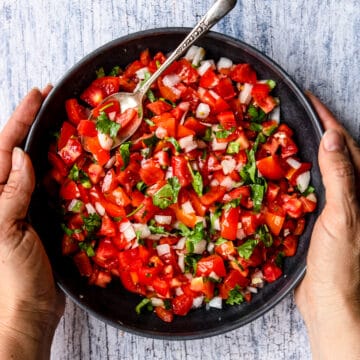
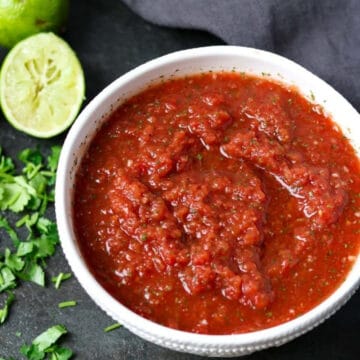
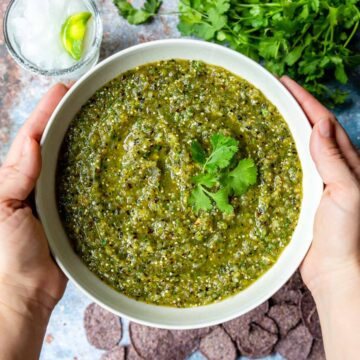
Sauces for Your Carnitas Tacos

  • two hands serving a bowl of Pico de Gallo
    Simple Pico de Gallo
  • tomatillo salsa in a bowl with tortilla chips to the side
    Tomatillo Salsa -No Roasting Required!
  • a bowl of fresh avocado guacamole with a chip dipping in
    Holy Guacamole, That’s Good Guac
  • homemade salsa in a bowl with cilantro and limes
    Restaurant Style Salsa
  • a wooden bowl of cilantro lime slaw
    Cilantro Lime Slaw
  • a bowl of grilled tomatillo salsa
    Grilled Tomatillo Salsa

Carnitas Instant Pot FAQs

What to do if my pork is still tough after cooking in the Instant Pot?

If you pull the pork pieces out of the Instant Pot and they are not fall apart tender, then they are not cooked through. Pop the lid back on the Instant Pot and pressure cook for another 10 minutes.

How long does pork meat take in the Instant Pot?

The answer is “it depends”! If you are cooking a whole piece of pork without cutting it into pieces, like in this Instant Pot Pork Roast, then you cook it for 15 minutes per pound. When you cut the larger pork piece into 2-3 inch pieces, like this carnitas recipe or Instant Pot Pulled Pork, it should be nice and fork tender after 30-40 minute pressure cook and a 10 minute natural release!

Why do you put orange juice in carnitas?

The answer is two fold. First, it adds a really nice flavor to the carnitas and the sweetness balances out the tartness of the lime and saltiness of the spices. It also adds some natural sugar that helps the carnitas caramelize in the oven after cooking in the Instant Pot.


Susie leaning on the kitchen counter

Did you make this recipe?

โญโญโญโญโญ

I would love to hear your review, especially if you have tips and tricks to add! Pop down to the comment section and connect with me

Rate This Recipeโ†’
Instant Pot Carnitas in a bowl with lime wedges and a fork

Pork Carnitas Recipe (Instant Pot)

Make really amazing Carnitas right in your Instant Pot or electric pressure cooker. The pork turns out fall-apart-tender and seasoned perfectly! Crisp it up under the broiler for the authentic Carnitas texture!
Serve it up in tacos, burritos, burrito bowls, enchiladas, and more….
LISTEN TO THE FULL AUDIO RECIPE WITH THE PLAYER BELOW!
5 from 5 votes
Print Pin Rate Save Saved!
Prep Time: 20 minutes minutes
Cook Time: 30 minutes minutes
Natural Release & Crisping in Oven: 20 minutes minutes
Total Time: 1 hour hour 10 minutes minutes
Servings: 10 servings
Calories: 332kcal
Author: Susie Weinrich

Equipment

  • Instant Pot or Electric Pressure Cooker

Ingredients

Pork

  • 4-5 lb. pork shoulder - – also called pork butt or Boston butt, cut into large 2-3 inch pieces (see note #1)
  • 1.5 tablespoon kosher salt - (be sure to use kosher salt, not iodized table salt)
  • 1 tablespoon black pepper
  • 3 tablespoon canola oil

Cooking Liquid

  • 1 cup lemon-lime soda - (see note #2)
  • 6 garlic cloves - chopped
  • ยฝ cup fresh squeezed orange juice
  • ยผ cup fresh squeezed lime juice
  • 1 teaspoon ancho chili powder - or chili powder
  • 1 ยฝ teaspoon Mexican Oregano - (see note #3)
  • ยฝ teaspoon each: garlic powder, onion powder, and cumin
  • ยฝ teaspoon smoked paprika
  • 1 bay leaf
  • 1 large white onion - quartered

Instructions
 

Trimming the Pork

  • Trim any large portions of fat cap from the pork butt.
    Since we are not cooking low and slow the fat will not render all the way.
    4-5 lb. pork shoulder
  • Cut the pork into large 2-3 inch pieces.
    If you have a bone-in pork butt, leave some meat around the bone and use it just like the other pieces (after cooking the meat will fall off the bone and you can discard the bone).
    pork butt cut into 3 inch pieces and the fat cap discarded to the side.

Searing the Pork

  • Season all sides of the pork pieces with the KOSHER salt and pepper.
    1.5 tablespoon kosher salt, 1 tablespoon black pepper
  • Brown/Sear the pork in 2 batches, about 1 tablespoon of oil per batch. Brown the pork for about 2-3 minutes per side.
    PRO TIP: Highly recommend doing it in a cast iron skillet on the stove top over high heat, it will be MUCH faster than in the Instant Pot. But if using the Instant Pot be sure to turn the sautรฉ function on high.
    3 tablespoon canola oil
  • Meanwhile, mix together the cooking liquid.
    Pro tip: be sure to crush the Mexican Oregano in the palm of your hand to release the beautiful flavor!
    1 cup lemon-lime soda, 6 garlic cloves, ยฝ cup fresh squeezed orange juice, ยผ cup fresh squeezed lime juice, 1 teaspoon ancho chili powder, 1 ยฝ teaspoon Mexican Oregano, ยฝ teaspoon each: garlic powder, onion powder, and cumin, ยฝ teaspoon smoked paprika
    liquid mixed together for cooking Carnitas in the Instant Pot
  • Pour the cooking liquid in and deglaze either the Instant Pot or cast iron skillet, wherever you browned the meat. Scrape up all the browned bits, that is FLAVOR!
    If you used a cast iron skillet, after deglazing pour the liquid into the Instant Pot.

Pressure Cooking

  • Add the browned pork pieces, onion and bay leaf to the Instant Pot, nestling it down into the cooking liquid.
    1 bay leaf, 1 large white onion
  • Close the Instant Pot and set to cook for 30 minutes, normal heat, high pressure. Do a 15 minute natural release, then finish releasing the pressure by turning the pressure valve to vent.
    Carnitas after they have been cooked in the Instant Pot
  • Remove the meat from the Instant Pot and shred either with two forks, clean hands or placing the (warm) meat in a stand mixer with a paddle attachment and run it for about 30 seconds.
  • You can use the Carnitas at the point, or crisp them up in the next step.

Crisping

  • If you want traditional crispy edges on your carnitas, preheat the broiler.
  • Place the shredded carnitas on a large rimmed baking sheet and sprinkle with a little juice from the Instant Pot.
  • Pop under the broiler for about 3 minutes.
  • Flip the meat and sprinkle with a little more juice. Broil for another 3-5 minutes.

Serving

  • Serve your carnitas as tacos, burritos, enchiladas, burrito bowls and more!
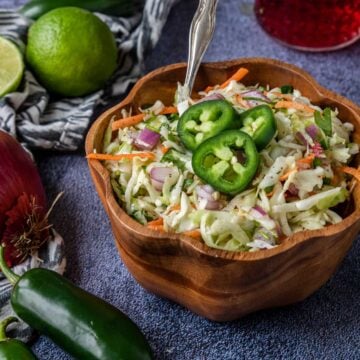
  • Excellent served with Easy Mexican Rice, Refried Beans, , Cilantro Lime Slaw and a Margarita.

Storing & Freezing

  • Store any leftover Carnitas in the fridge, in an airtight container for up to 5 days.
    Some fat may turn white when it cools in the fridge, it will look normal after reheating.
  • To extend the shelf life of your Instant Pot Carnitas you can freeze for up to 3 months.
    To use from frozen, thaw in the fridge overnight or thaw in the microwave. Then to get the crispy edges broil in the oven for about 3-5 minutes.

Recipe Tips and Notes:

  1. Use a pork butt, pork shoulder, or Boston butt, they are all basically the same. You can use bone-in or boneless. If you have a bone-in pork butt simply cut around the bone, leaving some meat around the bone. After cooking the meat will fall right off the bone and you can discard the bone.
  2. It doesn’t matter what brand of lemon-lime soda you use; Sprite, 7-Up, Starry, Sierra Mist, etc… However we do recommend that you use full sugar soda, not diet soda.
  3. Mexican Oregano is a little different than traditional Oregano. It has a different flavor profile that marries perfectly with Mexican flavors. I can find it near other Mexican ingredients, like dried chilies, which is in the produce section of my grocery store. If you cannot find that, regular oregano will work!
Did you make this recipe?Connect with me and let me know by commenting below!
Jump to Comments
Serving: 1serving | Calories: 332kcal | Carbohydrates: 6g | Protein: 36g | Fat: 17g | Saturated Fat: 5g | Polyunsaturated Fat: 3g | Monounsaturated Fat: 9g | Trans Fat: 0.02g | Cholesterol: 122mg | Sodium: 1191mg | Potassium: 689mg | Fiber: 1g | Sugar: 4g | Vitamin A: 152IU | Vitamin C: 11mg | Calcium: 38mg | Iron: 2mg

Episode 083 Homemade Fish Sticks

March 16, 2023 by Susie Weinrich Leave a Comment

crispy fish sticks on a plate with text overlay for the let's make dinner podcast

In episode 083 we are making Crispy Fish Sticks for dinner. If is a perfect dinner for “fish Friday” during Lent or a great family friendly dinner any night of the week. No need to pull the minced and pressed fish sticks out of the freezer when you can make your own crispy fish sticks made with whole filet of cod fish.

Serve it with a side of Cilantro Lime Slaw and some fries, tater tots or kettle chips for a great dinner.

Transcript

Click for the full transcript.

Intro: Welcome everybody to another episode of Let’s Make Dinner, your Audio library of amazing Dinner recipes you can always get on the table. I’m your host, Susie Weinrich. 
Susie Weinrich: Hey everybody. Happy Thursday. I’m so glad that you’re joining me today to make a little bit of dinner. I know on Thursdays a lot of people run out of dinner ideas and you’re like, what the hell am I going make for dinner tonight? You know that you can always come to the Let’s Make Dinner Podcast and figure out what you’re going to make for dinner. If you’re a part of my newsletter, then you know that we are in the middle of a huge construction project at our house. We are finishing our basement completely. We’re leaving a little bit of storage left, but the rest of it’s going to be finished. So I’m going to have a large kitchen space down there so that I can start doing some live video and just recorded video for YouTube. We’re putting a living room, kind of a game space, a bedroom and a bathroom down there. So I have my fingers crossed that they will not be drilling cement while I am recording this episode. So if you hear anything that’s herky jerky or me starting and stopping, it’s because they started drilling cement. But hopefully, fingers crossed, we can make it through this episode.
I do want to say, speaking of newsletter, If you are not a part of the Let’s Make Dinner and Mom’s Dinner newsletter, I would love to have you join our newsletter community. So I send out a newsletter every Thursday of course, you know, for the new podcast episode. Then I send out a newsletter on Sunday morning that goes over all the new recipes that are on Mom’s Dinner. So if you’re not familiar, Mom’s Dinner is actually the website where I share the actual recipes. Let’s Make Dinner is the podcast portion.
On Sunday, Mom’s Dinner sends out a newsletter that has all of the new recipes. It has kitchen tips and tricks, it has dinner ideas for the week. So if you want to join that, there will be a link to subscribe right on the show notes of this episode. 
This week since we’re kind of in the middle of Lent, so if you’re listening to this real time, we are halfway through March. So you’ve got just a couple more weeks of Lent to go if you celebrate Lent. We actually don’t give up anything or do fish Fridays in this house, but I know that a lot of people do. So I thought this week we would make some homemade crispy fish sticks. So if your family is a fish lover, then you are absolutely going to love these because it’s like having a really high quality fish stick. So basically like fried fish, right? But instead of frying, we’re actually going to bake these, but since we’re using a Panko breadcrumb, they’re going to get nice and crispy right in the oven. So this crispy fish stick recipe will take, I don’t know, probably about 15 minutes to prep, but the cooking time is super short. We’re talking under 10 minutes here to get them nice and crispy in the oven. So you’re looking at probably around 30 minutes by the time everything is prepped and done and in the oven and then ready to go. So not a super long labor intensive dinner recipe, which is great. How the recipe is written, it will serve about five people. But of course, if you want to double or triple the recipe, you absolutely can. On my recipe card. There will be a little button that says servings. You just hover over how many servings there are, and a little slider will appear and you can just increase the amount of people to serve. What will happen is all of the ingredients will also increase in the recipe cards, so you know how many ingredients you need to serve you know, seven people, 10 people, 20 people, whatever you want. I’m sliding it right now, it looks like it goes all the way up to 20 people. I’m going to slide it right back down to five. 
Tips and Tricks: Now as far as tips and tricks, let’s talk about a couple ingredients that you need for these fish sticks. One of the first ingredients is obviously the fish. The recipe says that you need one and a half pounds of fresh cod filets. You can use cod. If you can’t find cod, or you maybe don’t like cod, or the cod looks terrible at the grocery store, you could also use some other firm white flesh fish. That is so hard for me to say. Firm white flesh fish. You can use a haddock, a hake, or a catfish. Even tilapia will work, although sometimes tilapia filets are awfully thin. 
The next ingredient is the Panko breadcrumbs. When you’re at the grocery store, the aisle where you normally get your breadcrumbs. There will also be an option called Panko breadcrumbs. That’s what you want. They’re actually considered a Japanese style, I think it’s Japanese, Japanese style breadcrumbs. What it is, it’s bread with the crust removed and then it’s dried and ground into a much coarser texture. So traditional breadcrumbs are pretty fine and kind of smooth. Panko breadcrumbs are like if you took a saltine cracker and crunched it up. So they’re perfect for a crispy, crunchy coating. 
Then all of the other ingredients are pretty traditional as far as you know, breading, fish or chicken. You’ll have flour, eggs, seasonings, and then you will need a non-stick spray. 
Crispy Fish Sticks: So let’s go ahead and get into the full recipe for your crispy fish sticks. So when you’re breading an item, my best tip here is to set up an assembly line. So you’ll need three shallow bowls. In the first bowl, you’re going to place a half a cup of all-purpose flour mixed with one and a quarter teaspoons of kosher salt. Then in the second bowl, you’re going to beat together three eggs with one tablespoon of Dijon mustard. This part is optional. If you like a little tiny kick of heat, you can add a quarter teaspoon of cayenne pepper and mix that in there with eggs. Then the third bowl, you’re going to mix those breadcrumbs. So you need two cups of Panko breadcrumbs mixed with one teaspoon of onion powder, one teaspoon of garlic powder, one teaspoon of paprika, or smoked paprika and that’s it. So mix all those together, line up your three bowls. 
Then you also want to preheat your broiler in your oven and place the oven rack right in the middle position. Get a really large rimmed baking sheet. Cover it with foil and then generously spray it with non-stick spray. 
Now you want to take those cod filets and pat them dry with a paper towel. Then you’re going to cut them into about one inch strips. Maybe one inch thick and maybe three inches long. So just a normal fish stick that you would get, you know, a frozen fish stick. That’s kind of what you want them to look like. But, you know, these are homemade, so if they don’t look great, it’s totally fine. They’ll still taste good. 
All right. You’ll start by dipping a cod strip into that flour mixture. Dredge it all through there, and then give it a little shake to shake off any excess flour. Then you’re going to dip it fully in that egg mixture. Then the last step is to dredge it in that Panko mixture. What I like to do is kind of lightly press the Panko mixture onto the fish sticks so that it adheres to the fish. Then you’re going to place that right on your prepared baking sheet, and then repeat that with all of the fish sticks that you cut. 
When all of them are coated and they’re on that baking rack, what you want to do is spray the tops of them with non-stick spray. Again, generously spray them. Spraying the tops and having the foil sprayed on the bottom is going to help that Panko breadcrumbs become nice and golden and crispy.
So you’ll pop them into the preheated oven on that middle rack for about four minutes. Then you’re going to pull them out, flip them over, and pop them in for about another three to four minutes. You’ll know when they’re done when your fish sticks have reached 145 degree internal temperature. That means they are cooked through. You can use just one of those. Instant read thermometers are great. I will actually link the one that I use right in the show notes for you.
For serving these fish sticks, you know, keep it casual, keep it easy. Traditionally, we’re talking french fries, tater tots, kettle chips, fish and chips. Maybe some raw veggies with ranch dip or hummus. If you want to add a little bit more, you could add a green side salad or maybe some roasted vegetables. 
Traditionally, you add a little bit of tartar sauce on the side, and I actually have two recipes for homemade tartar sauce. If you’re like, yeah, I’m not making my own tartar sauce, you can just get some at the grocery store and use that, but my guess is one of the kids in your family will just use ketchup because that’s how it is at my house. One kid uses ketchup, one kid uses mustard. But, if you guys like tartar sauce, I have a classic tartar sauce recipe. Then I also have a jalapeno tartar sauce recipe that’s really good. 
If you are someone who likes to prepare meals and kind of get things ready ahead of time, right in the recipe card, I’m not going to go over it here, but right in the recipe card, there are instructions for making the fish sticks and then freezing them and then reheating them from frozen. So just like you would have frozen fish sticks from the grocery store, you can actually make them to have frozen fish sticks. 
Outro: All right, so that does it for the full episode of Let’s Make Dinner. I hope that you make these wonderful fish sticks for dinner tonight and cook along with me here on this episode.
Like I said before, I would love to have you guys join my newsletter. There will be a link right in the show notes, whatever podcast platform you’re listening on, I’m going to pop a link right in there so you can click it and just send your email address to me and you’ll be signed up for my newsletter.
So until next time, I hope this episode of Let’s Make Dinner Makes your Dinner Time a little easier. See ya!
Double Dip: All right, now it’s time for your double dip. Thanks for sticking around, guys. So in the double dip, if you’re enjoying cooking along with me on Thursdays and you’re finding it helpful and that it helps you plan your dinners when you’re fresh out of dinner ideas, you can always listen to the Double Dip and know it’s coming up the next week. Make sure you have the groceries ready and cook along with me right on Thursdays. 
So next week on, let’s see, what date will that be? That will be March 23rd. We are making Asian meatballs with a delicious hoisin glaze over top. These are so, so good. You can serve them up with a little bit of steamed rice or fried rice, which actually we like to buy ours just right at Trader Joe’s in their frozen food section. Super easy, and then I usually get some either sugar snap peas or snow peas and saute them or make some roasted broccoli and it makes just an absolutely perfect dinner. 
Okay, so here’s what you’re going to need to make the Asian meatballs with the hoisin glaze. Hoisin glaze. I have a really hard time saying that word too. Oh my gosh. Okay. Here is what you need. I’m going to preface this just like I did when we made our Veggie Pad Thai. Some of these Asian style recipes have a ton of ingredients, but really once you get some of these ingredients, you have them and you can make a whole lot of delicious Asian style food. 
So for this next episode, you’re going to need one egg, soy sauce, sesame oil, kosher salt, red pepper flakes, ground ginger. I’m talking about like dry ground ginger that you would find in the spice cabinet. Fresh garlic cloves, panko breadcrumbs, one and a half pounds of 85% lean ground beef, three scallions, non-stick spray. Then for the glaze, for the hoisin glaze, you need vegetable oil, garlic, fresh ginger, and this is a little tip about fresh ginger. You can of course buy the big knobs of fresh ginger in the produce aisle, or you can go to the frozen food section and go where they have some frozen herbs and there’s a brand called Dorot Gardens, and they have little cubes of frozen ginger that are perfect and it couldn’t be easier to use. So that’s what I use. You’ll need hoisin sauce, ketchup, rice vinegar, sambal, which is basically like garlic chili sauce, soy sauce, and again sesame oil. So that’s what you need for next week. I hope you’ll join me and cook along with me next week. Until then, I hope you guys have a great week. See ya.

Recipes Mentioned

  • Crispy Fish Sticks
  • Tartar Sauce
  • Jalapeno Tartar Sauce
  • Fish Stick Tacos
  • Cilantro Lime Slaw

Equipment Recommended

  • Internal Temp Thermometer

Next Week

I hope you will join me every Thursday for a new dinner idea and cook right along with the Let’s Make Dinner Podcast.

Next week we are making Asian Meatballs with Hoisin Glaze. Pop over and grab the ingredients list. If you are on your phone you can even text yourself the recipe link and ingredient list!

Follow Along

We would love to have you subscribe to our weekly newsletter that comes out every Thursday and Sunday. Stay on top of new recipes, new podcast episodes all the goings-on at Mom’s Dinner!

Five Star Chicken Salad with Grapes

March 15, 2023 by Susie Weinrich 4 Comments

chicken salad with grapes on a croissant with lettuce and tomato

Chicken Salad with Grapes is a classic dish that combines the savory flavors of cooked chicken with the sweetness of fresh grapes, the crunch of toasted pecans, and the freshness of dill. This Chicken Salad Recipe can be served as a light meal on its own, as a sandwich on bread or a croissants, on top of a lettuce salad, or just scooped up with buttery Ritz crackers.

chicken salad sandwich with lettuce and thick cut tomatoes

Use a rotisserie chicken or leftover chicken to make quick work of putting this recipe together. Or if I make a whole roasted chicken or two on the weekend, I will make this chicken salad recipe with the leftovers!

Ingredients

This will be the best Chicken Salad Recipe with Grapes you have ever had! The sauce is a perfect balance of salty, sweet, creamy and herby. It is all mixed with the perfect amount of sauce to coat the chicken and grapes.

Pictured are the ingredients you need to put together your chicken salad.

Ingredients to make chicken salad with grapes on a table
Ingredients Clockwise: Cooked chicken, lemon, dill, garlic powder, onion powder, kosher salt, pepper, sugar, celery, mayo, sour cream, green onions, pecans, red grapes.

Ingredient & Recipe Tips

Remember these tips when you are gathering all your ingredients to make this Chicken Salad with Grapes Recipe

  1. Buy seedless red grapes that are firm to the touch. You do not want to be chomping down on grape seeds while you are eating your chicken salad! Red grapes can tend to be sweeter than green grapes, but either will work.
  2. Use the white and light green part of the green onion. That is the part that has the most flavor. The dark green part is more of a garnish.
  3. Don’t skip the lemon or sugar. Adding these two ingredients balances the sauce flavors perfectly. I always say “if you feel like your dish is missing something, it’s probably acid (citrus, vinegar, etc…)”.
  4. Buy Fresh Dill. The fresh dill adds a bright note to the dish that dried herbs just can’t do.
  5. Toast your nuts. This is what takes chewy nuts to crispy and flavorful. There are complete instructions for toasting nuts below and in the recipe card.

Cooked Chicken – Shred or Chop

You will need cooked chicken to make this dish. There are a few ways to get cooked chicken:

  • Easiest – buy a rotisserie chicken and use both breasts and maybe 1 thigh.
  • Moderate – poach chicken breasts, you’ll probably need about 3 to equal four cups.
  • Moderate – bake a couple chicken breasts in a 350 degree oven, on a rimmed baking sheet, drizzled with olive oil and salt/pepper, for about 25 minutes.
  • Moderate + – make a rotisserie or whole chicken in the instant pot.
  • Hardest – bake a whole roasted chicken.

You can shred or chop the chicken for your salad.

If you choose to chop your chicken I recommend chopping it pretty fine into small bite sized pieces, like the size of a blueberry.

If you shred your chicken the very best way is to put your warm chicken in a stand mixer with a paddle attachment and run it for about 20 seconds. Shreds perfectly!

Toasting Nuts

The recipe calls for toasted pecans but you can certainly swap in walnuts or cashews.

To properly toast nuts you place them in a dry pan (no oil), over medium low heat for about 3-4 minutes, shaking the pan once in a while so they don’t burn. You will know they are done once they start darkening in color and you can distinctly smell the nuttiness.

How To Make Chicken Salad with Grapes

If you love cooking shows you can also watch Susie make this Chicken Salad recipe on a 30 minute episode of Pinterest TV, by clicking here.

This is a pretty simple recipe. You will start by making the dressing and then add the chicken and fruit/veggies.

In a large mixing bowl combine the mayonnaise, sour cream, lemon juice, onion powder, garlic powder, sugar, salt, pepper and fresh dill. Whisk the dressing ingredients until thoroughly combined.

creamy homemade dressing for chicken salad

Then add the diced chicken, celery, green onions, grapes and toasted pecans to the
dressing mixture and toss gently to combine.

mixing chicken salad with grapes in a bowl

Taste and adjust seasonings if desired. Serve right away or pop fridge for up to 4 days.

Storing

Just like a really good chili, this Chicken Salad Recipe with Grapes gets better with a little time, , which makes it great for meal prep! Make it a day ahead and store in the fridge overnight.

If you have leftovers you can keep it in the fridge in an airtight container for up to 4 days.

Serving Options

There are so many ways you can enjoy chicken salad. Here are some ideas to get you started:

Chicken Salad Sandwiches: Use this homemade chicken salad as a filling for sandwiches. Spread the salad between two slices of bread or buttery croissant. Add lettuce, tomato, and cucumber for extra freshness.

Salad: Serve scooped on top of a bed of lettuce or mixed greens that are lightly dressed with a vinaigrette. (we love the House Vinaigrette at Aldi!)

chicken salad on top of a bed of lettuce and mixed greens

Lettuce wraps: Use large lettuce leaves, such as romaine or butter lettuce, as wraps for the chicken salad with grapes. Top the leaves with the salad, and roll them up like a burrito.

Snack: Afternoon snack time- scoop a little chicken salad onto a cracker or cucumber round.

Stuffed avocado or tomato: Cut an avocado in half and remove the pit or cut the top off a pepper and scoop our the seeds. Scoop the chicken salad with grapes into the avocado halves or peppers for a healthy and filling meal.

Side Dish Ideas for Chicken Salad

This recipe pairs well with a variety of side dishes. Here are some ideas to help you create a well-rounded meal:

  1. Fresh fruit: Serve a plate of sliced fresh fruit, such as watermelon, cantaloupe, or pineapple.
  2. Grilled vegetables: Grill some zucchini, bell peppers, or eggplant and serve them as a side dish. The smoky flavor of the grilled veggies will complement the sweetness of the grapes.
  3. Pasta salad: Toss together a simple pasta salad, the acidity of the dressing will balance out the creaminess of the chicken salad.
  4. Corn on the cob: Grill, boil or Instant Pot some fresh corn on the cob and serve it with a dollop of butter or a sprinkle of salt.
  5. Green salad: Serve a side salad of mixed greens with a simple vinaigrette dressing.
  6. Chips: Serve some sweet potato chips, kettle chips, or pita chips. This is a quick and easy side dish that will add some crunch to the meal.

How Much Per Person

Depending on how you are serving this chicken salad (dinner or snack) you will want to plan about 4-6 ounces per person. Since the recipe calls for 4 cups of chicken it should serve about 8 people.

More “Salad Sandwiches”

  • Easy Egg Salad Recipe
  • creamy artichoke chicken salad in a baking dish topped with french fried onions
    Baked Artichoke Chicken Salad
  • Tuna Salad Sandwich on a croissant.
    Classic Tuna Salad Recipe

Susie leaning on the kitchen counter

Did you make this recipe?

โญโญโญโญโญ

I would love to hear your review, especially if you have tips and tricks to add! Pop down to the comment section and connect with me

Rate This Recipeโ†’
chicken salad with grapes on a croissant with lettuce and tomato

Chicken Salad Recipe with Grapes + Video

A perfect chicken salad recipe with grapes and pecans, mixed with a creamy dressing that has dill, celery and green onions. Serve it on top of a bed of lettuce, on a sandwich or just as a snack.
Cook along with the video or you can watch Susie make this chicken salad on a 30 minute Pin TV episode!
4.84 from 6 votes
Print Pin Rate Save Saved!
Prep Time: 15 minutes minutes
Cook Time: 0 minutes minutes
Total Time: 15 minutes minutes
Servings: 8 sandwiches
Calories: 320kcal
Author: Susie Weinrich

Ingredients

  • 4 cups cooked chicken breast - diced or shredded -I like to use a rotisserie chicken
  • ยพ cup mayonnaise
  • ยฝ cup sour cream
  • 2 Tbsp. fresh squeezed lemon juice
  • 1 tsp. onion powder
  • ยฝ tsp. garlic powder
  • 2 tsp. sugar
  • ยพ tsp. kosher salt
  • ยฝ tsp. black pepper
  • 1 Tbsp. (heaping) fresh chopped dill - chopped
  • 3 celery ribs - finely diced
  • 4 green onions/scallions - sliced (use both the white and light green parts)
  • 2 cups red grapes - halved or quartered if they are large
  • ยฝ cup toasted chopped pecans - – see notes for toasting instructions

Instructions
 

  • Start by mixing the sauce in a large bowl. Combine the mayonnaise, sour cream, lemon juice, onion powder, garlic powder, sugar, salt, pepper and fresh dill.
    ยพ cup mayonnaise, ยฝ cup sour cream, 2 Tbsp. fresh squeezed lemon juice, 1 tsp. onion powder, ยฝ tsp. garlic powder, 2 tsp. sugar, ยพ tsp. kosher salt, ยฝ tsp. black pepper, 1 Tbsp. (heaping) fresh chopped dill
  • Whisk the dressing ingredients until thoroughly combined.
  • To the sauce add the diced chicken, celery, green onions, grapes and toasted pecans and toss gently to combine.
    4 cups cooked chicken breast, 3 celery ribs, 4 green onions/scallions, 2 cups red grapes, ยฝ cup toasted chopped pecans
  • Taste and adjust seasonings if desired.

Serving

  • You can serve the chicken salad immediately or chill in the refrigerator for a few hours.
  • Ways to serve chicken salad with grapes:
    Chicken Salad Sandwiches with lettuce and tomato on bread or croissant
    Salad
    Lettuce wraps or sandwich wraps
    Stuffed in an avocado, bell pepper or tomato
    Snack: scoop a little chicken salad onto a cracker or cucumber round.

Storing

  • Keep any leftover chicken salad in the fridge, in an airtight container for up to 4 days.

Recipe Tips and Notes:

Toasting Nuts:
Place your pecans in a dry skillet (no oil), over medium low heat. Let them roast for about 3-4 minutes, tossing them occasionally. This will make them flavorful and crispy. You will know they are toasted when they start to darken in color and smell very nutty. But, keep an eye on the pan so they don’t burn!
ย 
Cooked Chicken Options:
Store Bought Rotisserie Chicken (preferred method)
Poached Chicken
Instant Pot Rotisserie Chicken
All Purpose Instant Pot Chicken
Baked Chicken Breasts (3) – Drizzle the chicken breasts with olive oil and sprinkle on salt and pepper. Bake on a rimmed baking sheet at 350 for about 25 minutes until the internal temp reaches 165ยฐ.
PRO TIP for shredding chicken: if you choose to shred your chicken you can do it easily in your stand mixer. Place the WARM chicken breasts in the stand mixer with a paddle attachment. Run the mixer for about 20 seconds and watch it shred your chicken perfectly!
Did you make this recipe?Connect with me and let me know by commenting below!
Jump to Comments
Serving: 1serving (ยฝ cup) | Calories: 320kcal | Carbohydrates: 11g | Protein: 23g | Fat: 20g | Saturated Fat: 4g | Polyunsaturated Fat: 8g | Monounsaturated Fat: 6g | Trans Fat: 0.03g | Cholesterol: 74mg | Sodium: 329mg | Potassium: 349mg | Fiber: 1g | Sugar: 8g | Vitamin A: 353IU | Vitamin C: 6mg | Calcium: 47mg | Iron: 1mg

Saucy Hoisin Meatballs

March 13, 2023 by Susie Weinrich Leave a Comment

Saucy Hoisin Meatballs in a bowl with broccoli

This Saucy Hoisin Meatballs Recipe will satisfy your craving for your favorite Asian flavors like Hoisin, Sesame, Garlic and Fresh Ginger. This recipe is a delicious and unique twist on traditional meatballs. You will start by making a super flavor-packed beef meatball and pop them in the oven, while they bake you put together an easy-to-make Hoisin Glaze on the stove top.

Hoisin Glazed meatballs in a bowl with roasted broccoli

It all comes together in the most delicious and crave-worthy way! Perfect served with steamed rice or fried rice and Asian Slaw with Crispy Ramen or roasted broccoli.

Meatball Ingredients

There is no skimping on flavor with the meatball recipe! Pictured below are all the ingredients you need to make these knock-out meatballs:

Asian flavored meatball ingredients on a table
Ingredients Clockwise: 85% Ground Beef, Panko bread crumbs, green onions/scallions, garlic, sesame oil, soy sauce, kosher salt, ground ginger, red pepper flakes, and 1 egg.

Ground Ginger – for the meatballs you will not use a fresh ginger, a dry ginger powder from your spice cabinet is what you want to use. You will use a fresh ginger in the Hoisin Sauce.

Ground Beef – using an 85% lean ground beef is the perfect balance of fat to keep your meatballs juicy and flavorful without being overly greasy!

Homemade Hoisin Glaze Ingredients

We are not going with a bottled sauce here. You will blend a combo of Asian flavored ingredients that make a perfectly balanced Hoisin Glaze for the meatballs. Pictured are the ingredients that you will need:

ingredients for the Hoisin Glaze on table in colorful bowls
Ingredients Clockwise: Fresh ginger, Sambal Oelek, rice vinegar & water, ketchup, garlic, soy sauce & sesame oil, hoisin, and vegetable oil.

Hoisin Sauce: is a thick, dark, and sweet sauce that is commonly used in Chinese cuisine. It is made from a blend of soybeans, vinegar, garlic, sugar, and various spices, and has a distinct flavor that is both sweet and savory. It will be in a bottle at the grocery store and can be found in the Asian foods aisle.

Rice Vinegar: there may be two options for rice vinegar at the store- seasoned rice vinegar and rice vinegar. The recipe calls for rice vinegar, but either will work. Note that the seasoned rice vinegar may be a little sweeter.

Sesame Oil: just like the rice vinegar, there may be two options at the grocery store – toasted sesame oil and sesame oil. Both will work!

Sambal Oelek: this is an Asian Chili Paste that can be found in the Asian food aisle of the grocery store. It has a similar flavor to Sriracha without being overly garlicky. It will have a slight kick of heat and a tang of vinegar.

If you buy a bottle of Sambal you can also use it to make:

  • Asian Brussels Sprouts with Sambal Aioli
  • Easy Beef Ramen
  • Instant Pot Beef Ramen
  • Ground Beef Bulgogi Bowls
  • Crispy Chili Cauliflower

Tips on Using Ginger

There are two ways to get the fresh minced ginger you need for this Hoisin Meatball recipe.

  1. Fresh Ginger Nobs – pictured above. My tip here is to use the edge of a spoon to scrap the brown peel from the ginger and then mince or grate the fragrant yellow flesh.
  2. ** Our Preferred Method – Dorot Gardens Frozen Ginger Cubes. There is this AMAZING product at the grocery store in the freezer section. They are little cubes of frozen minced ginger. You literally pop the cubes out of the tray and use them as needed. So easy and so convenient!

How To

You can also watch Susie make these Hoisin Meatballs on a 30 minute episode of Pinterest TV, click here.

To make this recipe you will start by making the meatballs, then while they are in the oven you will get the sauce prepared:

  • Make the meatballs.
  • In a bowl mix together the egg, soy sauce, sesame oil, panko breadcrumbs and all the seasonings. Let sit for a minute or two.
  • Add the ground beef and scallions. Lightly combine.
  • Form meatballs and place on a foil lined baking sheet. Spray the tops with non-stick spray.
  • Bake for 15-18 minutes at 400 degrees.
Asian Meatballs that have been baked
  • While they bake make the Hoisin Sauce.
  • In a sauce pot heat the vegetable oil over medium low heat.
  • Sautรฉ the garlic and ginger for a minute.
  • Stir in the remaining ingredients and simmer until thickened, 3-5 minutes.
  • Toss the cooked meatballs in the Hoisin Glaze and serve!
Homemade Hoisin glaze in a saucepan

Serving

Serve these meatballs for dinner or as an appetizer. Make sure to garnish with sliced green onions/scallions and sesame seeds. Cilantro would even be a delicious garnish!

There are several options menu options to choose from:

Dinner

One popular way is to serve them over a bed of steamed rice (we love to buy the bags of frozen rice either at the grocery store or Trader Joe’s), with Roasted Broccoli.

Hoisin Meatballs being served with broccoli and rice

Alternately, serving the meatballs with Fried Rice and these Asian Brussels Sprouts with Sambal Aioli will be a real knock-out dinner!

Appetizer Style

You can also serve these as appetizer meatballs! Simply make the meatballs smaller. They will only need to bake for about 10 minutes. Toss in the sauce and then place them on a platter with some toothpicks.

Meatball Sub

Serving these Hoisin Sauce Meatballs on a Sub Sandwich is SUPER non-traditional but would be delicious!

On a toasted hoagie bun add the meatballs, some sliced cucumbers and some Asian Slaw or Kimchi.

Storing

These Asian-Style Meatballs will be good in the fridge, in and airtight container for up to 4 days.

To reheat single portions place them on a microwave safe dish and microwave for about 1 min 30 sec. Cutting them in half may help them heat quicker without drying out in the microwave.

To reheat a whole recipe or multiple servings place in an oven proof dish. Heat at 350 degrees, covered with foil, for about 15 minutes.

Recipe Tips

Follow these final tips to make sure your Hoisin Glazed Meatballs are perfect!

  1. Use fresh ingredients: Make sure to use fresh garlic, ginger, and scallions for the best flavor.
  2. Pick your protein: You can also use ground pork or turkey instead of beef for a different taste.
  3. Adjust the spiciness: If you prefer more spice add more red pepper flakes to the meatballs!
  4. Use a meat thermometer: To ensure that the meatballs are fully cooked, use a meat thermometer to check the internal temperature. The temperature should read 160-165 degrees Fahrenheit.

More Meatball Recipes

  • BBQ meatballs on a plate
    Best Baked BBQ Meatballs
  • baked chicken meatballs in a pile garnished with parsley and romano cheese
    Flavorful Baked Chicken Meatballs
  • mashed potatoes and Swedish Meatballs in a gray bowl
    Five Star Instant Pot Swedish Meatballs
  • ham balls in a pan with glaze baked over top
    Classic Iowa Ham Balls

Susie leaning on the kitchen counter

Did you make this recipe?

โญโญโญโญโญ

I would love to hear your review, especially if you have tips and tricks to add! Pop down to the comment section and connect with me

Rate This Recipeโ†’
Saucy Hoisin Meatballs in a bowl with broccoli

Saucy Hoisin Meatball Recipe

This Saucy Hoisin Meatball Recipe is a super delicious Asian twist on traditional meatballs. The beef meatballs are packed with flavors like sesame, ginger, and garlic. Then a sweet and savory homemade Hoisin Sauce tops it all off!
Serve it up with some steamed rice and a green veggie!
USE THE PLAYER BELOW TO COOK ALONG WITH THE FULL AUDIO RECIPE! Or you can watch Susie make these Hoisin Meatballs on a 30 minute episode of Pinterest TV.
5 from 1 vote
Print Pin Rate Save Saved!
Prep Time: 20 minutes minutes
Cook Time: 15 minutes minutes
Total Time: 35 minutes minutes
Servings: 20 meatballs
Calories: 129kcal
Author: Susie Weinrich

Equipment

  • Large rimmed baking sheet
  • foil

Ingredients

Meatballs

  • 1 egg - lightly beaten
  • 3 tablespoon soy sauce
  • 1 tablespoon (toasted) sesame oil
  • ยพ teaspoon kosher salt
  • ยผ teaspoon red pepper flakes
  • ยผ teaspoon ground ginger
  • 2 garlic cloves - minced
  • ยพ cup Panko breadcrumbs
  • 1 ยฝ lbs 85% lean ground beef
  • 3 scallions - finely chopped
  • non-stick spray

Asian Flavored Glaze

  • 1 tablespoon vegetable oil
  • 2 cloves garlic - minced
  • 2 teaspoon fresh ginger - minced (or use the Dorot Garden's frozen ginger cubes!)
  • ยพ cup hoisin sauce
  • 3 tablespoon ketchup
  • 2 tablespoon rice vinegar
  • 2 tablespoon water
  • 1 tablespoon Sambal Oelek - (chili garlic sauce)
  • 1 tablespoon soy sauce - (we like low sodium)
  • 1 teaspoon (toasted) sesame oil

Serving & Garnish

  • Rice, Sliced Green Onions, and Sesame Seeds

Instructions
 

Meatballs

  • Preheat the oven to 400 degrees. Line a baking sheet with aluminum foil and lightly spray with cooking spray.
  • For the meatballs, combine the egg, soy sauce, sesame oil, salt, red pepper flakes, ground ginger, garlic and panko breadcrumbs.
    1 egg, 3 tablespoon soy sauce, 1 tablespoon (toasted) sesame oil, ยพ teaspoon kosher salt, ยผ teaspoon red pepper flakes, ยผ teaspoon ground ginger, 2 garlic cloves, ยพ cup Panko breadcrumbs
  • Let the mixture sit for a minute to soften.
  • Add in the ground beef and chopped scallions and lightly combine. Do not overmix or your meatballs will be tough.
    1 ยฝ lbs 85% lean ground beef, 3 scallions
  • Form the mixture into golf ball sized meatballs and place on the prepared baking sheet. Spray the tops of the meatballs with cooking spray.
  • Bake the meatballs for 15-18 minutes or until they register 160-165 degrees.

Hoisin Glaze – make while the meatballs cook

  • For the sauce, heat vegetable oil in a saucepan over medium low heat. Add the garlic and ginger and sautรฉ for 1 minute.
    1 tablespoon vegetable oil, 2 cloves garlic, 2 teaspoon fresh ginger
  • Stir in the hoisin sauce, ketchup, rice vinegar, water, sambal, soy sauce and sesame oil. Bring the mixture to a simmer and cook until thickened (about 5 minutes).
    ยพ cup hoisin sauce, 3 tablespoon ketchup, 2 tablespoon rice vinegar, 2 tablespoon water, 1 tablespoon Sambal Oelek, 1 tablespoon soy sauce, 1 teaspoon (toasted) sesame oil

Assembly & Serving

  • Toss the meatballs with the sauce and simmer until heated through.
  • Serve the meatballs over rice topped with sliced green onion and sesame seeds.
    Rice, Sliced Green Onions, and Sesame Seeds
  • Perfect with steamed rice, sticky rice, or fried rice and roasted broccoli

Recipe Tips and Notes:

Appetizer Meatballs: Make the meatballs a little smaller and bake for about 10 minutes, combine with the sauce and then serve on a platter with toothpicks.
Meatball Sub: Serve these saucy meatballs on a toasted hoagie with some sliced cucumbers and Asian Slaw or Kimchi.
Ground Beef: you can also use ground pork or turkey instead of beef for a different taste.
Did you make this recipe?Connect with me and let me know by commenting below!
Jump to Comments
Serving: 1meatball | Calories: 129kcal | Carbohydrates: 8g | Protein: 8g | Fat: 7g | Saturated Fat: 2g | Polyunsaturated Fat: 1g | Monounsaturated Fat: 3g | Trans Fat: 0.3g | Cholesterol: 32mg | Sodium: 519mg | Potassium: 146mg | Fiber: 1g | Sugar: 4g | Vitamin A: 51IU | Vitamin C: 1mg | Calcium: 18mg | Iron: 1mg

Episode 82 Mushroom Pasta

March 9, 2023 by Susie Weinrich Leave a Comment

mushroom pasta in a bowl with text overlay for the Let's Make Dinner Podcast

Today on the Let’s Make Dinner Podcast we are making Creamy Mushroom Pasta for dinner. It is a penne pasta with cremini mushrooms all coated in a delicious garlic parmesan sauce.

Transcript

Click for the full transcript.

Welcome everybody to another episode of Let’s Make Dinner, your Audio Library of amazing Dinner recipes you can always get on the table. I’m your host, Susie Weinrich

Hey Hey everybody. Okay. I’m so excited to be in my office today. It has been a minute, so this last week, if you’re listening to this in real time last week, I actually spent five wonderful glorious days in Chicago with other people in my industry. So content creators, photographers, recipe developers, podcasters, and a lot of those people. When you’re doing the job that I do, you’re just meeting those people online or through social media and to actually meet some of these people in person is just, it’s so inspirational and so wonderful.

So I’m feeling on top of the world today and it’s also good to be home and to be eating in my own house. I’m gonna tell you what, when you’re traveling for five days, the constant eating out gets to be too much. I love a good, rich, yummy dinner, but when you’re eating steak and fries and you know really rich breakfasts every day it gets to be a little bit much and when you’re having all the drink, It can be a little bit much after five days.

So I’m back home. Happy to be here. Super happy to be recording another podcast episode and I bet you’re wondering what we’re making for dinner tonight. So tonight we are making the creamy mushroom pasta. So when I’m in the kitchen cooking, one of my absolute favorite smells in the kitchen, this is kind of weird, but one of my favorite smells is when butter is simmering in a pan and you add fresh garlic and mushrooms. That three ingredient combo, they need to make a candle that is mushroom, garlic, and butter . I would burn it in my kitchen every day. So that’s going to be the foundation of this recipe for creamy mushroom pasta.

I was looking at this recipe because we’re gonna make it for dinner and the recipe calls for eight ounces of pasta and you know, then it has the cream sauce and the mushrooms and I have on there that it serves four people, and I’m like, in what world does eight ounces of pasta feed four people.

So I think I need to go back and make this recipe. Obviously I’m gonna make it tonight, but I need to maybe, adjust how many people this serves. So I think with eight ounces of pasta, I think you could serve that to four people, but you for sure better have a side salad and maybe some garlic bread to go with it.

So my recommendation for right now is that if you make this pasta dish for four people, Double the recipe, and then if you have leftovers, great. You’ll have delicious pasta for lunch the next day. This recipe is going to come together pretty quickly, so probably in the time that it takes for you to cook the pasta, which is probably gonna be, you know, eight to 10 minutes, you can also have the cream sauce with the mushrooms already in another pan. So I would say in total, at like 20 minutes tops to get this done.

Recipe Tips and Tricks

For our tips and trick section, the only thing that I really wanna talk about here are two of the ingredients included in this recipe. One is a 10 to 16 ounce container of Cremini mushrooms. In the grocery store they are going to be the ones that are about the size of button mushrooms, like the white button mushrooms, but they’re gonna be really dark brown in color.

It should say cremini mushrooms on the package, or it might say baby bella mushrooms, because a cremini is basically the same thing as a portobello mushroom, just much smaller and more in the middle of its ripeness. But it still has super delicious, you know, really earthy, hearty mushroom flavor. Of course, any mushroom type will work here, but the cremini or baby bella mushroom is what is written in the recipe.

The other ingredient that I wanna talk about is the Parmesan cheese. So this is going to add quite a bit of flavor to the actual sauce for your pasta. So my recommendation is that you get a really good Parmesan cheese. So if you go to your grocery store and they have, you know, the really processed commercial Parmesan cheese, it’ll look like a little triangle that’ll work, absolutely.

But if you want that really kind of tangy, rich aged Parmesan flavor, look for something that comes off of a full wheel of Parmesan. It’ll look really craggy, kind of dry and rustic that is going to have way more flavor than your, you know, really processed Parmesan. So that’s it for ingredients and tips and tricks.

Creamy Mushroom Pasta Audio Recipe

Let’s go ahead and just jump right into the full recipe for the creamy mushroom pasta. So, like I said before, you’re gonna need eight ounces of pasta. Just cook that per package instructions to like an al dente. The tip here though, is that you always, always wanna cook your pasta in a salted water. Your water, it’s gonna take way more salt than you think.

So add that kosher salt. You can actually taste the pasta water, and if it tastes like salty sea water, then you’ve salted it enough. So go ahead and cook your eight ounces of pasta. If you’re doubling the recipe, go ahead and use a whole pound. You can use penne pasta, any kind of like tubular noodle, like a rigatoni, a cavatapi, anything like that will work really well.

So while that is cooking, you’re gonna go ahead and get the mushrooms sauteing and make that cream sauce. So in a large skillet, something with taller sides melt three tablespoons of butter over medium to medium low heat. Then you’re gonna stir in those 10 to 16 ounces of sliced cremini mushrooms. And three, at least three, plump garlic cloves that have been chopped.

If you like more garlic, add more garlic. Then get that sauteing around the pan for about 10 minutes and inhale that smell. The smell of butter and garlic and mushrooms is like heaven.

Now at this point you’re gonna add one more tablespoon of butter to the pan. we do this because we’re gonna make a roux to make the sauce thick, and when you cook mushrooms and butter, they generally will absorb all the butter, which is great.

Makes it super delicious. But you need a little more fat in the pan to thicken your sauce. So add one more tablespoon of butter. Then you’re gonna stir in an entire teaspoon of salt and two tablespoons of all-purpose flour. You’re gonna stir that around the pan. It’s going to coat the mushrooms, and it’s going to start to kind of thicken up a little bit.

Then you’re going to pour in one cup of heavy cream and a half a cup of milk. That milk can just be 1% milk, whole milk, skim milk. It just slightly lightens up that heavy cream. Stir that really well so that there’s no lumps left in your sauce and simmer it lightly until it starts to thicken up. And this will just take a couple minutes.

Now you’re going to remove it from the heat, you’ll add in your cooked pasta, and then you’re going to add in a half cup of shredded Parmesan cheese. You stir it until the pasta is completely coated with that melted creamy cheese sauce. So good. My mouth is watering right now.

Serving

And then give it a taste. We always recommend that you taste before you serve. Make sure that you don’t want to add a little more salt or if you want to add some fresh garlic at the end or if you want some parsley in there.

The other nice thing about this recipe is you can absolutely add some extra mix ins, so if you want, you can add some fresh spinach in there and just wilt it down to add a green note. You could add some sautรฉ or grilled shrimp or chicken. You could also add some asparagus in there when you add the mushrooms. Or this is another great idea at the very end, you can stir in a couple tablespoons of pesto, fresh pesto. Super, super delicious. It add adds a really bright note.

Now, when you taste it, if you feel like the dish is a little heavy, you can also squeeze on a little bit of lemon juice, and that always adds a little bright note. I always say if you taste a recipe and you feel like there’s just something missing to the recipe, it’s usually an acid. And what you add for that is, you know, vinegar, balsamic vinegar, citrus. Any of those things will work to add that high note.

Side Dishes

Like I said before, when you’re serving this, I definitely recommend adding a side salad.

This is such an easy recipe that, you know, just a really good bagged Caesar salad from the grocery store will work perfect. You wanna put a little more effort in? You could absolutely make my big old Italian salad (podcast episode for Italian Salad) with fresh pesto vinegarette, but that’s a little more work. If you’re making this during the week, on a Thursday, you might wanna just like grab a bag of.

If you have a Trader Joe’s nearby, they have an excellent salad that would be perfect with this, that I’m actually serving tonight. It is an arugula salad that has a lemon vinaigrette and it has like almonds or maybe it’s pistachios in it. Look for it at, um, Trader Joe’s. Super delicious. And then of course, warm bread, like a ciabatta bread or breadsticks or garlic bread would be perfect here as.

Tips for Cream Sauces

Now since we’re making a cream sauce, I’m gonna talk through just a couple points here about troubleshooting cream sauce. And this is gonna be, you know, whether you’re making an Alfredo, if you’re making this creamy mushroom pasta. Sometimes cream sauce can give you problems.

So if you’re making cream sauce and you’re feeling like it’s not thick enough, you can simmer it for longer, but you always wanna make sure that you’re stirring cream sauce because that cream that fat can burn to the bottom of the.

If you are simmering your cream sauce and it didn’t thicken up at all, and you’re like, this is still like milk . What you can do is mix a heaping tablespoon of corn starch with about one and a half tablespoons of cool water. Stir that together, and what that is called is a slurry. And then while your sauce or your liquid is simmering, you pour that in, whisk it, and it should thicken up right.

Now if you don’t want to use a corn starch, there’s another option called a beurre manie, and that is a French word, fanciness, for kneaded butter. And what you do is you take a tablespoon of softened butter, a tablespoon of all-purpose flour, take a fork and mash it together completely. And then while your sauce is simmering, whisk it in and that will thicken it perfectly.

Now if you’re done with your cream sauce and you’re like, this is light glue, it is too thick. What you want to do is just whisk in a little more milk. Maybe you want to whisk in some more cream, chicken broth, water, whatever you wanna use, just whisk in a little bit more liquid.

All right. That does it for our full recipe for creamy mushroom pasta today.

I hope you make it for dinner on this Thursday night. If you’re listening real time, it’s Thursday! You can always look for a new recipe to come out on Let’s Make Dinner podcast every Thursday morning, and then hopefully you’ll grab the ingredients and make it for dinner that night.

Of course, all of the recipes I talked about in this episode will be linked right in the show notes, so you can click through and go to the recipe hit jump to recipe. Jump right down to the recipe card. Cook from my website. If you’re on your phone, there’s a little button in the middle of my recipe card called Cook Mode, and it’s a little toggle switch. Toggle it on and then your screen will not go dark, like best invention ever. So when you’re cooking, you don’t have to continually turn on your screen.

It will just stay on for you the whole time and you can cook. You could also print out the recipe. You can pin it, you can actually, if you’ve got to go to the grocery store and you’re on your phone, you can text yourself all of the ingredients and a link back to the recipe right from my recipe card. So check it out I hope you’ll use that feature. It is so slick.

All right, we’ll see you guys next week, and as always, I hope this episode of Let’s Make Dinner Makes your Dinner Time a little easier.

Double Dip- Next Weeks Episode

And now it’s time for the double dip. . I love the double dip. Double dip is so casual. Here we are.

What a double dip is, is where you are enjoying making these recipes and cooking along with me on Thursdays when you’re fresh out of dinner ideas. You can come here, make the recipe, and then listen to the double dip and figure out what we’re making next week.

So next week on the Let’s Make Dinner Podcast, we are going to make crispy fish sticks. So if you’ve ever had fish sticks from the grocery store, then you know that a lot of times it’s actually minced and pressed fish. It’s like a chicken McNugget . It’s just pressed. So if you want something a little bit better, something a little bit fancier, but doesn’t take a ton of time, then you can actually buy a really nice filet of fish into, you know, sticks.

Bread it with some Panko, get it really crispy in the oven and serve that up. You can make your own tartar sauce. You can bite it at the grocery store, whatever you wanna do. , but that’s what we’re making next week. So I want you to be prepared and have the ingredients that you need to make your crispy fish sticks.

So let me go over all of the ingredients that you need to grab to have on hand for next week’s episode. All right? There’s not a lot. Most of it’s going to come from your spice cabinet. You need:

  • 1.5 pounds of codfish, filets
  • all-purpose flour
  • three eggs
  • Dijon mustard
  • Kosher salt
  • Cayenne pepper
  • panko breadcrumbs
  • onion powder, garlic powder, paprika, or smoked paprika.
  • non-stick spray
  • Foil

I hope that you’ll join us next week and make the crispy fish sticks with us, and I’ll see you then.

Have a great week you guys.

Subscribe To Stay Connected!

Sign up for the Mom's Dinner Newsletter and get dinner help delivered straight to your inbox. From new recipes and videos to weekly dinner ideas and kitchen tips, it's your go-to resource for feeling confident at dinnertime.

Sign Up Now โ†’

Episode 081 Vegetarian Enchiladas

March 2, 2023 by Susie Weinrich Leave a Comment

Veggie Enchiladas and text overlay for the Let's Make Dinner Podcast

In episode 081 we are making Vegetarian Enchiladas for dinner. We have been trying to fill our meals with a few more veggies lately and this one hits the mark, plus it’s super delicious. And enchiladas is one of our favorite things to eat.

These enchiladas are filled with refried black beans and a veggie mixture of poblano peppers, tomatoes, corn, green onions, cilantro and spices. They cook hot and fast in the oven for an easy dinner.

Show Notes

Hey everybody. Welcome to another episode of Let’s Make Dinner, your audio library of amazing dinner recipes you can always get on the table. I’m your host, Susie Weinrich.

Hey. Hey everybody. Happy Thursday. I’m so glad that you came in to join me and hopefully to make a really delicious dinner with me. I don’t know if this was intentional or if this is just how it happened, but we’ve been doing some really veggie heavy recipes lately and I actually really love it. I’ve been trying to eat a lot more vegetables. I think it was Michael Pollen that said, um, eat food, not too much. Mostly plants. And I do love that.

Like, yes, like let’s eat, let’s fuel our bodies. You know, don’t overeat, eat just enough to fuel your body. And make sure that you’re eating plenty of vegetables. I love that. Of course, you know, for me, for my family, we add protein in, but just as of late we’ve been trying to eat a lot more vegetables and move our body.

Trying to get a little bit more exercise in, especially as it starts to warm up in the. So to go along with that yummy veggie heavy trend that we have right now, we’re doing a veggie enchilada for dinner tonight. Enchiladas are one of my very favorite things to eat, I’m telling you.

And I just tested a recipe for carnitas enchiladas that should be coming out soon. It’s so good. So when it does come out, I will link that recipe here, in the show notes for you as well. But today we’re not talking about Caritas, we’re talking about vegetarian vegetable enchiladas.

So, What these are, you know, just a traditional enchilada with either a corn or a flour tortilla. They’re gonna be stuffed with refried black beans, poblano peppers, corn, bell peppers, fresh tomatoes, cilantro, cheese, and then you can either use a verde sauce or a red enchilada sauce on top, and then of course, extra cheese. They’re baked hot and fast in the oven. So this is actually a recipe that you can get together pretty quickly. you know you can do it during the week, you could do it on the weekend, and it will be a fast dinner for you.

So this recipe is gonna make anywhere from 10 to 12 enchiladas. At our house, we’re usually serving two enchiladas per person. So I think you can plan on serving either five or six people with this recipe, and it should take you no longer than 30 minutes to get this done from start to finish.

Recipe Tips and Tricks

The only real like tips and tricks that I have for this recipe is if you do use corn tortillas, make sure that you know how to prep a corn tortilla to use it.

Corn tortillas are delicate little bitches . Okay, sorry if you’ve got kids in the car, but you can’t just use them right out of the package. They require a little bit of prep, and how I like to do it is just get my cast iron skillet.

Set over about a medium, medium high heat. Set them in that dry pan one at a time, about one minute per side, and it warms it up enough that it makes it flexible and they won’t tear when you roll them up.

But of course if you have any questions about this recipe or about cooking in your kitchen or anything, you could always reach out to me. Either message me on Instagram if you’re following me on Instagram at Mom’s Dinner. So Mom’s Dinner is actually my website where I share all of my recipes, or you can email me. My email address is susie@momsdinner.com you can just email me anytime you have questions about any recipes, anything we talk about here on the podcast, or if there’s a recipe you’re looking for and you would love to see it on the website, I would love to know that too.

Audio Recipe

So let’s go ahead and get into the full recipe for these veggie enchiladas. There’s kind of three different sections to making these enchiladas. There’s making the filling, which is gonna be the veggie mixture and the refried black beans. And then we’re gonna assemble all of the enchiladas and then we’re gonna bake it.

So you wanna start by preheating your oven to 400 degrees. Like I said, we’re gonna cook these hot and fast, so they’re gonna be ready very quickly. Then on the stove top, you want to saute a few veggies for that veggie filling. You’re gonna put a skillet over medium heat. Add about one tablespoon of oil and you’re gonna saute together one poblano pepper that’s been chopped, one medium bell pepper that’s chopped, and two fresh garlic cloves that are chopped. Just saute that together for about five minutes.

Then you’re gonna add in three quarters cup of fresh, diced tomatoes, so either a cherry tomato or roma tomato will work perfectly. Four green onions that are chopped. And when you use green onions, you wanna use the white and the light green parts. Those are the parts that taste like green onions. The dark green parts are best used for garnish, so you could absolutely chop up that dark green part and sprinkle it over top of the enchiladas.

Once they’re cooked you’ll add half a cup of frozen corn, a third a cup of fresh chopped cilantro. And now we’re gonna add a few seasoning. You’re going to add a half teaspoon each of cumin, chili powder and kosher salt and a quarter teaspoon each of garlic powder and onion powder. Now give everything a really good stir so that all of the seasonings coat the veggies and that all of the veggies finish softening. So we’re gonna continue to saute for about five more.

While that’s saute, what I recommend is you prep your refried black beans, and with the refried black beans, you can absolutely just use refried beans, which are pinto beans if you prefer that, but you’ll need a 16 ounce can of refried black beans. What I like to do is scoop all of that out into a bowl and usually when refried beans come straight out of a can, they can be pretty firm.

What I like to do is add maybe a couple splashes of water, give them a stir and pop ’em in the microwave for maybe a minute. Stir ’em up a little bit again and see if they’re soft and creamy. If they’re not, pop ’em back in the microwave for about another 30 seconds and continue that process until they’re nice and creamy and soft, and you can spread.

My one tip with using any kind of refried beans, unless you’re going for that vegetarian recipe, don’t buy the fat-free refried beans. You want that little bit of oil or fat or lard in your refried beans to keep ’em really creamy and flavorful. Now it’s time to assemble your vegetarian enchiladas. What you wanna do is have like a 9 by 13 casserole.

Spray the bottom generously with a little non-stick. and now it’s time to put together the enchiladas. Like I said in the beginning, if you’re gonna use the corn tortillas, then you’re gonna want to prep them by heating them a little bit before you roll them. If you’re using flower tortillas, you can just move straight ahead.

What you’re gonna do is spread one heating tablespoon of refried black beans down the center of your tortilla. Spread it from end to end. And then you’re gonna top it with that sauteed veggie mix. Now just remember that you have to divide that veggie mix between about 10 to 12 enchiladas. So just be mindful of that.

When you’re filling each enchilada, you’ll roll the tortilla over the filling, place it in the pan seam side down, and then continue working through all of those tortillas until you’ve used them all up. If you have some refried beans left over, that’s totally ok. You could dot that in the pan with the enchiladas, or you can just use that as a side dish to your dinner.

If you have some of the veggie mixture leftover, definitely scrape that into kind of like the open spaces in the pan and cook that right alongside your enchiladas and you can scoop it out right onto your plate when it’s time to. So now you’re gonna pour a 10 ounce can of enchilada sauce over the rolled enchiladas.

And here you can use a verde enchilada sauce or a red enchilada sauce. Either one will work. Then you’re gonna sprinkle three quarters cup of shredded cheese over top of the enchiladas. And if you want more cheese, add more cheese. Cheese is good , but you can use any kind of cheese you like. Monterey Jack, Colby, Jack, cheddar, pepper jack, any of those will work.

Now you’re gonna pop them right in the oven uncovered for just 12 minutes. Like I said, they’re gonna cook hot and fast, and then after they’re done cooking, you’re gonna let them cool for about five minutes before you serve. But while they’re cooking, you wanna go ahead and make your chili lime crema. It is super delicious and is just kind of the little something extra for these veggie enchiladas. So either in a large glass, liquid measuring cup or just a bowl, you’ll whisk together half a cup of plain Greek yogurt, you could also use sour cream, a quarter teaspoon each of cumin chili powder, garlic powder, and salt. Three tablespoons of water and one tablespoon of fresh lime juice. Just whisk that all together and then set it aside until it’s time to eat.

So that’s it. That’s your full vegetarian veggie enchilada recipe. So now that you have that done, let’s talk about some side dishes. And of course all of these recipes will be on momsdinner.net. You can find all of these recipes and I will link all of these recipes that I talked about right in the show notes of this episode so that you can click through when you’re ready to make these, or you wanna check out the recipe or you wanna save it or pin it or print it. You can do all of those things on moms dinner.

Do. There’s also a really great feature before I tell you about these side dishes. If you click through to a recipe on your phone, you can actually text yourself the recipe link and the recipe ingredients right from the recipe card. There’s a button right in the middle of the recipe card that says, text me the recipe link and all the ingredients, and it will just send it right to your phone.

Super easy , and don’t worry, you’re not giving me your phone number. You do it automatically. It populates a text and you send it to yourself.

Side Dishes

So some side dishes that I love for these veggie enchiladas are a cilantro lime slaw, and then doing a super simple Mexican rice. I have two recipes for easy Mexican rice, either in the instant pot or on the stove top, and I will link both of those as well as the cilantro lime slaw.

Now if you click through to the veggie enchilada recipe right at the bottom of the post, right before the recipe card, there are three menus that give you amazing options for side dishes. There’s also a pineapple that has a cilantro honey citrus glaze over top. That’s so, so good. I’ve got recipes for guacamole too, Salsa, Pico De Gallo, amazing margaritas, and all the tequila cocktails you could possibly want.

So that does it for this episode of Let’s Make Dinner. If you’re enjoying these episodes, I would love to have you follow along in your preferred podcast player. And then when you’re following, I would love to have you rate and review our show. As a newer show it just helps us be shown to more people and have more ears on our show. So until next time, I hope this episode of Let’s Make Dinner makes your Dinner time a little easier. See ya.

Double Dip – Next Weeks Episode

All right, now it’s time for your double dip. I love the double dip. So if you’re enjoying cooking along with Let’s Make Dinner on Thursdays. Then I want you to be prepared for next week when Thursday rolls around, you’re out of dinner ideas, you can come to our show, find the dinner idea that you wanna make.

And follow along. So if you wanna cook with me next Thursday, we are making a creamy mushroom pasta. So we’re going all veggie again, but this one is a little more rich and deluxe, but super, super simple to make. So if you wanna cook along with me, of course, I’ll put a link in the show notes of this episode for that creamy mushroom pasta.

But I’m gonna go ahead and tell you all of the ingredients that you need right now so that you can make sure you’re prepared for next week. All right. If you love mushrooms, this one’s gonna be for you. You need to have

  • 8 oz of penne pasta
  • 16 ounces of cremini mushrooms
  • fresh garlic cloves
  • Four tablespoons of butter
  • kosher salt
  • all-purpose flour
  • heavy whipping cream
  • 2% or whole milk
  • shredded Parmesan cheese

You also can add some optional add-ins here. Asparagus is really inexpensive right now and would just be killer on this creamy mushroom pasta. You could also add some fresh spinach, or you can add like a sauteed shrimp or grilled chicken would be excellent.

So I hope you’ll join me next week when we make that creamy mushroom pasta on the Let’s Make Dinner Podcast and I will talk with you then. Have a great week.

Recipes Mentioned

  • Vegetarian Enchiladas
  • Cilantro Lime Slaw
  • Mexican Rice
  • Instant Pot Mexican Rice
  • Honey Lime Cilantro Pineapple
  • All Mexican-Inspired Recipes
  • All Tequila Cocktail Recipes

Follow Along

We would love to have you subscribe to our weekly newsletter that comes out every Thursday and Sunday. Stay on top of new recipes, new podcast episodes all the goings-on at Mom’s Dinner!

Italian Style Meatball Soup

February 24, 2023 by Susie Weinrich Leave a Comment

meatball soup recipe in a bowl with basil and parmesan over top

This Meatball Soup Recipe is full of tender and flavorful homemade meatballs, onions, garlic, carrots, spinach and ditalini pasta all in a savory and rich tomato broth with Italian seasonings. It is a hearty soup that is perfect for a family dinner.

a big bowl of meatball soup with parmesan and basil over top

If you love meatballs you will not only love this Meatball Soup recipe, you will also want to check out all the other meatball recipes on Mom’s Dinner. Some of our favorites are Classic Italian Meatballs, Iowa Ham Balls (a recipe I grew up eating), and next level Swedish Meatballs!

Ingredients & Substitutions

This Italian Style Meatball Soup recipe is full of simple and fresh ingredients. This is also a great recipe to use up carrots and celery that have gone limp in the fridge!!!

See the ingredients pictured below for the meatballs.

meatball ingredients on a table
Ingredients clockwise: egg, 85% ground beef, garlic, kosher salt, red pepper flakes, parmesan, onion, Italian Seasoning, Italian Breadcrumbs.

Ground Beef: We recommend using an 85% lean ground beef. It has enough fat to be flavorful, but not too much to make your soup greasy.

Italian Breadcrumbs: If you don’t have Italian and you only have plain breadcrumbs, just add 1 teaspoon Italian Seasoning to your breadcrumbs.

Parmesan: We recommend coarsely grinding your parmesan so you get little pockets of parmesan in your meatballs! Delish! You can also use Pecorino Romano, Asiago, or Grana Padano.

See the ingredients pictured below for the soup.

meatball soup ingredients on a tbale
Ingredients clockwise: Spinach, diced tomatoes with basil, garlic and oregano, crushed tomatoes, carrots, beef base, celery, garlic, ditalini pasta, oil, onion, beef stock, salt, pepper, Italian seasoning and bay leaf.

Beef Base: we love the Better Than Bouillon brand at the grocery store. It will be in soup aisle and comes in a tub or jar and is a paste. It has a ton of flavor, way more flavor than traditional bouillon.

Ditalini Pasta: this is a small tube pasta that has a thicker wall and holds up perfect in the meatball soup. It is also commonly used in Pasta e Fagioli Soup. You can also use other pasta shapes:

  • elbow macaroni
  • rotini
  • cavatappi
  • orzo
  • any other small tube shaped pasta

Using Frozen Meatballs

If you are short on time you can absolutely use your favorite frozen meatball. Just use about 25 meatballs.

Simply pop them in the oven to warm them through per package instructions and then add them to the soup! Easy enough!

Step by Step Picture Instructions

This is actually a great soup recipe to make with a partner, family or older kids. One person can make the meatballs while the other person starts the soup!

Start by making the meatballs and getting them in the oven.

Preheat the oven to 350 and line a rimmed baking sheet with foil and spray with non-stick spray.

In a mixing bowl combine the meatball ingredients. Then roll them into “walnut sized” meatballs. A small melon baller or cookie scoop works great for this process!

showing walnut sized meatballs

Spray the tops with non stick spray, this helps the browning process, especially since it’s a shorter cooking time!

Bake for 15 minutes.

meatballs that have been baked

MEANWHILE… get the soup started while the meatballs bake.

In a large pot add the oil and sautรฉ the onions, carrots, celery and garlic for about 10 mins. Then stir in the seasonings, beef base, salt and pepper.

onions, carrots, celery coated in beef base and seasonings

Pour in the beef broth, both tomatoes, and add the bay leaf. Bring to a boil.

Add the pasta and cook for about 10 minutes.

At this point taste the broth for seasoning. If it is tangy or acidic add a teaspoon of sugar and taste again.

Pro Tip: Adding a little sugar to tomato based dishes is a great way to cut the acidity and make it more mild.

Finally, turn the heat to low. Add in the cooked meatballs and chopped spinach. Simmer for about 5 more minutes.

Remove the bay leaf, and it’s time to eat!

a large dutch oven full of Meatball Soup

Serving

This soup is knock out delicious with some quality extra virgin olive oil drizzled into each bowl, parmesan shaved over top, and fresh basil torn and sprinkled in.

Storing & Freezing

Store leftovers in the fridge, in an airtight container for up to 5 days. The pasta will soak up some of the liquid so you may need to add some beef broth or water when reheating.

You can also freeze any leftovers, they will be good in the freezer for up to 3 motnhs. These Souper Cubes make freezing soup in portions super simple.

If you are making this ahead and freezing, wait to add the spinach when thawing and reheating.

Side Dishes for Meatball Soup

This Meatball Soup recipe is pretty much a complete meal on it’s own. You have the protein, starch and plenty of veggies.

However it is great with some warm bread or breadsticks served on the side for dipping! Believe me you will want to be sopping up every last drop in the bowl.

  • Ciabatta Bread
  • Crusty Italian Bread
  • Garlic Knots
  • Breadsticks

Recipe Tips

  • Coarsely grind your parmesan in a food processor or blender for amazing parmesan flavor in the meatballs. (see photo below)
  • Use an 85% lean ground beef for the meatballs; it has enough fat to be flavorful, but won’t make your meatball soup greasy.
  • Don’t skip the beef base, it adds deep flavor to the broth.
  • Taste the broth for seasoning (and acidity balance by adding sugar) before adding the meatballs and spinach.
  • It will look like a mountain of spinach, but it cooks way down. Make sure to use all 4oz (about 3 generous cups).
coarse ground parmesan cheese

More Meatball Recipes to Love!

  • Italian Meatballs in a Marinara Sauce
    Very Best Baked Italian Meatballs
  • meatball sub made with frozen meatballs
    How to Make Meatball Subs
  • baked chicken meatballs in a pile garnished with parsley and romano cheese
    Flavorful Baked Chicken Meatballs
  • BBQ meatballs on a plate
    Best Baked BBQ Meatballs
  • a large bowl filled with mashed potatoes topped with Swedish Meatballs
    Recipe for Swedish Meatballs
  • Instant Pot Ground Turkey Meatballs on top of spaghetti
    Easy Instant Pot Turkey Meatballs

Susie leaning on the kitchen counter

Did you make this recipe?

โญโญโญโญโญ

I would love to hear your review, especially if you have tips and tricks to add! Pop down to the comment section and connect with me

Rate This Recipeโ†’
meatball soup recipe in a bowl with basil and parmesan over top

Italian Style Meatball Soup Recipe

Rich and savory tomato broth filled with homemade meatballs, ditalini pasta, veggies, garlic, spinach and Italian spices. Great served with shaved parmesan, torn basil and warm bread!
5 from 1 vote
Print Pin Rate Save Saved!
Prep Time: 15 minutes minutes
Cook Time: 30 minutes minutes
Servings: 8 people
Calories: 371kcal
Author: Susie Weinrich

Equipment

  • large pot
  • small cookie scoop or melon baller (optional) for the meatballs

Ingredients

Meatballs

  • 1 large egg - lightly beaten
  • ยผ cup yellow onion - very finely diced
  • 1 tsp. Italian seasoning
  • Pinch of red pepper flakes
  • ยฝ tsp. Kosher salt
  • 2 cloves garlic - minced
  • 1 lb. ground beef - 85% lean works well
  • ยฝ cup grated Parmigiano Reggiano
  • โ…“ cup Italian seasoned bread crumbs

Soup

  • 2 Tbsp. olive oil
  • 1 medium onion - diced
  • 3 cloves garlic - minced
  • 1 cup carrots - diced
  • 1 cup celery - diced
  • 48 oz. beef broth or stock
  • 14.5 oz can diced tomatoes with basil, garlic and oregano - (do not drain)
  • 15 oz can crushed tomatoes - (do not drain)
  • 1 bay leaf
  • 1 tsp. Italian seasoning
  • ยพ tsp. each Kosher salt and black pepper
  • 2 tsp. beef base - we love Better Than Bouillon brand
  • 1 cup ditalini pasta (heaping cup)
  • optional – sugar - to cut the acidity of the tomato
  • 4 oz. fresh baby spinach - chopped - should equal about 3 cups
  • non-stick spray

Garnish

  • Shaved Parmigiano Reggiano
  • Optional: Extra Virgin Olive Oil, fresh chopped parsley or basil

Instructions
 

Meatballs

  • Preheat oven to 350 degrees. Line a baking sheet with aluminum foil and spray with nonstick cooking spray.
  • For the meatballs, combine the lightly beaten egg, onion, Italian seasoning, red pepper flakes, salt and garlic.
    1 large egg, ยผ cup yellow onion, 1 tsp. Italian seasoning, Pinch of red pepper flakes, ยฝ tsp. Kosher salt, 2 cloves garlic
  • Add in the ground beef, Parmigiano Reggiano and bread crumbs and lightly mix ingredients together.
    1 lb. ground beef, ยฝ cup grated Parmigiano Reggiano, โ…“ cup Italian seasoned bread crumbs
  • Roll the mixture into walnut size meatballs (should make approx. 25-30). Place on the prepared baking sheet and coat the tops of the meatballs with cooking spray.
    Pro Tip: a small cookie scoop or melon baller makes quick work of making meatballs!
    showing walnut sized meatballs
  • Bake for approx. 15-17 minutes, until lightly browned and cooked through.

Soup

  • While the meatballs cook you can start the soup.
    In a large Dutch oven, heat the olive oil over medium heat. Add the onions, garlic, carrots and celery.
    2 Tbsp. olive oil, 1 medium onion, 3 cloves garlic, 1 cup carrots, 1 cup celery
  • Sautรฉ, stirring frequently until the vegetable are tender (about 10 minutes).
  • Stir in the beef base, seasonings, salt and pepper.
    1 tsp. Italian seasoning, ยพ tsp. each Kosher salt and black pepper, 2 tsp. beef base
  • Add the beef broth, diced tomatoes, crushed tomatoes, and bay leaf. Bring to a boil over medium high heat.
    48 oz. beef broth or stock, 14.5 oz can diced tomatoes with basil, garlic and oregano, 15 oz can crushed tomatoes, 1 bay leaf
  • Add in the 1 heaping cup pasta and simmer uncovered until the pasta is al dente (approx. 10 minutes).
    1 cup ditalini pasta (heaping cup)
  • Taste the soup and adjust the seasonings if necessary (I like to add 1-2 teaspoon sugar at this point to cut the acidity of the tomatoes).
    optional – sugar
  • Reduce the heat to low and add in the chopped spinach and baked meatballs. Lightly simmer for 5-10 minutes.
    4 oz. fresh baby spinach - chopped
  • Remove the bay leaf and discard.
  • Ladle the soup into bowls and top with a drizzle of olive oil, chopped fresh parsley or basil and large shavings of Parmigiano Reggiano cheese.
    Shaved Parmigiano Reggiano, Optional: Extra Virgin Olive Oil, fresh chopped parsley or basil

Storing

  • Keep in the fridge in an airtight container for up to 5 days.
  • The pasta will soak up some of the liquid while in the fridge. You may need to add some water or beef broth when reheating.

Recipe Tips and Notes:

Side Dishes: this Meatball Soup is pretty much a complete meal! Just add some warm crusty bread like ciabatta, Italian, garlic knots or breadsticks.
Subs for Ditalini: any short tube pasta will work here. Or you can use:
  • elbow macaroni
  • cavatappi
  • rotini
  • orzo
Using Frozen Meatballs: If you are short on time you can absolutely use your favorite frozen meatball. Use about 20-25 meatballs. Cook in the oven per package instructions to heat through and then add to the soup.ย 
Recipe Tips:ย 
  • Coarsely grind your parmesan in a food processor or blender for amazing parmesan flavor in the meatballs.
  • Use an 85% lean ground beef for the meatballs; it has enough fat to be flavorful, but won’t make your meatball soup greasy.
  • Don’t skip the beef base, it adds deep flavor to the broth.
  • Taste the broth for seasoning (and acidity balance by adding sugar) before adding the meatballs and spinach.
  • It will look like a mountain of spinach, but it cooks way down. Make sure to use all 4oz (about 3 generous cups).
Did you make this recipe?Connect with me and let me know by commenting below!
Jump to Comments
Serving: 1serving | Calories: 371kcal | Carbohydrates: 31g | Protein: 21g | Fat: 19g | Saturated Fat: 6g | Polyunsaturated Fat: 1g | Monounsaturated Fat: 9g | Trans Fat: 1g | Cholesterol: 65mg | Sodium: 1439mg | Potassium: 788mg | Fiber: 4g | Sugar: 7g | Vitamin A: 4344IU | Vitamin C: 17mg | Calcium: 198mg | Iron: 4mg

Episode 080 Veggie Pad Thai

February 23, 2023 by Susie Weinrich Leave a Comment

Veggie Pad Thai photo with text overlay for Let's Make Dinner Podcast

In Episode 80 we are making a Veggie Pad Thai for dinner. This is the perfect vegetable heavy dinner that doesn’t taste like a salad! There are three main steps to making delicious Pad Thai – make a sauce, cook the rice noodles and then put it all together with the veggies. Serve it up with some fresh lime wedges, chopped cilantro and peanuts over top.

You can also watch Susie make this recipe on a 30 minute Pinterest TV Episode: Veggie Pad Thai.

Recipes Mentioned

  • Veggie Pad Thai

Equipment and Ingredients

  • Tamarind Paste
  • Amazon Choice Wok
  • Non Stick Skillet

Next Week

Find a new audio recipe every Thursday. Follow along to make dinner with me every week.

Next week we are making Veggie Enchiladas for dinner. I hope you will cook along with me then!

Subscribe To Stay Connected!

Sign up for the Mom's Dinner Newsletter and get dinner help delivered straight to your inbox. From new recipes and videos to weekly dinner ideas and kitchen tips, it's your go-to resource for feeling confident at dinnertime.

Sign Up Now โ†’

Savory Waffles with Ham and Cheese

February 17, 2023 by Susie Weinrich 3 Comments

a stack of savory waffles with an over easy egg on top

Waffles are a classic breakfast staple, but next time try making this Savory Waffle Recipe. The combination of salty ham, melted cheese, and green onions in a crispy waffle is a match made in heaven. It takes a little extra work to make these ham and cheese waffles, but it is so worth it for the unique flavor! The best part is they can be made ahead and refrigerated or frozen for easier meal prep!

savory waffles with ham and cheese and an egg on top

Just like Overnight Ham & Egg Casserole, this also a great recipe to use up leftover ham, especially after the Easter Holiday.

Ingredients

This Savory Waffle recipe uses pretty simple ingredients. It is made with traditional homemade waffle ingredients except we are not adding sugar and instead are adding some savory ingredients like Dijon, green onions, ham, cheese, salt and pepper.

Pictured are the ingredients you need, plus some tips on a few ingredients:

ingredients for savory waffle recipe
Ingredients Clockwise: oil, Dijon mustard, eggs, cheese, baking powder with kosher salt and black pepper, milk, green onions, flour, ham.

Ham: You need a heaping cup of ham to make this savory waffle recipe. It is a great way to use up leftover ham. Or, like pictured above, you can buy a ham steak and dice it up. There is also a product at the grocery store that is finely diced ham in a package.

Cheese: Whatever cheese you choose to use, Gruyere, Swiss or Cheddar, it is best to use fresh shredded cheese. It will melt smoother and creamier in your waffles.

Green Onions: When using green onions in your waffles make sure you cut them small, and use the white and light green parts. Then you can use the dark green parts for garnish.

Equipment: Waffle Iron

This recipe will work in any waffle maker that you have! I use a 4 inch Dash Waffle Iron. It is a single waffle iron so it does take a little longer to make all 20 waffles.

A quad waffle iron would make much faster work of these ham and cheese waffles!

Variation Options

This Savory Waffle Recipe is filled with cheese, ham and green onions, but you can choose any combo of salty and savory ingredients for your waffles. Here are some ideas:

  • Pancetta, shredded mozzarella, chopped basil & spinach
  • Breakfast sausage (browned & crumbled), cheddar, green onion
  • Crispy prosciutto (crumbled), parmesan, shallots
  • Crispy Crumbled Bacon, Monterey Jack cheese, green onions

Step by Step

To make these ham and cheese waffles you will start by separating 3 eggs, you need one bowl of yolks and one bowl of whites.

Then pop the whites into a stand mixer with a whisk attachment. Whisk until stiff peaks form, about 7-10 minutes. Then set aside.

Meanwhile, in one bowl mix the dry ingredients: flour, baking powder, kosher salt and black pepper. Set aside

In another bowl or large liquid measuring cup combine: egg yolks, oil, milk and Dijon mustard.

folding cheese and ham into waffle batter

Now stir the liquid ingredients into the dry ingredients. Stir in the green onions, diced ham and cheese.

Finally, fold the stiff egg whites into the mixture.

folding egg whites into savory waffle batter

Time to make the waffles! Preheat your waffle maker and lightly spray with non-stick spray.

In my 4 inch Dash Waffle Iron I use a scant โ…“ cup of batter per waffle, and they cook in about 2 minutes.

Repeat until all the batter is used.

a stack of ham and cheese waffles topped with eggs and avocado

My 4 inch waffle iron makes about 20 waffles. I serve 2 per person with some fruit and yogurt.

Make Ahead

Since it takes a while to prep and make all the waffles you can absolutely make them ahead for easier meal prep.

Keep them in an air tight container in the fridge for up to 5 days.

You can reheat them in a skillet, toaster or toaster oven or if you are doing more than one you can pop them in a 350 degree oven for about 5 minutes until they are warmed through and crispy.

Freezing

These waffles freeze really well! I like to place them on a baking sheet that will fit in the freezer. Leave them in the freezer for about 1 hour. Then transfer to a freezer safe baggie.

baking sheet of savory waffles

They will be good in the freezer for about 6 months.

You can reheat them in a skillet, toaster or toaster oven or if you are doing more than one you can pop them in a 350 degree oven for about 10 minutes until they are warmed through and crispy.

Savory Waffle Topping Ideas

Of course there is the traditional topping of butter and maple syrup for your savory waffles. But we like to branch out with things like avocado and over easy eggs. Here are some other ideas:

  • Diced Avocado or mashed avocado
  • Extra Dijon mustard
  • Sour cream or plain Greek Yogurt
  • over easy egg
  • Mango pepper jelly or other spicy fruit jellies
  • Hollandaise sauce
  • Crispy Bacon
  • Fresh tomatoes and burrata
  • Crispy Chicken Tenders and syrup (Chicken & Waffles!)
  • Bacon Jam

Side Dishes for Serving

Since this is a savory breakfast recipe I recommend adding some sweetness on the side. Fresh fruit and a sweet fruit yogurt would be perfect!

Menu for a Brunch Buffet

If you are having a brunch buffet and want to include these Savory Waffles, here are some other dishes to add:

  • Savory Waffles
  • Toppings: syrup, sour cream, mashed avocado, and fruit & pepper jelly
  • Scrambled eggs
  • Fresh fruit bowl
  • Crispy Chicken Tenders
  • Cheesy Potatoes
  • Store Bought Kale Salad
  • Fresh Lemonade

More Savory Breakfast Recipes

  • Make Ahead Egg Casserole
  • two chicken crepes topped with cream sauce
    Savory Chicken & Mushroom Crepes
  • sausage egg cups on a breakfast buffet
    Sausage Egg and Cheese Muffins

Susie leaning on the kitchen counter

Did you make this recipe?

โญโญโญโญโญ

I would love to hear your review, especially if you have tips and tricks to add! Pop down to the comment section and connect with me

Rate This Recipeโ†’
a stack of savory waffles with an over easy egg on top

Savory Waffle Recipe

A fluffy and savory waffle made with ham, cheese and green onions in the mix! A great way to have a unique waffle.
5 from 4 votes
Print Pin Rate Save Saved!
Prep Time: 15 minutes minutes
Cook Time: 2 minutes minutes
Servings: 20 – 4 inch waffles
Calories: 158kcal
Author: Susie Weinrich

Equipment

  • waffle iron

Ingredients

  • 3 large eggs - yolks and whites divided!
  • 2 cups all purpose flour
  • 1 Tbsp. baking powder
  • ยพ tsp. kosher salt
  • ยผ tsp. black pepper
  • 1 ยพ cups milk - preferably whole milk
  • ยฝ cup canola oil
  • 1 Tbsp. Dijon mustard
  • 1 cup ham (heaping cup) - finely diced
  • 1 cup Gruyere, Swiss OR Cheddar cheese
  • 1 Tbsp. chopped chives - optional

Instructions
 

  • Start by separating the 3 eggs: yolks in one bowl, whites in another bowl.
  • Beat the 3 egg whites with an electric mixer until stiff peaks form. This will take a while, 7-10 minutes. Set aside.
  • Meanwhile, in a large mixing bowl combine the flour, baking powder, salt, and pepper. Give it a light whisk or stir to combine.
    2 cups all purpose flour, 1 Tbsp. baking powder, ยพ tsp. kosher salt, ยผ tsp. black pepper
  • In a separate bowl, whisk together the 3 egg yolks, milk, oil and Dijon mustard.
    1 ยพ cups milk, ยฝ cup canola oil, 1 Tbsp. Dijon mustard
  • Gradually stir the liquid ingredients into the flour mixture.
  • Add in the diced ham, cheese and chives and blend together lightly; mixture should be slightly lumpy.
    1 cup ham (heaping cup), 1 cup Gruyere, Swiss OR Cheddar cheese, 1 Tbsp. chopped chives
  • Carefully fold the egg whites into the above mixture. Do not over mix.
    folding egg whites into savory waffle batter
  • Preheat the waffle iron. Spray the waffle iron with non-stick spray.
  • Pour the batter onto the center of the waffle iron. Cook the waffles until golden brown.
    In my 4 inch waffle iron it takes about 2 minutes per waffle.
  • Serve topped with butter and maple syrup. Also delicious with a poached egg and diced avocado on top and additional Dijon mustard for dipping.
    See notes for other toppings.

Recipe Tips and Notes:

Savory Waffle Topping Options:
  • Diced Avocado or mashed avocado
  • Dijon Mustard for dipping
  • Bacon Jam!
  • Sour cream or plain Greek Yogurt
  • over easy egg
  • Mango pepper jelly or other spicy fruit jellies
  • Hollandaise sauce
  • Crispy Bacon
  • Fresh tomatoes and burrata
  • Crispy Chicken Tenders and syrup (Chicken & Waffles!)
Did you make this recipe?Connect with me and let me know by commenting below!
Jump to Comments
Serving: 1waffle | Calories: 158kcal | Carbohydrates: 11g | Protein: 6g | Fat: 10g | Saturated Fat: 3g | Polyunsaturated Fat: 2g | Monounsaturated Fat: 5g | Trans Fat: 0.02g | Cholesterol: 37mg | Sodium: 296mg | Potassium: 81mg | Fiber: 0.4g | Sugar: 1g | Vitamin A: 128IU | Vitamin C: 0.003mg | Calcium: 116mg | Iron: 1mg

Episode 079 Buffalo Chicken Chili

February 16, 2023 by Susie Weinrich Leave a Comment

buffalo chicken chili in a bowl with text overlay for Let's Make Dinner podcast

In episode 079 we are making Buffalo Chicken Chili in the Instant Pot. I made this soup for the 2023 Super Bowl, it is PERFECT football food! This will serve about 6-8 people. Load it up with tortilla chips, sour cream and diced avocado. You can also watch Susie make this chili on a 30 minute Pinterest TV episode.

Serve it up with some corn bread for a yummy dinner! 

Transcript

Click for the full transcript.

Intro: Welcome everybody to another episode of Let’s Make Dinner, your audio library of amazing dinner recipes you can always get on the table. I’m your host, Susie Weinrich. 

Susie Weinrich: Okay, I’m going to have to apologize for my little bit of froggy voice today. So in real time as I’m recording this, I live in the Kansas City area and the Kansas City Chiefs just won the Super Bowl. It was so exciting. It was an excellent game. Super fun. Had a big party and actually had perfect timing. I made this Instant Pot Buffalo Chicken Chili for our Super Bowl party, and it was delicious. It is perfect game day food. So unfortunately, the football season is over, but you can use it for other parties, for baseball, for just a fun weeknight dinner or for next football season.

So of course for this recipe, you’re going to want to have an Instant Pot. I actually currently have two Instant Pots because I love it so much and I do a lot of Instant Pot recipes on PinterestTV. So I need two pots so that I can make a recipe and then make a recipe during the show. The pot that I have is the Six Quart Instant Pot Duo Plus, and then I have a seven in one and a nine in one. I have to say that the seven in one is plenty for me. I don’t really use the nine functions. In fact, I don’t really use the seven functions. I use about four of the functions. So save a little bit of money, get the seven in one Instant Pot, if you don’t already have one, it’ll save you about 30 bucks.

The most important feature is that you want to have at least a six quart Instant Pot. Most recipes are going to be written in either a six quart or an eight quart pot. This recipe for Instant Pot Buffalo Chicken Chili is going to serve about, it’s tough to say because it depends on, if you’re at a Super Bowl party and you have a lot of other food, it’s going to serve a lot of people. But if it’s just a dinner that you’re doing, it’s going to serve probably about six people. You can double the recipe, but I think if you have just a six quart pot, doubling the recipe is going to be hard because it will fill the pot to the brim. If you’ve worked with an Instant Pot before, you know that in the inside of the pot, there’s that max fill line, and you don’t want to go over that when you’re cooking in the Instant Pot.

Total time to make this recipe is going to be probably about a good 20 minute prep time just because you have chopped onions and peppers and garlic and then the actual pressure cook time is only 12 minutes. Now not calculated in there, of course, is the time it comes to bring your pot to pressure and then the release time. 

Tips and Tricks: There’s not a ton of tips and tricks that I’m sharing before the recipe today, but there are two ingredients that I want to talk about briefly. So the ranch packet, it’s that little one ounce envelope of Dry Ranch Mix. I have tried the Aldi brand or off brand or store brands, they’re not quite the same as the Hidden Valley brand. I’m not sponsored by Hidden Valley. I just think that it is definitely a better flavor. So if you see the Hidden Valley ones, grab that.ย 

Then also the buffalo sauce that goes into this recipe. Number one, if you don’t like spicy things, this is not the recipe for you. After the Super Bowl this year, I had somebody email me and tell me that my Buffalo Chicken nachos were too spicy. I’m like, if you don’t like buffalo or you don’t know about buffalo, or you don’t like spicy things, then this recipe is not going to be for you. But the buffalo sauce, Frank’s Red Hot Original, is always good. But I will say I’ve tried the Aldi one and it is just as good, truly. Now you’ll also see buffalo sauce and then you’ll see wing sauce. They will both work, but the buffalo sauce is not going to have as much like oil and butter in it as a wing sauce. The wing sauce is ready to be put on chicken wings and stick to the chicken wings. Like I said, they’ll both work. But if you can find the Frank’s Red Hot Original, it’s delicious. 

Instant Pot Buffalo Chicken Chili Recipe: All right, so let’s get on to making this full recipe for Instant Pot Buffalo Chicken Chili. You want to start by setting your Instant Pot on saute mode. Once it reads hot, you’re going to add one tablespoon of oil to the pot. Then, you’re going to add in one yellow onion that’s been diced. Three garlic cloves that are chopped. One cup of chopped celery and one bell pepper that’s been chopped. You can use any color; red, green, yellow, orange, they’ll all work here.

So let that saute around for about five to eight minutes. Then you’re going to turn the saute mode off. You’re going to add in two large chicken breasts, and what I like to do here is cut them into four pieces each so that they cook all the way through in your cooking time. Then you’ll sprinkle in that one ounce packet of ranch dressing mix, and then pour in four cups of chicken broth or chicken stock and then three quarters cup of buffalo sauce that Frank’s Red Hot Original that we talked about. Now if you are like, I just want a little bit of spice, you can absolutely adjust this to a quarter cup all the way up to the three quarters. So just add as much buffalo sauce as you think you want. Of course you can always add more at the end if you want to taste it and then see what your heat level is.

Now you’re going to place the lid on your Instant Pot. Turn it, lock that pressure valve to seal and set it to cook either on manual mode, high pressure for 12 minutes, or you can do the meat and stew mode, which is basically the same thing for 12 minutes. After the pressure cook is done, you’ll do a quick release of pressure, which just means you turn that pressure valve to vent and all of that steam will escape.

So at this point we’re going to finish the soup. What you want to do is fish out all eight pieces of that chicken breast and you can chop it or shred it. My very favorite tip for shredding chicken is putting it in your stand mixer with a paddle attachment and it needs to be warm or hot chicken to do this. So put it in your Kitchenaid with a paddle attachment. Buzz it on medium speed for about 15 to 30 seconds and it shreds it beautifully and it’s so, so easy. So shred that up. Set that aside. 

Now, in the Instant Pot, you’re going to add your cream cheese. It’s an eight ounce block of cream cheese. I like to cut mine up into one inch blocks so that it melts down into the soup a little bit easier. Usually I’ll take a whisk and whisk it in so that it breaks up and melts down into the soup. Then you’re going to finish the soup by stirring in the shredded chicken. A 14 and a half ounce can of diced tomatoes that’s been drained and a 15 and a half ounce can of great Northern beans that’s been drained. One and a half cups of frozen corn. A third cup of fresh chopped cilantro and then one tablespoon of honey. The honey just balances that flavor and balances all of the spiciness and the tanginess. You’ve got a lot of tanginess in this soup, so that honey just balances everything out. So give it a really good stir, mix it all up, and then let it cool for about 15 minutes and it will start to thicken up as it cools.

So that is the full recipe. Now, in the recipe, I do have troubleshooting for spice levels. If you don’t like things too spicy, like we said, dial back the buffalo sauce. If it’s too late and you already made it too spicy, what you can do is add more cream cheese, or you can stir in a little bit of heavy cream or half and half.

Now, if you have just started the recipe and you’re like, give me all the spice, I want more spice than just the buffalo, you can add one or two chopped jalapenos in the beginning when you’re sauteing the onions and celery and bell. 

Now if you’ve already made the chili and you want more spice, of course you can add in a little bit more buffalo sauce. You can add in some ground cayenne pepper or a couple dashes of your favorite hot sauce. You can also serve it with fresh jalapenos. That will be nice and spicy.

Now when you’re serving this Instant Pot Buffalo Chicken Chili, what I like to do is have all of those buffalo toppings ready. So blue cheese, cheese. My favorite is to crumble up some tortilla chips into the soup. I like to have celery sticks, carrots sticks, maybe some cornbread, some different corn breads or Fritos, sour cream, avocados. All of that is delicious piled on top of this soup. 

All right, so that does it for today’s recipe for Instant Pot Buffalo Chicken Chili. Of course, all of the recipes that I talked about in this episode can be found on momsdinner.net. That is my website where I share all of my recipes. You can save them, print them, and cook right from my website. I would love to have you check them out. I will put links to all of the recipes right in the show notes for you.

Outro: If you are loving these episodes and it’s helping you in the kitchen, I would love to have you rate and review this show in your favorite podcast player. Until next time, I hope this episode of Let’s Make Dinner makes your dinner time a little easier. See ya.

Double Dip: Now it’s time for your Double Dip. So if you are enjoying cooking along with these episodes, then I want you to be prepared for next week’s episode, which of course, comes out every Thursday. So next week we’re making a Veggie Stir Fry. So it’s going to be really similar to a vegetable Pad Thai that you would get from a Thai restaurant.

Yes, you can absolutely make it at home. It’s pretty easy to do and it’s absolutely delicious. However, it does have a longer list of ingredients, but I want to give you all of the ingredients now so that you can have everything you need and cook along next Thursday. I will also put a link in the show notes to next week’s recipe so that you can check it out. You can actually even text yourself the ingredients from the recipe so that when you go to the grocery store, you have it right in your text. There’s a big button right in the middle of the recipe that says, text me the ingredients. So you can use that, especially if you’re on your mobile phone. 

All right, so let’s get to these ingredients. You’ll need eight ounces of rice noodles. I like the Thai Kitchen brand. Vegetable oil, broccoli florets, a red pepper, garlic cloves, kosher salt, two large eggs, one cup of bean sprouts and green onions. Then for the Pad Thai sauce, of course you could buy a Pad Thai sauce at the grocery store and be good to go. But if you want to make your own, you’ll want vegetable broth or chicken broth, tamarind paste, fish sauce, soy sauce, brown sugar, creamy peanut butter. Again, garlic, fresh ginger and red pepper flakes. A note about the fresh ginger. So I usually don’t use fresh ginger. What I use are the little frozen cubes. They’re, I think they’re called Dorot Gardens, I get them at Trader Joe’s and they’re little frozen cubes. Each cube is a teaspoon of fresh grated ginger. It couldn’t be easier. 

All right, then for the garnish, you’re going to want to have roasted peanuts, cilantro, and fresh lime wedges. That’s it. So I hope you join me next week and make some Pad Thai for dinner on Thursday when you are fresh out of dinner ideas and you’re like, what am I going to make for dinner? You can come back to this podcast, Let’s Make Dinner and cook along with me. I’ll see you then.

Recipes Mentioned

  • Instant Pot Buffalo Chicken Chili
  • Sweet Cornbread Muffins
  • Buttermilk Cornbread

Equipment Recommended

  • Instant Pot Duo Plus 6 quart 9-in-1
  • Instant Pot Duo Plus 6 quart 7-in-1

Next Weeks Episode

Find a new audio recipe every Thursday. Follow along to make dinner with me every week.

Next week are making Veggie Pad Thai for dinner! Grab the ingredients and join me.

Follow Along

We would love to have you subscribe to our weekly newsletter! We send out two emails every week. One on Thursday sharing the new podcast episode and one on Sunday sharing all the weeks new recipes, featured recipes, and dinner ideas for the week ahead.

Subscribe Here

Episode 078 Vegetable Lasagna

February 9, 2023 by Susie Weinrich Leave a Comment

a picture of veggie lasagna with text overlay for Let's Make Dinner

In episode 078 we are making Vegetable Lasagna for dinner. This is a great way to fill your dinner menu with lots of veggies! This recipe will serve anywhere from 4 super hungry people to 9 people with the addition of side dishes. You can also watch Susie make this recipe on a 30 minute episode of Pinterest TV!

Serve this recipe up with a veggie side dish like roasted fennel, a side salad and some garlic bread.

Transcripts

Click for the full transcript.

Intro: Welcome everybody to another episode of Let’s Make Dinner, your audio library of amazing dinner recipes you can always get on the table. I’m your host, Susie Weinrich.ย 

Susie Weinrich: Okay, you guys, I had the best time the other night. I made this recipe. We’re making Veggie Lasagna tonight. I made it live on PinterestTV the other night, and I had the best time. The recipe turned out perfect and it was absolutely delicious. I actually made two because my PinterestTV episodes are only 30 minutes long. So I don’t have time to actually bake the recipe. So I have one that’s cooked and yummy and delicious, and we’ve been eating it for lunch all week. I have one that I’m going to bake today that I’m going to cut up into individual pieces and pop them in the freezer so that over the next three months I can pull out just an individual piece of lasagna and have it for lunch whenever I want to. Perfect. You’re going to love this recipe. 

So like I said before, we’re making a vegetarian lasagna today. It’s just going to be like a normal lasagna. It’s got the cheese, the noodles, the sauce, all the spices. But instead of a meat layer, it’s going to have a veggie layer that’s filled with onions, carrots, zucchini, and roasted red peppers. It’s the perfect blend to go into your veggie lasagna. 

So this recipe is a little bit different from a traditional lasagna recipe. It’s actually made in either an eight by eight or a nine by nine pan. Either one will work. It’s going to give you a couple different options for serving. If you’ve got four super hungry people in your house, you can absolutely just cut this two by two, have four huge slices, and be good to go. You can also cut it so that it is cut three by two, giving you six slices, which that’s normally what I do. I just slice the pan in half and then go three across the other way. Your other option is to cut it three by three, so you have nine smaller slices. That’s great for if you’re having the veggie lasagna, and then you’re going to have maybe a roasted fennel or something on the side and a salad and garlic bread because they will be a little bit smaller slices. You can see with this recipe, there are a ton of different options for how you want to cut it and serve it. 

Now, like any lasagna, it’s going to take a little bit more time to put this recipe together. Lasagna is a labor of love. So you want to make sure that you plan out enough time, maybe 20 minutes for the prep in getting all the veggies sauteed and getting the lasagna all layered together. Then you’re going to need about 50 minutes for cooking time and then another 15 to 20 minutes for the lasagna to just sit and settle. Make sure you plan enough time. This maybe is not the recipe, this definitely is not the recipe for a busy Wednesday night. This is a great recipe for a Friday, Saturday, Sunday, or maybe a weekday where you really don’t have much else going on.

Tips and Tricks: All right, so like always, let’s go over a couple tips for this vegetarian lasagna recipe. First of all, we’re talking about lasagna noodles. Since the lasagna is made in a smaller eight by eight pan, we love to buy the Barilla or Barilla, I don’t know how you say it, but whatever. You know what I’m talking about. It’s in the blue box. Their oven ready lasagna noodles are a little bit shorter, and they’re just in these thin sheets. They’re perfect for that eight by eight or nine by nine pan. So that’s what we recommend. Then for your marinara sauce, since that is such an important component of this recipe, you want to make sure that you buy a really good marinara sauce.

So of course, I say it all the time. We love RAOs. It is way more expensive at the grocery store, but we have found in just taste testing through the years that the RAOs are delicious and it’s absolutely worth the extra dough. The best place to buy your RAO sauce actually is at Costco. It comes in a two pack and it’s way cheaper than the normal grocery store.

All right. Another ingredient that you may turn your nose up to is cottage cheese. I grew up eating cottage cheese in my lasagna, and actually, I think it’s America’s Test Kitchen, recommends cottage cheese for your lasagna. It bakes up really creamy and it lends just a really nice flavor to the lasagna. Ricotta, to be totally honest, ricotta that you buy at the store, does not have a ton of flavor. I think that even if you’re on the fence about using cottage cheese, I think that you should definitely, definitely give it a try. 

Three last little tips, and this is good for any lasagna that you make. Number one, when you cover your lasagna with foil to put it in the oven, spray the underside of your foil with a little non-stick spray and then put it over the lasagna. What that does is prevents the cheese from baking to that foil, and then when you take the foil off, all the cheese goes with it. That will not happen if you spray it with that non-stick spray. 

The other tip, especially for this lasagna, is to make the whole lasagna in that eight by eight or nine by nine pan, but then when you go to put it in the oven, place that pan on top of a rimmed baking sheet. I can almost guarantee you that this lasagna will bake over the edges. It’s just a very hearty lasagna. 

The very last tip before we get to the full recipe. With any lasagna, when it comes out of the oven, it is crucial that you let it sit and settle for 15 to 20 minutes. It needs that time to congeal. My husband loves that word. So it needs to set together and the layers need to cool and set in place. Then when you go to cut it, the layers will stay together. If you cut it too soon, you risk the layers falling apart. Which would still be delicious, but that’s not what you want when you actually serve a slice of lasagna. 

All right, so those are all the tips and tricks. I hope you have your ingredients ready, and we’re going to make a delicious veggie lasagna.

Vegetable Lasagna Recipe: So we’re going to start in a skillet, and what you want to do is put your skillet over medium heat, add about a tablespoon of olive oil, and then you’re going to add in one cup of chopped onion. I like to usually use either a white or a yellow onion here. Then also, one cup of carrots. For the carrots I like to cut them in kind of thin coins so that they soften during the saute and the cook time.

So get those two in the pan and just start sauteing and softening those for about five to 10 minutes. Now while that’s sauteing, you can go ahead and chop up three garlic cloves. Then one medium size zucchini. Chop both ends off and then just slice that up into, I don’t know, about a quarter inch or an eighth inch size slice.

You’ll also want to measure out a half teaspoon each of dried basil, dried oregano, and kosher salt. Then a quarter teaspoon each of onion powder and garlic powder. I usually go with a really generous quarter teaspoon of both of those things because they’re delicious. 

So once those carrots and onions have sauteed together for a while, go ahead and add in the zucchini, the garlic, and then all of those spices and seasonings and salt that you just measured out. Give that a stir around the pan and just let that saute for about three to five minutes to start to soften that zucchini. Now while that’s sauteing, you’ll take a 12 ounce jar of roasted red peppers and drain it in the sink. I usually just use a mesh colander or something and drain all that juice off so that you just have the red peppers.

Now usually jarred red peppers come, they can come in really long strips. It’s almost like the whole red pepper is still together. So after you drain it, you definitely want to give that red pepper a rough chop so that it’s in bite size pieces. Then you can remove all that veggie filling off of the stove and off of the heat. Just stir in that chopped red pepper. That is your filling for the lasagna. That’s all the veggie filling. It will smell really, really delicious at this point. 

Now, another layer that we need to put together is the cottage cheese layer. You can empty out a 15 ounce container of cottage cheese into a bowl, and I usually like to use the 2% or 4% milk fat cottage cheese, because it’s a little bit creamier and heartier. Then crack one egg into that cottage cheese and give it a light mix. Then you can set that aside. 

The last step is your mozzarella cheese. Highly, highly, highly recommend that you shred your own cheese, and if you can find it at your grocery store, a round of whole milk mozzarella, I highly recommend buying that and shredding that up. It will melt really creamy and really flavorful. So you need two cups of shredded mozzarella mixed with a half cup of fresh grated Parmesan cheese. Mix those two together and then set that aside. 

Now it’s time to layer up your lasagna. You’ll want to go ahead and preheat your oven to 400 degrees. Grab that eight by eight or nine by nine pan, and we’re going to start to layer. So make sure that you have 24 ounces of marinara sauce, your veggies, the cottage cheese, and the cheese, and then the no-boil lasagna noodles. We’ll get to layering everything up. 

So start by grabbing a third cup of that marinara sauce, and you’re going to just layer that down into the bottom of your pan and smooth it out so it covers the entire bottom. Then you’re going to lay two lasagna noodles side by side. On top of that, you’re going to add a third of that cottage cheese mixture. Again, just spread it edge to edge. Top that cottage cheese with a third cup of the marinara sauce. Again, spread it out. Then you’re going to top that with a third of that veggie mixture.

So usually what I like to do is spoon out some of the red peppers, onions, and carrots, and just scatter it all over the top of the lasagna layer. Then I like to grab out some of the zucchini and place them more strategically so that you don’t end up with just one pile of zucchini in the center of the lasagna. So get all those veggies spread out and then on top of that you’re going to put a generous quarter cup of the mozzarella and Parmesan cheese mixture. Just sprinkle that all over it. Now we’re going to repeat the layers two more times. Noodles, cottage cheese, marinara, veggies, cheese mixture. Then you’re going to do it again. Noodles, cottage cheese, marinara, veggies, cheese. 

Now we have the last layer. This last layer is just going to be two noodles, and when you put these noodles on, give them a little press because I bet that your dish is super full. Give them a little press just to kind of set the lasagna together and then take the rest of that marinara sauce and spread it all over the top of the lasagna from edge to edge. Then you’re going to finish with the remaining cheese, all of that cheese that you have. Spread that across the top.

Now you’ll notice that your pan is very, very full. So what you want to do is take a big piece of foil, spray it with a little bit of non-stick spray on one side, and then place that directly over the lasagna. Make sure you crimp that foil really well, all around the edges of the pan. Then take that pan and place it on top of a large rimmed baking sheet. Like I said, this is a full hearty lasagna and it will probably boil over in the oven. So you’re going to pop that in your preheated 400 degree oven for about 30 minutes.

At the end of the 30 minutes, you’re going to pull it out, take that foil off, and put it back in the oven for another 15 to 20 minutes. I usually err on the side of 20 minutes because I like those little golden bits on the top of my lasagna. Then at the end of that 20 minutes, you’ll pull the lasagna out. This is key to a really good lasagna. You have to let it sit for like 15 to 20 minutes, up to 30 minutes. It will still be hot. It will still retain all of its heat. But in that time it will also come together, set up, settle, and the layers will stick together, which is exactly what you want. Now, like I said in the beginning of the episode, at the point where it’s time to cut, you can cut it in two by two for four slices, in a two by three for six slices. Or three by three for nine smaller slices. 

So let’s talk about side dishes for your veggie lasagna. If you want to make it a really hearty meal, something like a roasted broccoli or a roasted fennel would be a great veggie side dish. Then of course, garlic bread, garlic breadsticks would be great. Either a Caesar salad or a green salad with a basil vinaigrette would be delicious. I have a wonderful recipe for a homemade basil vinaigrette that I will link in the show notes for you. 

Outro: So that does it for today’s episode of Let’s Make Dinner. I hope you enjoyed cooking along with me and making this vegetable lasagna for dinner. If you made this recipe and you’ve loved it, I would love to have you rate and comment on the recipe on momsdinner.net. Of course there will be a link to the recipe right in the show notes for you. 

So until next time, I hope this episode of Let’s Make Dinner makes your dinner time a little easier.

Double Dip: Now it’s time for your Double Dip. If you love cooking along with the Let’s Make Dinner podcast, then I want to let you know what recipe we’re making next Thursday. So when you are out of dinner ideas by Thursday, you can come to this podcast and be like, oh yeah, that’s what we’re having for dinner. So next week we are making a Buffalo Chicken Chili, and I’ve got two different ways to make it. We’re either going to do Instant Pot or stove top instructions. So either way, I hope you join me and make that for dinner.

Now here are the ingredients that you need to make this Buffalo Chicken Chili. You’re going to want to make sure you have one onion, garlic, one cup of chopped celery. Some bell peppers, any color will work. Two large chicken breasts. One one ounce packet of that, you know that ranch dressing mix? The powder dressing mix? You’ll want one of those. Four cups of chicken broth. Three quarters cup of buffalo sauce, Frank’s Red Hot is always a good choice. a 14 and a half ounce can of diced tomatoes and a 15 and a half ounce can of great northern beans.

Then you’re going to need frozen corn, fresh cilantro. An eight ounce block of cream cheese and one tablespoon of honey. Make sure you have all of those ingredients, and of course, if you want to print the recipe out or text yourself the ingredients, I will have a link in the show notes to the recipe where you can print it out or text yourself all of the ingredients and head over to the grocery store.

All right, I hope you guys have a great week. I’ll see you next Thursday.

Tips Shared

Use a whole milk mozzarella that is fresh grated that will melt really creamy and delicious.

Spray your foil with non-stick spray to avoid the cheese baking to the foil in the oven.

Place the lasagna pan on a rimmed baking sheet before putting in the oven. It will catch any spills in the oven.

After baking let the lasagna sit for 15-30 minutes so it can set up and settle before cutting into squares.

Recipes Mentioned

  • Vegetable Lasagna Recipe
  • Roasted Broccoli
  • Roasted Fennel
  • Basil Vinaigrette

Equipment Recommended

  • 8×8 baking dish

Next Weeks Episode

Find a new audio recipe every Thursday. Follow along to make dinner with me every week.

Next week are making Buffalo Chicken Chili for dinner! Grab the ingredients and join me.

Follow Along

Subscribe To Stay Connected!

Sign up for the Mom's Dinner Newsletter and get dinner help delivered straight to your inbox. From new recipes and videos to weekly dinner ideas and kitchen tips, it's your go-to resource for feeling confident at dinnertime.

Sign Up Now โ†’

Episode 077 Instant Pot Beef and Barley

February 2, 2023 by Susie Weinrich Leave a Comment

beef and barley stew in a bowl with text overlay for the let's make dinner podcast

In episode 077 we are making Beef and Barley Stew in the Instant Pot. This is a super hearty dinner that is perfect for winter. The recipe will serve around 6-8 people. The actual recipe has around 100 Five Star reviews and is loved by the pickiest eaters.

Serve it up with some saltine crackers or ciabatta bread and a side salad or veggies with ranch dip. To have a larger dinner you can add tea sandwiches that are smaller buns with turkey/ham/provolone with mayonnaise and mustard.

Transcript

Click for the full transcript.

Intro: Welcome everybody to another episode of Let’s Make Dinner, your audio library of amazing dinner recipes you can always get on the table. I’m your host, Susie Weinrich. 

Susie Weinrich: As I record this podcast episode, I am sitting at my desk and I have my new little happy light sitting up in the corner, and it truly is making me so happy. I definitely suffer from, oh, what’s it called? SAD. Seasonal Affective Disorder. When it’s really cold and not very sunny out and you can’t go outside and get any fresh air, it is seasonal depression. I think they also call it winter blues. So I ordered myself one of these little happy lights and set it on my desk, and I’m telling you, it is like my eyeballs are soaking up the energy from the light. It is wild. So I highly recommend, if you suffer from any kind of winter blues syndrome, that you get one of these lights. 

I also recommend that you make this recipe that we’re making today. It’s Instant Pot Beef and Barley Stew. It is one of the most popular recipes on momsdinner.net, which is where I share all of my recipes. That’s where you can find any recipe you listen to on Let’s Make Dinner. You can find it on momsdinner.net, the website.

This recipe to date, I think, has around 105 star reviews. That’s huge. That is testament from your peers, your cooking peers, that say, this recipe is amazing. So it’s not really complicated over the top flavors. It’s really basic, just hearty stew. Let me tell you, I have a ton of women, just because that’s a huge demographic for my site, that say that they have very picky husbands and that they absolutely love this stew recipe. So if you’ve got some picky eaters in your house, absolutely give this recipe a try.

So of course the one piece of equipment that you’re going to need to make this is your Instant Pot. Instant Pot is actually a brand. You just need an electric pressure cooker. So if you’ve got one of those, it’ll work. I use the Instant Pot Duo plus nine in one six quart style. It’s a lot of words. I also recently bought a second Instant Pot because I love mine so much, and I ended up going with a very similar Instant Pot, and instead of nine in one, it’s seven in one, so it just has seven functions instead of nine functions. Because I found that I really didn’t use all nine functions. It was unnecessary money to spend. So I will link both of those Instant Pot types in the show notes. So if you don’t have one and you’re interested in getting one, you can check both of those out on Amazon. Of course, if you have any questions about Instant Pot, I would love to have you guys email me and we can have a little conversation. My email is susie@momsdinner.net. It’s Susie, s u s i e. 

Tips and Tricks: Let’s go over a couple tips about this recipe before I share the recipe completely. First of all, this recipe is made with stew meat. So if you need a really economical recipe, this is a great one. Stew meat is a great cut of beef that definitely needs either a longer, low and slow cooking time, or like with this one, hot and high pressure. Stew meat works really, really well in the Instant Pot. 

Another ingredient that we use here is something called beef base. You can find beef base in the soup aisle. It’s going to be like bouillon, but way more flavorful and way more intense. So it usually comes in a jar or a tub, and it will be in a paste form. The brand that we love to use is the Better than Bouillon brand. That’s an actual brand. I just got the roast beef base. It really punches the flavor up for you. 

Now another ingredient that you’re going to want to have is barley, and there’s going to be a couple different options when you go to buy barley. I always get the pearl barley for this recipe. Pearl barley is going to be longer cooking barley, so it’s going to hold up to the Instant Pot pressure while that stew meat cooks down. There’s another type of barley called quick cooking barley, but you don’t need that quick cooking. You want to get the pearl barley.

The rest of the ingredients for this recipe are just your average garlic, onions, oil, seasonings, beef broth, salt and pepper. So I think we can go ahead and get into the full recipe for your Instant Pot Beef and Barley Stew. 

Instant Pot Beef and Barley Soup Recipe: You’re going to start this recipe by popping your Instant Pot onto saute mode. Actually, your Instant Pot saute mode has three different functions. There is low heat, normal heat, and high heat. You just want normal heat to saute your veggies. Low heat is more like, let’s keep things warm. High heat is going to be more searing, browning or wok style cooking. To scroll through all of those functions, you can just hit your saute button a couple times and you’ll see it scroll through all of those functions. So just make sure it’s normal. 

Add that oil. You’re going to add one tablespoon of oil, and then you’re going to add in one yellow or white onion that’s chopped. Two large celery stalks that are sliced. Three garlic cloves that are chopped. One and a half cups of carrots that are sliced either in coins or you can dice them. It’s up to you, you know, how you want to eat your soup. So go ahead and saute those in the oil for about five minutes. While that’s sauteing, you can get the rest of your ingredients all ready. 

So you’ll want to measure out a half a teaspoon each of onion powder and garlic powder. One and a half tablespoons of worcestershire sauce, one tablespoon of tomato paste, two teaspoons of that beef base we talked about, one teaspoon of kosher salt, half a teaspoon of black pepper. Then there is an optional ingredient here. You could add two teaspoons of fresh chopped rosemary or thyme. It just adds another little layer of flavor, but is totally optional. You do not have to add it. After those veggies saute for about five minutes, you’ll add in all of those seasonings and give them a really good stir around the pot. You want the tomato paste and the beef base to coat all of those veggies, and then also kind of start to caramelize on the bottom of the pot. Do that for just a couple minutes and then you’re going to pour in your beef broth. So you need 32 ounces of beef broth and one and a half cups of water. 

When you do that, you’re going to want to do something called de-glazing the bottom of the pot. You want to make sure that all of that tomato paste and beef broth that may be caramelized on the bottom of the pot, you need to scrape all of that up. By deglazing, you’re going to prevent getting the burn notice with your pot. Knock on wood, I have yet to get a burn notice with my pot. So the deglazing definitely works as long as you scrape up all of those bits that are on the bottom.

Now at this point, you can turn off the saute mode and we’re going to add in the rest of the ingredients. So first you’re going to add in the stew meat and you need about one and a half pounds of stew meat. If you’re just shy of that, that’s totally fine. Just make sure that all of the pieces are cut into half to one inch size pieces, so they’re bite size when you go to eat the soup. 

Then I like to pour in the one cup, and I usually do about one scant cup of pearl barley and just make sure it’s touching all of the liquid. There’s no need to give this a really good stir at this point. You kind of want that barley to be on top of the beef. 

Now you’ll close your Instant Pot and set it to either that meat slash stew mode or just manual pressure, high pressure for 25 minutes. You’ll let the pot come to pressure. It will count down from 25 to zero. Once it hits zero and it beeps at you, you’re going to do a quick release. That means you’re just going to turn that little valve on the top of the pot and all of that pressure is going to rush out and release, and then you can open the pot.

Once you open the pot, you’re going to give it a really nice stir, and then you’re going to let it cool for about 10 minutes. During that 10 minutes, it’s going to start to thicken up. So the starch from all of that barley is going to combine with the liquid and it will get nice and thick and so delicious. 

So that is it. Dinner is ready. With this soup, I like to serve on the side, either just saltine crackers or like a warm ciabatta bread or maybe if we want it to be a little bit harder, I might do a green side salad or maybe a tray with raw veggies and ranch dip. Or if you’re serving this as a weekend dinner, you can also add little tea sandwiches. Tea sandwiches are what I call them. So you just use slider buns or mini buns or pretzel buns. Put either ham or Turkey or both. Maybe a little provolone cheese and then a little bit of mayonnaise and mustard, and you have your little tea sandwiches that go perfect with soup.

As always, I will link all of the recipes that I talked about in this show, right in the show notes for you. Like I said in this episode, if you ever have any questions about the recipes, about cooking, about Instant Pot, you can always email me, susie@momsdinner.net. I would love to connect with you and answer any cooking questions that you have. 

Outro: So until next time, I hope this episode of Let’s Make Dinner makes your dinner time a little easier. See ya. 

Double Dip: Now for your Double Dip. If you are following along with the Let’s Make Dinner Podcast and you enjoy cooking along and you want to be prepared for next week’s episode, I want you to make sure you have all the groceries you need. So we are making a Vegetarian Lasagna next week that is the ultimate. It is so, so good. 

So some of the ingredients you want to make sure that you have on hand to follow along next week are olive oil, onions, carrots, zucchini, garlic, a 12 ounce jar of roasted red peppers, 16 ounces of cottage cheese, one egg. Then you’ll need a few spices from your spice cabinet. So kosher salt, dried basil, dried oregano, onion powder, and garlic powder. You’ll need eight oven ready, no-boil lasagna noodles. A 24 ounce jar of marinara and then two cups of shredded mozzarella cheese. 

You can find the vegetarian lasagna recipe on momsdinner.net, and I will of course link it in the show notes for you. So mark your calendar for next Thursday and we will make Vegetarian Lasagna for dinner together.

Tips Shared

Make sure you use pearl barley and not quick cooking barley. You need the longer cooking barley to hold up to the Instant Pot.

Stew meat is an economical beef cut to use. It works great in the Instant Pot!

Don’t skip the Beef Base! It really punches the flavor up in the soup. You can find it in the soup aisle at the grocery store. It comes in a jar or tub and is in a paste form.

Recipes Mentioned

  • Instant Pot Beef Barley Stew

Equipment Recommended

This recipe does require an Instant Pot or electric pressure cooker. Here are the two models that I have:

  • Instant Pot 9-in-1 Duo Plus 6 quart
  • Instant Pot 7-in-1 Duo Plus 6 quart

And for all you fellow SAD sufferers… this is the happy light I got from Amazon.

Next Weeks Episode

Find a new audio recipe every Thursday. Follow along to make dinner with me every week. We are making VEGETARIAN LASAGNA next!

Follow Along

Subscribe To Stay Connected!

Sign up for the Mom's Dinner Newsletter and get dinner help delivered straight to your inbox. From new recipes and videos to weekly dinner ideas and kitchen tips, it's your go-to resource for feeling confident at dinnertime.

Sign Up Now โ†’
  • « Previous Page
  • 1
  • …
  • 19
  • 20
  • 21
  • 22
  • 23
  • …
  • 64
  • Next Page »
Susie in the kitchen with an apron on getting ready to cook

Meet The Author:

Susie Weinrich is a professional food photographer and recipe developer. Her thoroughly tested recipes and step-by-step guides give readers confidence in the kitchen.

YOU will feel like a huge success at dinner time with any of the simple recipes on Mom's Dinner! Read More

Helpful Meal Planning Resources

  • a table with white place settings and green garland
    Easy Meals for House Guests
  • a round table with a large family eating dinner
    30 Easy Meals for Large Family Vacations & Gatherings
woman owned small business certificate by Sertify

Amazing New Recipes

  • Chopsticks resting on the edge of a bowl served with rice, and chicken thighs topped with teriyaki sauce.
    Easy Teriyaki Chicken Thighs
  • Close up of baked ground turkey meatloaf slices, served on a tray.
    Easy Ground Turkey Meatloaf
  • Wooden spoon dripping stroganoff sauce onto a plate of pasta and steak.
    Homemade Beef Stroganoff
  • Large serving bowl of Ambrosia fruit salad with a spoon resting in it.
    Ambrosia Fruit Salad

Holiday Faves

  • homemade stuffing in a baking dish
    How to Make Stuffing Recipe
  • mashed potatoes in a bowl
    Best Instant Pot Mashed Potatoes
  • A plate of turkey, mashed potatoes and stuffing with cranberry sauce poured over the turkey
    Best Canned Cranberry Sauce Recipe
  • Glass gravy boar with turkey gravy ready to serve.
    How to Make Turkey Gravy (without drippings)
  • sweet potato casserole with a pecan brown sugar topping
    Canned Sweet Potato Casserole
  • Dinner rolls baked in a pan with a kosher salt, sugar and dill topping
    Easy Homemade Rolls

Footer

^ back to top

About

  • Susie Weinrich
  • Privacy Policy
  • Accessibility Policy

Contact

  • Sign Up! for emails
  • Contact Me!
  • Join Me On YouTube

Recipes

  • Recipe By Category
  • Instant Pot Recipes
  • Dinner Recipes

Copyright ยฉ 2025 Mom's Dinner

Rate & Review This Recipe

Your vote:


A rating is required
A name is required
An email is required