On Episode 068 Susie shares a super traditional recipe for Fruit Cake Cookies! This is an updated version of fruitcake that is really tasty. They make the perfect Christmas Cookie.
Transcript
Click for the full transcript.
Intro: Welcome everybody to another episode of Let’s Make Dinner, your audio library of amazing dinner recipes you can always get on the table. I’m your host, Susie Weinrich.
Susie Weinrich: Happy holidays everyone. If you are looking at this recipe today, then you are probably in the mood for a little Christmas or holiday baking, and that’s exactly what we’re doing today.
Today we are going to be making a fruitcake cookie. Don’t be turned off. Don’t turn off the podcast episode by the word fruitcake. This is an old fashioned, updated version of fruitcake, so you’re going to be eating it in a cookie form. It’s still full of all of those holiday fruits, so candied cherries, dates, pecans, maybe some pineapple depending on what kind of candy cherry mix you get. It’s all baked as a drop cookie. They are absolutely tender, sweet and delicious, and I love them. I actually grew up eating these at my grandma’s house when I was little, and I hope that you absolutely love them.
Tips and Tricks: So usually I go over lots of different tips and tricks. Before we get into the full recipe. I only have a couple things to say before we move on to the recipe. Then within the actual recipe, I’m going to share all of the tips and tricks and things that you need to know to make the recipe perfect.
But when you are in the grocery store looking for the candied cherries, sometimes people have a hard time finding these at the grocery store. During the holiday season, a lot of times they are kept actually on an end cap because they’re very popular for fruitcake and these cookies. So you can maybe find them there. Sometimes if you’re at more of a Target or a Walmart situation, you’ll find them on a holiday baking display. So you can look there as well. But they’ll be in little clear plastic tubs. They look like neon red and green cherries because they’re candied cherries. So it’ll be like a maraschino cherry, but really sticky. They are so good in this cookie, I swear to you. Delicious.
The other thing that you’re going to need are dates. So I like to buy the pitted dates, and a lot of times I’ll just find them whole in the produce section. But if you can find chopped dates, maybe near the raisins, then go ahead and buy those.
The last ingredient I want to talk about are the pecans. There’s an option in the recipe to place a whole pecan on the top of the fruitcake cookie, and I actually love how that looks. I like the extra texture and crunch on top of the cookie. So I like to buy whole pecans, chop part of them to mix into the batter and then leave some of them whole to put on top. But if you don’t want to use the pecan on top of the cookie, then you can just buy chopped pecans in the bag.
So those are all of my ingredient tips. Let’s get on to making this entire recipe.
Fruit Cake Cookies Recipe: This recipe makes a ton of cookies. You’re going to have around 50 cookies by the time you’re done with this recipe. So this is a great one to take to cookie exchanges or to take to your neighbors or you can even pop some in the freezer so you can save some for the actual Christmas week, if you make them ahead.
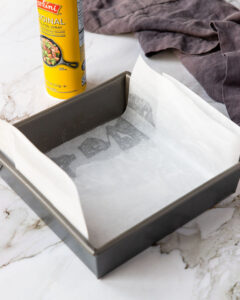
You’ll start by preheating your oven to 400 degrees and then you’ll grab a large cookie sheet. What I like to use always when I’m baking cookies is either a reusable silpat, but I got to say, here’s what I’m going to say about these. When people use reusable silpats, and they wash them with soap or they put them in the dishwasher, I can always taste the soap on whatever they bake on them. So if you use a reusable silpat, just think about that next time you bake with it and see if you can taste the soap on whatever you’re baking. What I prefer to use is parchment paper and you can just get it, you know, at your normal grocery store, probably in the same aisle where you’d find plastic wrap or foil.
So line your baking sheet with the parchment paper or your silpat. Then what you’re going to do is cream together two sticks of softened butter and two cups of brown sugar. This will take about two minutes. You can either use a handheld mixer or you can use a stand mixer with a paddle attachment. Then you’re going to add in two eggs. I like to just add one at a time so that it starts to mix into the batter and mix that for about another minute or two. Now you’re going to pour in half a cup of buttermilk and one teaspoon of vanilla.
A little tip with the buttermilk. If that’s not an ingredient you have or that you want to purchase, you can actually create your own buttermilk by combining a scant half cup of milk and two teaspoons of either lemon juice or vinegar. Let it sit for about five minutes. Give it a stir, and then you can use it in the recipe. Basically you’re going to need that vinegar or that I guess it’s really an acid to activate your baking soda. So don’t skip the buttermilk.
So go ahead and mix that together for about another minute. Now, at this point in the cookies, don’t be alarmed if your batter is looking curdled. Once you get the flour and all the dry ingredients mixed in, it will not look so scary.
In a separate bowl, you’re going to sift together three and a half cups of all-purpose flour, one teaspoon of baking soda and one teaspoon of kosher salt, a half a teaspoon of ground cinnamon and a quarter teaspoon each of ground clove and ground nutmeg.
So sift all that together and then add that flour mixture to the cookie dough until it just comes together. Now on a cutting board, you’ll want to just roughly chop up two cups of those candied cherries, and you can get those candy cherries either in red or green, or a red and green mixture. I like the red and green mixture because I feel like it feels a little bit more festive. So give those a rough chop as well as two cups of dates and then one and a half cups of pecan. Chop all those together.
Here is a fun cookie tip, anytime you’re making cookies, it doesn’t matter what, you know, when you go to a website, like momsdinner.net and you see a cookie and you’re like, why do my cookies not look like that? The tip that a lot of food bloggers or food stylists use is that they will save back a few of the mix-ins and after you form your cookies, they’ll actually dot the outside with those mix-ins. Like chocolate chips, nuts, in this case, the cherries, so that when they bake, those colors are really pronounced on the outside and make your cookies extra beautiful.
So stir in the candy cherries, dates and pecans into that cookie dough. Then once it’s all together, it’s time to bake. Just like the name says on Mom’s Dinner, it’s a fruitcake drop cookie, so there’s no need to roll, to cut out, to slice. This is literally a scoop and drop cookie. Each cookie will be a heaping tablespoon of dough, so just scoop it out and drop it right onto that prepared baking sheet. If you’re using the pecan half for the top of the cookie, you can lightly press one into the top of each cookie dough ball on the baking sheet.
Then you’re going to bake them for about nine to 11 minutes. They’re going to be done when the outside edge is just starting to turn golden, but the middle is going to be extremely soft. These are meant to be really soft and tender cookies. What’s going to happen is after you bring them out of the oven, as they cool on the cookie sheet, they’re going to continue to bake a little bit and they’re going to firm up. So really don’t bake them in the oven until they’re brown all the way across.
If you’re baking these in batches, which I’m assuming you are, that you don’t have an oven that can fit 50 cookies in it at the same time, you’ll want to place that extra batter in the fridge while your other batches bake. That’s just a good cookie tip no matter what kind of cookie you’re making.
All right, and that is the full recipe for your holiday fruitcake drop cookies. The nice thing about these cookies is that you can actually freeze the baked cookies or you can scoop out the dough and freeze the dough and bake it later. There’s lots of options with these cookies. They’re pretty simple to make, and they are extremely festive and perfect for Christmas.
So as always, I will link this recipe in the show notes for you so you can find it. When you’re ready to make these cookies. I will also pop a link in there for all of my Christmas cookies and treats and deliciousness.
Outro: So happy holidays, everybody. Until next time, I hope this episode of Let’s Make Dinner makes your holiday time a little sweeter. See ya.
Recipes Mentioned
Equipment Recommended
Follow Along

Subscribe To Stay Connected!
Sign up for the Mom's Dinner Newsletter and get dinner help delivered straight to your inbox. From new recipes and videos to weekly dinner ideas and kitchen tips, it's your go-to resource for feeling confident at dinnertime.